jest 테스트 결과를 토대로 report html 페이지를 자동 생성해주는 jest-html-reporter 사용법을 알아보자.
- 먼저 다운받자
npm install jest-html-reporters --save-dev- jest.config 파일에 해당 사용 설정을 해주자
// jest.config.js에 해당 옵션 추가
// 아래 옵션은 정말 정말 기본 옵션이기 때문에 옵션들을 확인해서 자신에게 알맞게 사용설정 해주세요
"reporters": [
    "default",
    "jest-html-reporters"
  ],
https://github.com/Hargne/jest-html-reporter#configuration
해당 링크에 옵션들이 잘 설명되어 있습니다.
// 제가 한 설정입니다.
// 프로젝트의 html-report라는 파일에 report.html이란 이름으로 파일을 저장하기로 설정합니다.
// 실패 시 실패 메세지도 포함합니다.
"reporters": [
  "default",
  ["jest-html-reporters", {
    "publicPath": "./html-report",
    "filename": "report.html",
    "openReport": true,
	"includeFailureMsg": true
  }]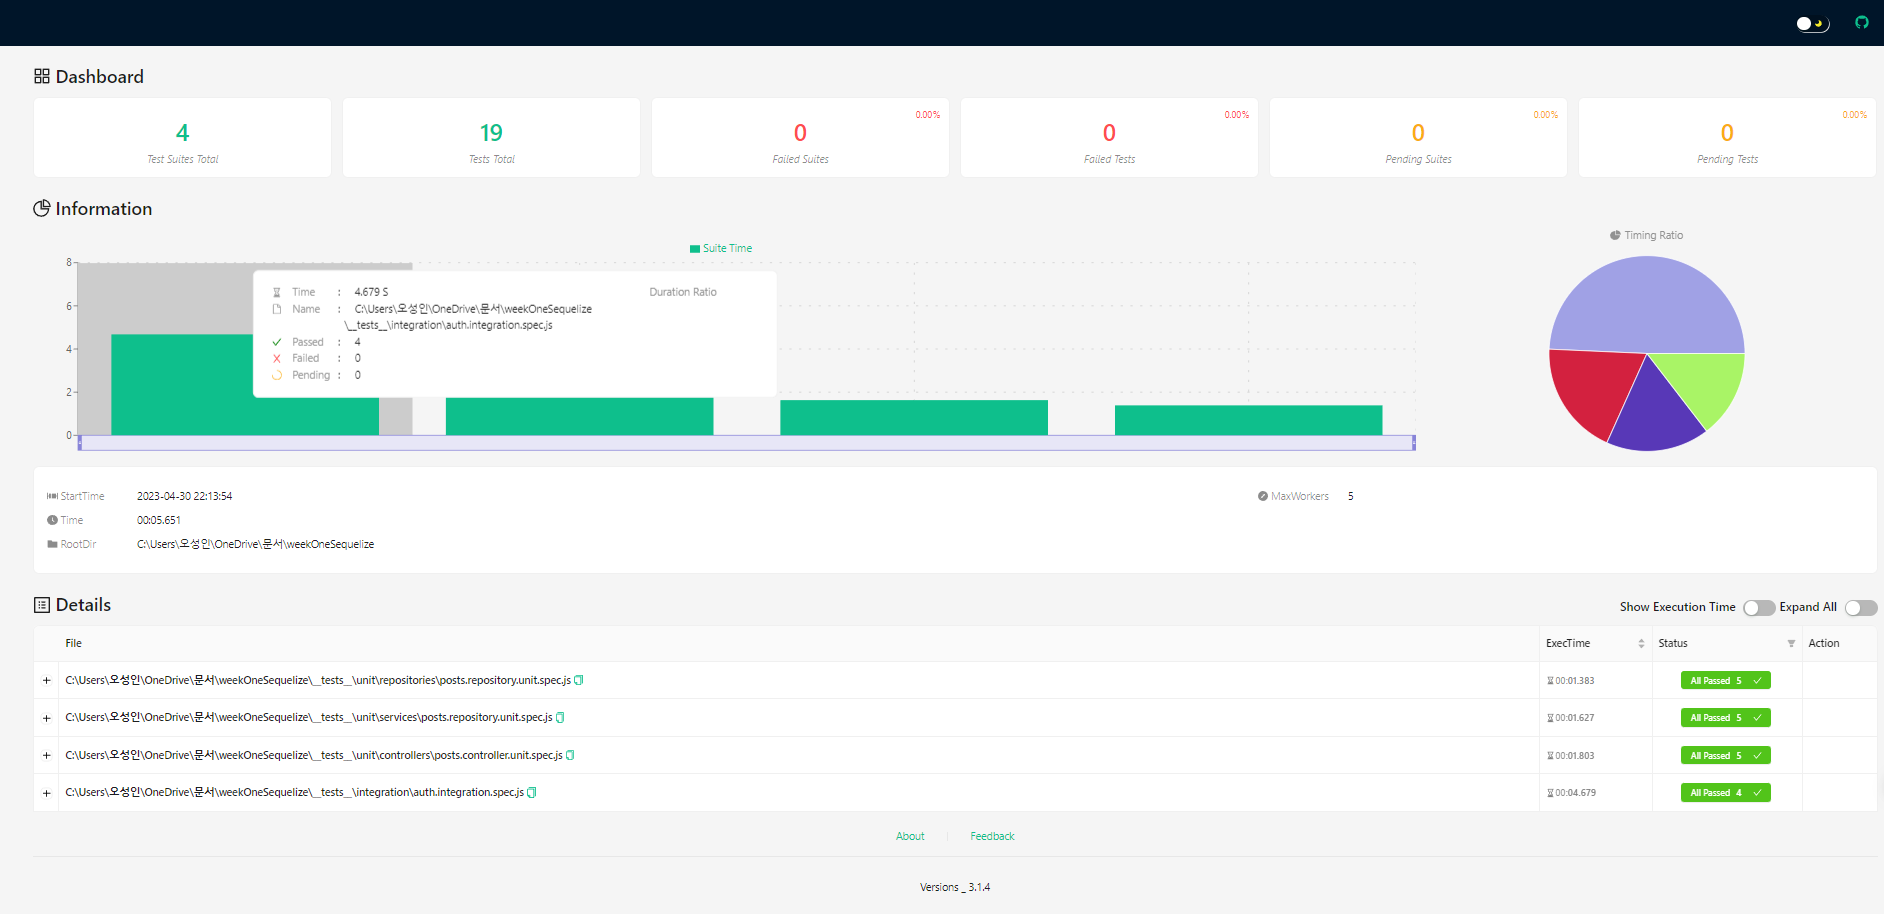
]- 이후 jest 테스트를 진행한 후에 해당 폴더와 파일이 생성되어 있는 것을 확인할 수 있습니다. 해당 파일을 열면 아래와 같이 html이 잘 생성된 것을 확인하실 수 있습니다.

기여하는 개발자