

진행한 사항
- navigation bar
- 먹기록 조회 페이지
- 먹기록 작성 페이지
- 먹기록 수정 페이지
navigation bar
바깥에 html파일을 하나 만들어서 상속했다.
- 프로젝트 안에 templates라는 디렉토리를 만들고 그 안에 html 파일을 만들었다
- css 파일을 만들고 link 태그로 불러온다.
static 폴더 안에 해당 css 파일을 만들었다.


html
<body>
    <div class="nav">
        {% if user.is_authenticated %}
        <!-- left -->
        <div class="nav-left">
            <a href={% url 'write' %}>
                <img src="{% static 'shared/image/plus.png' %}" alt="write">
            </a>
        </div>

        <!-- title -->
        <div class="nav-center">
            <a href="{% url 'home' %}">Muklog</a>
        </div>

        <!-- right -->
        <div class="nav-right">
            <a href={% url 'logout' %}?next={{request.path}}>
                <img src="{% static 'shared/image/logout.png' %}" alt="logout">
            </a>
            <a href={% url 'mypage' user.username %}>
                <img src="{% static 'shared/image/user.png' %}" alt="user">
            </a>
        </div>

        {% else %}

        <!-- title -->
        <div class="nav-center">
            <a href="{% url 'home' %}">Muklog</a>
        </div>

        <div class="nav-right">
            <a href={% url 'login' %}?next={{request.path}}>
                <!-- <img src="{% static 'shared/image/login.png' %}" alt="login"> -->
                로그인
            </a>
            <a href={% url 'signup' %}?next={{request.path}}>
                가입하기
            </a>
        </div>

        {% endif %}

    </div>

    {% block content %}
    {% endblock %}
</body>
navigation bar에 이미지를 사용했다.
- 이미지들도 static에 저장하여 불러왔다.
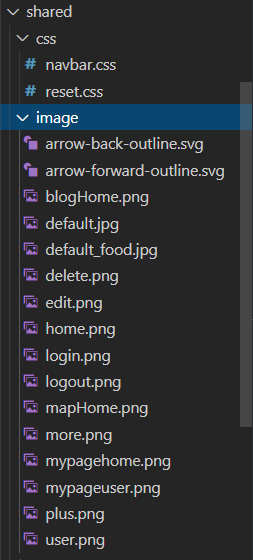
주로 flaticon에서 다운받아 사용하였다.
css
@font-face {
    font-family: 'MapoPeacefull';
    src: url('https://cdn.jsdelivr.net/gh/projectnoonnu/noonfonts_2001@1.1/MapoPeacefullA.woff') format('woff');
    font-weight: normal;
    font-style: normal;
}

.nav {
    font-family: 'Pacifico', cursive;
    position: relative;
    background-color: #fafafa;
    box-shadow: 0 2px 4px 0 rgba(0, 0, 0, .2);
    overflow: hidden;
    align-items: center;
    margin-bottom: 10px;
}

.nav a{
    color: #2e2e2d;
}

.nav-left a {
    float: left;
    text-align: center;
    align-items: center;
    padding: 14px 16px;
    text-decoration: none;
}

.nav-right a {
    font-family: 'MapoPeacefull';
    float: right;
    font-weight: bolder;
    align-items: center;
    padding: 14px 16px;
    height: 100%;
    text-align: center;
    text-decoration: none;
    font-size: 14px;
}

.nav-left a:hover, .nav-right a:hover {
    background-color: #ddd;
}

.nav-center a {
    height: 100%;
    padding: 14px 16px;
    float: none;
    position: absolute;
    left: 50%;
    top: 50%;
    transform: translate(-50%, -50%);
    text-decoration: none;
    font-weight: bold;
}

.nav-center a:hover {
    color: #f5be7fcd ;
}
먹기록 조회
벨로그 페이지도 (믿기지 않겠지만) 참고했고, 기존 카드뷰 형식의 페이지들을 좀 참고해 구성했다.
단순 먹기록용이긴 한데 개발자 감성이 드는건 내 기분 탓일까.. 역시 하얗고 깔끔한게 좋은것이.. ㅎㅎ
html
{% extends 'accountsBase.html' %}
{% load static %}

{% block title %}
Muklog | tempHome
{% endblock %}

{% block css %}
<link rel="stylesheet" href="{% static 'blog/css/blog.css' %}"> <!-- css 불러오기-->
{% endblock %}

{% block content %}
<body class="blog">

  {% if user.is_authenticated %}

  {% if error %}
  {{ error }}
  {% endif %}

  <div class="posts">
    {% if blogs %}
    {% for blog in blogs %}
    <div class="card">
      <div class="content">
        <div class="thumbnail">
          {% if blog.thumbnail %}
          <a href="{% url 'detail' blog.id %}">
            <img src="{{ blog.thumbnail.url }}" alt="image" />
          </a>
          {% endif %}
        </div>
        <div class="opening">
          <h3>{{ blog.title }}</h3>
          <p>{{blog.pub_date|date:"Y-m-d"}}</p>
        </div>
        <p class="sum">{{ blog.summary }}</p>
      </div>
     </div>
    {% endfor %}

    {% else %}
    <p>좌측 상단의 <img src="{% static 'shared/image/plus.png'%}" alt="write" width="14" height="14">
      를 눌러 첫 글을 작성해보세요.
    </p>

    {% endif %}
  </div>

  {% else %}
  <p>
    로그인하여 글을 작성해주세요.
  </p>
  {% endif %}

</body>
{% endblock %}
css
.blog{
    background-color: #fafafa;
    color: #2e2e2d;
}

.posts {
    padding: 20px;
    width: 70%;
    margin-left: auto;
    margin-right: auto;
    display: grid;
    grid-template-columns: auto auto auto auto;
    grid-gap: 20px;
}

.thumbnail, .sum {
    max-height: 150px;
    max-width: inherit;
    overflow: hidden;
    margin-bottom: 20px;
}

.sum{
    padding: 0 20px 0 20px;
    font-size: 13px;
}

.thumbnail img {
    max-height: initial;
    margin-top: -25%;
    width: 100%;
}

.card {
    background-color: white;
    border-radius: 8px;
    box-shadow: 0 4px 8px 0 rgba(0, 0, 0, .05);
}

.card div {
    text-align: center;
}

.opening {
    text-align: center;
    margin-bottom: 20px;
}

.opening p{
    font-size: 12px;
}
먹기록 작성
placeholder 문구랑 구분선은 벨로그를 살짝 따라했다 (ㅋㅋㅋ)
html
{% block css %}
<link rel="stylesheet" type="text/css" href="{% static 'blog/css/map.css' %}" />
<link rel="stylesheet" href="{% static 'blog/css/write.css' %}">
{% endblock %}
먹기록 작성 부분의 css도 static에 따로 저장한 후 저렇게 불러서 썼다.
여기도 navigation bar를 사용하기 때문에 상속받지만, 편의상 생략 !
(지도도 불러오기 때문에 지도용 js 코드가 있지만 여기선 생략)
<div class="write-page">
  <div id="naver-map"></div>
  <div id="map-search">
    <input type="text" id="search" placeholder="주소를 검색해보세요." />
    <button id="search-btn">검색</button>
  </div>
  <div>
    <div id="search-list"></div>
    <form method="post" action="{% url 'create' %}" enctype="multipart/form-data">
      {% csrf_token %}
      <div class="write-contents">
        <input id="post-title" type="text" name="title" placeholder="제목을 입력하세요."/>
        <div class="underBar"></div>
        <input type="text" name="address" id="place-input" placeholder="주소를 입력하세요."/>
        <input type="file" name="image" id="imageUpload" accept="media/*" />
        <textarea class="autosize" onkeydown="resize(this)" onkeyup="resize(this)" name="body" placeholder="당신의 이야기를 적어보세요..."></textarea>
        <!-- 글을 쓰면 height가 늘어남 -->
        <input type="text" name="lat" id="map-lat" value="" placeholder="위도" hidden/>
        <input type="text" name="lng" id="map-lng" value="" placeholder="경도" hidden/>
        <input id="uploadButton" type="submit" value="올리기" />
      </div>
    </form>
    <div class="goToHomes">
      <a href="{% url 'home' %}"><img src="{% static 'shared/image/mapHome.png'%}" alt="goToMap"></a>
      <a href="{% url 'tempHome' %}"><img src="{% static 'shared/image/blogHome.png'%}" alt="goToBlog"></a>
    </div>
  </div>
</div>
<script>
  function resize(obj) {
      obj.style.height = "1px";
      obj.style.height = (12 + obj.scrollHeight) + "px";
  }
  // textarea의 height 늘어나는 부분
</script>
css
- 먹로그에만 사용할거기 때문에 blog 앱 내 static에 파일을 만들었다.
body {
    background-color: #fbfdfc;
}

input{
    border: none;
}

input:focus{
    outline: none;
}

textarea:focus{
    outline: none;
    box-shadow: 0 2px 4px 0 rgba(0, 0, 0, .2);
}

.write-page{
    margin: 20px 0 20px 0;
    padding: 30px;
    background-color: white;
    width: 60%;
    margin-right: auto;
    margin-left: auto;
    box-shadow: 0 2px 4px 0 rgba(0, 0, 0, .2);
}

#naver-map{
    width: 100%;
    height: 500px;
}

#map-search {
    margin-top: 20px;
    display: flex;
    flex-direction: row;
    height: 30px;
}

#map-search input{
    font-family: 'MapoPeacefull';
    width: 100%;
    padding: 10px;
    font-size: 15px;
    border-bottom: 2px solid #737272;
}

#search-list{
    margin: 10px 0 30px 0;
    color: coral;
    font-family: 'MapoPeacefull';
}

#map-search button{
    width: 70px;
    background-color:#737272;
    border-radius: 4px;
    border: none;
    color: white;
}

#map-search button:hover{
    background-color: #5c5b5b;
    color:white;
}

.write-contents input{
    margin-top: 20px;
    width: 100%;
}

#post-title{
    height: 65px;
    font-size: 2.75rem;
    font-weight: bold;
    border: none;
    color: #2e2e2d;
}

#post-title::placeholder, textarea::placeholder, #map-search input::placeholder{
    color: #afb7be;
}

textarea{
    color: #2e2e2d;
    font-size: 15px;
    padding:20px;
    margin-top: 20px;
    width: 100%;
    border: none;
    font-family: 'MapoPeacefull';
}

textarea.autosize { min-height: 50px; }

.underBar{
    height: 6px;
    width: 4rem;
    margin-top: 1.5rem;
    margin-bottom: 1rem;
    background-color: #737272;
    border-radius: 1px;
}

#uploadButton{
    color: #2e2e2d;
    border-radius: 8px;
    height:50px;
    font-size: 16px;
    font-family: 'MapoPeacefull';
}

#uploadButton:hover{
    background-color: #f5be7fcd;
}

.goToHomes{
    margin-top: 50px;
    display: flex;
    justify-content: space-around;
    flex-direction: row;
}
먹기록 수정
먹기록 작성 부분과 똑같다.
html
{% block css %}
<link rel="stylesheet" href="{% static 'blog/css/write.css' %}">
{% endblock %}
먹기록 작성의 css 파일을 불러왔다.
<div class="write-page">
    <div id="naver-map"></div>
    <div id="map-search">
        <input type="text" id="search" placeholder="주소를 검색해보세요.">
        <button id="search-btn">검색</button>
    </div>
    <div id="search-list"></div>
    <form method='post' action="{% url 'edit' blog.id %}" enctype="multipart/form-data">
        {% csrf_token %}
        <!-- <h4>title: </h4> -->
        <div class="write-contents">
            <input id="post-title" type="text" name="title" value='{{blog.title}}'>
            <div class="underBar"></div>
            <input type="text" name="address" id="place-input" value="{{ blog.address }}" />
            <input type="file" name="image" id="imageUpload" accept="media/*">
            <textarea class="autosize" onkeydown="resize(this)" onkeyup="resize(this)"
                name="body">{{ blog.body }}</textarea>
            <input type="text" name="lat" id="map-lat" value="{{ blog.latitude }}" hidden>
            <input type="text" name="lng" id="map-lng" value="{{ blog.longtitude }}" hidden>
            <input id="uploadButton" type="submit" value="올리기">
        </div>
    </form>
    <div class="goToHomes">
        <a href="{% url 'home' %}"><img src="{% static 'shared/image/mapHome.png'%}" alt="goToMap"></a>
        <a href="{% url 'tempHome' %}"><img src="{% static 'shared/image/blogHome.png'%}" alt="goToBlog"></a>
    </div>
</div>
<script>
    function resize(obj) {
        obj.style.height = "1px";
        obj.style.height = (12 + obj.scrollHeight) + "px";
    }
</script>
write.css를 공유하여 사용하기 위해 먹기록 수정 html 파일 내 class 이름을 같게 만들었다.
어차피 수정하는 페이지도 작성할 때 들어간 디자인과 똑같게 통일하고 싶었기 때문이다.
결과
화려하고 고급 기술이 들어가진 않았지만 (나름) 깔끔하게 만들었다.
대충 페이지 디자인은 다음과 같다.
.gif)
홈화면이 맵홈이랑 블로그홈 두개가 있다. 작성페이지 하단의 블로그 아이콘을 누르면 먹로그의 블로그홈으로, 맵 아이콘을 누르면 맵홈으로 간다.
.gif)
다음 포스트에선 나머지 부분과 전체 flow에 대해 잘 정리해야 겠다.
개발 공부하는 심리학도