📌 개요
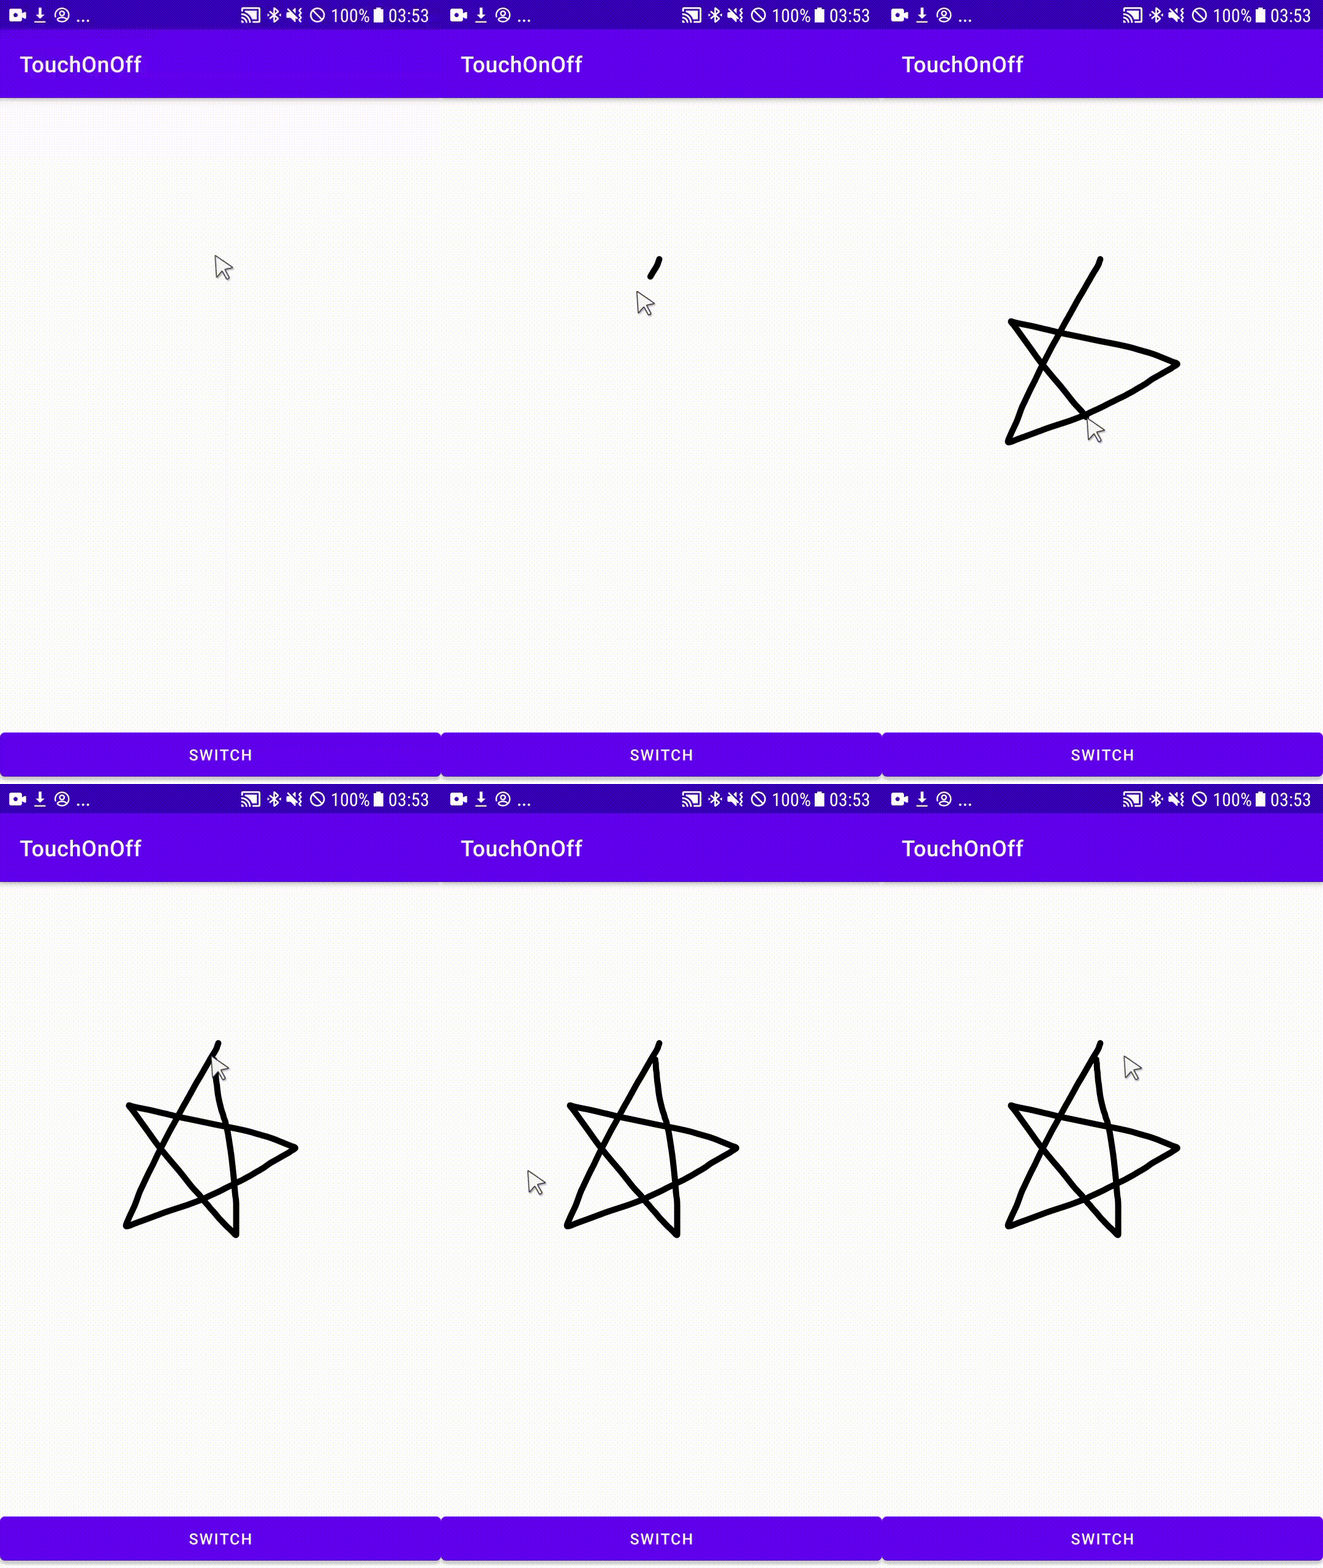
PC와 달리, 핸드폰이나 패드에서의 가장 보편적인 조작 방식은 터치입니다. 이 때 손가락이나 펜은 터치하지 않으면 인식할 수 없지만, 마우스 등을 이용할 때에는 이미 화면 안에 커서가 존재하므로 굳이 터치를 하지 않아도 인식할 수 있습니다. 이럴 때 Touch ON/OFF를 하면 굳이 특정 버튼을 계속 누르지 않아도 그림 그리기 등의 작업을 할 수 있지 않을까요?
📌 코드
activity_main.xml
<?xml version="1.0" encoding="utf-8"?>
<androidx.constraintlayout.widget.ConstraintLayout xmlns:android="http://schemas.android.com/apk/res/android"
    xmlns:app="http://schemas.android.com/apk/res-auto"
    xmlns:tools="http://schemas.android.com/tools"
    android:layout_width="match_parent"
    android:layout_height="match_parent"
    tools:context=".MainActivity">

    <com.example.touchonoff.DrawingView
        android:layout_width="match_parent"
        android:layout_height="match_parent"
        android:id="@+id/drawingView"
        app:layout_constraintTop_toTopOf="parent"
        app:layout_constraintBottom_toBottomOf="parent"
        app:layout_constraintStart_toStartOf="parent"
        app:layout_constraintEnd_toEndOf="parent">
    </com.example.touchonoff.DrawingView>

    <Button
        android:layout_width="wrap_content"
        android:layout_height="wrap_content"
        android:id="@+id/switchButton"
        android:text="switch"
        app:layout_constraintVertical_bias="0.9"
        app:layout_constraintTop_toTopOf="parent"
        app:layout_constraintBottom_toBottomOf="parent"
        app:layout_constraintStart_toStartOf="parent"
        app:layout_constraintEnd_toEndOf="parent">
    </Button>

</androidx.constraintlayout.widget.ConstraintLayout>
그림을 그릴 수 있는 DrawingView라는 Custom View를 화면 전체에 띄워주고, Touch On/Off를 할 수 있는 버튼을 하나 넣은 간단한 구조입니다.
DrawingView.java
package com.example.touchonoff;

import android.content.Context;
import android.graphics.Bitmap;
import android.graphics.Canvas;
import android.graphics.Color;
import android.graphics.Paint;
import android.graphics.Path;
import android.util.AttributeSet;
import android.view.MotionEvent;
import android.view.View;

import androidx.annotation.Nullable;

import java.util.ArrayList;

public class DrawingView extends View {
    private Path drawPath;
    private Paint drawPaint;
    private Paint canvasPaint;
    private int paintColor;
    private Canvas drawCanvas;
    private Bitmap canvasBitmap;

    private ArrayList<Path> paths = new ArrayList<Path>();
    private float mX, mY;
    private static final float BRUSH_SIZE = 20;
    private static final float TOUCH_TOLERANCE = 4;

    public DrawingView(Context context, @Nullable AttributeSet attrs) {
        super(context, attrs);
        init();
    }

    public void init() {
        paintColor = 0xFF000000;
        drawPath = new Path();
        drawPaint = new Paint();
        drawPaint.setColor(Color.BLACK);
        drawPaint.setStrokeWidth(BRUSH_SIZE);
        drawPaint.setAntiAlias(true);
        drawPaint.setStyle(Paint.Style.STROKE);
        drawPaint.setStrokeJoin(Paint.Join.ROUND);
        drawPaint.setStrokeCap(Paint.Cap.ROUND);
        canvasPaint = new Paint(Paint.DITHER_FLAG);
    }

    protected void onDraw(Canvas canvas) {
        canvas.drawBitmap(canvasBitmap, 0, 0, canvasPaint);
        canvas.drawPath(drawPath, drawPaint);
    }

    protected void onSizeChanged(int w, int h, int oldw, int oldh) {
        super.onSizeChanged(w, h, oldw, oldh);
        canvasBitmap = Bitmap.createBitmap(w, h, Bitmap.Config.ARGB_8888);
        drawCanvas = new Canvas(canvasBitmap);
    }

    public boolean onTouchEvent(MotionEvent motionEvent) {
        float touchX = motionEvent.getX();
        float touchY = motionEvent.getY();

        switch (motionEvent.getAction()) {
            case MotionEvent.ACTION_DOWN:
                touchStart(touchX, touchY);
                invalidate();
                break;

            case MotionEvent.ACTION_MOVE:
                touchMove(touchX, touchY);
                invalidate();
                break;

            case MotionEvent.ACTION_UP:
                touchUp();
                invalidate();
                break;

            default:
                return false;
        }
        invalidate();
        return true;
    }

    public void touchStart(float x, float y) {
        drawPath.reset();
        drawPath.moveTo(x, y);
        mX = x;
        mY = y;
    }

    private void touchUp() {
        drawPath.lineTo(mX, mY);
        drawCanvas.drawPath(drawPath, drawPaint);
        paths.add(drawPath);
        drawPath = new Path();
    }

    private void touchMove(float x, float y) {
        float dx = Math.abs(x - mX);
        float dy = Math.abs(y - mY);
        if (dx >= TOUCH_TOLERANCE || dy >= TOUCH_TOLERANCE) {
            drawPath.quadTo(mX, mY, (x + mX) / 2, (y + mY) / 2);
            mX = x;
            mY = y;
        }
    }
}
View 위에 그림을 그릴 수 있도록 Custom View를 만들어 주었습니다. 터치로 그림을 그리는 코드는 여기를 참고했습니다. 만약 TouchEvent의 동작 방식에 대해 익숙하지 않으시다면 onTouchEvent() 부분을 주목해주세요. 안드로이드에서 특정 View의 터치를 인식하는 방법 중 하나로 onTouchEvent()를 활용하는 방법이 있습니다. 한 손가락이나 펜으로 터치하는 보편적인 onTouchEvent()는 아래의 MotionEvent들을 한 세트로 해서 이루어집니다.
MotionEvent.ACTION_DOWN
: 손가락을 화면에 터치한 순간 인식되는 MotionEventMotionEvent.ACTION_MOVE
: 손가락을 화면에 터치한 채로 움직이는 순간 인식되는 MotionEventMotionEvent.ACTION_UP
: 터치하고 있던 손가락을 화면에서 떼는 순간 인식되는 MotionEvent
터치하게 되면 자동적으로 MotionEvent의 타입을 구별하고 이를 매개변수로 onTouchEvent()가 실행됩니다. 하지만 터치하지 않아도 터치 입력을 넣어주고 싶을 때에는, 세 단계의 MotionEvent를 직접 구분하여 설정하고 TouchEvent에 따로 반영해야 합니다.
MainActivity.java
package com.example.touchonoff;

import androidx.appcompat.app.AppCompatActivity;

import android.os.Bundle;
import android.os.SystemClock;
import android.view.MotionEvent;
import android.view.View;
import android.widget.Button;

public class MainActivity extends AppCompatActivity {

    DrawingView drawingView;
    Button switchButton;

    private float touchX;
    private float touchY;
    private long currentTime;
    private boolean isTouchMode = false;

    @Override
    protected void onCreate(Bundle savedInstanceState) {
        super.onCreate(savedInstanceState);
        setContentView(R.layout.activity_main);
        drawingView = findViewById(R.id.drawingView);
        switchButton = findViewById(R.id.switchButton);

        drawingView.setOnGenericMotionListener(new View.OnGenericMotionListener() {
            @Override
            public boolean onGenericMotion(View v, MotionEvent event) {
                touchX = event.getX(); // 커서가 이동한 지점의 X좌표
                touchY = event.getY(); // 커서가 이동한 지점의 Y좌표
                if (event.getAction() == MotionEvent.ACTION_HOVER_MOVE) {
                    if (isTouchMode) {
                        currentTime = SystemClock.uptimeMillis(); // 이벤트가 발생한 시간
                        MotionEvent moveMotionEvent = MotionEvent.obtain(currentTime, currentTime+1000,
                        	MotionEvent.ACTION_MOVE, touchX, touchY, 0); // MotionEvent 생성
                        drawingView.dispatchTouchEvent(moveMotionEvent); // MotionEvent 수동 반영
                    }
                }
                return false;
            }
        });

        switchButton.setOnClickListener(new View.OnClickListener() {
            @Override
            public void onClick(View v) {
                isTouchMode ^= true;
                if (isTouchMode) {
                    currentTime = SystemClock.uptimeMillis();
                    MotionEvent downMotionEvent = MotionEvent.obtain(currentTime, currentTime+1000,
                    	MotionEvent.ACTION_DOWN, touchX, touchY, 0);
                    drawingView.dispatchTouchEvent(downMotionEvent);
                }
                else {
                    MotionEvent upMotionEvent = MotionEvent.obtain(downTime, eventTime+1000,
                    	MotionEvent.ACTION_UP, touchX, touchY, 0);
                    drawingView.dispatchTouchEvent(upMotionEvent);
                }
            }
        });
    }

}
만약 Touch가 On이 된다면, 커서가 이동할 때마다 ACTION_MOVE처럼 위치를 감지하고 그림을 그려나가야 하겠죠? 그래서 drawingView에는 커서의 이동을 감지할 수 있는 GenericMotionListner를 세팅해야 합니다. event.getX()와 event.getY()를 통해 View에서 커서가 이동한 X좌표와 Y좌표를 불러올 수 있습니다.
MotionEvent를 직접 생성하기 위해서는 모션의 위치 외에도 모션의 시작 시각, 종료 시각, 모션 타입 및 metastate가 필요한데요.SystemClock.uptimeMillis()를 통해 어플의 현재 진행 시각을 불러와 시작 시각을 현재 진행 시각으로, 종료 시각을 현재 진행 시각으로부터 0.1초 뒤로 설정합니다. 원하는 모션인 MotionEvent.ACTION_MOVE와 metastate(meta data를 사용하지 않으므로 0으로 설정)까지 넣어 MotionEvent를 새로 생성하고, dispatchEvent()를 통해 drawingView에 이벤트를 수동으로 적용시켜 줍니다. 이를 통해 위에서 DrawingView의 onTouchEvent()가 직접 생성한 MotionEvent를 인자로 실행됩니다.
Touch가 특정 트리거를 통해서만 On/Off된다면, 손가락이 처음 닿는 ACTION_DOWN과 손가락을 끝내 떼는 ACTION_UP은 트리거를 통해서 구현되어야 합니다. 그래서 switchButton에는 ClickListner를 세팅해 클릭할 때마다 터치 모드가 바뀌며 ACTION_DOWN 또는 ACTION_UP MotionEvent가 drawingView에 적용되도록 했습니다.
📌 마무리
전체 프로젝트는 여기에서 확인하실 수 있습니다.
글을 작성하면서 참고한 사이트입니다.
Tistory
Stackoverflow
Android

