EKS로 애플리케이션 구축 이어서
helm chart 구성
helm chart가 필요한 이유
- 하나의 솔루션이나 서비스를 구현하기 위해서 필요한 다양한 오브젝트, 디펜더시가 있는데 따로 배포하면 중요한 컴포넌트 누락, 순서 꼬임 등이 발생할 수 있음.
- dev,qa,stg,prd등 다양한 환경에서 사용하는 템플릿을 통일하고 벨류값 및 이미지등 만을 변경하여 사용하기 위해.
helm custom chart 구성
- 커스텀 차트 생성
$ helm create game2048 - helm chart 구성
- manifest repo에
service/폴더 생성 service/아래에 helm chart 구성- 기존 yaml 파일들은
archive/아래로 이동
- manifest repo에
helm chart 적용
-
기존에 만들었던 오브젝트 삭제
$ k delete -f . -
helm chart 설치
$ helm install -f values.yaml game2048 --create-namespace . -
helm chart 업데이트
$ helm upgrade -f values.yaml game2048 .
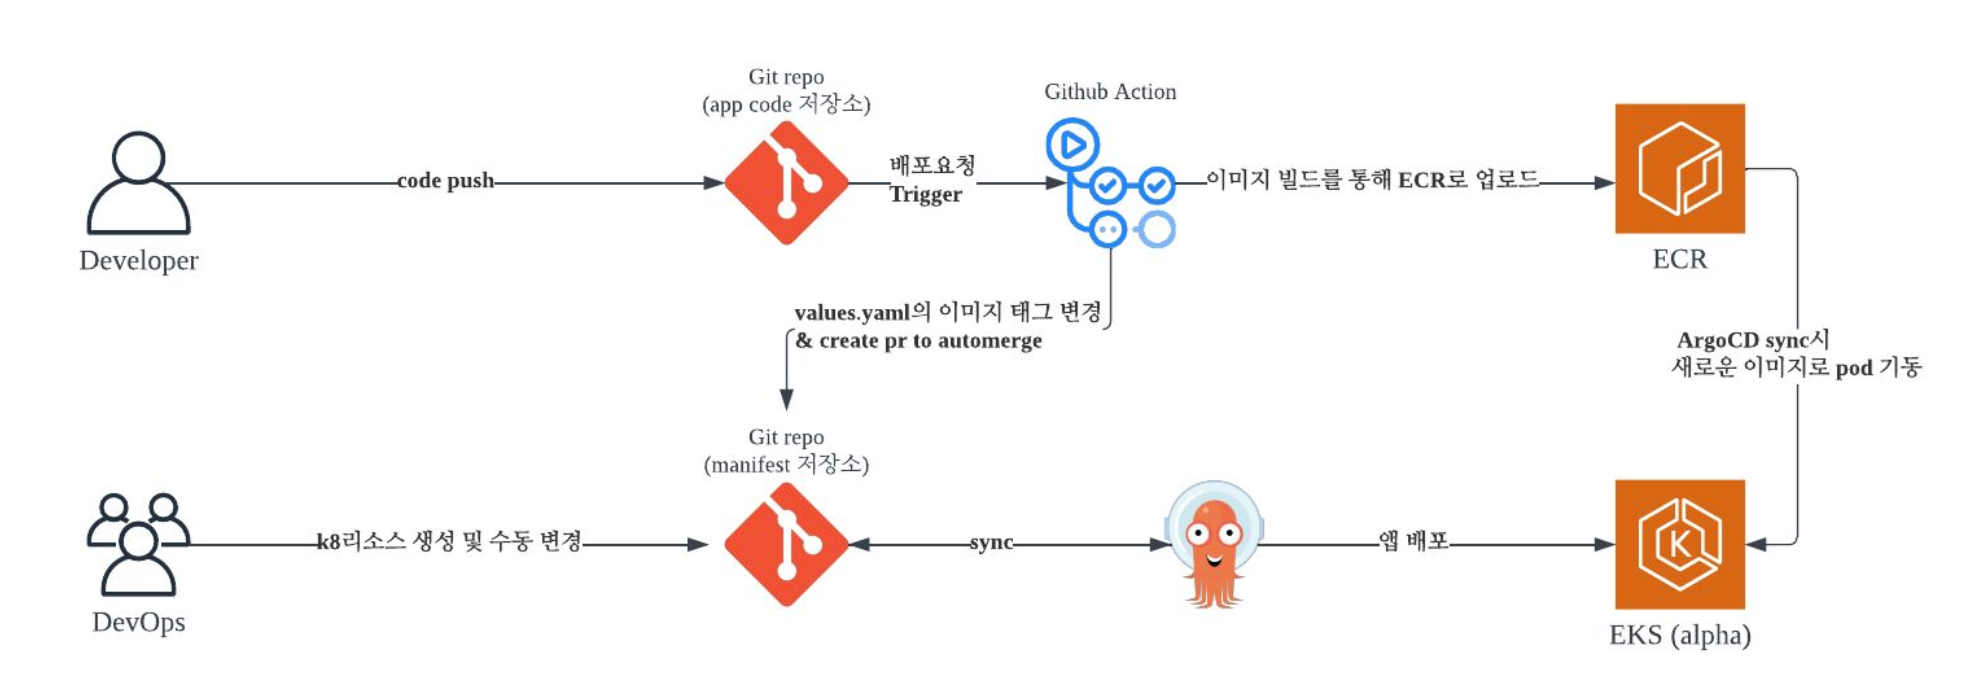
Github Action으로 빌드 구성
Github Action 구성 사전 작업
-
cicd.tf
# PATH = eks-infra-repo/modules/eks-cluster
  locals {
   tags = {
      Environment = "test"
      Terraform   = "true"
   }
 }

 resource "aws_iam_user" "github-action" {
    name = "github-action"
    tags = local.tags
 }

 resource "aws_iam_user_policy" "github-action-pol" {
   name = "github-action-pol"
   user = aws_iam_user.github-action.name

   policy = <<EOF
  {
     "Version": "2012-10-17",
     "Statement": [
         {
             "Sid": "AllowPush",
             "Effect": "Allow",
             "Action": [
                 "ecr:GetDownloadUrlForLayer",
                 "ecr:BatchGetImage",
                 "ecr:BatchCheckLayerAvailability",
                 "ecr:PutImage",
                 "ecr:InitiateLayerUpload",
                 "ecr:UploadLayerPart",
                 "ecr:CompleteLayerUpload"
             ],
             "Resource": "arn:aws:ecr:ap-northeast-2:${data.aws_caller_identity.current.account_id}:repository/eks-app"
         },
         {
             "Sid": "GetAuthorizationToken",
             "Effect": "Allow",
             "Action": [
                 "ecr:GetAuthorizationToken"
             ],
             "Resource": "*"
         }
     ]
 }
 EOF
 }
➡️ github-action 사용자 추가
-
github-action 의 역할
- 이미지 빌드, 태킹, ECR로 업로드
- 이미지 태그 변경
- eks-manifest-repo 레포의 deployment에서 이미지 경로를 수정
- Pull request 생성
- eks-manifest-repo 레포로 PR을 생성하고 auto merge
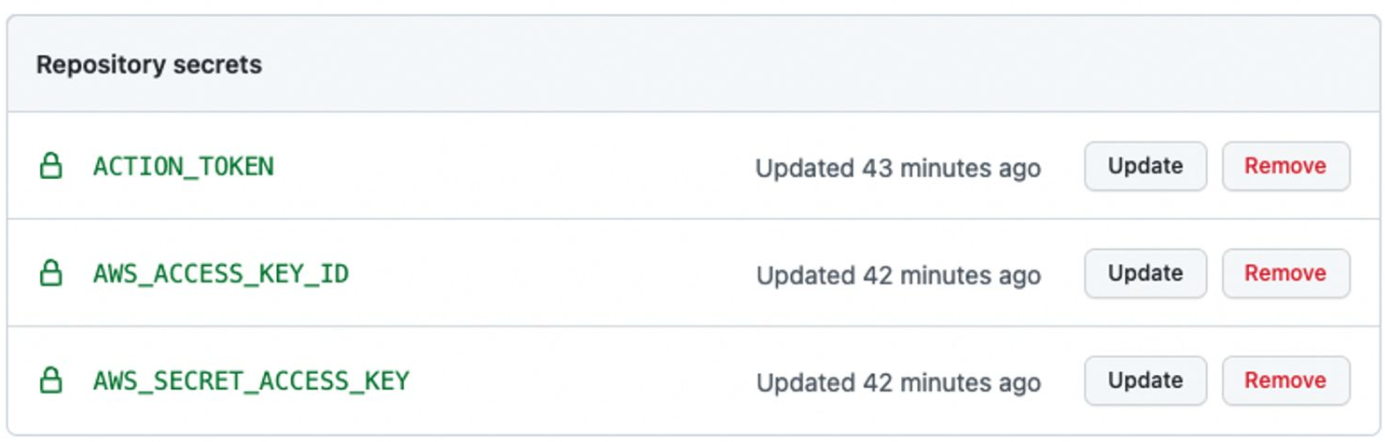
Github Action Secret 설정
- github-action IAM User의 credential 생성, 발급
- github Personal access token 생성
- github secret 설정
Github Action 빌드 스크립트
game2048-build.yaml
# PATH = eks-app-repo/.github/workflows

name: Build For game-2048

on:
  push:
    branches: [ main ]

jobs:
  build:
    runs-on: ubuntu-latest
    steps:
      - name: Checkout source code
        uses: actions/checkout@v2

      - name: Build front
        run: |
          npm install
          npm run build

      - name: Configure AWS credentials
        uses: aws-actions/configure-aws-credentials@v1
        with:
          aws-access-key-id: ${{ secrets.AWS_ACCESS_KEY_ID }}
          aws-secret-access-key: ${{ secrets.AWS_SECRET_ACCESS_KEY }}
          aws-region: ap-northeast-2

      - name: Login to Amazon ECR
        id: login-ecr
        uses: aws-actions/amazon-ecr-login@v1

      - name: Get image tag(version)
        id: image
        run: |
          VERSION=$(echo ${{ github.sha }} | cut -c1-5)
          echo VERSION=$VERSION
          echo "::set-output name=version::$VERSION"

      - name: Build, tag, and push image to Amazon ECR
        id: image-info
        env:
          ECR_REGISTRY: ${{ steps.login-ecr.outputs.registry }}
          ECR_REPOSITORY: eks-app
          IMAGE_TAG: ${{ steps.image.outputs.version }}
        run: |
          echo "::set-output name=ecr_repository::$ECR_REPOSITORY"
          echo "::set-output name=image_tag::$IMAGE_TAG"
          docker build -t $ECR_REGISTRY/$ECR_REPOSITORY:$IMAGE_TAG .
          docker push $ECR_REGISTRY/$ECR_REPOSITORY:$IMAGE_TAG

    outputs:
      image_tag: ${{ steps.image.outputs.version }}
      sha: ${{ github.sha }}

  deploy:
    needs: build
    name: apply docker image tag to frontend deployment manifest
    runs-on: ubuntu-latest
    env:
      IMAGE_TAG: ${{ needs.build.outputs.image_tag }}
      GIT_ACCESS_TOKEN: ${{ secrets.ACTION_TOKEN }}
      HASH: ${{ needs.build.outputs.sha }}
      GIT_REPO: sk-lim19f/eks-manifest-repo

    steps:
      - name: Clone Deploy repository
        uses: actions/checkout@v2
        with:
          repository: ${{ env.GIT_REPO }}
          ref: 'main'
          token: ${{ env.GIT_ACCESS_TOKEN }}

      - name: Image Tag Change
        uses: mikefarah/yq@v4.9.6
        with:
          cmd: yq e --inplace '.image.tag = "${{ env.IMAGE_TAG }}"' service/game2048/values.yaml

      - name: Create Pull Request
        id: cpr
        uses: peter-evans/create-pull-request@v3
        with:
          token: ${{ env.GIT_ACCESS_TOKEN }}
          commit-message: 'deploy: game2048-${{ env.HASH }}'
          base: main
          branch: game2048-${{ env.HASH }}
          title: 'deploy: game2048-${{ env.HASH }}'
          labels: |
            automerge
automerge.yaml
# PATH = eks-menifest-repo/.github/workflows

name: automerge
on:
  pull_request:
    branches:
      - main
    types:
      - labeled

jobs:
  automerge:
    if: ${{ github.event.label.name == 'automerge' }}
    env:
      BASE_BRANCH: ${{ github.event.pull_request.head.ref }}
    runs-on: ubuntu-latest
    steps:
      - name: automerge
        uses: "pascalgn/automerge-action@v0.14.2"
        env:
          GITHUB_TOKEN: "${{ secrets.ACTION_TOKEN }}"
Github Repository
eks-infra-repo
eks-app-repo
eks-manifest-repo
ArgoCD 구성
ArgoCD 접근을 위한 퍼블릭 노출 설정
# argocd 네임스페이스 생성
$ k create ns argocd

# argocd 서버스 패치 // argocd-service의 type을 ClusterIP -> LoadBalancer
$ k patch svc argocd-server -n argocd -p '{"spec": {"type": "LoadBalancer"}}'

# 3~4분 후 (CLB 생성 시간) ArgoCD 접속이 가능한 ELB 주소 확인 (콘솔에서도 확인 가능)
$ k get -n argocd svc argocd-server
로그인
Username: admin
Password: 아래 명령어로 확인
k -n argocd get secret argocd-initial-admin-secret -o jsonpath="{.data.password}" | base64 -dArgoCD 클러스터 등록
# 웹에서도 등록 가능
# 현재 컨텍스트 및 클러스터 이름 확인
$ k config current-context

# argocli로 로그인
$ argocd login <CLB Endpoint>

# 클러스터 등록
$ argocd cluster add my-eks-cluster
버전 업데이트 테스트
앱 코드 수정
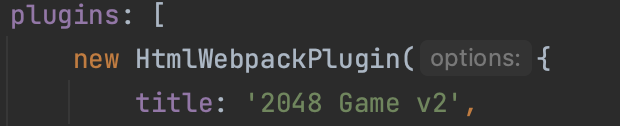
결과

서비스 스케일링
Metric server 구성
# Metric server 설치 (ns:kube-system)
$ k apply -f https://github.com/kubernetes-sigs/metrics-server/releases/latest/download/components.yaml
# 설치 확인
$ k get deploy metrics-server -n kube-system
$ k top node
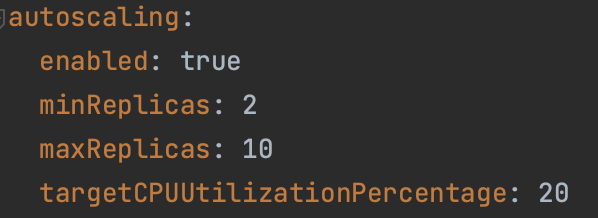
$ k top podHPA 구성
# PATH = eks-manifest-repo/service/game2048/templates

{{- if .Values.autoscaling.enabled }}
apiVersion: autoscaling/v2beta1
kind: HorizontalPodAutoscaler
metadata:
  name: {{ include "game2048.fullname" . }}
  labels:
    {{- include "game2048.labels" . | nindent 4 }}
spec:
  scaleTargetRef:
    apiVersion: apps/v1
    kind: Deployment
    name: {{ include "game2048.fullname" . }}
  minReplicas: {{ .Values.autoscaling.minReplicas }}
  maxReplicas: {{ .Values.autoscaling.maxReplicas }}
  metrics:
    {{- if .Values.autoscaling.targetCPUUtilizationPercentage }}
    - type: Resource
      resource:
        name: cpu
        targetAverageUtilization: {{ .Values.autoscaling.targetCPUUtilizationPercentage }}
    {{- end }}
    {{- if .Values.autoscaling.targetMemoryUtilizationPercentage }}
    - type: Resource
      resource:
        name: memory
        targetAverageUtilization: {{ .Values.autoscaling.targetMemoryUtilizationPercentage }}
    {{- end }}
{{- end }}
pod 구성
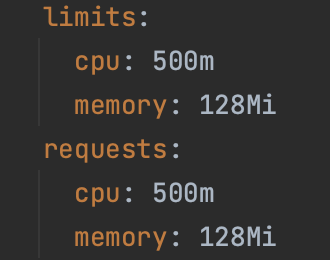
부하 테스트


Junior DevOps Engineer