오늘은 바텀네비게이션 적용방법을 기록한다.
bottom_navigation
xml
<?xml version="1.0" encoding="utf-8"?>
<androidx.constraintlayout.widget.ConstraintLayout xmlns:android="http://schemas.android.com/apk/res/android"
    xmlns:app="http://schemas.android.com/apk/res-auto"
    xmlns:tools="http://schemas.android.com/tools"
    android:layout_width="match_parent"
    android:layout_height="match_parent"
    tools:context=".MainActivity">

    <LinearLayout
        android:id="@+id/linearLayout"
        android:layout_width="match_parent"
        android:layout_height="match_parent"
        android:orientation="vertical"
        app:layout_constraintStart_toStartOf="parent"
        app:layout_constraintEnd_toEndOf="parent"
        app:layout_constraintTop_toTopOf="parent"
        app:layout_constraintBottom_toTopOf="@+id/bottomNavigationView" />

    <com.google.android.material.bottomnavigation.BottomNavigationView
        android:id="@+id/bottomNavigationView"
        android:layout_width="match_parent"
        android:layout_height="wrap_content"
        app:layout_constraintStart_toStartOf="parent"
        app:layout_constraintBottom_toBottomOf="parent"
        app:menu="@menu/bottom_navigation_menu"
        app:itemBackground="@android:color/white"/>


</androidx.constraintlayout.widget.ConstraintLayout>
화면 전체를 채우는 레이아웃과 바텀네비게이션을 만들어준다.
menu
<?xml version="1.0" encoding="utf-8"?>
<menu xmlns:android="http://schemas.android.com/apk/res/android">
    <item
        android:id="@+id/page_home"
        android:enabled="true"
        android:icon="@drawable/icon_home"
        android:title="홈"/>
    <item
        android:id="@+id/page_tv"
        android:enabled="true"
        android:icon="@drawable/icon_tv"
        android:title="TV"/>
    <item
        android:id="@+id/page_calendar"
        android:enabled="true"
        android:icon="@drawable/icon_calendar"
        android:title="일정"/>
</menu>
layout-menu아래에 bottom_navigaion_menu.xml파일을 만들어준다. 아이콘은 vector이미지를 사용했다.
Activity
class MainActivity : AppCompatActivity() {
    private val binding by lazy { ActivityMainBinding.inflate(layoutInflater) }
    private val homeFragment = HomeFragment()
    private val tvFragment = TVFragment()
    private val calendarFragment = CalendarFragment()
    override fun onCreate(savedInstanceState: Bundle?) {
        super.onCreate(savedInstanceState)
        setContentView(binding.root)
        with(binding){
            bottomNavigationView.setOnNavigationItemSelectedListener { menuItem ->
                when (menuItem.itemId) {
                    R.id.page_home -> {
                        replaceFragment(homeFragment)
                        true
                    }
                    R.id.page_tv -> {
                        replaceFragment(tvFragment)
                        true
                    }
                    R.id.page_calendar -> {
                        replaceFragment(calendarFragment)
                        true
                    }
                    else -> false
                }
            }
            // 기본으로 첫 번째 아이템 선택
            bottomNavigationView.selectedItemId = R.id.page_home
        }
    }
    private fun replaceFragment(fragment: Fragment) {
        supportFragmentManager.beginTransaction()
            .replace(R.id.linearLayout, fragment)
            .commit()
    }
}
이렇게 해주면 바텀 네이베이션이 적용된다.
아이콘,글씨 색 변경
<com.google.android.material.bottomnavigation.BottomNavigationView
    android:id="@+id/bottomNavigationView"
    android:layout_width="match_parent"
    android:layout_height="wrap_content"
    app:layout_constraintStart_toStartOf="parent"
    app:layout_constraintBottom_toBottomOf="parent"
    app:menu="@menu/bottom_navigation_menu"
    app:itemBackground="@android:color/white"
    app:itemIconTint="@color/black"
    app:itemTextColor="@color/black"/>
여기서 제일아래 IconTint는 아이콘색을, TextColor는 네비게이션의 텍스트 색을 바꿔줄수 있다.
selector
네비게이션에서 선택된 값들과 선택되지않은 값들이 똑같이 나타나서 구분이 가지않는다. selector를 이용해서 구분을 지어준다.
<selector xmlns:android="http://schemas.android.com/apk/res/android">
    <item android:state_checked="true" android:color="@android:color/black" />
    <item android:color="@android:color/darker_gray" />
</selector>
이렇게하고 xml에서 아래와같이 수정해주면 된다.
app:itemIconTint="@color/bottom_navigation_item_selector"
app:itemTextColor="@color/bottom_navigation_item_selector"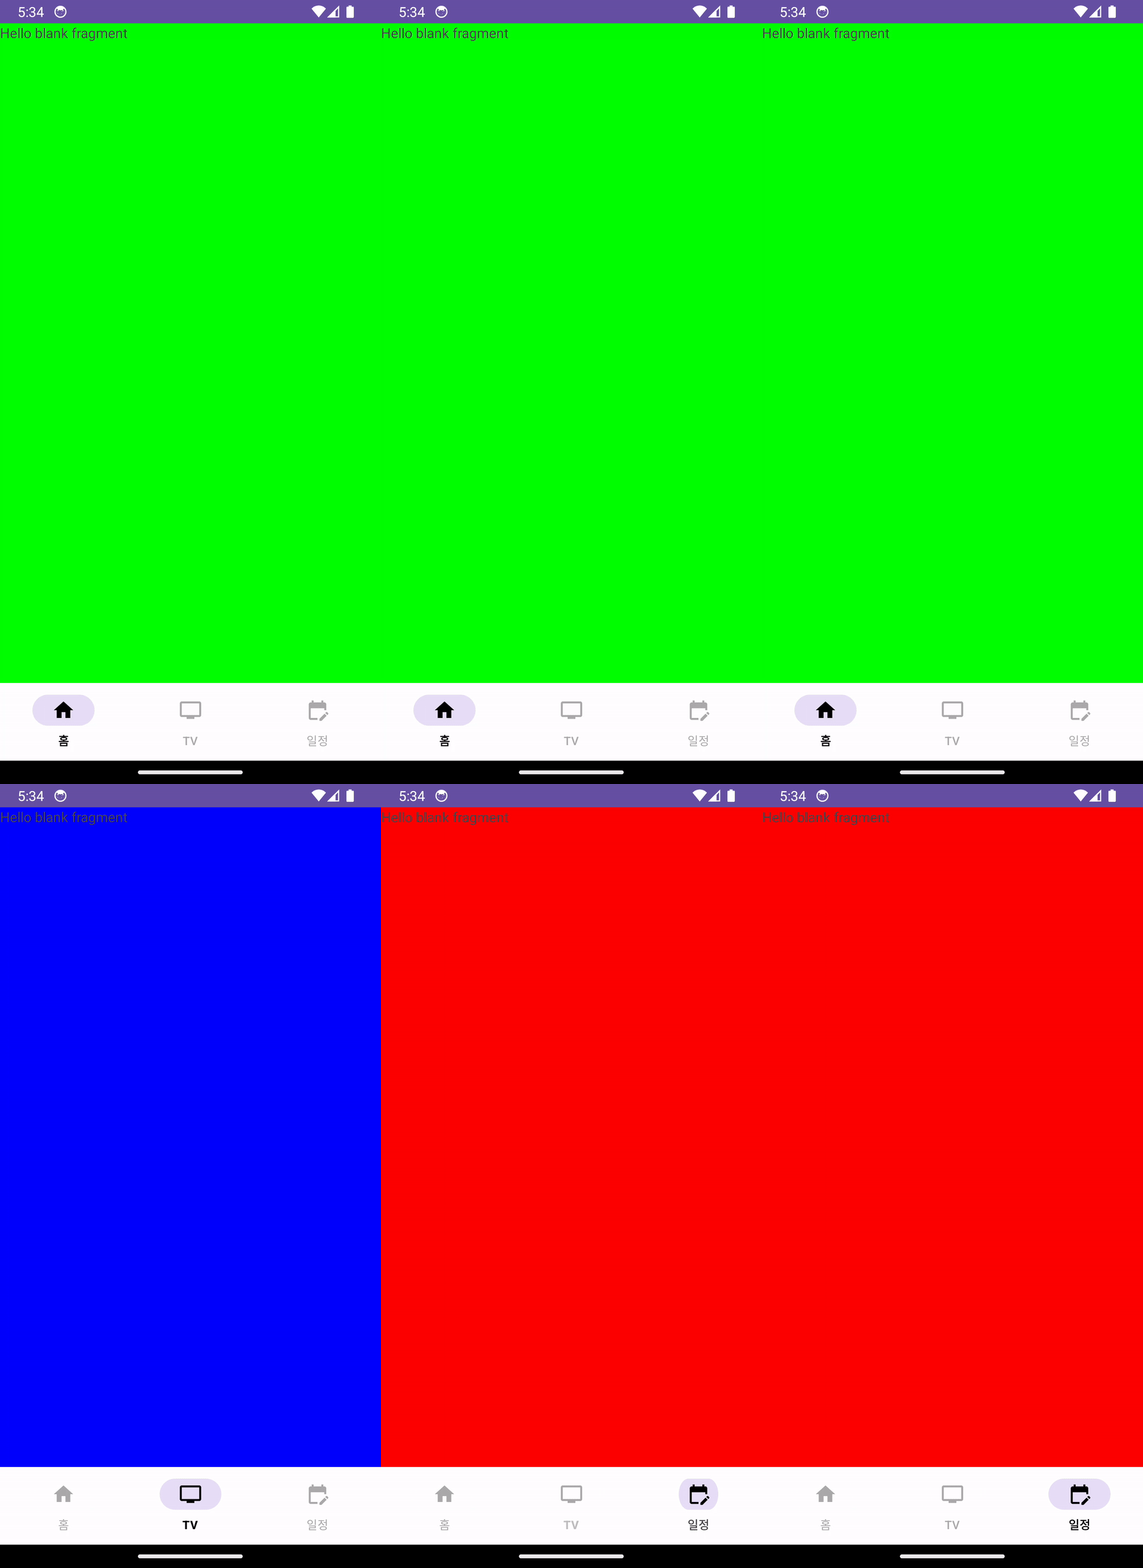
바텀네비게이션
바텀
bottomnavigation
bottom
bottomNavigation

이우진