1. GetComponent 우회 방법
일전의 총을 쏘고, 적에게 데미지를 계산하는 방식을 다음과 같이 가져왔었다.
private IDamageable RayShoot()
    {
        Ray ray = new Ray(_camera.transform.position, _camera.transform.forward);
        RaycastHit hit;

        if (Physics.Raycast(ray, out hit, _attackRange, _targetLayer))
        {
            return hit.transform.GetComponent<IDamageable>();
        }

        return null;
	}
하지만 이와 같은 방식으로 총을 쏠 때마다 GetComponent를 하면 메모리적으로 부담이 될 수밖에 없다.
이를 우회할 수 있는 방법이 있을까?
이를 우회하기 위한 방법을 한 번 생각해보자.
1.1 ReferenceRegistry
딕셔너리와 키를 이용한 방식으로 게임오브젝트를 가져온다.
이 기능은 Util로 사용될 기능이므로 MonoBehaviour가 붙지 않는다.
using System.Collections.Generic;
using UnityEngine;

public static class ReferenceRegistry
{
    private static Dictionary<GameObject, ReferenceProvider> _providers = new();

    public static void Register(ReferenceProvider referenceProvider)
    {
        if (_providers.ContainsKey(referenceProvider.gameObject)) return;

        _providers.Add(referenceProvider.gameObject, referenceProvider);
    }

    public static void Unregister(ReferenceProvider referenceProvider)
    {
        if(!_providers.ContainsKey(referenceProvider.gameObject)) return;

        _providers.Remove(referenceProvider.gameObject);
    }

    public static void Clear()
    {
        _providers.Clear();
    }

    public static ReferenceProvider GetProvider(GameObject gameObject)
    {
        if (!_providers.ContainsKey(gameObject)) return null;

        return _providers[gameObject];
    }
}
1.2 ReferenceProvider
가져온 게임 오브젝트의 컴포넌트를 가져온다.
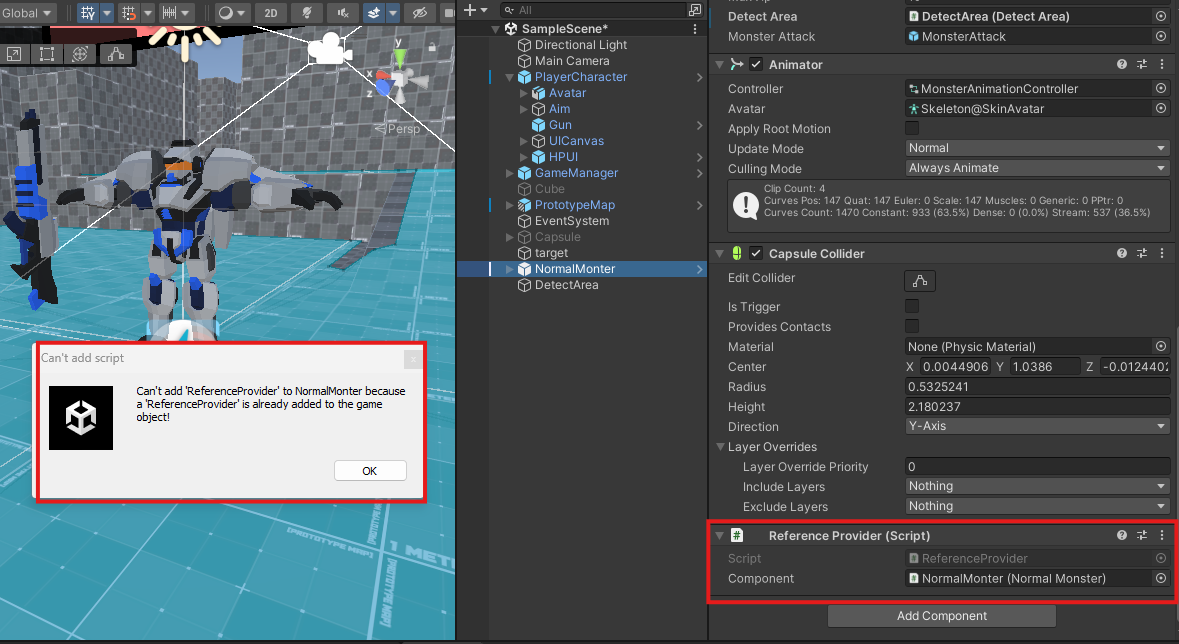
이때 ReferenceProvider를 한 오브젝트에 컴포넌트가 두 개 이상 배치되지 않도록 [DisallowMultipleComponent] 요소를 추가한다.
using UnityEngine;

[DisallowMultipleComponent]
public class ReferenceProvider : MonoBehaviour
{
    [SerializeField] private Component _component;

    private void Awake() => ReferenceRegistry.Register(this);

    private void OnDestroy() => ReferenceRegistry.Unregister(this);

    public T GetAs<T>() where T : Component
    {
        return _component as T;
    }
}
해당 기능을 추가했을 경우 아래와 같이 한 오브젝트에서 컴포넌트가 두 개 이상 들어갈 수 있는 실수를 막아준다.
1.3 플레이어의 몬스터 공격 데미지 반영
이와 같이 Util 기능을 만든 뒤에 어떻게 사용하는지 알아보자.
-
가져와야 하는 컴포넌트를 가진 오브젝트에 ReferenceProvider를 추가하고, 해당 함수가 들어 있는 컴포넌트를 참조한다.
-
해당 함수를 가져오는 클래스에서 ReferenceRegistry로 컴포넌트를 가져오고, 캐스팅을 통해 정보를 가져온다.
데미지를 주는 Gun 부분의 코드를 아래와 같이 수정하였다.
private IDamageable RayShoot(out RaycastHit hitTarget)
{
    Ray ray = new Ray(_camera.transform.position, _camera.transform.forward);
    RaycastHit hit;

    if (Physics.Raycast(ray, out hit, _attackRange, _targetLayer))
    {
        hitTarget = hit;
        if (hit.collider.gameObject.layer == LayerMask.NameToLayer("Monster"))
        {
            return ReferenceRegistry.GetProvider(hit.collider.gameObject).GetAs<NormalMonster>() as IDamageable;
        }
    }
    hitTarget = hit;
    return null;
}
다만 이와 같은 방법은 Dictionary로 구현되어 있으니 여러 컴포넌트의 정보가 필요하면 배열로 선언해도 되지 않겠냐고 할 수도 있겠지만, 개수가 많아질 경우 결국 GetComponent와 성능적 차이가 별로 없게 될 수도 있으니 유의하도록 하자.
1.4 몬스터의 플레이어 공격 데미지
위와 같이 플레이어의 데미지를 반영했으니, 이제 몬스터의 플레이어로의 데미지도 해당 내용을 반영할 차례이다.
처음에 몬스터의 데미지 계산을 아래와 같이 했었다.
if (_attackTime <= 1.77 && _attackTime >= 1.75 && other != null && other.CompareTag("Player"))
{
	other.GetComponent<IDamageable>().TakeDamage(_monsterDamage);
}
플레이어에게 PlayerController 컴포넌트를 가져올 수 있게 하고 아래와 같이 함수를 수정하면 된다.
if (_attackTime <= 1.77 && _attackTime >= 1.75 && other != null && other.CompareTag("Player"))
{
	IDamageable playerAttack = ReferenceRegistry.GetProvider(other.gameObject).GetAs<PlayerController>() as IDamageable;
	playerAttack.TakeDamage(_monsterDamage);
}
2. InputSystem
우리는 이전까지의 작업물에서 Input Manager로 이동을 구현하는 방법을 기본으로 사용해왔지만, InputSystem이란 기능을 통해서 다양한 입력장치를 통한 유연한 키 입력을 구현할 수 있다.

가령 게임 중에 키 설정을 바꿀 수 있는 시스템이 있다든지, 키보드, 게임패드 등 다양한 입력장치로 게임을 플레이할 수 있는 기능을 제공해 주는 시스템이다.
해당 내용은 유니티 공식의 유니티 워크플로에도 해당 내용 및 예시가 자세하게 적혀 있어 나중에 참고삼아 공부해 볼 가치가 있어 보인다.
- 유니티 워크플로 - InputSystem
https://docs.unity3d.com/Packages/com.unity.inputsystem@1.14/manual/Workflows.html
그러면 유니티 InputSystem을 사용하기 위해 패키지 매니저로 다운 받는 과정부터 살펴보자.
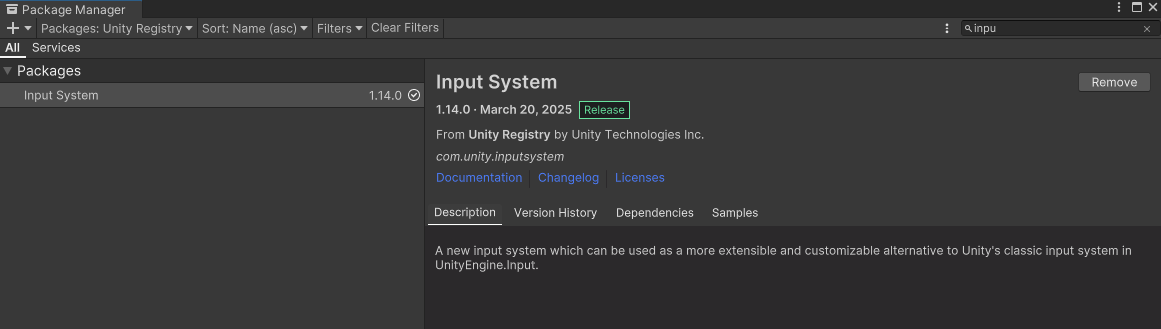
유니티 InputSystem은 이와 같이 유니티 자체에 추가적으로 설치할 수 있는 패키지이다. InputSystem을 Install한 후에 Project에서 Input Action을 만들어보자.
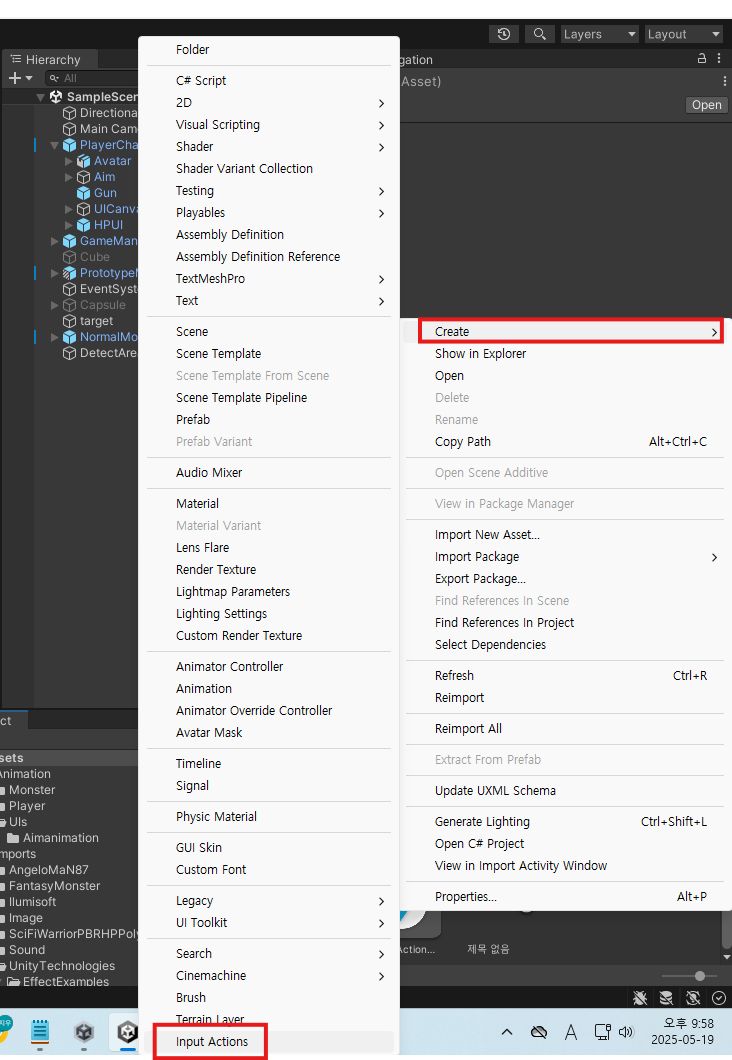
그러면 이렇게 생긴 아이콘이 생기고, 여기에서 유니티 InputSystem을 세팅할 수 있다.

해당 아이콘을 더블클릭하면 InputSystem 세팅 창이 나온다.
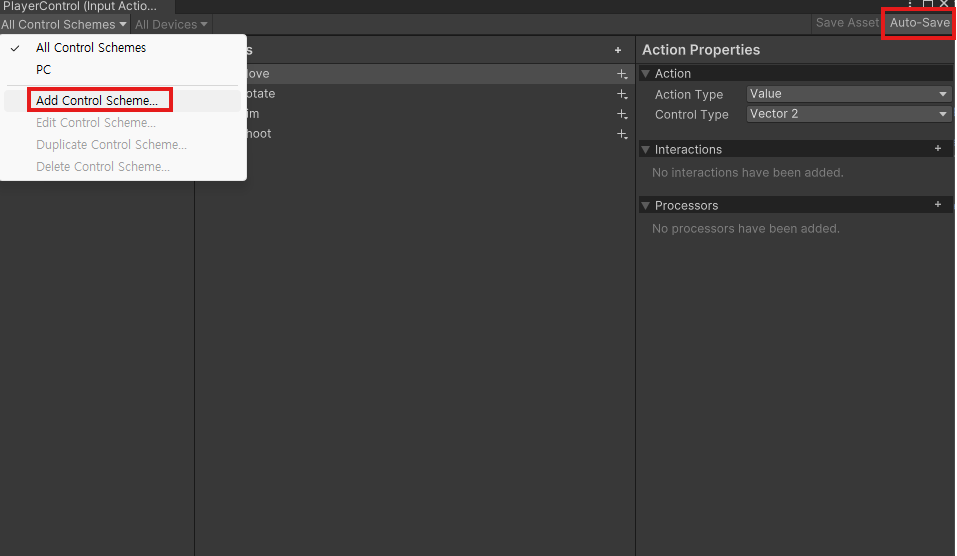
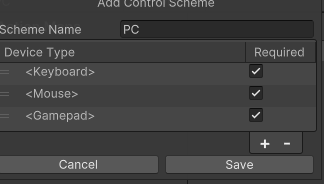
Auto-Save를 켜 놓고 작업해야 하며, 작동하고 있는지 확인하고 나서 Control Scheme을 추가한다.
1.1 세부 세팅
- 컨트롤러 세팅
기본적으로 Keybooard + Mouse 사용 방식과 Gamepad 사용 방식 두 가지를 지원하기 위해 세팅했다.
- 행동 정의와 키세팅
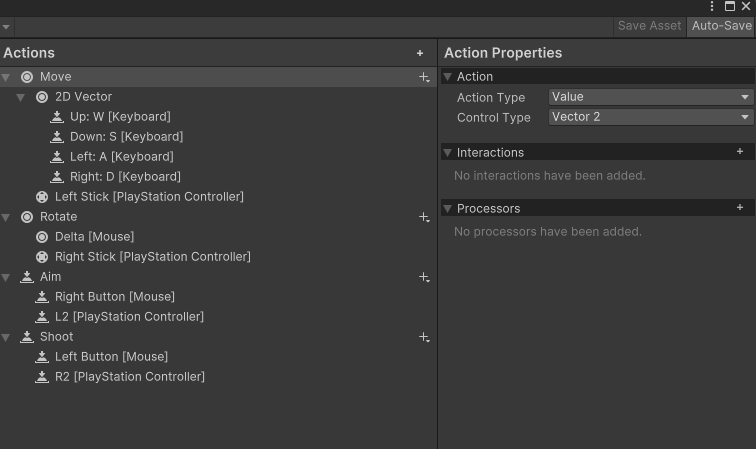
기본적으로 모든 키에 대한 세팅이 완료되어야 정상 작동한다. 필자는 집에 있던 PlayStation 컨트롤러를 연결해서 작업했기 때문에 그에 맞춰서 테스트를 진행했다.
세부 세팅은 아래와 같은 것들이 있다.

- Value : 지속적인 값 추적이 필요한 경우 사용 - ex) 이동 방향키, 카메라 마우스 회전 등
- Button : 이전 상태를 확인하지 않고 행동을 수행하는 경우 - 버튼을 누르고 특정 반응 나오게 함 - ex) 공격 등
- PassThrough : 바인딩된 컨트롤을 변경하면 해당 컨트롤 값으로 콜백이 트리거됨, 액션 집합의 모든 입력을 처리하려는 경우 유용
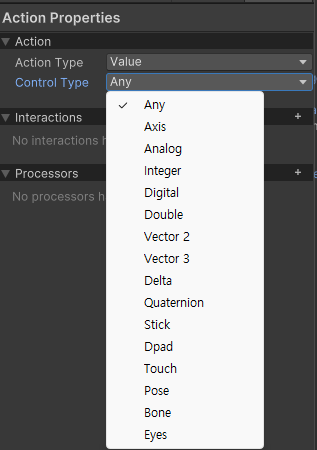
입력받을 수 있는 유형이 다양하므로 상황에 맞춰서 쓰도록 한다.

Interaction 도 옵션을 추가하여 원하는 옵션을 만들 수도 있다.
ex) Multi Tap으로 더블 클릭 시의 행동도 표시할 수 있음

키세팅에서 이와 같이 여러가지 세팅을 할 수 있으며, 상황에 따라 적절하게 골라서 세팅하면 된다.
1.2 코드로 연결
위와 같이 세팅을 맞춘 후 코드로 연결해주어야 한다. InputSystem을 코드 상으로 연결하기 위해서는 이와 같이 해야 한다.
- using UnityEngine.InputSystem; 선언
- InputAction 변수로 선언 혹은 함수의 입력값을 InputValue로 받아 값을 가져오는 것.
위의 방법으로 플레이어의 Move와 Rotate(카메라 이동), Aim과 Shoot을 반영해보자.
- Move, Rotate
using UnityEngine;
using UnityEngine.InputSystem;

public class PlayerMovement : MonoBehaviour
{
	...

    public Vector2 InputDirection { get; private set; }
    public Vector2 MouseDirection { get; private set; }

	...

    public Vector3 GetMoveDirection()
    {
        Vector3 direction =
            (transform.right * InputDirection.x) +
            (transform.forward * InputDirection.y);

        return direction.normalized;
    }

    public void OnMove(InputValue value)
    {
        InputDirection = value.Get<Vector2>();
    }

    public void OnRotate(InputValue value)
    {
        Vector2 mouseDir = value.Get<Vector2>();
        mouseDir.y *= -1;
        MouseDirection = mouseDir * _mouseSensitivity;
    }
}- Aim, Shoot
public class PlayerController : MonoBehaviour, IDamageable
{
	...

    private InputAction _aimInputAction;
    private InputAction _shootInputAction;

	...

    private void Awake() => Init();
    private void OnEnable() => SubscribeEvents();
    private void Update() => HandlePlayerControl();
    private void OnDisable() => UnsubscribeEvents();

    private void Init()
    {
		...

        _aimInputAction = GetComponent<PlayerInput>().actions["Aim"];
        _shootInputAction = GetComponent<PlayerInput>().actions["Shoot"];

        _hpUI.SetImageFillAmount(1);
        _status.CurrentHp.Value = _status.MaxHp;
    }

    private void HandlePlayerControl()
    {
        if (!isControlActive) return;

        HandleMovement();
        OnShoot();
    }

    public void OnShoot()
    {
        if (_status.IsAming.Value && _shootInputAction.IsPressed())
        {
            _status.IsAttacking.Value = _gun.Shoot();
        }
        else
        {
            _status.IsAttacking.Value = false;
        }
    }

    private void HandleMovement()
    {

		...

        if (_status.IsAming.Value)
        {
            _animator.SetFloat("X", _movement.InputDirection.x);
            _animator.SetFloat("Z", _movement.InputDirection.y);
        }
    }


    private void HandleAiming(InputAction.CallbackContext ctx)
    {
        _status.IsAming.Value = ctx.started;
    }

	...

    public void SubscribeEvents()
    {

		...

        // inputs---
        _aimInputAction.Enable();
        _aimInputAction.started += HandleAiming;
        _aimInputAction.canceled += HandleAiming;
    }

    public void UnsubscribeEvents()
    {

		...

        // inputs---
        _aimInputAction.Disable();
        _aimInputAction.started -= HandleAiming;
        _aimInputAction.canceled -= HandleAiming;
    }
...

}
여기서 InputAction과 관련된 몇 가지 함수를 알아보고자 한다.
-
InputAction의 키입력
_shootInputAction.WasPressedThisFrame(); => 이번 프레임에 눌렀는가? (GetKeyDown)
_shootInputAction.WasReleasedThisFrame(); => 이번 프레임에 떼어졌는가? (GetKeyUp)
_shootInputAction.IsPressed(); => 지금 눌려있는가? (GetKey) -
InputAction.CallbackContext의 키입력
ctx.started => 키 입력이 시작됐는지 판별
ctx.performed => 키 입력이 진행중인지 판별
ctx.canceled => 키 입력이 취소됐는지(떼어졌는지) 판별
3. Particle System
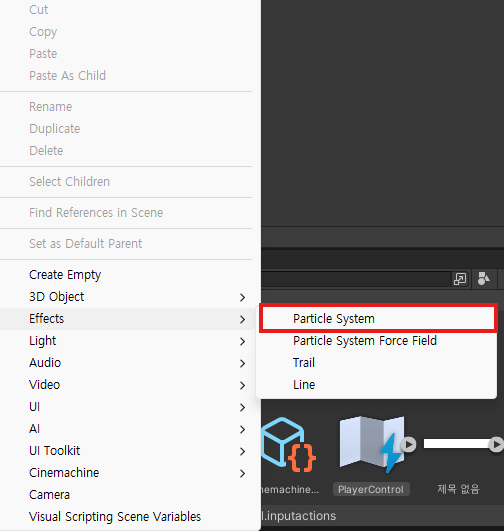
파티클 시스템은 유니티에서 만들 수 있는 이펙트 효과를 말한다.
실무에서는 프로그래머가 이 파티클을 만드는 경우는 잘 없다고는 하지만, 그 기능 몇 가지만 알아보고자 한다.
3.1 기본 설정
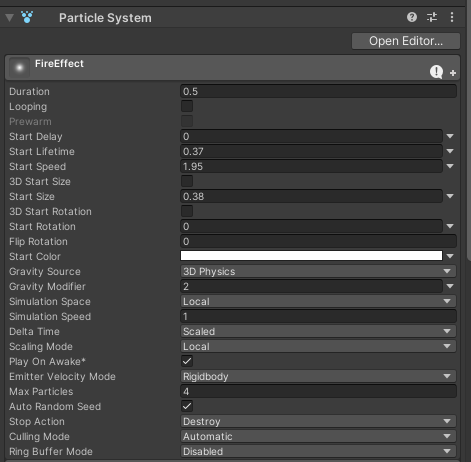
항목을 일일히 설명하는 것보다는 직접 써 보면서 대략적인 감을 잡는게 나아 보인다고 생각했다.
조금 핵심적인 기능을 꼽자면 이와 같은 것이 있다고 생각했다.
- Duration : 파티클의 지속시간, 지속시간 이후 파티클이 사라진다
- Looping : 파티클의 재생을 Loop로 걸지(체크), 아니면 한 번 터뜨리고 끝낼지(체크해제) 결정
- Start Delay : 파티클이 터지는 시간을 조절, 저 시간 동안 파티클이 나오지 않고 대기 상태
- Start Speed : 파티클 속도, 파티클이 얼마나 빠르고 멀리 날아가는지 결정
- Stop Action : 파티클이 재생이 끝나고 나서 어떻게 할 건지 결정됨
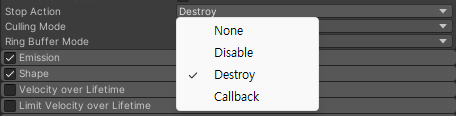
비활성화, 파괴, 콜백 등의 옵션이 있다.
3.2 Shape
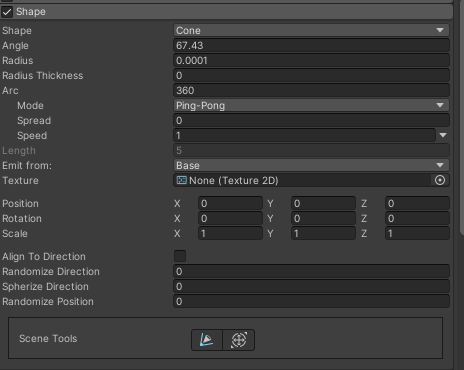
파티클이 퍼지는 효과와 모양, 퍼지는 각도 등을 조절할 수 있다.
3.3 Color of Lifetime

파티클이 사라질 때까지 색이 어떻게 출력될지 결정할 수 있다. 투명하게 변할 수도 있으며 Color를 더블클릭하면 세부 편집도 가능하다.
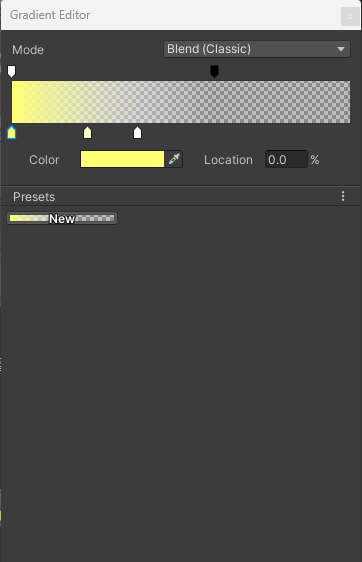
아래쪽 바의 포인트를 늘려서 색을 자유자재로 변경할 수 있다.
위쪽 바의 포인트를 늘려서 특정 구간의 투명도를 조절할 수 있다.
3.4 Collision
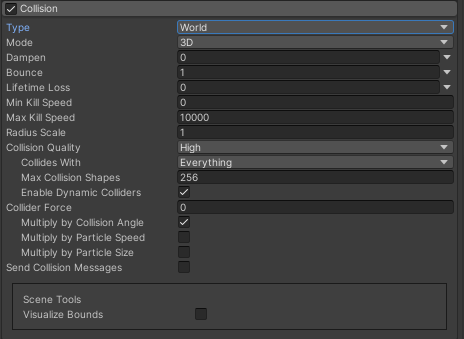
파티클 입자가 충돌을 가질 수 있도록 설정할 수 있다.
3.5 Trails
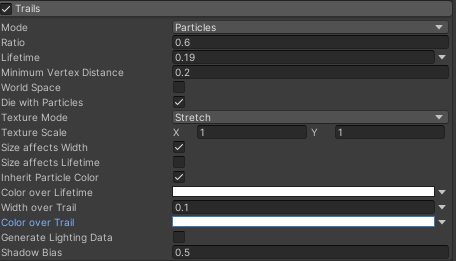
파티클 입자가 이동하면서 잔상 - 꼬리를 남길 수 있도록 한다.
3.6 Renderer
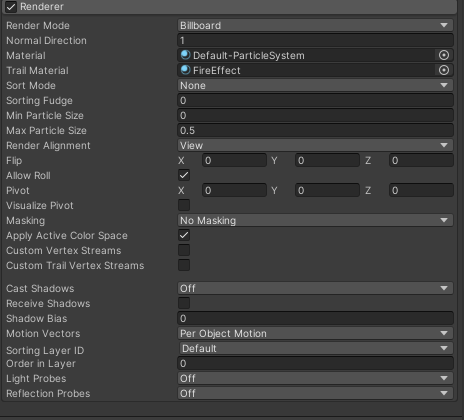
파티클의 출력 옵션을 조절하는 곳이다. Trail를 설정했을 경우 여기에서 Trail Material 설정을 해 주어야 한다.
3.7 파티클의 호출
파티클을 호출하는 것은 결국 기본적으로 씬 맵에 배치하거나, 코드를 통해 불러와야 한다.
여기서 주의해야 할 상황은, Particle을 오브젝트 풀 패턴으로 불러오는 것이 정말로 효율적인 것인지에 대한 고민이다.
무기의 종류가 많고 파티클의 개수가 많을 수록 오브젝트 풀 패턴으로 불러내는 것보다는 Instantiate 하고 파괴하는 게 효율이 좋을 상황에 놓일 수도 있다는 것을 유념해 두어야 한다.
이번에 총의 타격 이펙트를 표시하는 건 Instantiate으로 시도해 보았다.
using UnityEngine;
using Cinemachine;

public class Gun : MonoBehaviour
{
	...

    [SerializeField] private ParticleSystem _fireParticles;

    ...

    public bool Shoot()
    {
        if (!_canShoot) return false;

        PlayShootSound();
        PlayCameraEffect();
        PlayShootEffect();
        _currentCount = _shootDelay;

        RaycastHit hit;
        IDamageable target = RayShoot(out hit);

        if(!hit.Equals(default))
        {
            PlayFireEffect(hit.point, Quaternion.LookRotation(hit.normal));
        }

        if (target == null) return true;

        target.TakeDamage(_shootDamage);
        //Debug.Log("공격받음!");

        return true;
    }

    private void HandleCanShoot()
    {
        if(_canShoot) return;

        _currentCount -= Time.deltaTime;
    }

    private IDamageable RayShoot(out RaycastHit hitTarget)
    {
        Ray ray = new Ray(_camera.transform.position, _camera.transform.forward);
        //Debug.DrawRay(_camera.transform.position, _camera.transform.forward * 100, Color.red, 3);
        RaycastHit hit;

        if (Physics.Raycast(ray, out hit, _attackRange, _targetLayer))
        {
            hitTarget = hit;
            if (hit.collider.gameObject.layer == LayerMask.NameToLayer("Monster"))
            {
                return ReferenceRegistry.GetProvider(hit.collider.gameObject).GetAs<NormalMonster>() as IDamageable;
            }
        }

        hitTarget = hit;
        return null;
    }

    private void PlayFireEffect(Vector3 position, Quaternion rotation)
    {
        Instantiate(_fireParticles, position, rotation);
    }

    ...
}
이와 같이 작성한 후 게임 내 출력을 확인해보자.
