AWS ALB를 활용한 Ingress Controller 설치
GCP로 실습하면 자동으로 Ingress Controller가 세팅되어 있으니, 별도로 Ingress Controller를 세팅하는 과정을 거치지 않아도 된다.
MacOS : Homebrew 설치
- 설치 방법 원문 : https://brew.sh/
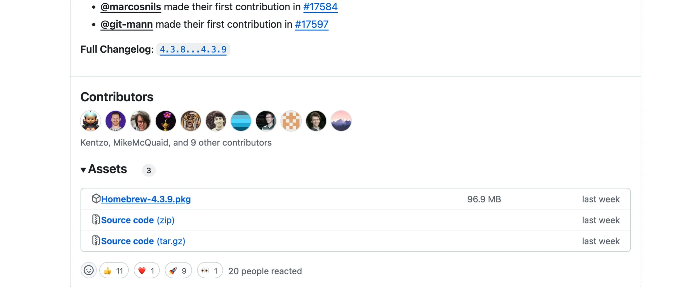
- https://github.com/Homebrew/brew/releases 에 접속
- 최신 버전의 pkg 파일을 다운로드 받아 설치
Windows : Chocolatey 설치
- 설치 방법 원문 : https://chocolatey.org/install
- Powershell을 관리자 권한으로 실행
- 다음 명령어를 붙여 넣자.
Set-ExecutionPolicy Bypass -Scope Process -Force; [System.Net.ServicePointManager]::SecurityProtocol = [System.Net.ServicePointManager]::SecurityProtocol -bor 3072; iex ((New-Object System.Net.WebClient).DownloadString('https://community.chocolatey.org/install.ps1'))eksctl 설치
-
설치 방법 원문 : https://docs.aws.amazon.com/ko_kr/emr/latest/EMR-on-EKS-DevelopmentGuide/emr-eks.html
-
MacOS
- 아래 명령어를 순차적으로 입력
brew tap weaveworks/tapbrew install weaveworks/tap/eksctl- Windows
choco install -y eksctlHelm 설치
- 설치 방법 원문 : https://helm.sh/docs/intro/install/
- MacOS
brew install helm- Windows
choco install kubernetes-helmIAM 정책 생성 및 등록
- 아래 명령어를 통해서 IAM 정책 파일을 다운로드
- curl 명령어가 동작하지 않는다면, 해당 URL로 이동하여 직접 다운로드 받자.
curl -O https://raw.githubusercontent.com/kubernetes-sigs/aws-load-balancer-controller/v2.7.2/docs/install/iam_policy.json
- 파일을 다운로드 받은 경로에서 아래 명령어를 입력하여 새로운 IAM 정책을 생성
- 정책 생성 후 출력되는 메시지의 Arn 항목을 보면, iam과 policy 사이에 내 AWS 계정의 고유번호가 적혀있다. 이 번호를 복사해두자.
aws iam create-policy \
    --policy-name AWSLoadBalancerControllerIAMPolicy \
    --policy-document file://iam_policy.json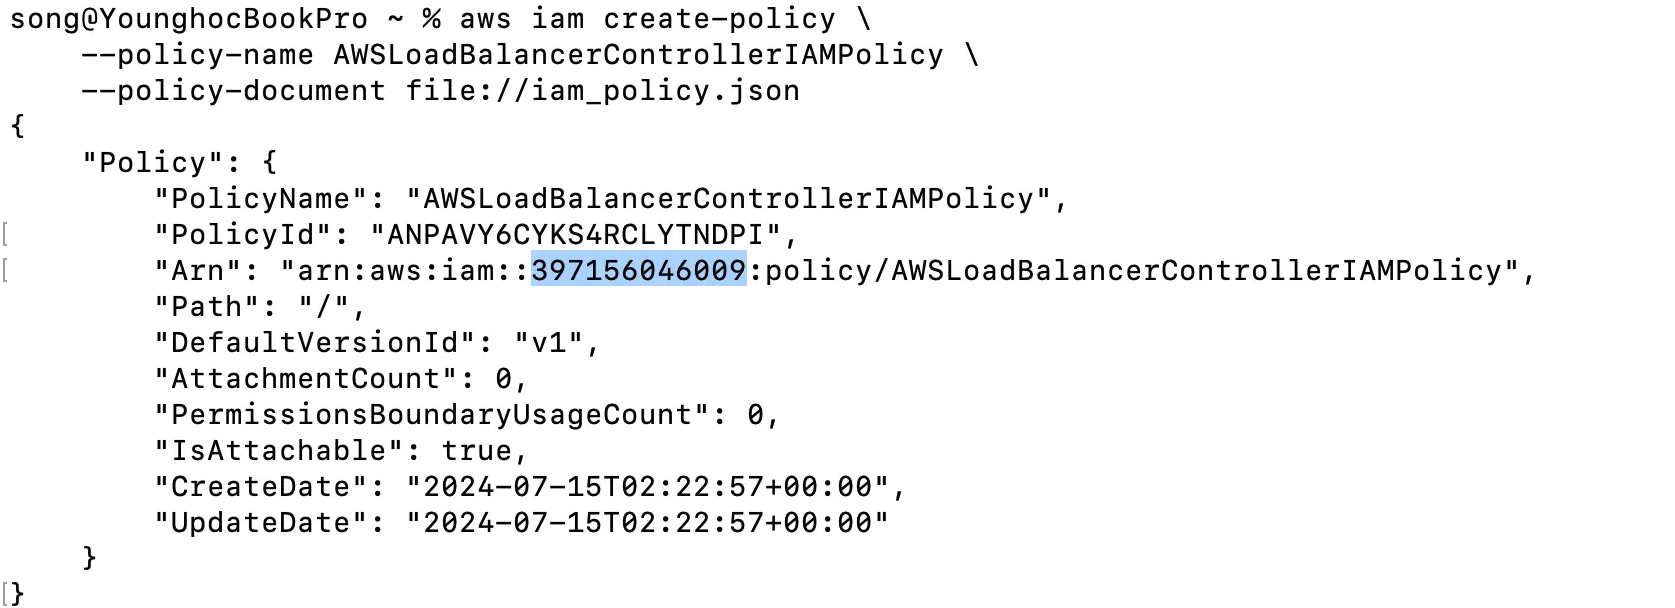
- 아래 명령어를 입력하여 쿠버네티스 클러스터에 OIDC 기능을 활성화
eksctl utils associate-iam-oidc-provider --cluster <EKS 클러스터명> --approve
- 아래 명령어를 입력
eksctl create iamserviceaccount \
  --cluster=<EKS 클러스터명> \
  --namespace=kube-system \
  --name=aws-load-balancer-controller \
  --role-name AmazonEKSLoadBalancerControllerRole \
  --attach-policy-arn=arn:aws:iam::<내 AWS 계정 고유번호>:policy/AWSLoadBalancerControllerIAMPolicy \
  --approve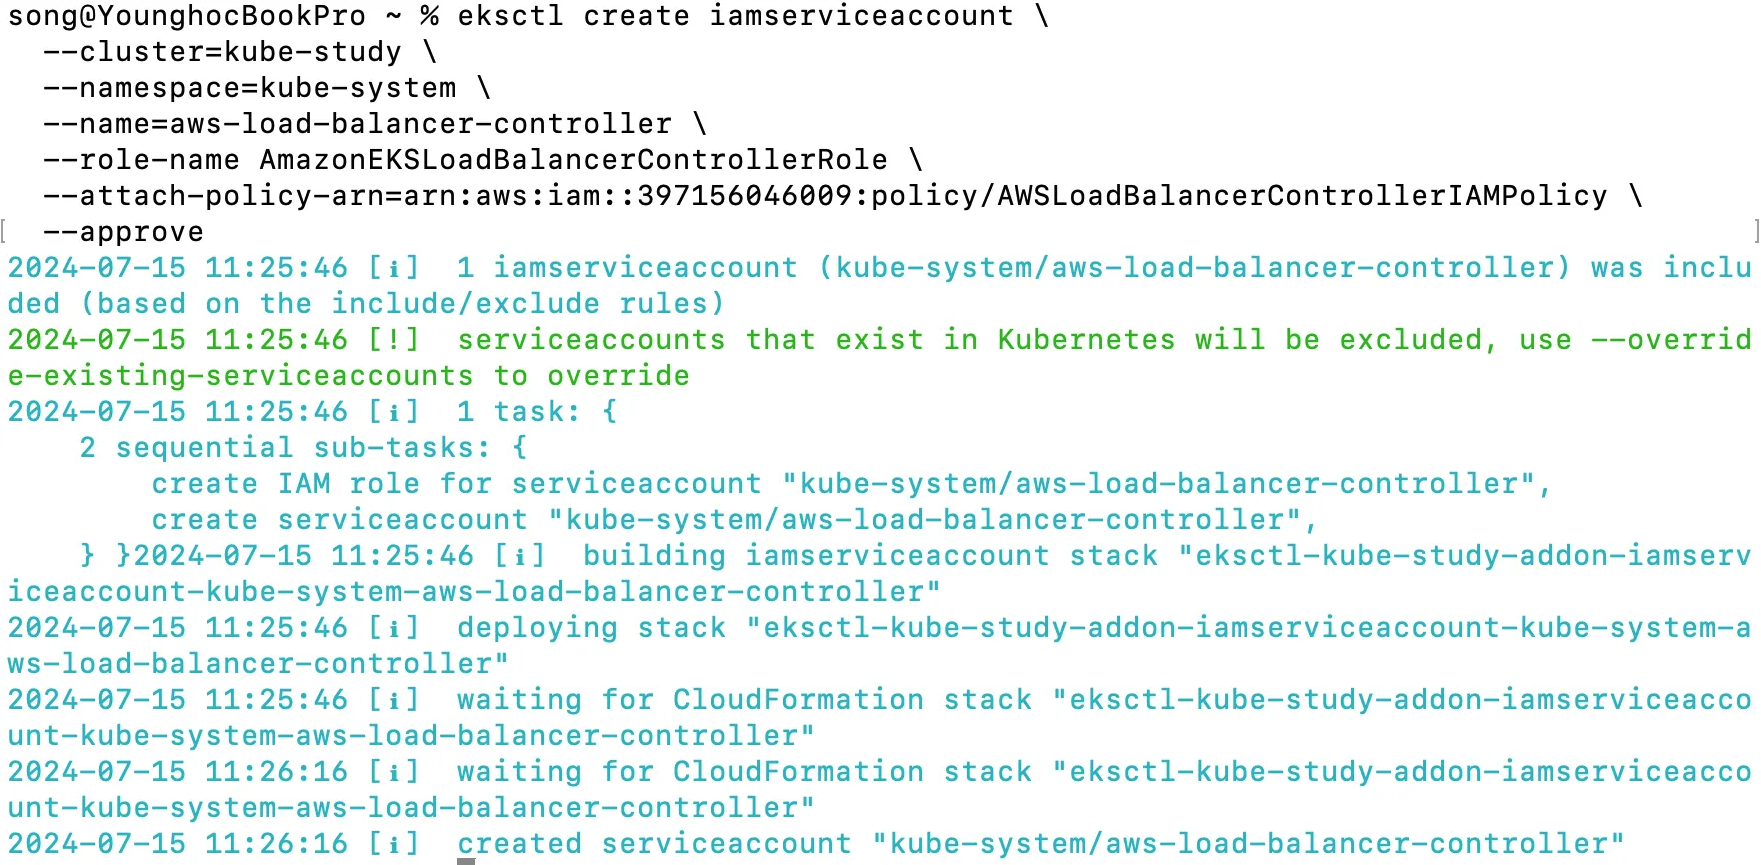
ALB Ingress Controller 설치
- 아래 명령어를 순차적으로 입력해 Helm 레포지토리를 추가
helm repo add eks https://aws.github.io/eks-chartshelm repo update eks- 아래 명령어를 입력해 Helm을 통해 ALB Ingress Controller를 설치
helm install aws-load-balancer-controller eks/aws-load-balancer-controller \
  -n kube-system \
  --set clusterName=<EKS 클러스터명> \
  --set serviceAccount.create=false \
  --set serviceAccount.name=aws-load-balancer-controller
Subnet 태그 입력
-
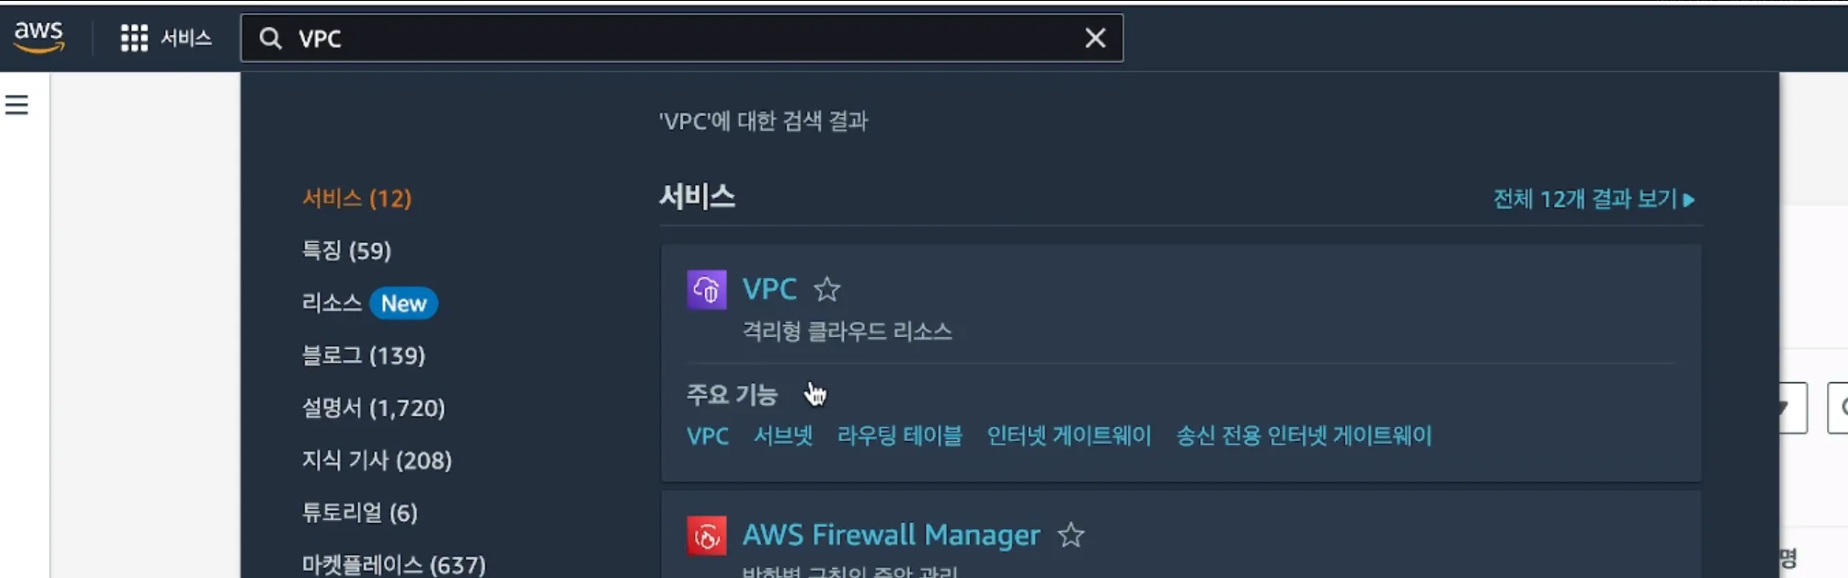
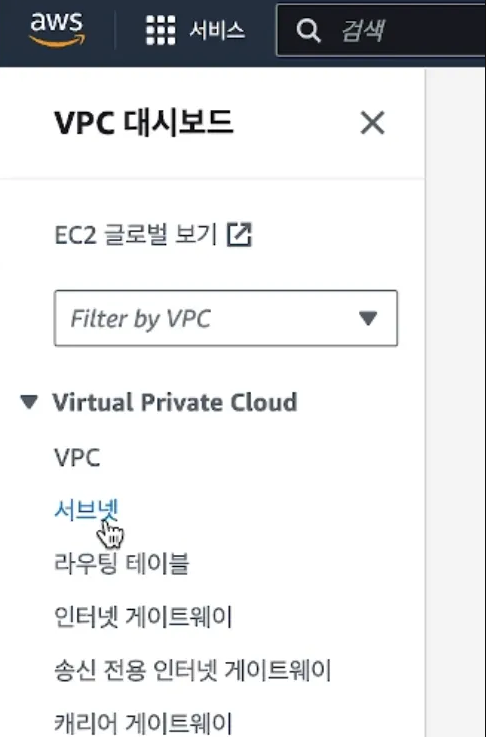
AWS 콘솔에서 VPC 서비스에 접속
-
Virtual Private Cloud -> 서브넷 메뉴에 접속
-
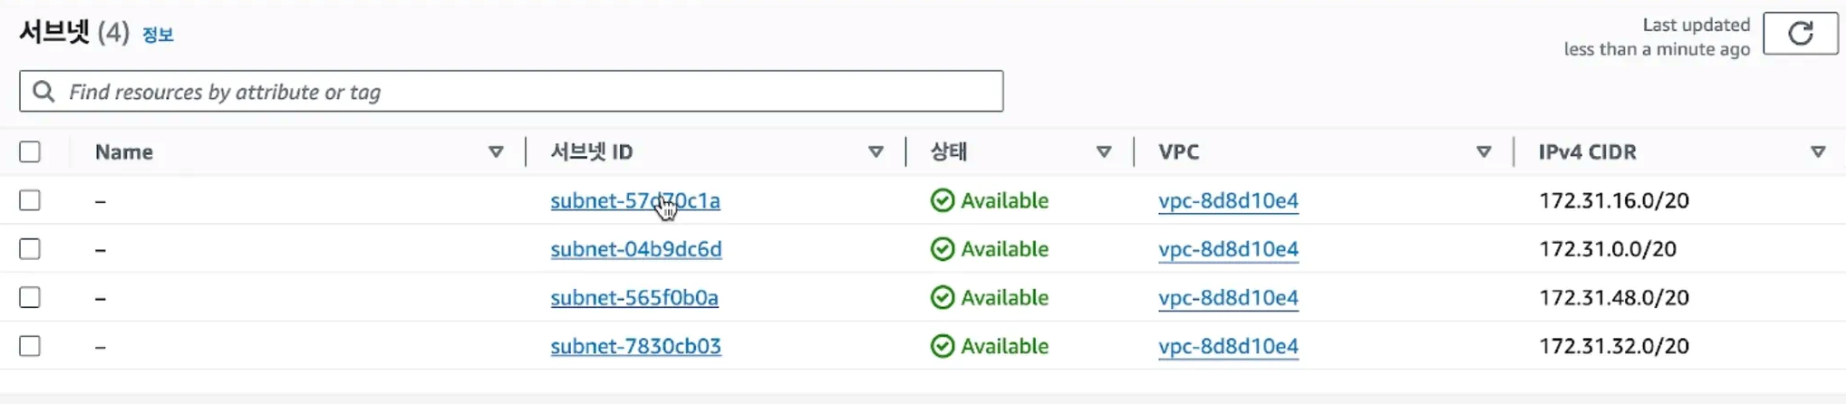
존재하는 서브넷 ID들을 전부 확인.
-
터미널에서 아래 명령어를 각 서브넷마다 입력
aws ec2 create-tags --resources <서브넷 ID> --tags Key=kubernetes.io/role/elb,Value=1Ingress 오브젝트 생성
apiVersion: networking.k8s.io/v1
kind: Ingress
metadata:
  name: sample-ingress
  namespace: default
  annotations:
    alb.ingress.kubernetes.io/scheme: internet-facing
    alb.ingress.kubernetes.io/target-type: ip
spec:
  ingressClassName: alb
  rules:
    - http:
        paths:
        - path: /
          pathType: Prefix
          backend:
            service:
              name: sample-svc-nodeport
              port:
                number: 80
GCP 사용(Ingress 오브젝트 생성)
- GCP는 AWS와 다르게 여러 Annotation을 빼줘도 자동으로 세팅되게 되어있다.
apiVersion: networking.k8s.io/v1
kind: Ingress
metadata:
  name: sample-ingress
  namespace: default
spec:
  rules:
    - http:
        paths:
        - path: /
          pathType: Prefix
          backend:
            service:
              name: sample-svc-nodeport
              port:
                number: 80
Ingress와 함께 생성된 ALB에 접속해보기
- Ingress 생성이 완료된 후,
kubectl get ingresses명령어를 통해 Ingress 목록을 확인할 수 있다. - 잠시 기다리면, ADDRESS에 Ingress 주소가 나온다. 이 주소로 접속하면 외부에서 접속이 가능하다.

GCP 사용
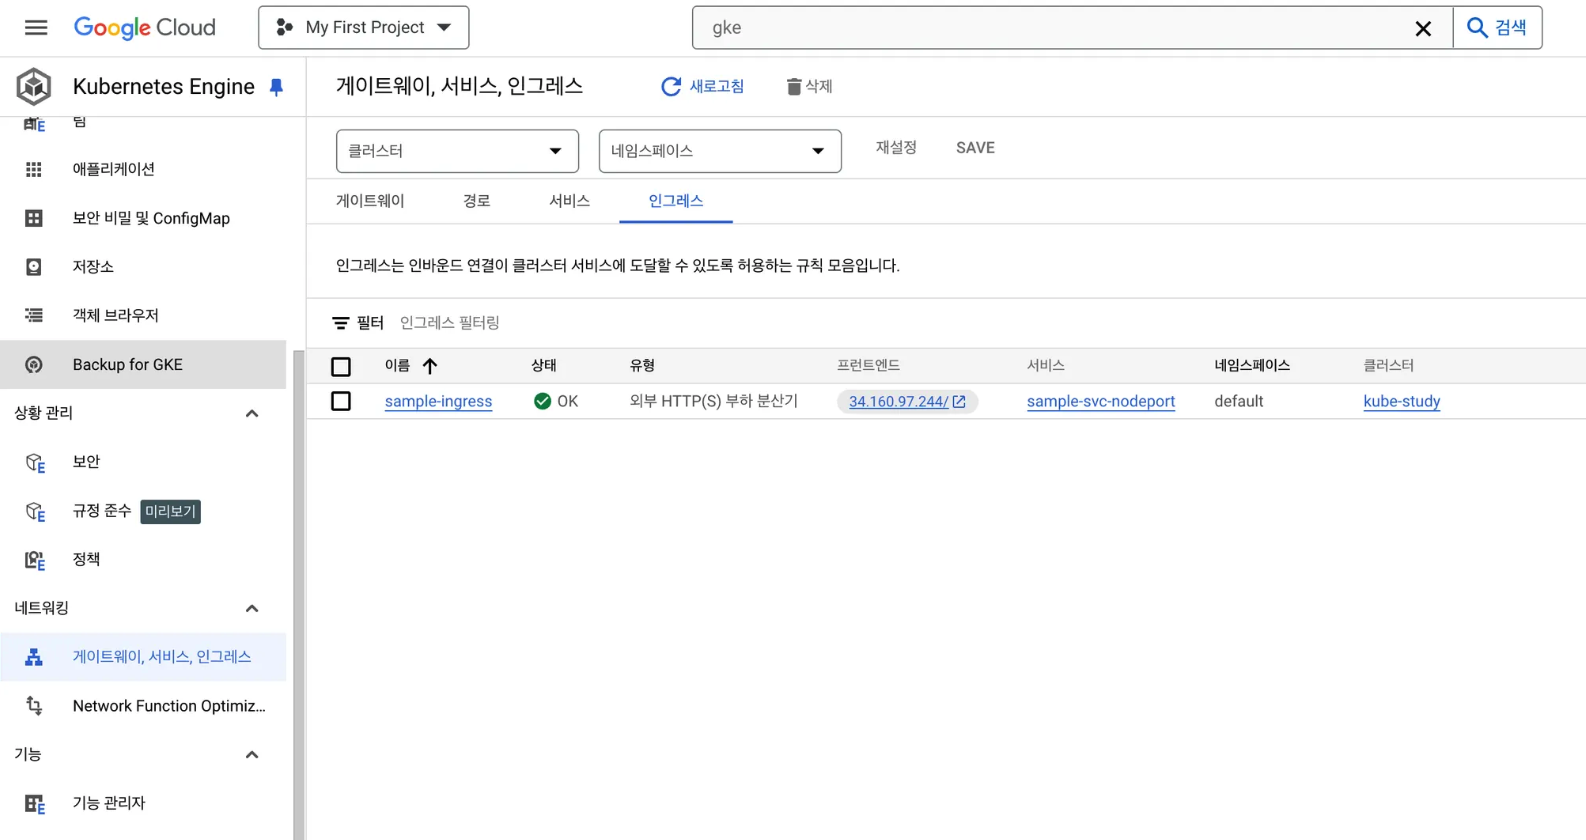
- AWS의 ALB와 마찬가지로, 로드밸런서가 준비되는데에는 시간이 좀 걸린다.
- GKE 서비스 -> 네트워킹 : 게이트웨이, 서비스, 인그레스 메뉴 -> 인그레스 탭에서 로드밸런서 생성 현황을 확인 가능

inkwon Hwang