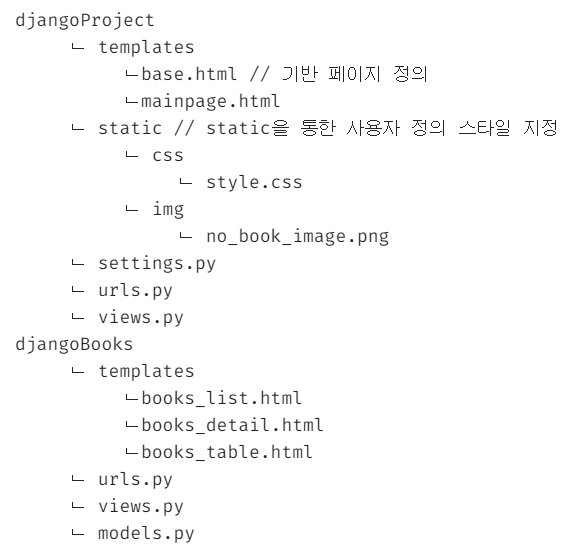
1. CSS와 Base HTML 활용
- 웹 애플리케이션을 구성하기 위해서는 많은 HTML 파일이 만들어진다.
- 이때 상단 메뉴바와 같은 모든 페이지에 생성되는 기능들을 반복해서 넣게 된다면
- 기능을 수정하거나 추가하는데 있어서 번거롭고 자잘한 실수로 이어질 수 있다.
- 이를 위해서는 Base 페이지를 만들어놓고 이를 활용하면 좋다.
웹 페이지의 다양한 디자이닝 요소는 CSS를 활용한다.
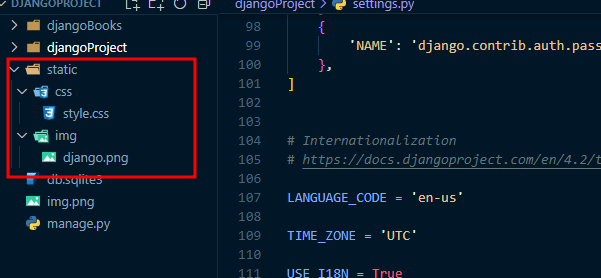
그냥 집어넣는다고 사용할 수는 없기 때문에 먼저 settings.py에 경로를 넣어준다.
📑 djangoProject/settings.py
...
STATIC_URL = '/static/'
STATICFILES_DIRS = (
    os.path.join(BASE_DIR, 'static'),
)
...
이후에 static/css/style.css 경로로 파일을 만들어주면 된다.
또한 이미지를 넣어주고 싶다면 static/img 경로를 만들면 된다.
📑 djangoProject/static/css/style.css
/* body(바디) 정의 */
body {
   /* 고정 상단메뉴를 위해 상단 공간 생성 */
   padding-top: 75px;
}
/* header(헤더) */
header {
   position: fixed;
   top: 0;
   left: 0;
   right: 0;
   height: 50px;
   padding: 1rem;
   color: #DFDBCE;
   background: teal;
   font-weight: bold;
   display: flex;
   justify-content: space-between;
   align-items: center;
}
/* logo text(로고 텍스트) 정의 */
a.logo {
   text-decoration-line: none;
   display: flex;
   flex-direction: row;
   align-items: center;
   font-size: 30px;
   font-weight: 900;
   color: #DFDBCE;
}
/* logo image(로고 이미지) 정의 */
img.logo {
   margin: 10px;
   padding: 0;
   width: 100px;
}
/* menu text(메뉴 텍스트) 정의 */
a.menu {
   text-decoration-line: none;
   display: flex;
   padding: 0 2em;
   font-size: 17px;
   font-weight: 600;
   border-right: 1.5px solid rgba(0, 0, 0, 0.3);
   align-items: center;
   color: #DFDBCE;
}
CSS의 경우 상단 메뉴바에 대한 간단한 정의를 해준다.
CSS가 해보니까 어렵다... 공부를 좀 더 해주어야 개발할때 용이하게 이용할 것 같다.
이제 상단 메뉴와 함께 페이지의 기반이 될 Base.html을 만든다.
📑 djangoProject/templates/base.html
{% load static %}
<html lang="ko">
   <head>
      <meta charset="utf-8" />
      <!-- jquery와 ajax 설정 -->
      <script
         src="https://kit.fontawesome.com/f9a809ddea.js" crossorigin="anonymous"></script>
      <script src="https://code.jquery.com/jquery-3.3.1.slim.min.js" integrity="sha384-q8i/X+965DzO0rT7abK41JStQIAqVgRVzpbzo5smXKp4YfRvH+8abtTE1Pi6jizo" crossorigin="anonymous"></script>
      <script src="http://code.jquery.com/jquery-latest.js"></script>
      <script src="https://ajax.googleapis.com/ajax/libs/jquery/1.8.3/jquery.min.js"></script>
      <!-- 페이지 타이틀 설정 -->
      <title>장고북스</title>
      <!-- css 설정 -->
      <link rel="stylesheet" href="{% static 'css/style.css' %}" />
      {% block style %}
      <!-- 스타일 블록 -->
      {% endblock %}
   </head>
   <body>
      <!-- header 정의 -->
      <header>
         <!-- logo 정의 -->
         <a class="logo" href="{% url 'main' %}" >
               <!-- logo 이미지 및 이름 -->
               DjangoBooks <img class="logo" src="{% static 'img/django.png' %}"></a>
         <!-- 네비게이션 바 정의 -->
         <nav>
            <span ><a class="menu" href="{% url 'djangoBooks:list' %}">도서목록</a></span>
         </nav>
      </header>
      {% block content %}
      <!-- 내용 -->
      {% endblock %}
      <footer>
         <!-- footer 정의 -->
      </footer>
   </body>
</html>
해당 코드를 html을 부르는 기반 html로 사용하기 때문에 기본적인 기능들 및 상단 메뉴가 들어가 있다.
이를 받는 다른 html에서는 {% block style %}과 {% block content %}를 활용하여 그 사이에 기능과 스타일을 적용하게 된다.
여기서 추가된 기능은 로고 정의에서 href="{% url 'main' %}을 사용한 점인데 urls.py에서 각 경로의 이름을 지정할 수 있다.
📑 djangoProject/urls.py
urlpatterns = [
    path('admin/', admin.site.urls),
    path('', mainpage, name='main'), #name 파라미터로 간편한 이름 설정 가능
    path('books/', include('djangoBooks.urls')),
]
물론 겹쳐서는 안되는 부분이기 때문에 따로 이름을 기록해놓고 사용하면 편하다.
url을 복잡하게 꼬이지 않게 하는 Django의 기능 중에 하나이다.
📑 djangoProject/templates/mainpage.html
{% extends 'base.html' %}
{% block content %}
{% load static %}
  <h1>Django Books</h1>
  <p>이제 페이지를 하나씩 채워보도록 합시다.</p>
{% endblock %}
길게 정의되었던 mainpage.html을 간단하게 줄일 수 있게 되었다.
첫 세 줄에서 base를 부르고, 이하 정의된 내용을 base.html의 content 블록으로 넣게된다.
📑 djangoBooks/templates/books_list.html
{% extends 'base.html' %}
{% block content %}
{% load static %}
    도서 목록 페이지
    {% include 'books_table.html' %}
{% endblock %}
자연스럽게 도서 목록 페이지의 길이도 짧게 줄어든다.
2. HTML 내에서의 조건문
static으로 이미지를 사용할 수 있으니 이전에 도서 목록에서 이미지가 깨졌던 것에 대해 예외처리를 해보자
📑 djangoBooks/templates/books_table.html
{% load static %}
...
{% for book in books_list %} <!-- 반복문을 통해 도서에 대한 내용 출력 -->
<div class="col-12 item">
  {% if book.img_url %}
  <img src="{{book.img_url}}">
  {% else %}
  <img src="{% static 'img/no_book_image.png' %}">
  {% endif %}
...
도서의 이미지가 없는 경우 이를 대체할 이미지를 static/image/no_book_image.png로 만들어 넣은 후 다음과 같이 조건문을 추가한다.
{% if book.img_url %}: 도서가 있는 경우 이미지 출력{% else %}: 도서가 없는 경우 저장된 대체 이미지 출력
Django에서는 이렇게 html에 조건문을 넣을 수 있는데 중요한 점은 endif라고 하는 조건문의 종료를 알리는 코드를 꼭 넣어야 한다는 점이다.
📑 djangoProject/static/css/style.css
/* 도서 아이템 정의 */
.book-items .item {
   display: flex;
   flex-direction: row;
   width: 100%;
   padding-bottom: 1.5em;
   padding-top: 1.5em;
   border-bottom: rgba(0, 0, 0, 0.3) solid 1px;
   align-items: stretch;
   .metadata {
      width: 1000px;
      padding-left: 1em;
      display: flex;
      flex-direction: column;
      justify-content: space-between;
      .title {
         color: #000000;
         font-size: 2em;
         font-weight: 800;
         margin-bottom: 0.5em;
      }
      table.bibil {
         th {
            width: 80px;
            font-size: 1em;
            color: #666666;
         }
         td {
            text-align: left;
            color: #666666;
            font-size: 1em;
         }
      }
      .desc {
         width: 100%;
         color: #666666;
         display: -webkit-box;
         -webkit-line-clamp: 6;
         -webkit-box-orient: vertical;
         overflow: hidden;
         text-overflow: ellipsis;
      }
      .rate {
         padding: 0 0 0 20px;
         margin-bottom: 0.5em;
         width: 100%;
         color: #666666;
         border: none;
         font-size: 1em;
         font-weight: normal;
      }
      .stars {
         color: rgba(241, 147, 51, 0.7);
         font-size: 1.5em;
      }
   }
}
/* 도서 아이템 이미지 정의 */
.book-items .item img {
   width: 200px;
   height: 300px;
   object-fit: fill;
   border: 1px solid black;
   border-radius: 5px;
}
각 아이템에 대해서도 css를 적용시켜주면 목록에 대한 페이지가 완성되게 된다.
3. 스크롤 업과 기능 변경
1. 페이지네이션 휠업
Ajax로 페이지네이션을 이동한 이후 스크롤을 위로 올려주는 기능의 경우 간단하게 scrollTo를 활용하면 된다!
djangoBooks/books_table.html
<script>
...
    //페이지 클릭 시 작동방식
    function page_click() {
        $.ajax({
            type: "get", //GET 방식 사용
            url: "{% url 'djangoBooks:list' %}", //djangoBooks의 list url을 불러옴
            data: {
                'page': num_pages //GET 방식에 페이지 번호를 넣어서 전송
            },
            success: function (data) { //전송 성공시에 전송받는 데이터를 table class에 변경을 추가
                console.log(data)
                $('#table').html(data);
                window.scrollTo( 0, 0 ); //페이지 스크롤을 위로 올려주는 역할 추가
            }
        })
    }
</script>
2. 처음과 마지막 페이지
페이지네이션의 기능을 처음 또는 마지막 페이지로 이동하는 기능으로 바꾸기 위해서 기능을 수정했는데 특히 마지막 페이지의 경우 페이지네이션의 마지막 페이지 값을 전달하는게 어려웠지만... 간단하게 변경했다.
또한 페이지네이션의 현재 페이지에 강조 표시를 추가했는데 이는 Django에서의 조건문을 활용했다.
djangoBooks/books_table.html
...
  	<!-- 페이지네이션 부분 -->
    <div class="row justify-content-center">
        <div class="col-8 pagination">
            <!-- 처음으로 버튼 -->
            {% if books_list.has_previous %}
            <a class="first_page"><i class="fa-solid fa-chevron-left"></i></a>
            {% endif %}
             <!-- 각 페이지 버튼 -->
            {% for page in books_list.paginator.page_range %}
                {% if page >= books_list.number|add:-5 and page <= books_list.number|add:5 %}
                    {% if page == books_list.number%}
                        <a class="now_page"><b>{{page}}</b></a>  <!-- 현재 페이지인 경우 Bold 사용 -->
                    {%else%}
                        <a class="now_page">{{page}}</a>
                    {% endif %}
                {% endif %}
            {%endfor %}
            <!-- 마지막으로 버튼 -->
            {% if books_list.has_next %}
            <a class="last_page" value={{books_list.paginator.num_pages}}><i class="fa-solid fa-chevron-right"></i></a>
      <!-- value값을 페이지네이션을 통해 페이지네이션 마지막 페이지값을 전달힌다. -->
            {% endif %}
        </div>
    </div>
...
<script>
    // 각 페이지네이션 버튼 클릭에 따른 결과 전달
    $('.first_page').click(function () {
        num_pages = 1;
        page_click();
    })
    $('.now_page').click(function () {
        num_pages = parseInt($(this).text());
        page_click();
    })
    $('.last_page').click(function () {
        num_pages = parseInt($(this).attr("value"));
        page_click();
    })
  ...
</script>
<a ... value={{books_list.paginator.num_pages}}>...</a>
a 태그에 대해 value로 전달하고 싶은 값을 추가한다. 여기서 사용한 페이지네이션의 num_pages는 전체 페이지의 수에 해당한다.num_pages = parseInt($(this).attr("value"));
script에서는 해당 값을 value값을 다음과 같은 형식으로 가져와 정수화 했다.
👌 결과