
Spring Security란?
Spring Security는 Spring기반 애플리케이션의 보안을 담당하는 스프링 하위 프레임워크
Spring Security는 인증(Authentication)과 권한(Authorization)에 대한 부분을 Filter의 흐름에 따라 처리
많은 보안 관련 옵션들을 제공해주어 개발자가 보안 로직을 하나씩 작성하지 않아도 되는 장점
필요한 이유
사이트는 각종 서비스를 하기 위한 리소스와 서비스를 사용하는 유저들의 개인 정보를 가지고 있음
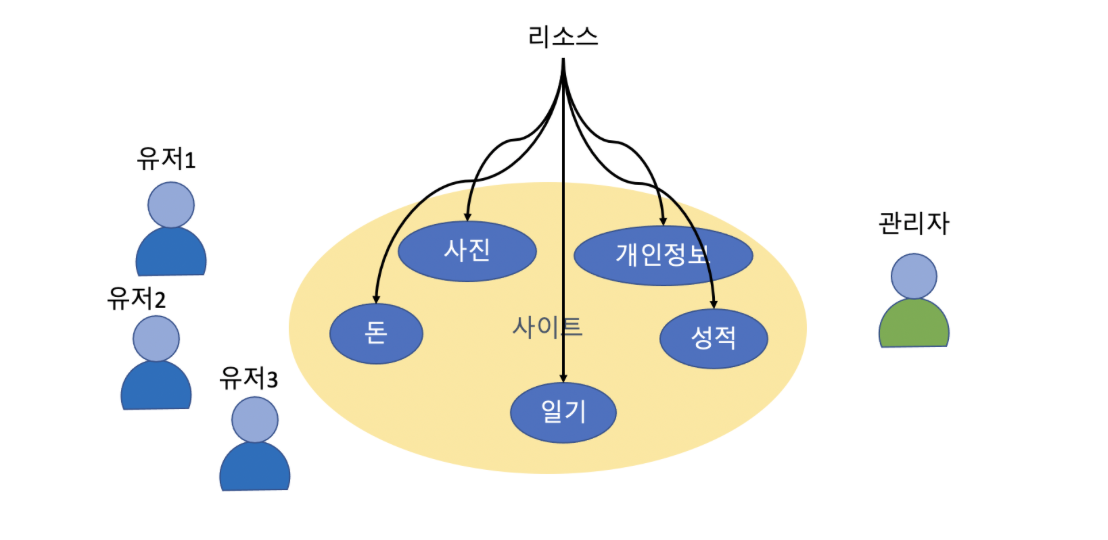
이러한 리소스들을 보호하기 위해 두가지(서버 리소스, 유저들의 개인정보) 보안정책을 설정해야 함
인증(Authentication)과 권한(Authorization)
인증(사용자가 누구인지?)
-
사이트에 접속하려는 자가 누구인지 확인하는 절차
-
UsernamePassword를 통한 인증(Session관리, Token관리)
-> 전통적인 사이트는 대부분은 세션을 통해 인증을 관리했지만 최근에는 서버들이 스케일 아웃을 하면서 여러 대의 서버로 서비스 하는 경우가 많아 이 경우 세션을 서로 분산해서 저장해야되고, 동기화해야 하는 문제점 때문에 토큰을 이용하는 사이트가 점차 많아짐
SNS로그인을 통한 인증 위임을 할 수도 있다.
권한(인가)
- 사용자가 어떤 일을 할 수 있는지 권한 설정하는 절차이다.
- 특정 페이지/리소스에 접근할 수 있는지 권한을 판단한다.
- Secured, PrePostAuthorize 어노테이션으로 쉽게 권한 체크를 할 수 있다.
- 비즈니스 로직이 복잡한 경우 AOP를 이용해 권한 체크를 해야한다.
인증(Authentication)절차를 거친 후에 권한(Authorization)절차를 진행하게 된다.
Spring Security에서는 이러한 인증과 인가를 위해 Principal을 아이디로, Credential을 비밀번호로 사용하는 Credential 기반의 인증 방식을 사용한다.
Principal(접근 주체): 보호받는 Resource에 접근하는 대상
Credential(비밀번호): Resource에 접근하는 대상의 비밀번호
메모리 사용자 인증
주로 스프링 시큐리티를 테스트 하기 위한 용도로 사용
- 기본 사용자 로그인
application.yml에 설정하고 로그인하기UserDetailService를 이용하기WebSecurityConfigurerAdapter를 사용하기
실습
spring security의 의존성이 추가되지 않은 경우 해당 url을 접속하였을 때 아무런 보안, 인증 없이 접속이 가능
의존성 추가
implementation "$boot:spring-boot-starter-security"의존성 추가후 url 접근 시
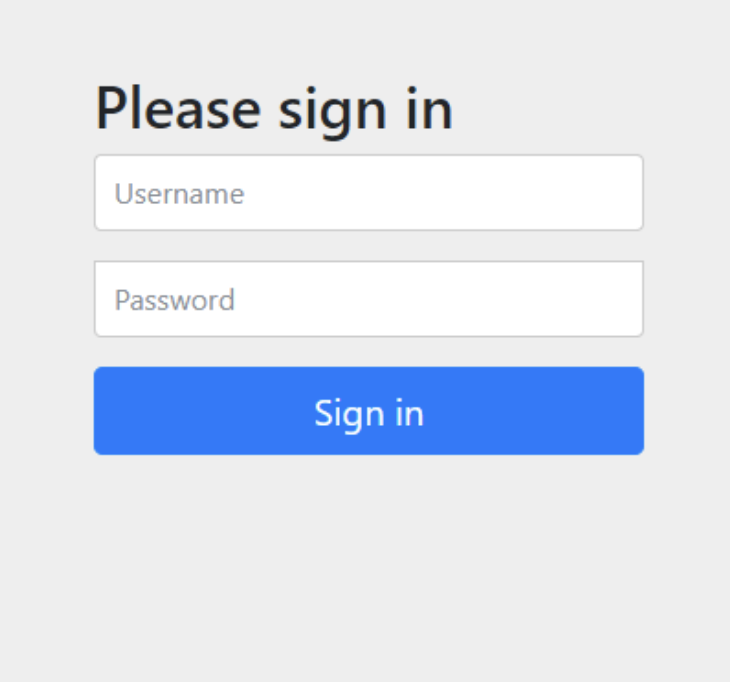
인증 받으라는 로그인 화면이 뜨게 됨
위 사진은 기본 화면이며 사용자가 설정을 통해 바꿔줄수 있다
-> 이때 기본 ID는 User, 기본 Password는 인텔리제이 콘솔에 출력됨
application.yaml에서 고정된 id/pw 지정 가능함
spring:
  security:
    user:
      name: user1
      password: 1111
      roles : USER
SecurityMessage
@Data
@AllArgsConstructor
@NoArgsConstructor
@Builder

public class SecurityMessage {

    private Authentication auth;
    private String message;

}
HomeController
@RestController
public class HomeController {

    @RequestMapping("/")
    public String index(){
        return "홈페이지";
    }

    @RequestMapping("/auth")
    // 사용자가 가진 AUTH 정보 프린트 하는 url 맵핑
    public Authentication auth(){
        return SecurityContextHolder.getContext()
                .getAuthentication();
    }

    @PreAuthorize("hasAnyAuthority('ROLE_USER')")
    @RequestMapping("/user")
    // 사이트의 개인정보에 해당하는 리소스를 시뮬레이션
    public SecurityMessage user(){
        return SecurityMessage.builder()
                .auth(SecurityContextHolder.getContext().getAuthentication())
                .message("User 정보")
                .build();
    }

    @PreAuthorize("hasAnyAuthority('ROLE_ADMIN')")
    @RequestMapping("/admin")
    public SecurityMessage admin(){
        return SecurityMessage.builder()
                .auth(SecurityContextHolder.getContext().getAuthentication())
                .message("관리자 정보")
                .build();
    }

}
위 클래스만으로 Application 실행 시 여러 User 등록을 할 수 없음
또한 기본페이지 접근시에도 로그인을 해야 하고 User 권한으로 로그인 하였지만 ADMIN 페이지에도 접근이 됨
@EnableWebSecurity(debug = true)
@EnableGlobalMethodSecurity(prePostEnabled = true)
public class SecurityConfig extends WebSecurityConfigurerAdapter {
    @Override
    protected void configure(AuthenticationManagerBuilder auth) throws Exception {

        // 이처럼 Authentication Provider를 추가하게 되면 application.yml에 있는
        // 설정은 듣지 않게 되어 user1은 로그인 불가
        auth.inMemoryAuthentication()
                .withUser(User.builder()
                        .username("user2")
                        .password(passwordEncoder().encode("2222"))
                        .roles("USER")
                ).withUser(User.builder()
                        .username("admin")
                        .password(passwordEncoder().encode("3333"))
                        .roles("ADMIN"));
    }

    @Bean
    PasswordEncoder passwordEncoder(){
        return new BCryptPasswordEncoder();
    }

    // 홈페이지를 누구나 접근 하게 해주기 위해 풀어주는법
    @Override
    protected void configure(HttpSecurity http) throws Exception {
        http.authorizeRequests((requests) ->
                requests.antMatchers("/").permitAll()
                        .anyRequest().authenticated());
        http.formLogin();
        http.httpBasic();
    }
}