서버/클라이언트/웹 동작 개념
클라이언트가 요청하면, 서버로부터 html,css,js 데이터를 받아와서
브라우저에서 보여준다.
추억소환 웹페이지 만들기(VS Code사용)
1. 폴더 만들어서 사진추가하기.
2. 사진에 해당되는 주소 복사해서 VS Code에 복사 해넣기
3.주소의 좌표 가져오기
4.사진에 대한 스토리 적기
5.html 구역 나누기(제목,지도,이미지,주소,스토리 등)
6.박스구조잡기
<!DOCTYPE html>
<html lang="en">
<head>
<meta charset="UTF-8">
<meta http-equiv="X-UA-Compatible" content="IE=edge">
<meta name="viewport" content="width=device-width, initial-scale=1.0">
<title>나의 추억거리를 공유합니다.</title>
<style>
.mytitle{
margin-top:30px ;
display: flex;
flex-direction: column;
align-items: center;
justify-content: center;
}
.btn{
width: 300px;
height: 40px;
border: 2px solid red; /*a태그 박스 만들기*/
text-decoration: none; /*밑줄없애기*/
text-align: center; /* text 정렬 가운데로 하기*/
line-height: 40px; /*줄의 크기를 내높이와 똑같이 만들기*/
color: red;
font-weight: bold;
border-radius:40px ;
}
.btn:hover{
background-color: red;
color: white;
}
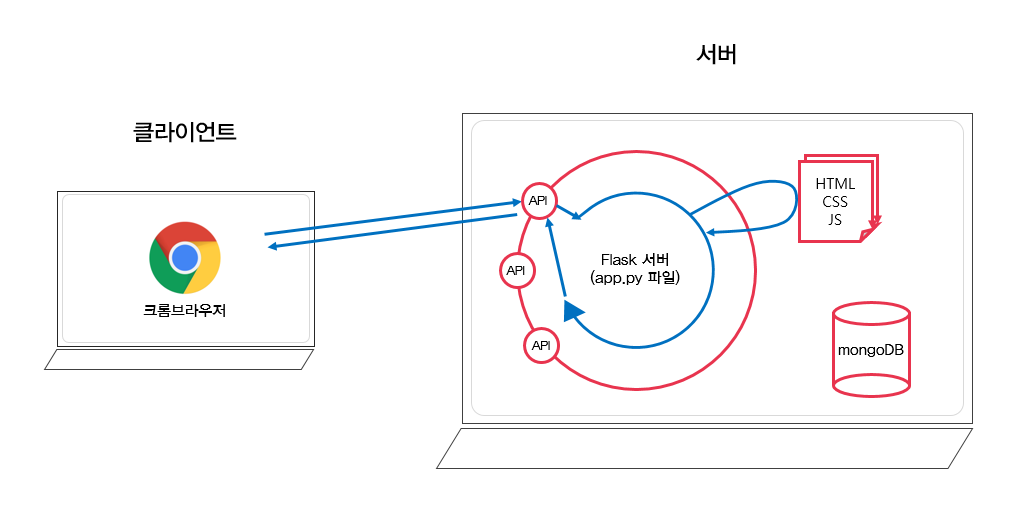
.box{
width: 1000px;
display: flex;
flex-direction: row;
align-items: center;
justify-content: center;
margin: 40px auto 0px auto;
}
.map{
width: 500px;
height: 500px;
background-color: red;
}
.story{
width: 450px;
height: 500px;
background-color: blue;
}
</style>
</head>
<body>
<div class="mytitle">
<h1>나의 추억거리를 공유합니다</h1>
<a class="btn" href="http://spartacodingclub.shop/free/202105/exhibition">모든 수강생들의 추억보러가기</a>
</div>
<div class="box">
<div class="map">
</div>
<div class="story">
</div>
</div>
</body>
</html>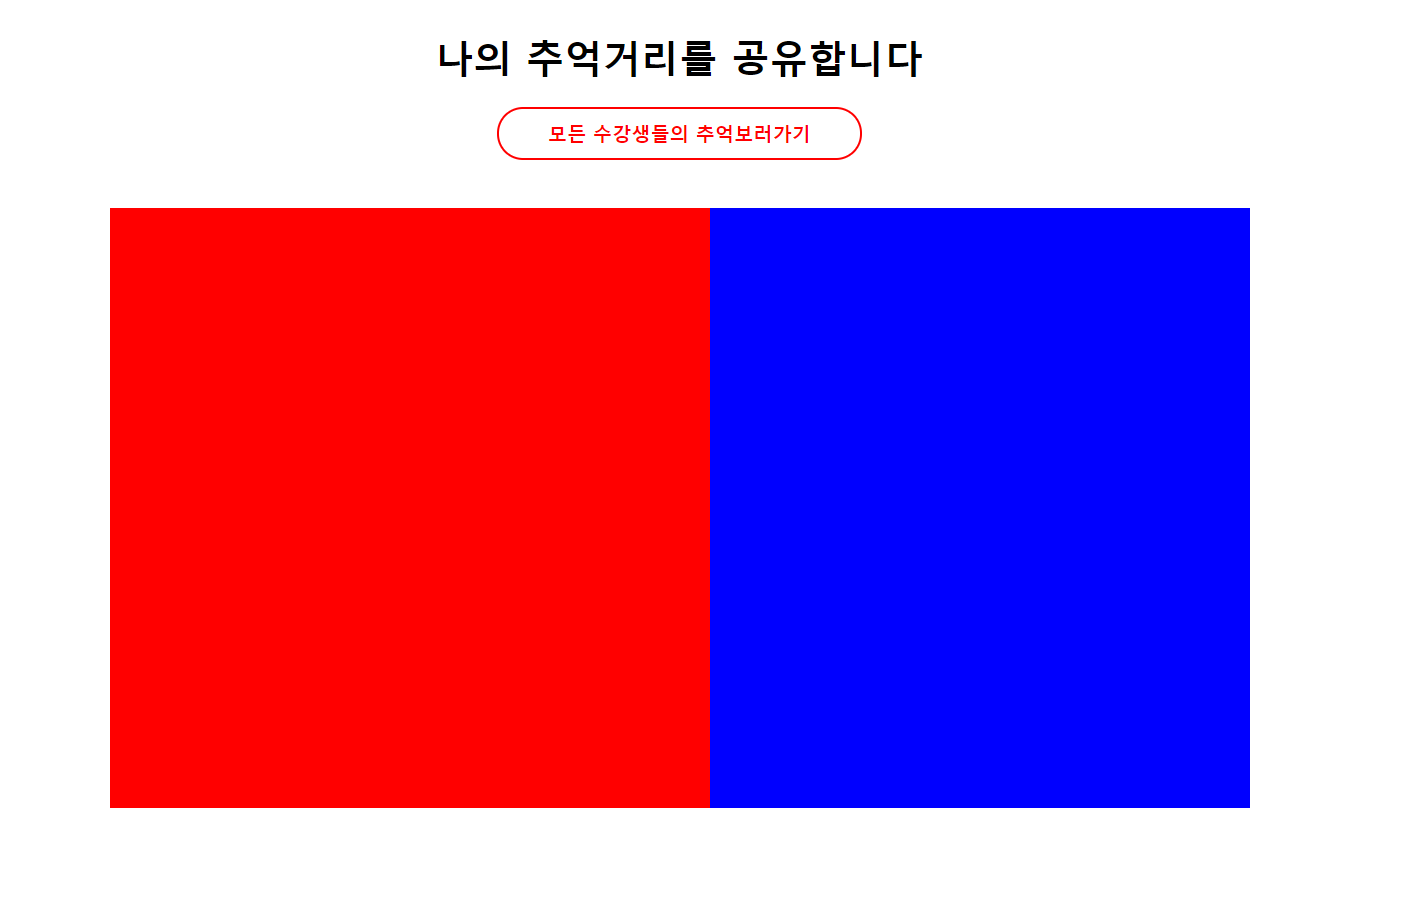
7.스토리 & 이미지 넣기
<style>
 .story{
            width: 450px;
            height: 500px;


        }
        .img{
            width: 450px;
            height: 300px;

            background-image: url('image.jpg');
            background-position: center;
            background-size: cover;
            border-radius: 24px;

        }
        .story > h2{
            margin: 20px 0px 0px 0px;
            color: cornflowerblue;
        }
        .story > h3{
            margin: 5px 0px 0px 0px;
            font-size: 16px;
            color: gray;
            font-weight: normal;
        }
        .story > p{
            line-height: 24px;

        }
        </style>
            .
            .
            .
   <div class="story">
            <div class="img"> </div>
                <h2>그레이스 정원</h2>
                <h3>경남 고성군 상리면 삼상로 1312-71</h3>
                <p>
                    여름 방학 중에 코로나로 인해
                    집에만 있다보니 답답해서 한적한 수목원에
                    가소싶어서 부모님께 말씀드려서 검색했더니
                    그레이스 정원을 발견하여 즉흥적으로 가게되었다.
                    생각보다 예쁘고 한적해서 사진찍기 좋았다.
                </p>
            </div>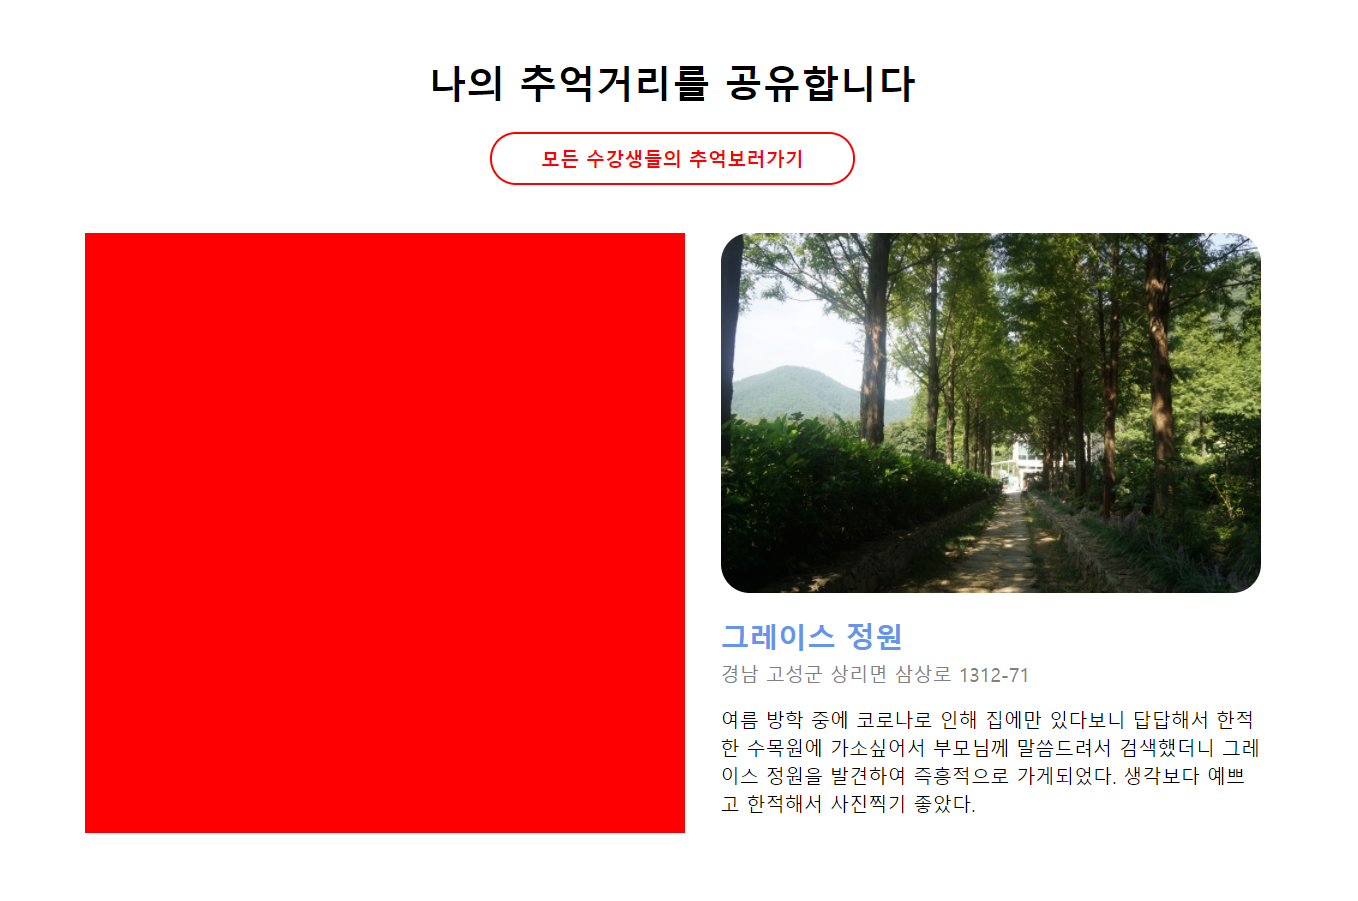
8. 지도 넣기 => kakao API 가져오기,
*위도,경도 변경 / id:map 지정
<script type="text/javascript" src="https://dapi.kakao.com/v2/maps/sdk.js?appkey=535068688f1a8bca1c21a9445ede0a89"></script>
        <script>
            var markerPosition = new kakao.maps.LatLng(34.977457363779465, 128.16880622525204)
            var mapContainer = document.getElementById('map'), // 지도를 표시할 div
                mapOption = {
                    center: markerPosition, // 지도의 중심좌표
                    level: 3 // 지도의 확대 레벨
                };

            var map = new kakao.maps.Map(mapContainer, mapOption); // 지도를 생성합니다

            var imageSrc = "https://s3.ap-northeast-2.amazonaws.com/materials.spartacodingclub.kr/2021_05_free_parents/sparta-marker.png";
            var imageSize = new kakao.maps.Size(65, 86);
            var markerImage = new kakao.maps.MarkerImage(imageSrc, imageSize);

            var marker = new kakao.maps.Marker({
                map: map,
                position: markerPosition,
                image : markerImage
            });

        </script>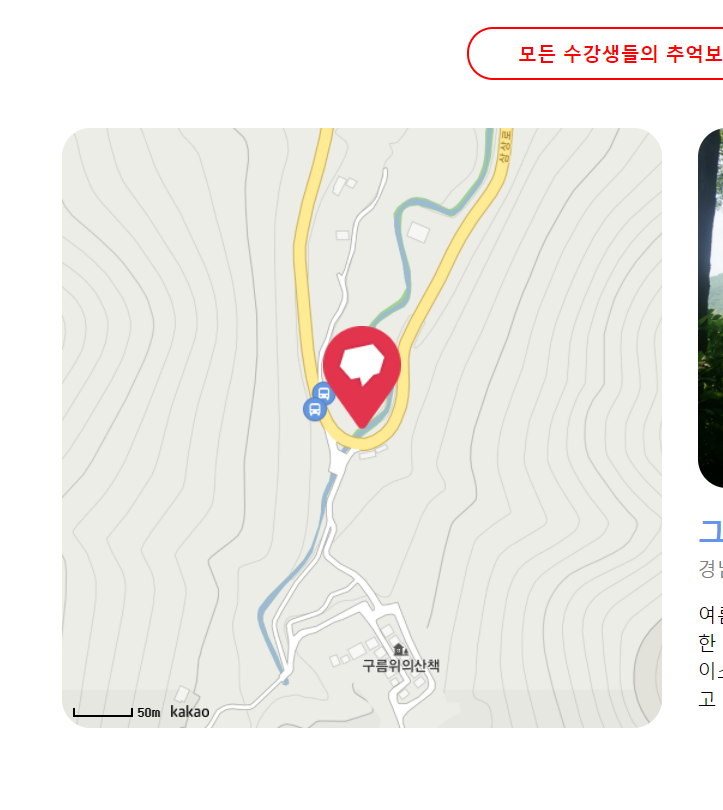
9.폰트 바꾸기<link rel="preconnect" href="https://fonts.googleapis.com"> <link rel="preconnect" href="https://fonts.gstatic.com" crossorigin> <link href="https://fonts.googleapis.com/css2?family=Hi+Melody&display=swap" rel="stylesheet"> <style> *{ font-family: 'Hi Melody', cursive; } </style>

10.모바일 화면 대응하기
<style>
 @media screen and (max-width: 640px) {
            h1{
                font-size: 26px;

            }
            .box{
                flex-direction: column;
                width: 100%;
            }
            .map{
                width: 100%;
                height: 200px;
                margin: 0;
            }
            .story{
                width: 100%;
                height: auto;
                margin-top: 10px;
                margin-bottom: 10px;
            }
            .img{
                width: 100%;
                height: 200px;
            }

        }
</style>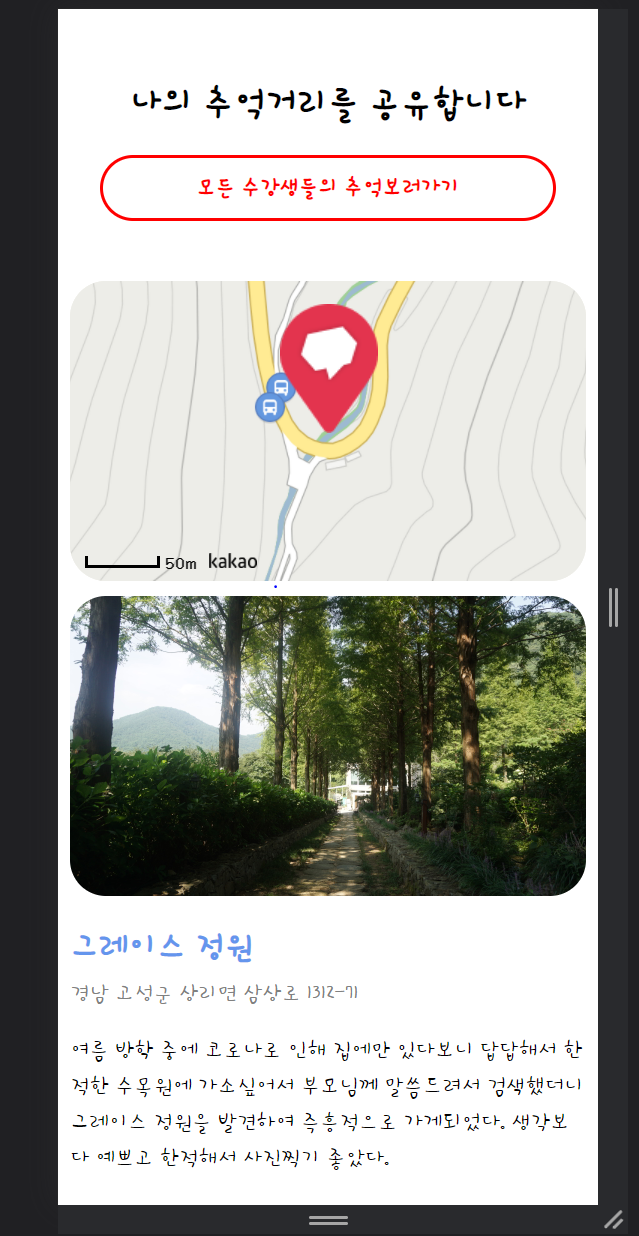
11.공유를 위한 기초작업
 <meta property="og:title" content="이름 님의 추억사진"/>
 <meta property="og:description" content="내가 만든 첫번째 웹페이지!"/>
 <meta property="og:image" content="image.jpg"/>
12. 공유하기
programming record