Homebrew 설치
brew install --cask visual-studio-code google-chrome iterm2 (VScode, 크롬, iTerm2 설치)
iTerm2 설정
-
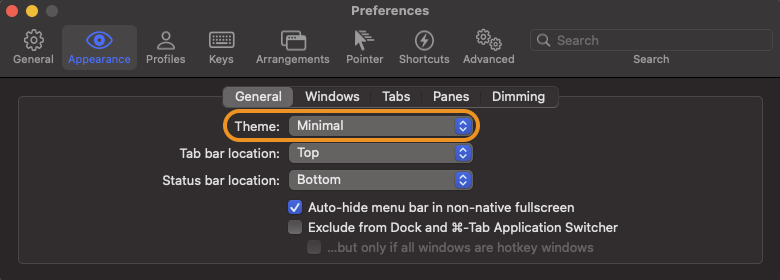
Preferences -> Appearance -> General(탭) -> Theme을 Minimal 설정
-
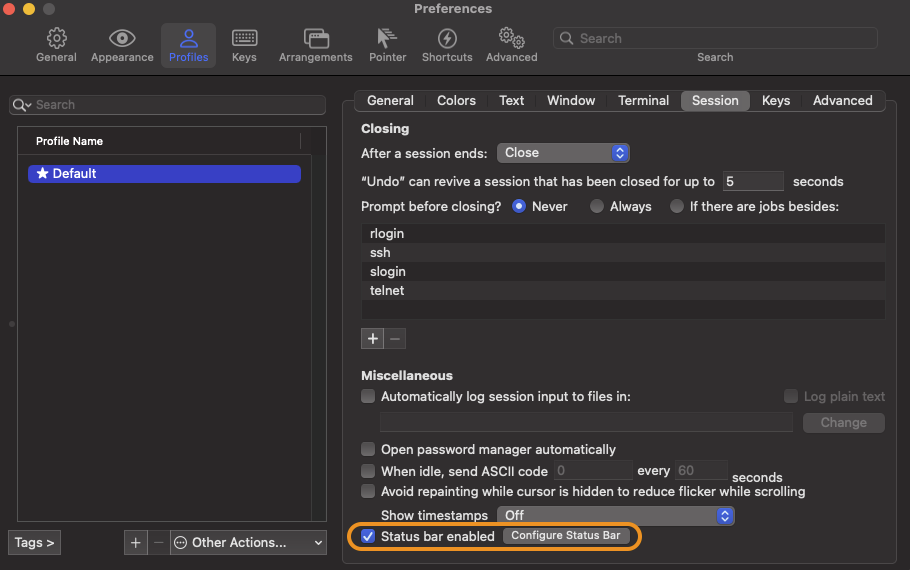
Preferences -> Profiles -> Status bar enabled 체크
-
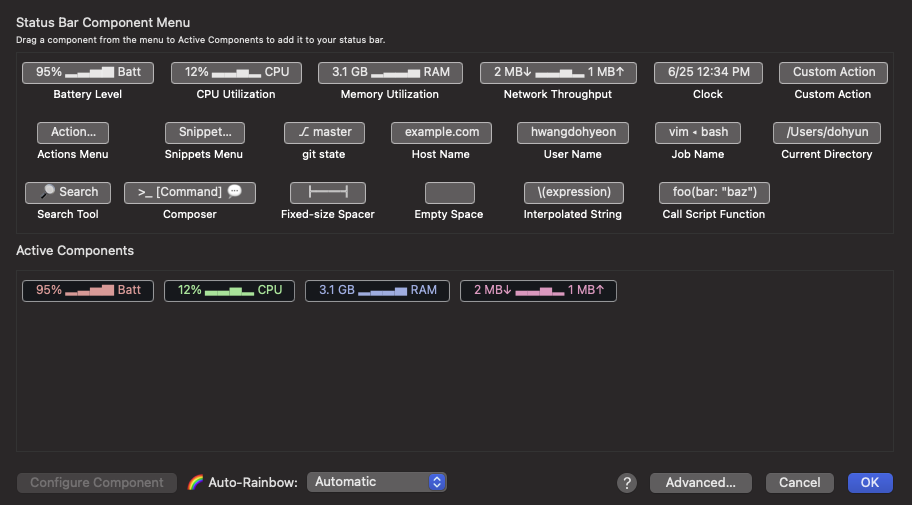
Preferences -> Profiles -> Configure Status Bar 클릭 후 원하는 메뉴 드래그앤드랍으로 설정
-
https://iterm2colorschemes.com
- 위 사이트에서 마음에 드는 컬러를 선택
- 선택1) 파일을 다운로드 받은 후 .txt 확장자를 지우고 파일 열기 (이렇게 하거나)
- 선택2)
// curl이 설치되어 있지 않은 경우 brew install curl // util이라는 이름의 directory를 생성하고 이동 mkdir util && cd util // snazzy color theme를 download // 만약 다른 color 테마를 다운로드 할 경우 curl -LO 이후에 해당 URL을 넣으면 됨 curl -LO https://raw.githubusercontent.com/mbadolato/iTerm2-Color-Schemes/master/schemes/Snazzy.itermcolors 다운로드 후 해당 파일 열기 -
위 선택 1 or 2로 진행 후 아래 설정하면 끝.
-
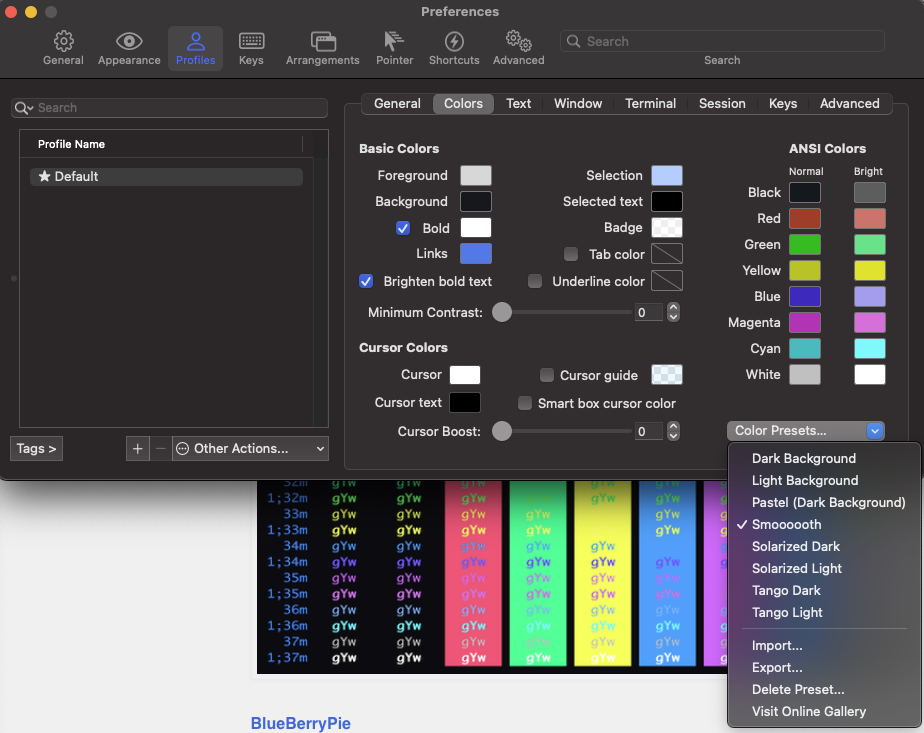
Preferences -> Profiles -> Colors -> Color Presets... 에서 다운받은 color 선택
Oh My Zsh 설치 및 커스텀 설정
-
터미널에 복사,붙여넣기 후 실행
sh -c "$(curl -fsSL https://raw.githubusercontent.com/ohmyzsh/ohmyzsh/master/tools/install.sh)" -
설치 후 powerlevel10k로 이동
https://github.com/romkatv/powerlevel10k#oh-my-zsh -
터미널에 복사,붙여넣기 후 실행
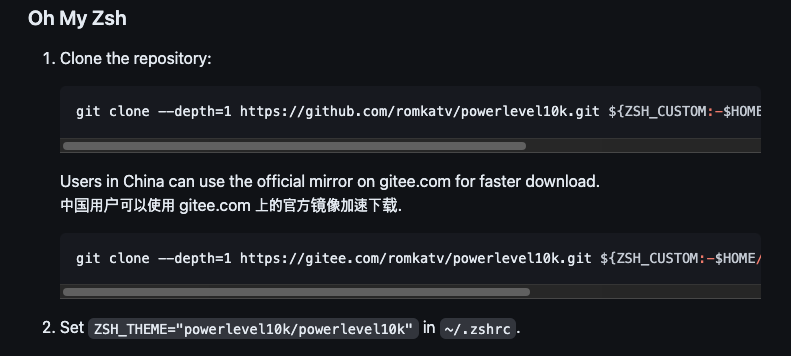
git clone --depth=1 https://github.com/romkatv/powerlevel10k.git ${ZSH_CUSTOM:-$HOME/.oh-my-zsh/custom}/themes/powerlevel10k -
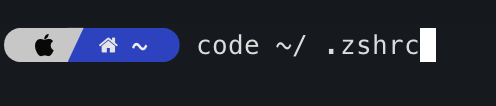
터미널에서 code~/ .zshrc 입력 후 실행
-
VScode에서 .zshrc 파일이 열리면 아래와 같이 설정 변경
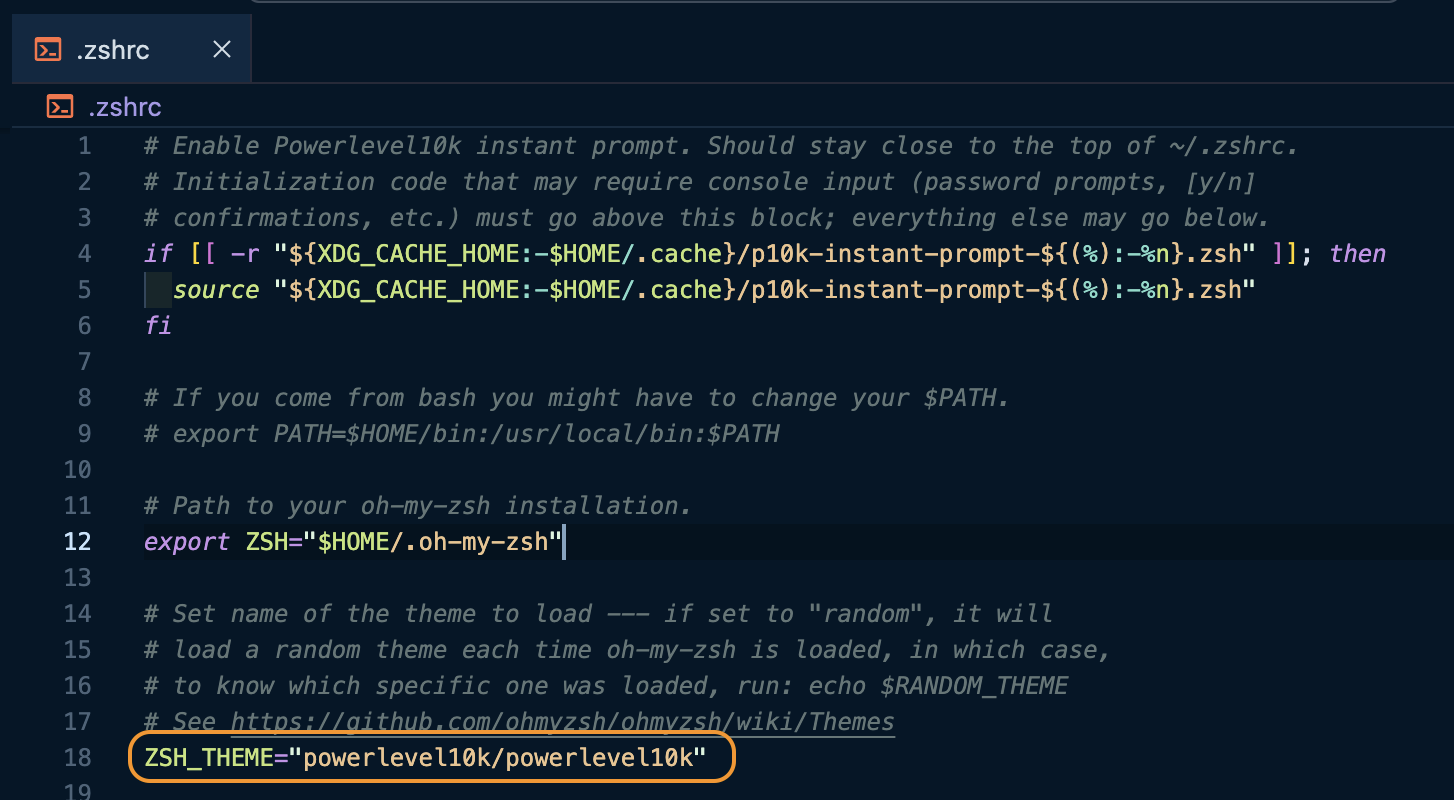
ZSH_THEME="powerlevel10k/powerlevel10k" -
위 설정을 완료후 iterm2 재시작 하면 Powerlevel10 환경설정이 실행됨.
- 대부분 Yes라고 하면됨.
- Prompt Style 설정부분 부터는 본인 취향대로 선택
- 실수로 다시 선택 하려면 (영문 소문자 r)을 누르면, 다시 시작할수있음
- 설정을 했는데 맘에 안들어서 다시 재설정 하고 싶을 경우 터미널에 p10k configure 입력 후 실행
- 선택 완료 후 Verbose를 선택하고, yes를 선택해주면 됨.
-
Syntax Highlight 적용하기
- brew로 zsh-syntax-highlighting 설치
brew install zsh-syntax-highlighting- code ~/ .zshrc 입력후 .zshrc 파일에 아래 코드 입력
// 아래꺼로 적용하기 이거안됨 - source /usr/local/share/zsh-syntax-highlighting/zsh-syntax-highlighting.zsh
source $(brew --prefix)/share/zsh-syntax-highlighting/zsh-syntax-highlighting.zsh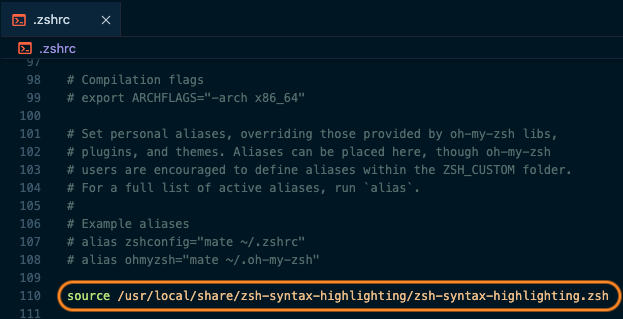
NVM / gh / git 설치
- 터미널에서 아래 명령어 입력
brew install nvm gh git - nvm 설치 중 나오는 설정을
- 터미널에서 code~/ .zshrc으로 열고 그대로 복사,붙여넣기
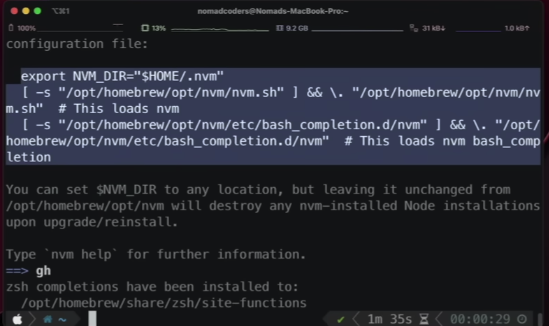
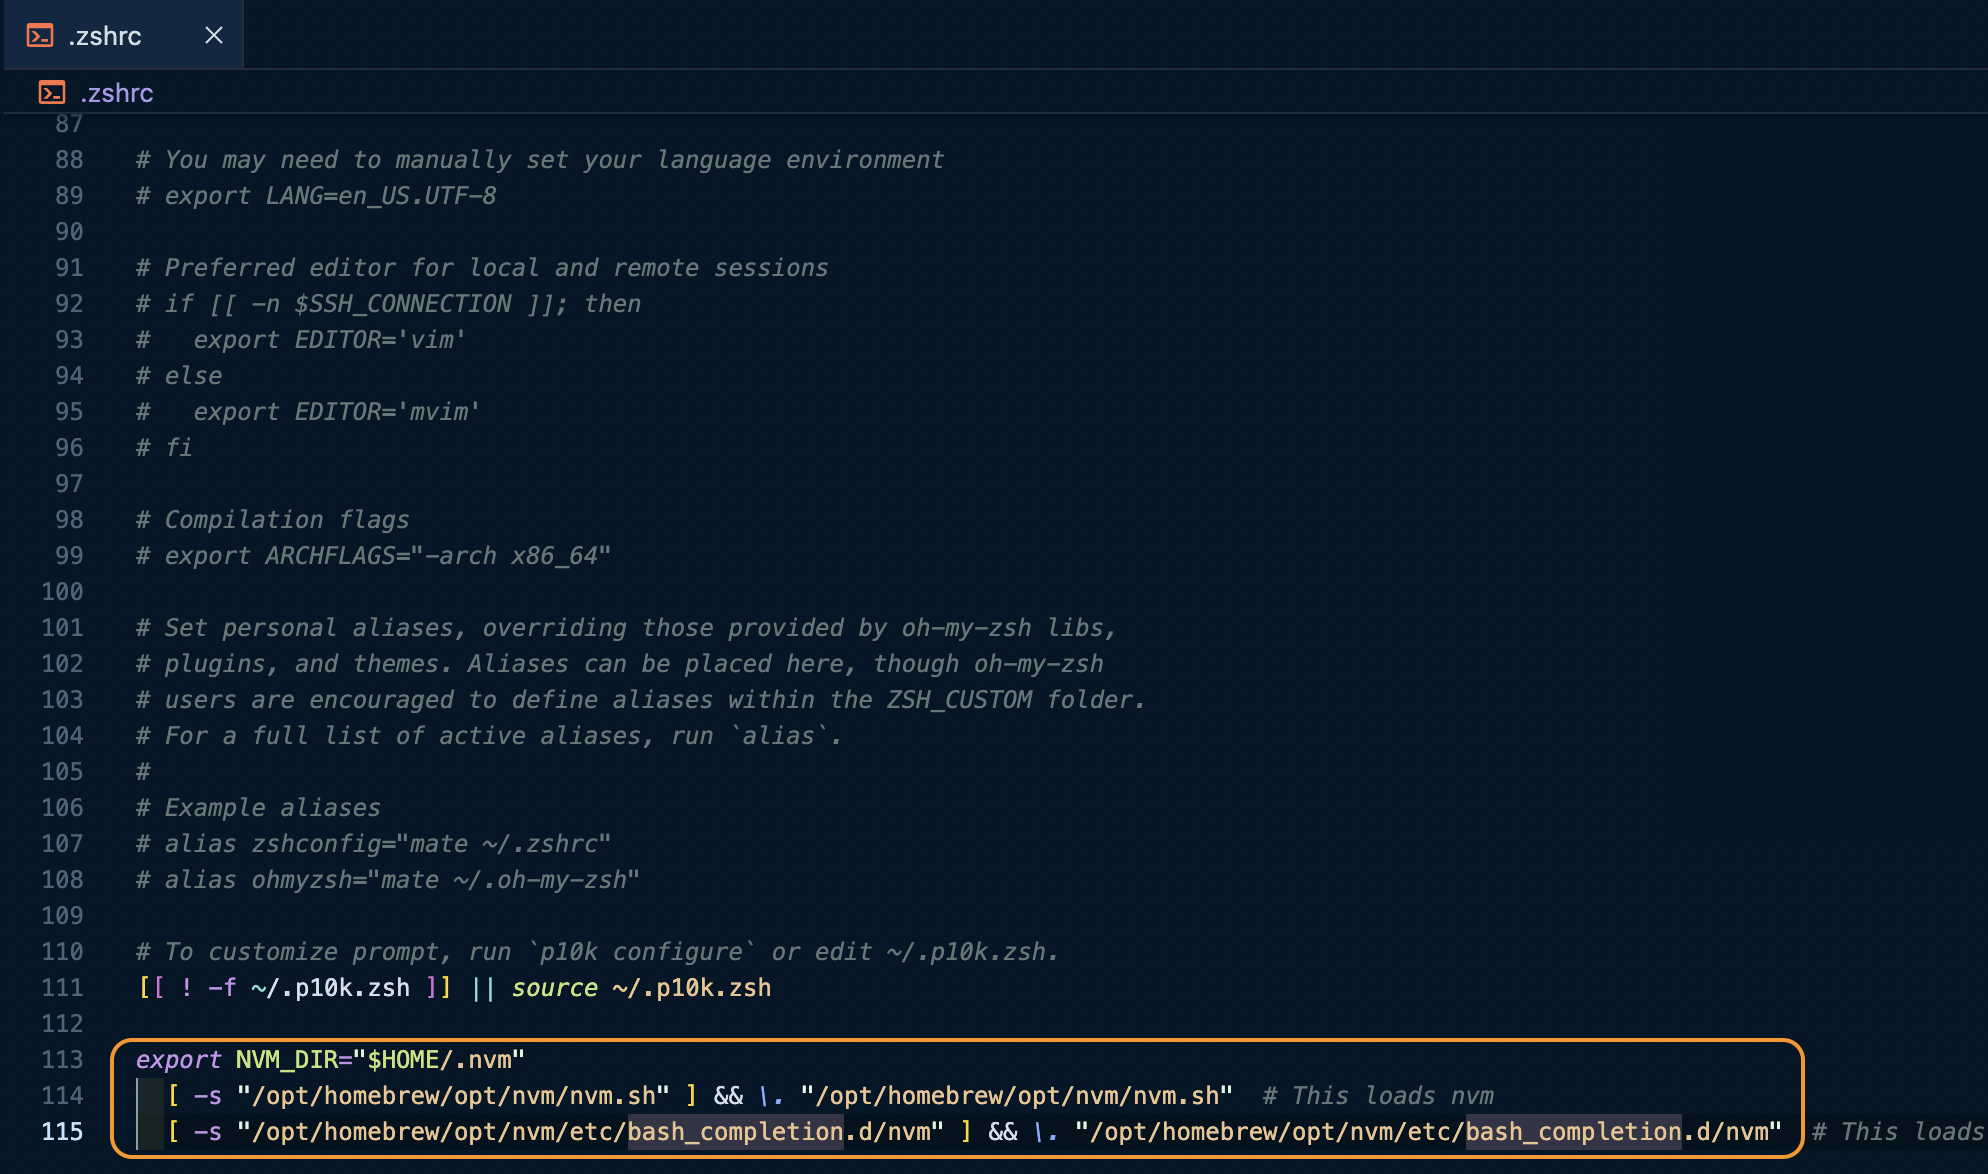
export NVM_DIR="$HOME/.nvm"
 [ -s "/opt/homebrew/opt/nvm/nvm.sh" ] && \. "/opt/homebrew/opt/nvm/nvm.sh"  # This loads nvm
[ -s "/opt/homebrew/opt/nvm/etc/bash_completion.d/nvm" ] && \. "/opt/homebrew/opt/nvm/etc/bash_completion.d/nvm" # This loads nvm bash_completion- 설정 후 터미널 재시작
- nvm 설치후 터미널에서 nvm ls-remote 입력
- 설치가 가능한 모든 node.js 버전을 보여줌
- 원하는 node 버전 설치를 하면 됨 (ex: nvm install 노드버전)
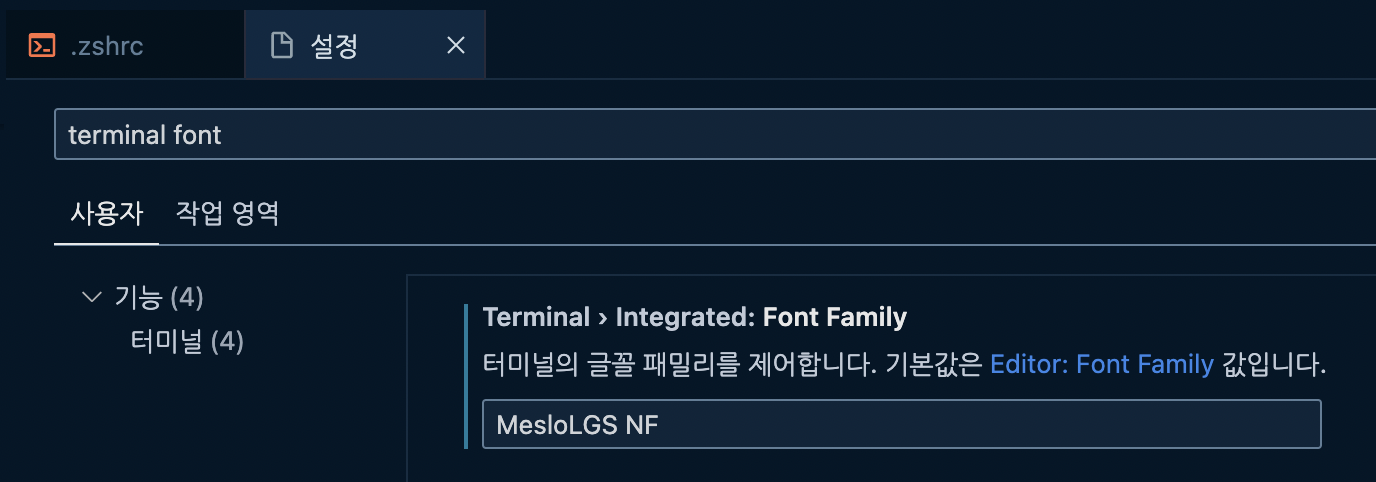
VScode 터미널에서 아이콘 및 폰트 깨지는 부분 설정 해주기
- 설정 -> terminal font -> Terminal › Integrated: Font Family -> MesloLGS NF 입력
Rosetta2 활성화 시키기
- 터미널에 입력후 실행
/usr/sbin/softwareupdate --install-rosetta --agree-to-license출처
1. 노마드 코더 - 개발자를 위한 M1 풀옵션 맥북프로 세팅! (YouTube)
2. https://ooeunz.tistory.com/21

프론트엔드 개발자