패스트캠퍼스 강의를 통해 RecyclerView와 Adapter 연동을 실습하던 중, RecyclerView.ListAdapter를 적용하는 방법을 적용해보고, 기존의 RecyclerView.Adapter 사용할 때 보다 편리한 부분이 있어서 이를 좀 더 자세히 알아보려고 작성한다.
Adapter와 AdapterView
Adapter
- 하나의 객체로서, AdapterView와 보여줄 Data 사이 일종의 브릿지이다.
- 즉 데이터를 받아 관리하고, 어댑터뷰가 출력할 수 있는 형태로 데이터를 제공하는 중간 객체 역할
AdapterView
- 어댑터가 제공한 가공된 데이터를 출력하는 역할
- 많은 정보를 효율적으로 처리하기 위해 View에 바로 데이터를 제공하지 않고 어댑터 객체를 이용
보통 RecyclerView와 RecyclerView.Adapter, LinearLayoutManager을 이용하여 데이터 리스트를 구성하거나, ViewPager2와 함께 사용하여 프래그먼트 리스트를 구성했다. 아래는 해당 방식으로 구현한 리스트 예시이다.
RecyclerView.Adapter 사용 예시
RecyclerView 추가
해당 뷰를 보여줄 Layout 안에 RecyclerView를 추가한다.
<!-- activity_main.xml -->
<androidx.recyclerview.widget.RecyclerView
	android:id="@+id/recyclerView"
    android:layout_width="match_parent"
    android:layout_height="0dp"
    app:layout_constraintBottom_toBottomOf="parent"
    app:layout_constraintEnd_toEndOf="parent"
    app:layout_constraintStart_toStartOf="parent"
    app:layout_constraintTop_toTopOf="parent"/>
List Layout 추가
RecyclerView로 보여줄 리스트 UI를 추가한다
<!-- item_value.xml -->
<?xml version="1.0" encoding="utf-8"?>
<androidx.constraintlayout.widget.ConstraintLayout xmlns:android="http://schemas.android.com/apk/res/android"
    android:layout_width="match_parent"
    android:layout_height="wrap_content"
    xmlns:app="http://schemas.android.com/apk/res-auto"
    xmlns:tools="http://schemas.android.com/tools"
    android:padding="24dp">

    <TextView
        android:id="@+id/valueTextView"
        android:layout_width="wrap_content"
        android:layout_height="wrap_content"
        tools:text="value"
        android:textSize="20sp"
        app:layout_constraintTop_toTopOf="parent"
        app:layout_constraintEnd_toEndOf="parent" />
  </androidx.constraintlayout.widget.ConstraintLayout>
Adapter Class 작성
- RecyclerView.Adapter를 확장한 ValueAdapter를 구현, 아래 메서드들을 override하여 구현
- onCreateViewHolder : 항목 내부를 구성하는 뷰 객체들을 관리하는 뷰 홀더를 생성
- onBindViewHolder : 데이터와 뷰 홀더를 바인딩
- getItemCount : 데이터 개수 반환
- ValueAdapter에서 사용할 RecyclerView.ViewHolder를 확장한 ValueViewHolder를 구현한다.
- ViewHolder 클래스는 항목 하나를 구성하는 View들의 주소 값을 가진 클래스
- 뷰바인딩을 통해 좀 더 편리하게 적용가능 (findViewById 호출 없이 처리)
class ValueAdapter(val list: MutableList<String>):
	RecyclerView.Adapter(WordAdapter.ValueViewHolder>() {

	override fun onCreateViewHolder(parent: ViewGroup, viewType: Int): ValueViewHolder {
    	val inflater = parent.context.getSystemService(Context.LAYOUT_INFLATER_SERVICE) as LayoutInflater
        val binding = ItemValueBinding.inflate(inflater, parent, false)
        return ValueViewHolder(binding)
    }

    override fun onBindViewHolder(holder: ValueViewHolder, position: Int) {
    	val value = list[position]
        holder.bind(value)
    }

    override fun getItemCount() = list.size

    class ValueViewHolder(private val binding: ItemValueBinding):
    	RecyclerView.ViewHolder(binding.root) {
        fun bind(value: String) {
        	binding.apply {
            	valueTextView.text = value
            }
        }
    }
}
RecyclerView와 Adapter, Data List 연결
private lateinit var valueAdapter: ValueAdapter
/* .. */
private fun initRecyclerView() {
	valueAdapter = ValueAdapter(mutableListOf())
    binding.recyclerView.apply {
    	// RecyclerView는 ListView와 GridView가 통합된 View로, layoutManager를 통해 이를 결정해야 함
        // LinearLayoutManager, GridLayoutManager, StaggerGridLayoutManager
    	layoutManager = LinearLayoutManager(applicationContext, LinearLayoutManager.VERTICAL, false)
    }
}

/* 이후 데이터셋이 변할 시 아래 메서드들을 통해 알림 */
valueAdapter.notifyDataSetChanged()
valueAdapter.notifyItemChanged(position)
valueAdapter.notifyItemRemoved(position)
valueAdapter.notifyInserted(position)
valueAdapter.notifyItemRangeInserted(positionStart, itemCount)
valueAdapter.notifyItemMoved(fromPosition, toPosition)
valueAdapter.notifyItemRangeChanged(positionStart, itemCount)
valueAdapter.notifyItemRangeRemoved(positionStart, itemCount)
기존 Adapter와 ListAdapter의 차이
그럼 ListAdapter는 무슨 차이가 있길래 편리하다고 느꼈을까? 비교를 통해 먼저 알아보자
기존의 Adapter
RecyclerView에서 Adapter는 ViewHolder 객체를 생성하고, 해당 객체에 Data List를 주입하며, Data List의 변경사항을 UI에 반영한다. (notify...() 메서드를 통해)
이는 데이터를 업데이트하는 곳마다 notifyDataSetChanged() 등의 메서드를 사용해야하며, notify되는 범위를 세분화하여(Inserted, Changed 등등) 지연시간을 줄이는 방법을 사용하는 것도 까다롭다.
이를 해결하기 위해 리스트의 갱신을 직접 알리는 대신, 리스트의 차이를 알아내는 DiffUtil을 사용한다.
DiffUtil
DiffUtil is a utility class that calculates the difference between two lists and outputs a list of update operations that converts the first list into the second one.
developer에 따르면 DiffUtil은 두 리스트간의 차이를 계산하고, 첫번째 리스트를 두번째 리스트로 변환하는 업데이트 작업 목록을 출력하는 유틸리티 클래스이다.
즉 기존 데이터 리스트와 업데이트된 데이터 리스트를 비교하여 차이를 알아낸다.
RecyclerView.ListAdapter 사용 예시
RecyclerView.Adapter를 사용할 때와 동일하게 RecyclerView와 List Layout을 추가한다.
ListAdapter Class 작성
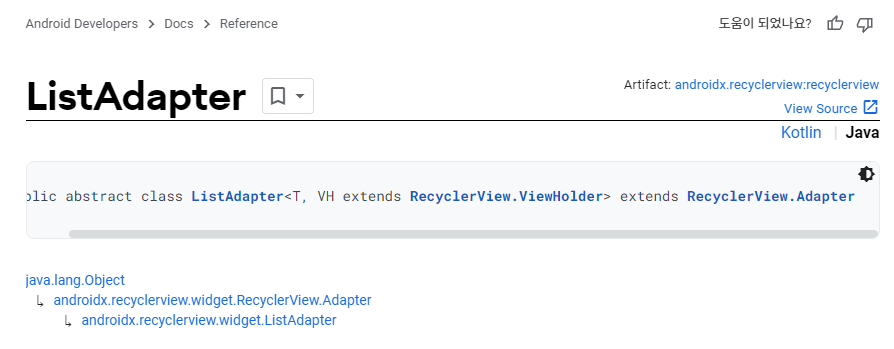
public abstract class ListAdapter<T, VH extends RecyclerView.ViewHolder> extends RecyclerView.Adapter

-> ListAdapter<데이터 클래스, 뷰홀더>(콜백)
RecyclerView.Adapter base class for presenting List data in a RecyclerView, including computing diffs between Lists on a background thread.
This class is a convenience wrapper around AsyncListDiffer that implements Adapter common default behavior for item access and counting.
ListAdapter에서 내부적으로
- AsyncListDiffer를 사용하여 간단히 백그라운드 스레드에서 실행한 후 메인 스레드에 처리하기 위한 처리를 함
- List(Immutable)로 다루기에 전달된 리스트의 항목을 직접적으로 변경하지 않고 변경된 List를 전달함
👉 백그라운드 스레드에서 리스트 변경 사항이 계산되면 사용자는 업데이트 된 RecyclerView를 볼 수 있음
리스트의 변경 사항은 DiffUtil.ItemCallback을 사용하여 차이를 계산함
DiffUtil.Callback : 데이터 리스트를 비교해서 차이를 계산하고 콜백 해주는 클래스
- areItemsTheSame : 두 객체가 같은 아이템인지 비교
- areContentsTheSame : 두 객체의 내용물이 동일한지 비교
class ValueAdapter: ListAdapter<String , RecyclerView.ViewHolder>(
    // 데이터가 변경됨을 체킹하기 위해 Implement한 메서드 -> RecyclerView와 달리 알아서 UI 처리
    object : DiffUtil.ItemCallback<String>() {
        override fun areItemsTheSame(oldItem: ImageItems, newItem: ImageItems): Boolean {
            // Identity, 같은 값을 참조하고 있는지 체크 (동등성 체크)
            return oldItem === newItem
        }

        override fun areContentsTheSame(oldItem: ImageItems, newItem: ImageItems): Boolean {
            // Equality, 같은 값인지 체크 (동일성 체크)
            return oldItem == newItem
        }

    }
) {
    override fun getItemCount(): Int {
        return currentList.size
    }

    override fun onCreateViewHolder(parent: ViewGroup, viewType: Int): RecyclerView.ViewHolder {
        val inflater = parent.context.getSystemService(Context.LAYOUT_INFLATER_SERVICE) as LayoutInflater
            val binding = ItemValueBinding.inflate(inflater, parent, false)
            return ValueViewHolder(binding)
        }
    }

    override fun onBindViewHolder(holder: RecyclerView.ViewHolder, position: Int) {
    	holder.bind(currentList[position])
    }
}
RecyclerView와 Adapter, Data List 연결
private lateinit var valueAdapter: ValueAdapter
/* .. */
private fun initRecyclerView() {
    valueAdapter = ValueAdapter()
    binding.recyclerView.apply {
        adapter = valueAdapter
        layoutManager = LinearLayoutManager(context)
    }
}
ListAdapter에서 사용할 수 있는 메서드는
- getCurrentList() : 현재 리스트를 반환
- getItemCount() : 데이터 셋 내 아이템 개수 반환
- onCurrentListChanged() : 현재 리스트가 업데이트 되었을 때 불러짐
- submitList() : ListAdapter의 상태를 변경하기 위해 새로운 리스트를 설정
기존의 Adapter와 ListAdapter를 함께 사용한 실습 예제는 링크를 통해 확인