이번 포스트에서는 지난번 포스트에 이어서 Springdoc의 기본적인 어노테이션에 대해 알아보겠다.
코드를 작성하면서 Controller, DTO에 적용했을 때 유용했던 어노테이션 기반으로 작성했다.
Controller
@XXXMapping
- spring-web 에서 제공해주는 HTTP 메서드 매핑 어노테이션
- springdoc에서 API의 HTTP 메서드를 참고하는데 사용됨
- 종류
PostMappingGetMappingPutMappingDeleteMappingPatchMappingRequestMapping(method = RequestMethod.method)
- 주요 속성
value또는path: url 경로
- Controller 공통 경로
- Controller에
@RequestMapping("/test")를 달면 내부 메서드의 URL 앞에 공통 경로(/test)가 자동으로 추가됨
- Controller에
@ApiResponse
- 특정 상태 코드의 응답을 설명할 때 사용됨
- 주요 속성
responseCode: HTTP 응답 코드description: 응답 설명
@Operation
- API의 정보를 설명할 때 사용됨
- 주요 속성
summary: API 요약description: API 설명tags: API 그룹핑
@Parameter, @Parameters
- 파라미터의 정보를 추가할 때 사용됨
- 주요 속성
name: 파라미터 이름description: 설명example: 예시required: 필수여부 (default : false)
@Parameter를 사용시 개별 파라미터의 정보를 입력할 수 있다.@Parameters를 사용시 메서드에 복수개의 Parameter 정보를 입력할 수 있다.
@Tag
- API 그룹핑이 필요할 때 사용됨
- Controller에 적용시 내부 메서드에 일괄 적용됨
- 주요 속성
description: 설명name: tag명
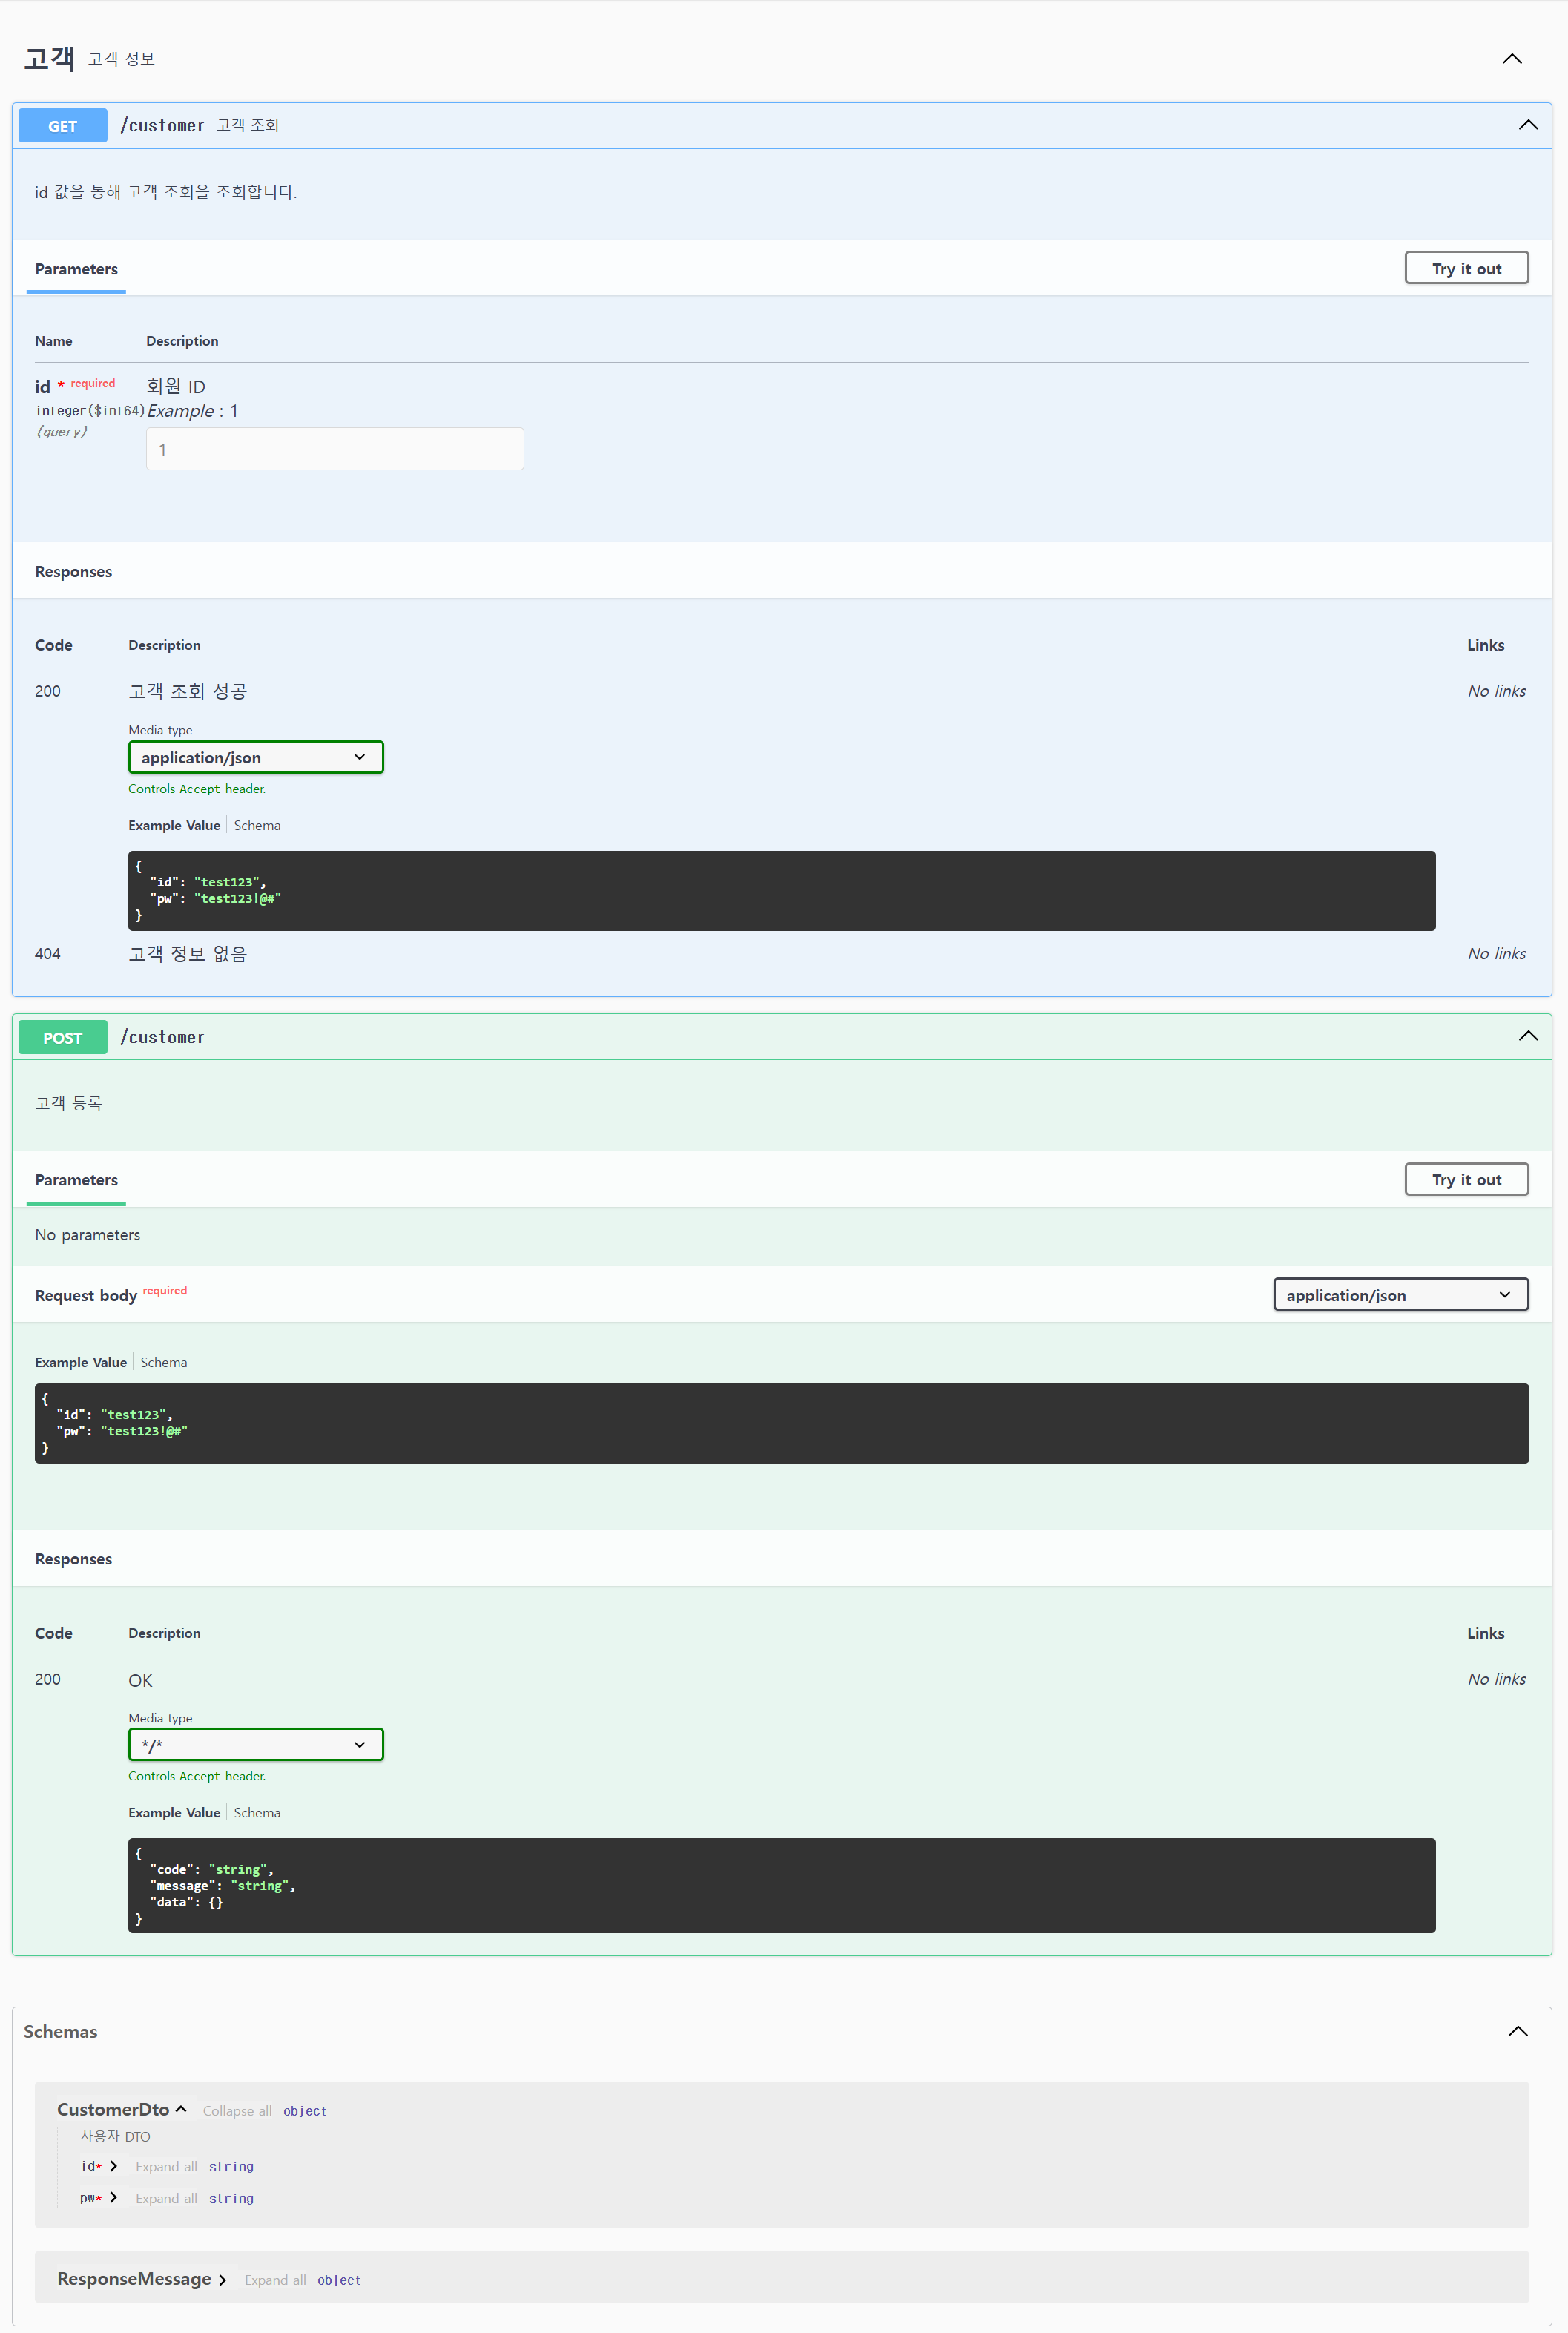
Controller example
@RestController
@RequestMapping("/customer")
@Tag(description = "고객 정보", name = "고객")
@AllArgsConstructor
public class CustomerController {

    private final CustomerService customerService;

    @PostMapping("")
    @Operation(description = "고객 등록", tags = "고객")
    public ResponseEntity<ResponseMessage> saveCustomer(
            @RequestBody  CustomerDto customerDto
    ){

        long id = customerService.saveOneCustomer(customerDto);

        return ResponseEntity.ok(ResponseMessage.success(id));
    }

    @GetMapping("") // @RequestMapping(value = "", method = RequestMethod.GET)
    @Operation(description = "id 값을 통해 고객 조회을 조회합니다.", summary = "고객 조회", tags = "고객")
    @Parameters({
            @Parameter(name = "id",description = "회원 ID", example = "1", required = true)
    })
    @ApiResponses({
            @ApiResponse(responseCode = "200", description = "고객 조회 성공",
                    content = @Content(schema = @Schema(implementation = CustomerDto.class), mediaType = "application/json")),
            @ApiResponse(responseCode = "404", description = "고객 정보 없음", content = @Content())
    })
    public ResponseEntity<ResponseMessage> findCustomer(long id){

        CustomerDto res = customerService.findCustomerById(id);

        return ResponseEntity.ok(ResponseMessage.success(res));
    }
}
DTO
@Schema
- DTO 내부 필드들에 대한 정보를 설명할 때 사용됨
- DTO class에도 적용 가능(DTO에 대한 설명이 필요할 때)
- 주요 속성
description: 필드 설명example: 예시requireMode: 필수여부 (default : NOT_REQUIRED). Swagger 화면에서 필수여부 *로 표시됨REQUIREDNOT_REQUIREDjakarta validation annotation인 @NotNull을 적용해도 swagger상에 필수여부를 설정할 수 있다.
accessMode: 데이터 접근 설정. HTTP METHOD 종류에 따라 swagger 화면에서 해당 필드의 hidden여부가 결정됨READ_ONLY: value will not be written to during a request but may be returned during a response.WRITE_ONLY: value will only be written to during a request but not returned during a response.READ_WRITE: value will be written to during a request and returned during a response.
hidden: 필드 숨김 여부
DTO example
@Getter
@AllArgsConstructor(access = AccessLevel.PROTECTED)
@NoArgsConstructor(access = AccessLevel.PROTECTED)
@Builder
@Schema(description = "사용자 DTO")
public class CustomerDto {
    @Schema(description = "사용자 이름", requiredMode = RequiredMode.REQUIRED, example = "test123")
    @JsonProperty("id")
    private String username;

    @Schema(description = "패스워드", requiredMode = RequiredMode.REQUIRED, example = "test123!@#")
    @JsonProperty("pw")
    private String password;

    @Schema(hidden = true)
    private String hidden;
}
controller, dto example이 적용된 Swagger 화면
참고 문서
다음 포스트에서는 swagger의 기본적인 설정들을 수정할 수 있는 방법에 대해 알아보겠다.
잘못된 정보나 추가할 내용이 있다면 언제든지 댓글로 알려주세요! 여러분의 피드백은 더 좋은 글을 만드는 데 큰 도움이 됩니다. 😊