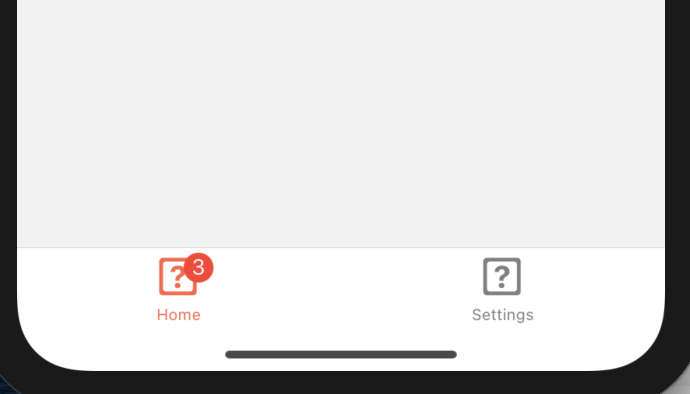
Tab
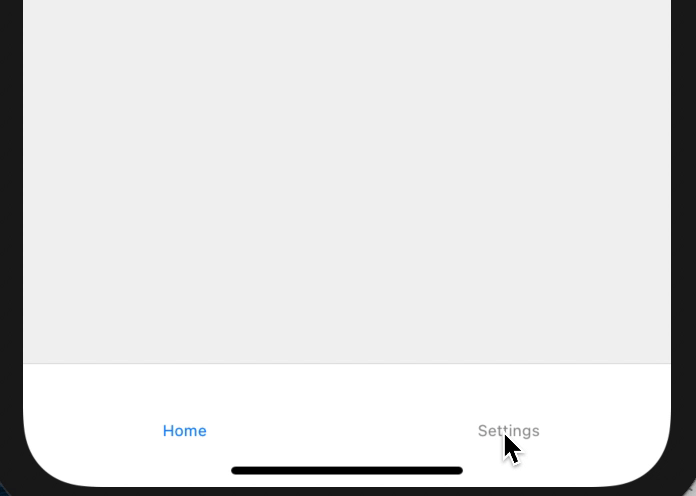
이렇게 bottom에서 screen을 바꾸는 기능!
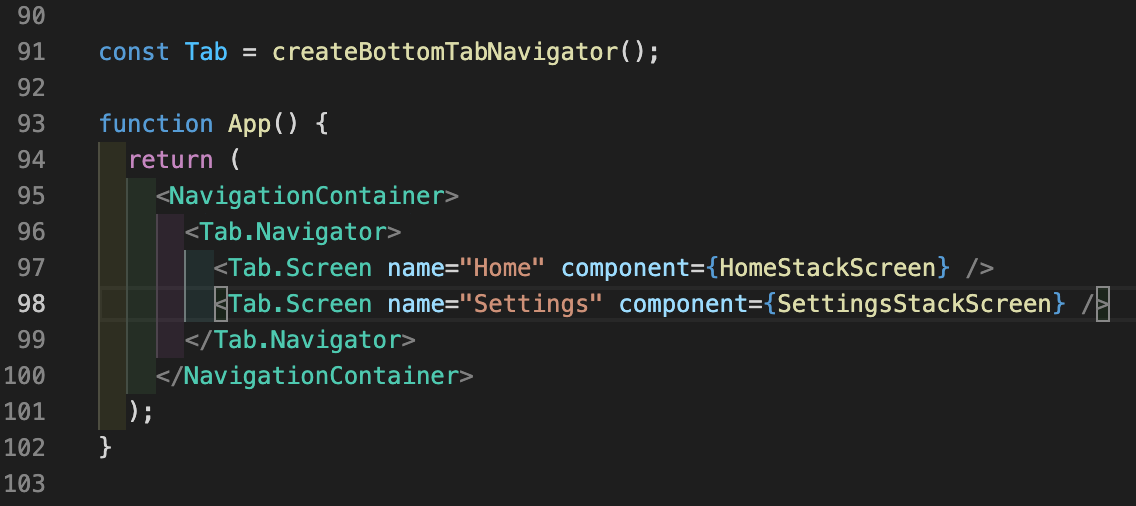
App.js
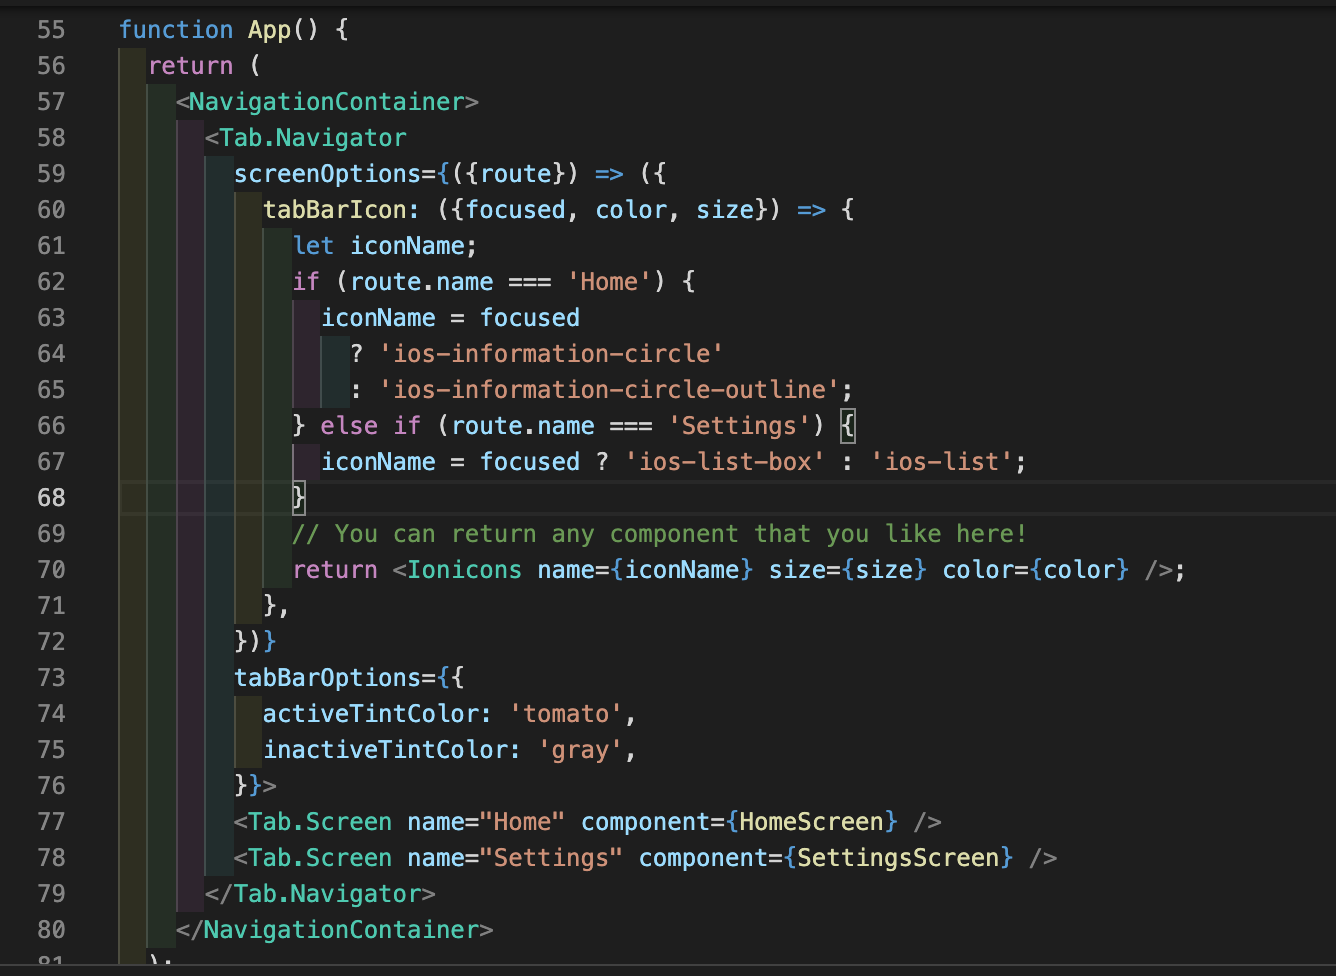
App이 조금 복잡해졌다. 하나씩 보자. 일단 Tab.navigator에 screenOptions라는 prop이 있는데 route를 인자로 받는다. tabBarIcon이라는 프로퍼티는 focused, color, size 3개를 인자를 받아 콜백을 실행! 콜백 안에서 tab을 클릭할 때마다 변화할 것을 결정해준다. 그리고 중요한 것은 return <Ionicons name={iconName} size={size} color={color} />; Icon 컴포넌트를 리턴한다!
tabBarOptions에서는 클릭할 때의 아이콘 color를 정할 수 있다.
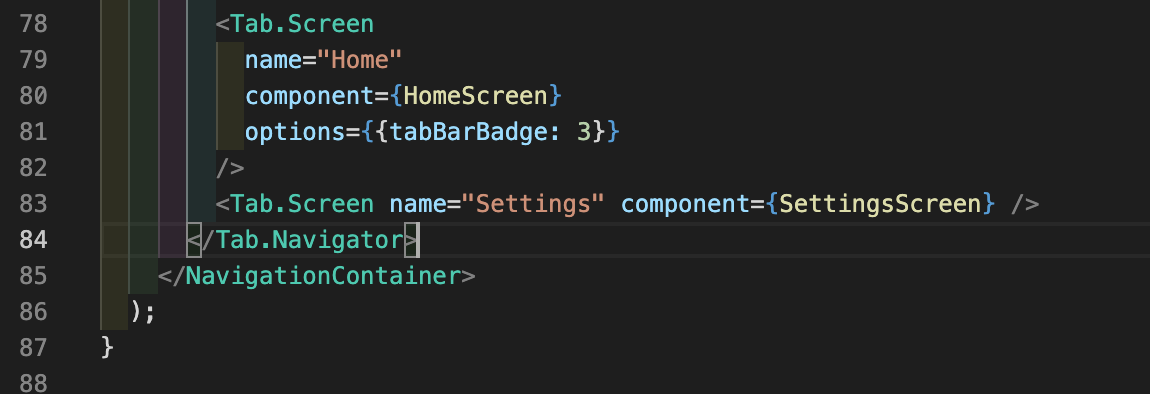
Tab.screen에 option을 추가하면 뱃지를 그릴 수 있다!
이것이 기본적인 tab의 기능이고 이제 본격적으로 시작해보자!
A stack navigator for each tab
App.js
Home, settings 모두 각자 stack을 가지고 있다.
Stack
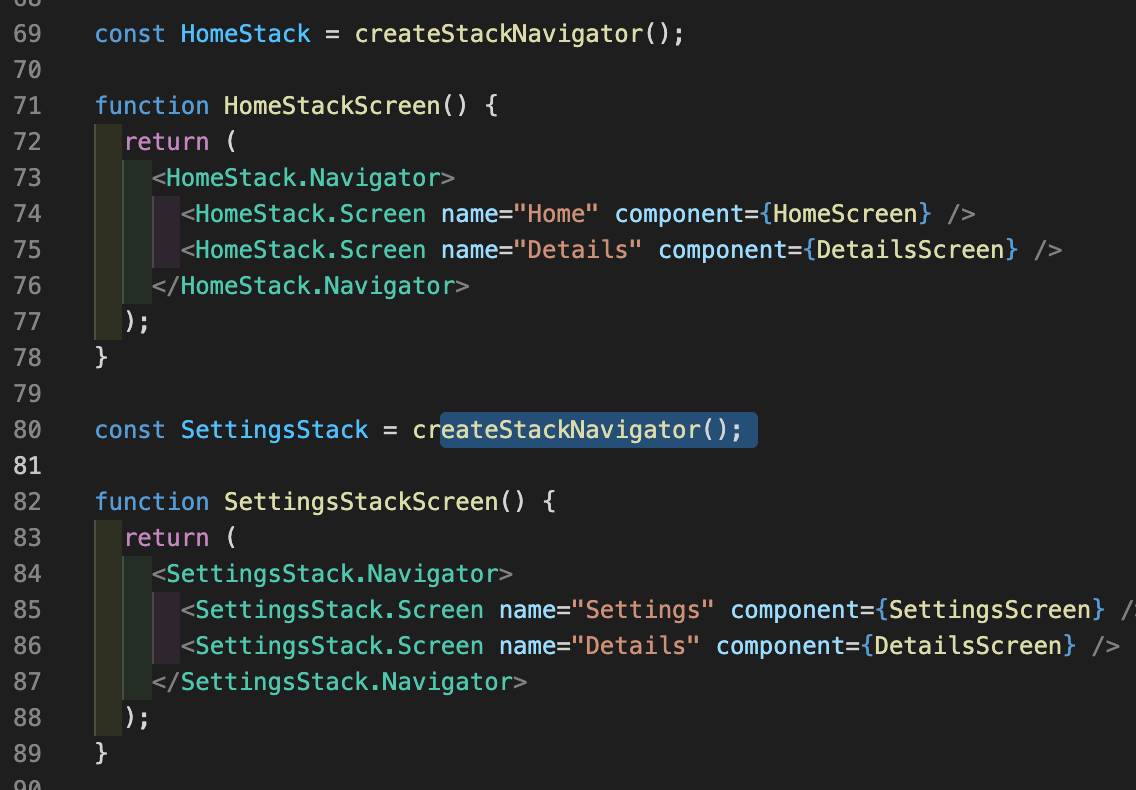
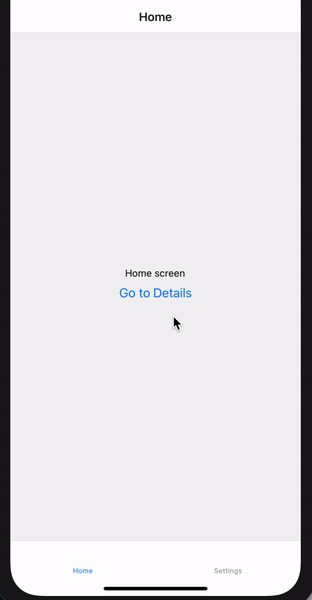
즉, App에서 2개의 Tab 스크린을 만들고 home과 setting에서 detail screen에 접근할 수 있게 한 것이다!
Drawer

Drawer는 말그대로 옆에서 당길 수 있는 Navigator다.
App.js와 Drawer.js
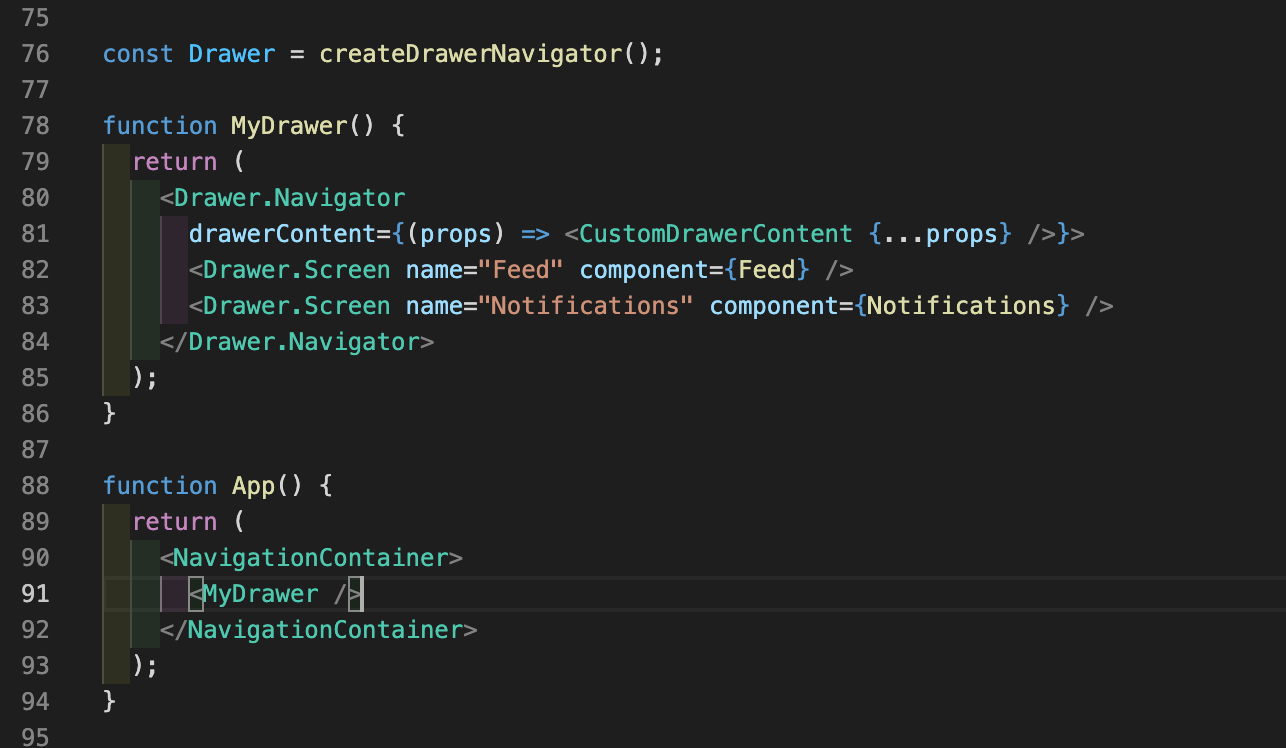
drawerContent 라는 프러퍼티에 CustomDrawerContent 라는 컴포넌트를 내려주고
CustomDrawerContent.js
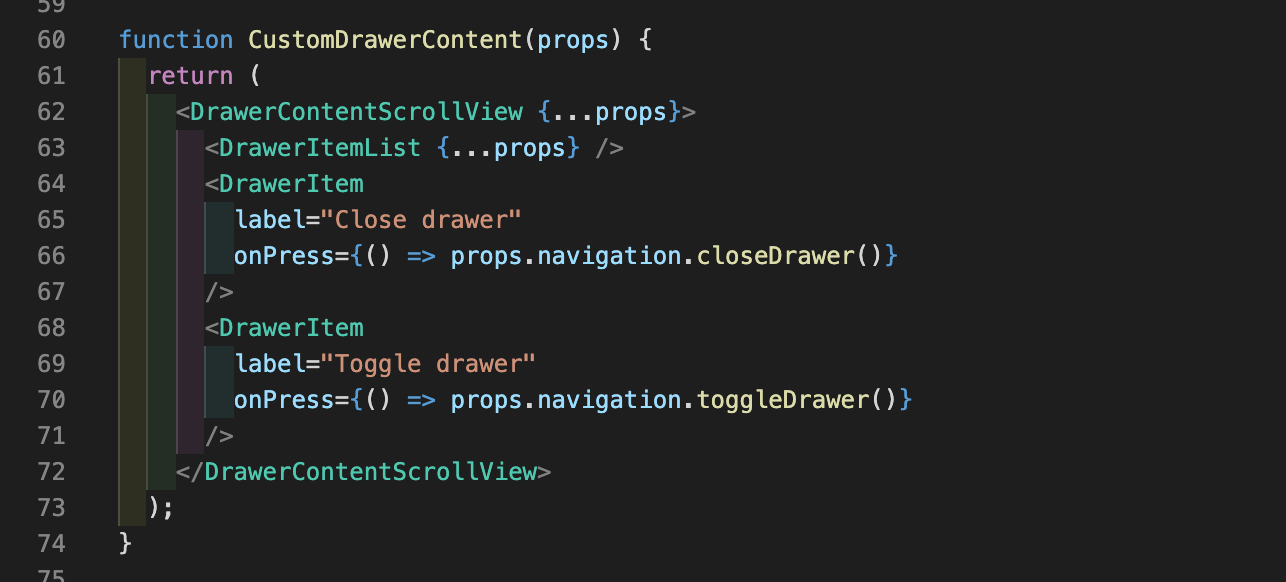
이렇게 DrawerItem이라는 컴포넌트에 onPress를 주고 closeDrawer()와 toggelDrawer()를 하면

요렇게 여닫는 것이 가능하다!
갑자기 Authentication flows?
왜 갑자기 Authentication flows가 나오는지 모르겠지만 공문 따라서 공부하고 있으니 일단 해보겠다.
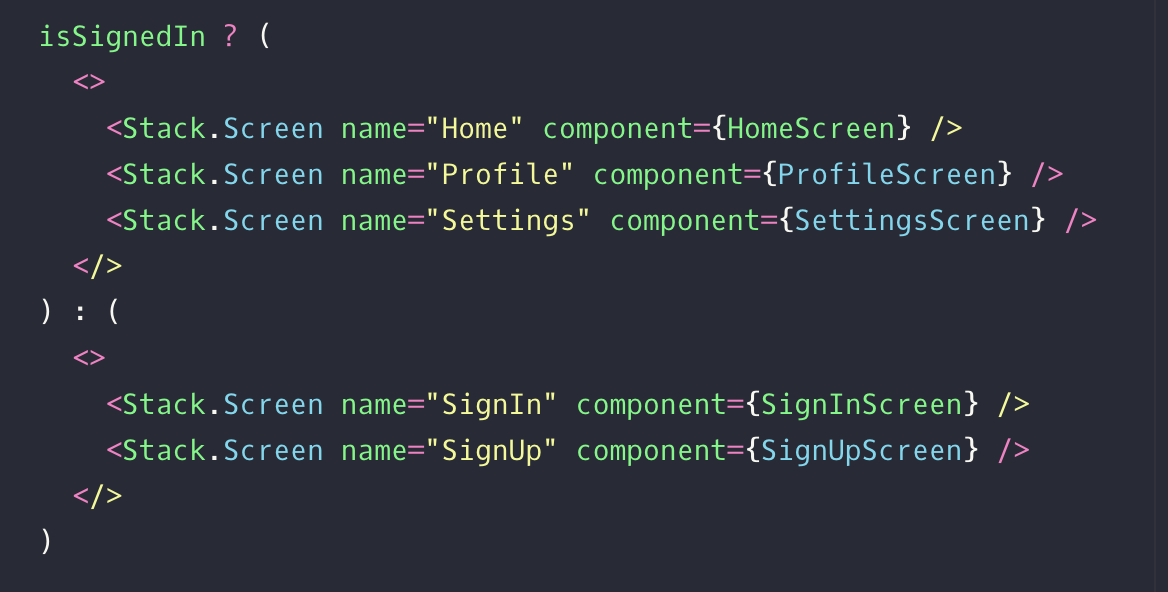
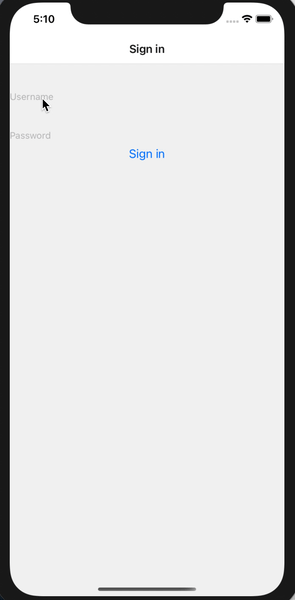
즉, login에 따라 보여주는 screen을 다르게 하는 것!
- 예제
이런 플로우로 진행되는데 loading 컴포넌트가 일단 있고 token의 유무에 따라 다른 컴포넌트를 보여준다! 이제 본격적으로 꿈과 희망의 세계, 로그인과 로그아웃의 나라로 떠나보자.
App.js
function App({navigation}) {
const [state, dispatch] = React.useReducer(
(prevState, action) => {
switch (action.type) {
case 'RESTORE_TOKEN':
return {
...prevState,
userToken: action.token,
isLoading: false,
};
case 'SIGN_IN':
return {
...prevState,
isSignout: false,
userToken: action.token,
};
case 'SIGN_OUT':
return {
...prevState,
isSignout: true,
userToken: null,
};
}
},
{
isLoading: true,
isSignout: false,
userToken: null,
},
);
React.useEffect(() => {
// Fetch the token from storage then navigate to our appropriate place
const bootstrapAsync = async () => {
let userToken;
try {
userToken = await AsyncStorage.getItem('userToken');
} catch (e) {
// Restoring token failed
}
// After restoring token, we may need to validate it in production apps
// This will switch to the App screen or Auth screen and this loading
// screen will be unmounted and thrown away.
dispatch({type: 'RESTORE_TOKEN', token: userToken});
};
bootstrapAsync();
}, []);
const authContext = React.useMemo(
() => ({
signIn: async (data) => {
// In a production app, we need to send some data (usually username, password) to server and get a token
// We will also need to handle errors if sign in failed
// After getting token, we need to persist the token using `AsyncStorage`
// In the example, we'll use a dummy token
dispatch({type: 'SIGN_IN', token: 'dummy-auth-token'});
},
signOut: () => dispatch({type: 'SIGN_OUT'}),
signUp: async (data) => {
// In a production app, we need to send user data to server and get a token
// We will also need to handle errors if sign up failed
// After getting token, we need to persist the token using `AsyncStorage`
// In the example, we'll use a dummy token
dispatch({type: 'SIGN_IN', token: 'dummy-auth-token'});
},
}),
[],
);
return (
<AuthContext.Provider value={authContext}>
<NavigationContainer>
<Stack.Navigator>
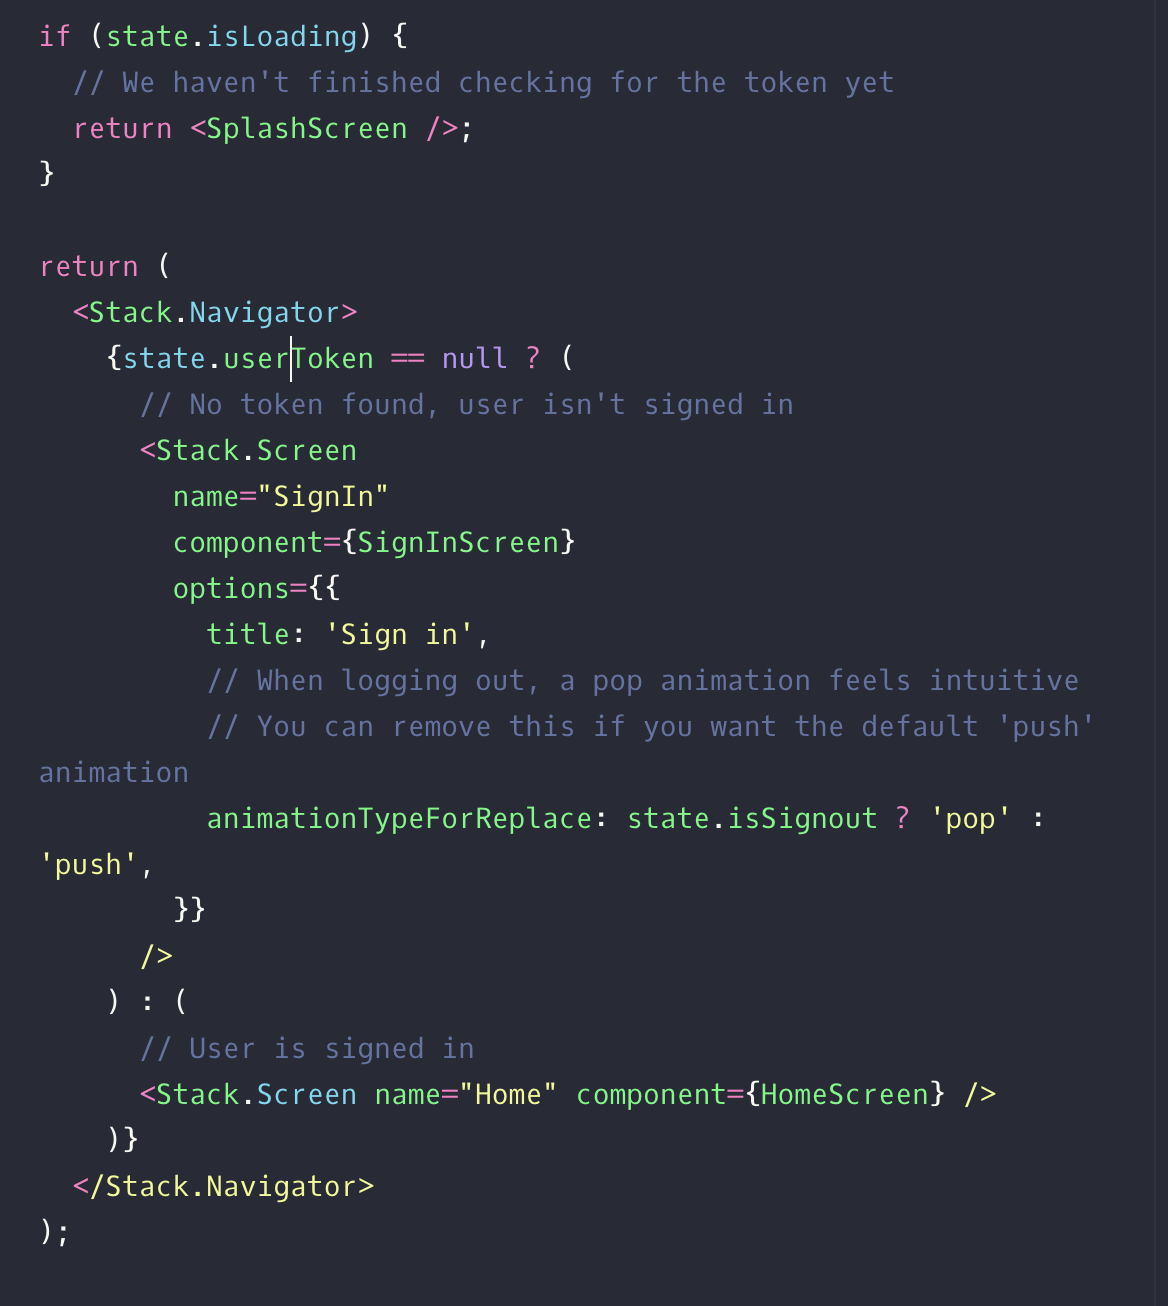
{state.isLoading ? (
// We haven't finished checking for the token yet
<Stack.Screen name="Splash" component={SplashScreen} />
) : state.userToken == null ? (
// No token found, user isn't signed in
<Stack.Screen
name="SignIn"
component={SignInScreen}
options={{
title: 'Sign in',
// When logging out, a pop animation feels intuitive
animationTypeForReplace: state.isSignout ? 'pop' : 'push',
}}
/>
) : (
// User is signed in
<Stack.Screen name="Home" component={HomeScreen} />
)}
</Stack.Navigator>
</NavigationContainer>
</AuthContext.Provider>
);
}어마어마하다. 일단 하나씩 보자!
App.js의 return
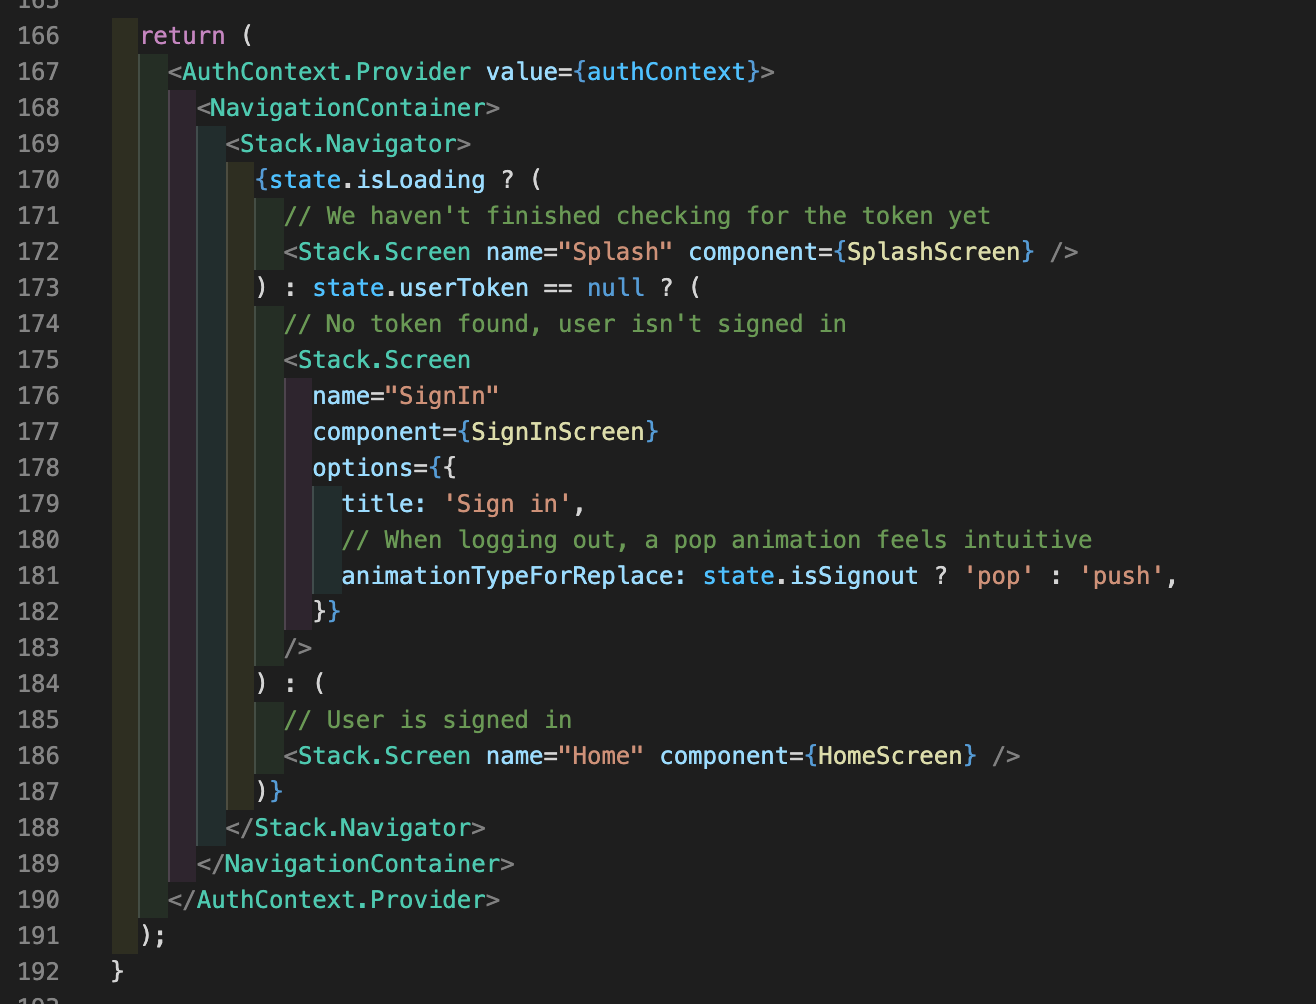
createContext를 이용해서 AuthContext 생성자를 만들고 provide로 전역에 내려준다. screen이 달라져도 어디서든 value를 확인 가능하다. Stack.Navigator에 isLoading 값에 따라 다른 컴포넌트를 보여주는 삼항을 사용한다.
중요한 것은 SignIn 컴포넌트에 animationTypeForReplace라는 프로퍼티인데, sign out을 하면 삼항으로 pop , push를 하는 것으로 보아 무언가 로그인 stack과 관련이 있어 보인다. login이라면 Home으로 넘어가는 것까지 총 삼항을 두 번 썼는데 약간 가독성이 떨어진다!
App.js의 reducer 부분
useReducer로 state와 dispatch를 만들고 switch문을 만든다. 정의한 useReducer()에 switch문을 작성하는 것은 처음 봐서 조금 낯설다.
App.js의 authContext 부분
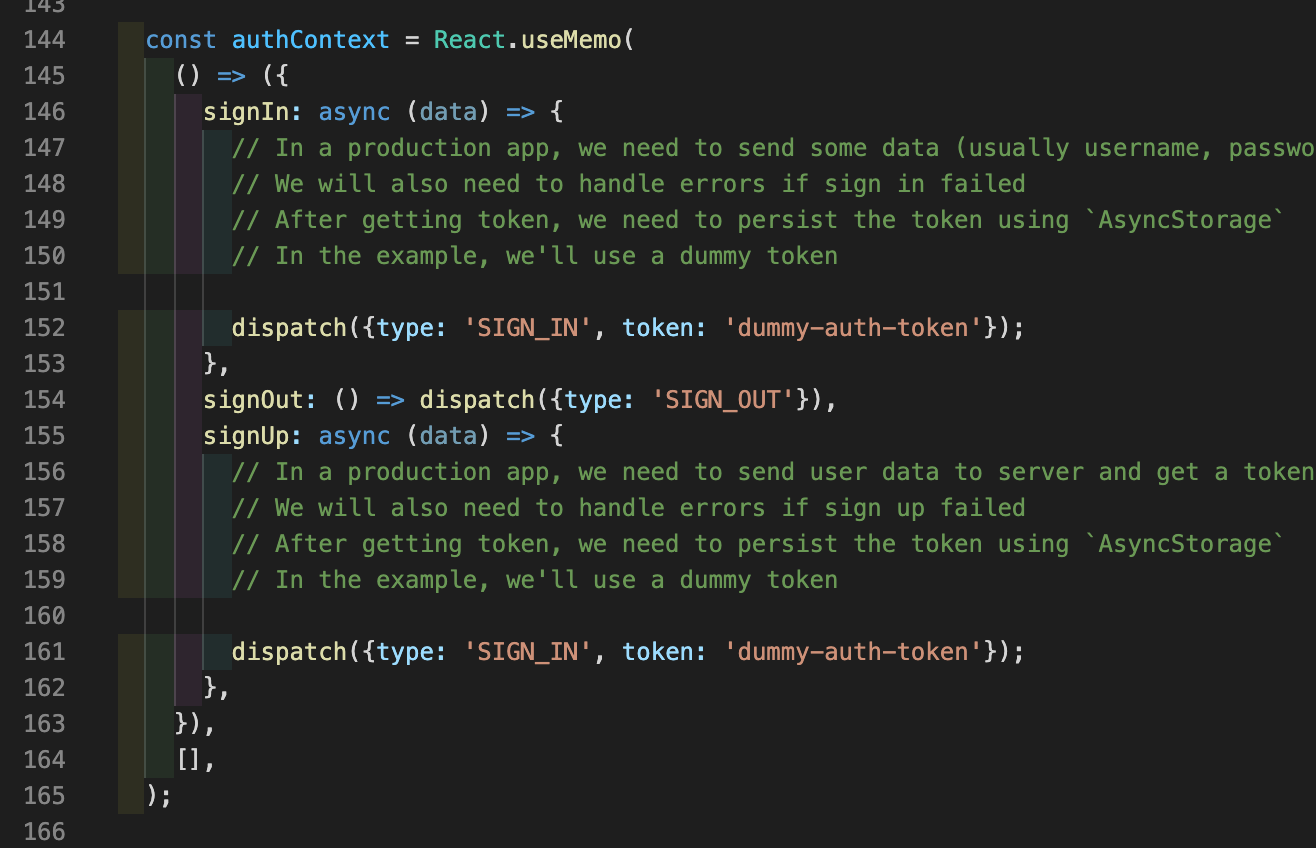
authConext에 useMemo를 할당한다. 인자로 콜백을 주고 signIn, signOut, signUp에 대한 dispatch를 정의한다.
App.js의 useEffect 부분
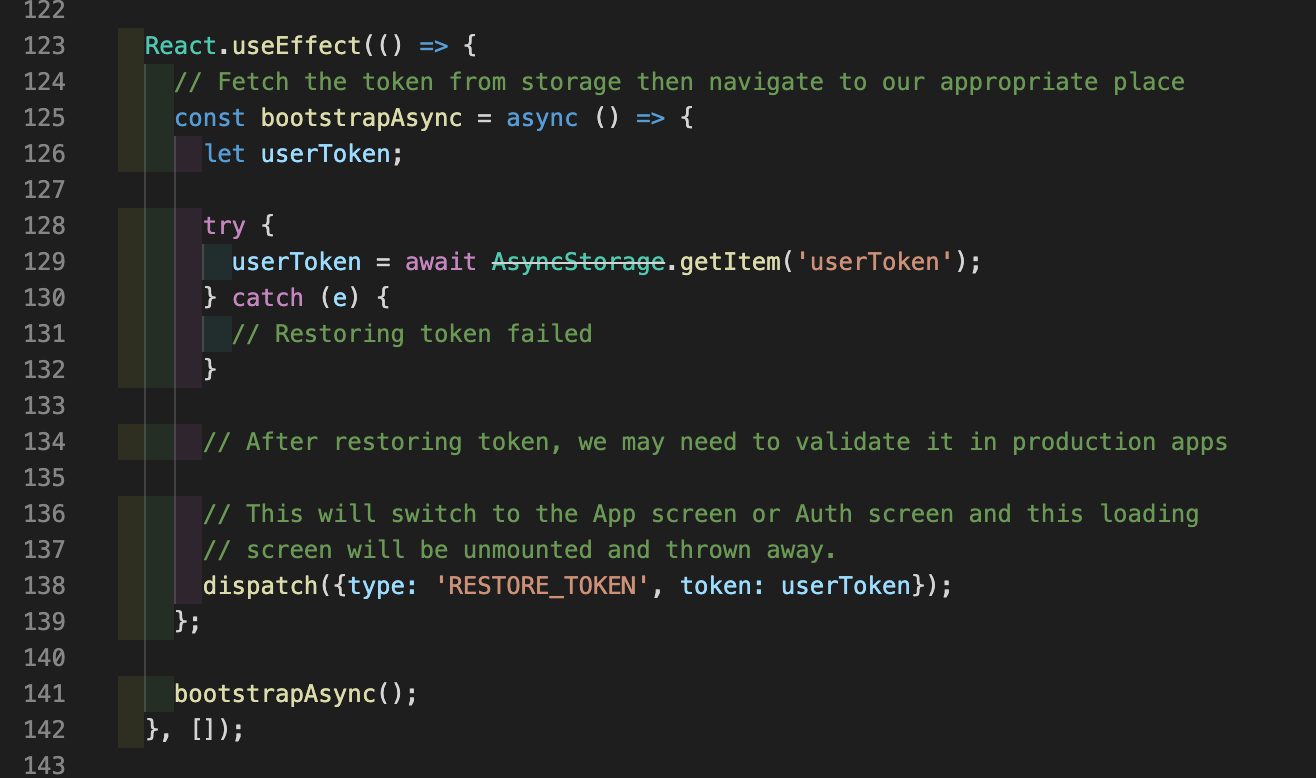
useEffect로 AsyncStorage에 저장된 토큰을 가져온다.
SignIn.js
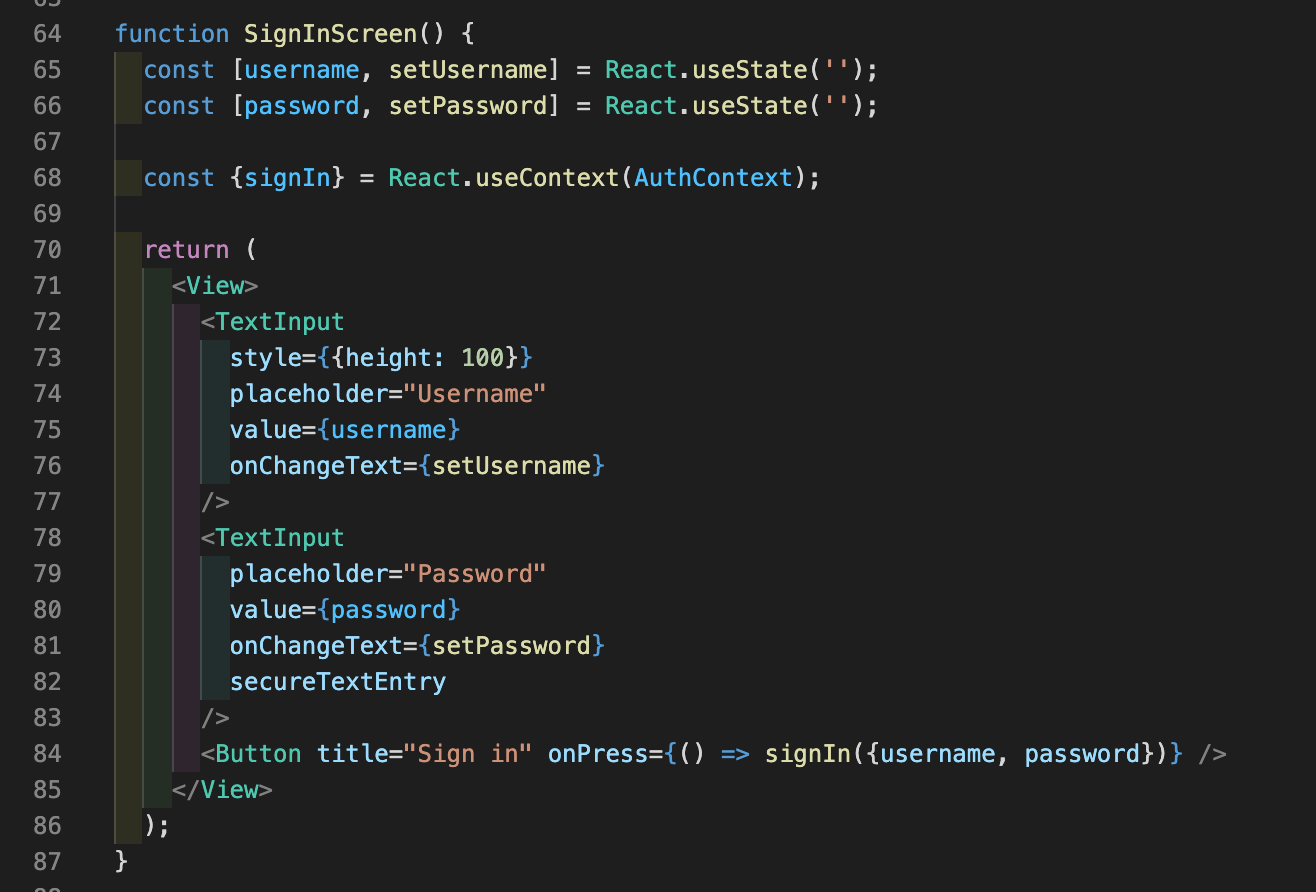
useContext로 가져온 AuthConext에 useState로 저장한 username과 password를 보낸다!
이렇게 로그인/로그아웃 플로우가 진행되는데 무지하게 어렵군. 더 공부하자!
Different status bar configuration based on route
App.js
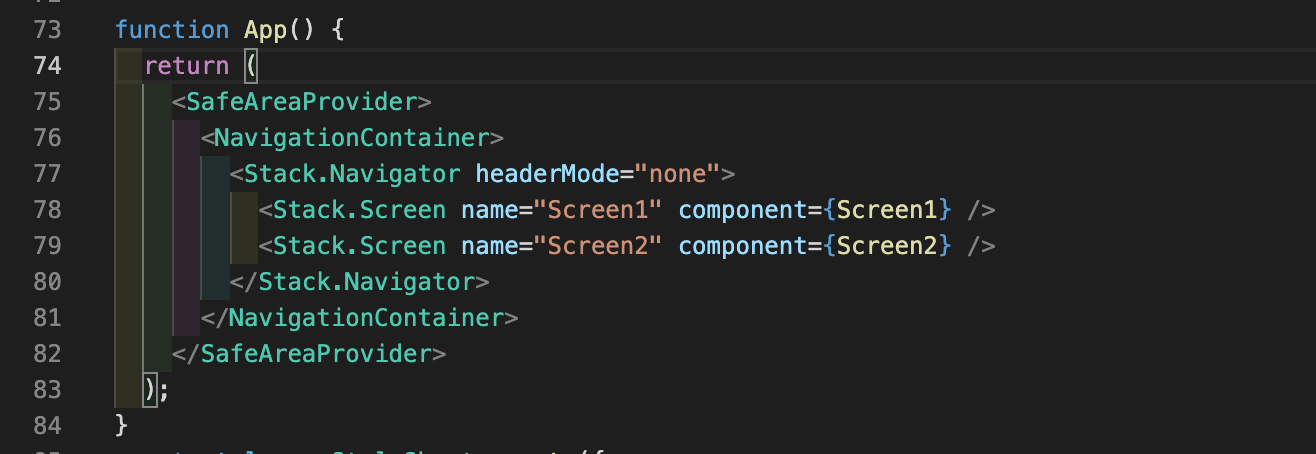
headerMode=none은 header를 숨긴다!
Screen1과 Screen2
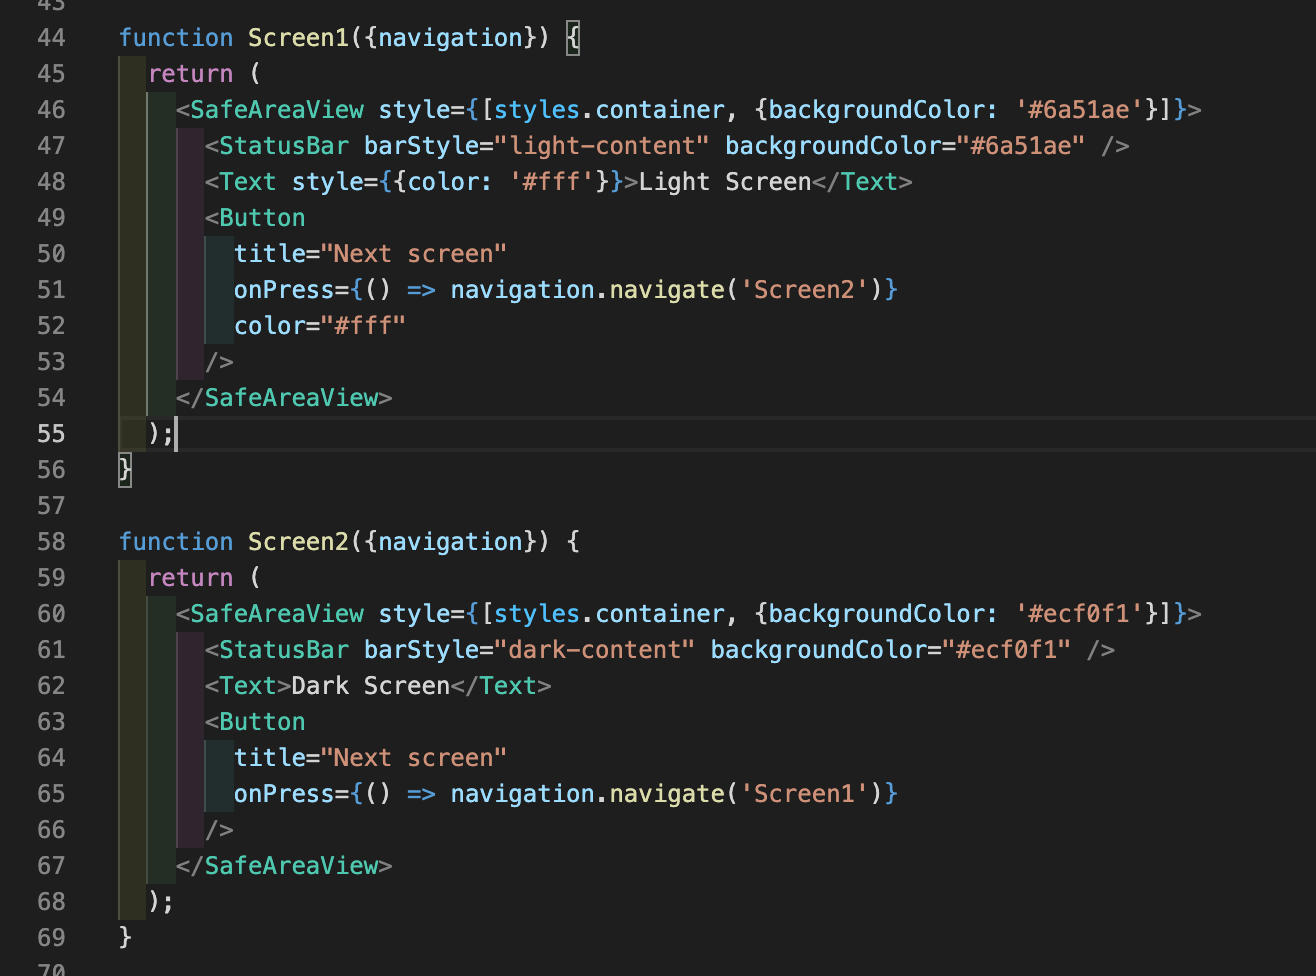
Screen1과 Screen2에 다른 style을 주는 것인데
style={[styles.container, {backgroundColor: '#ecf0f1'}]}
이렇게 인라인으로 개별적인 수정이 가능하다.
Screen options with nested navigators
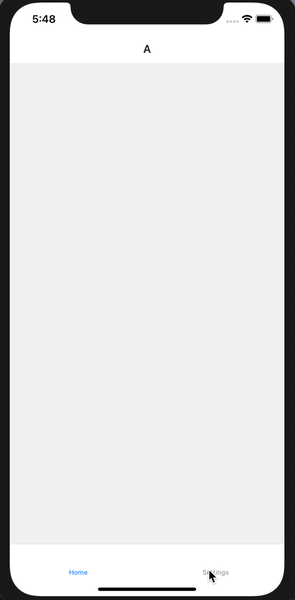

이런 구조의 app이 있다. A,B 컴포넌트는 stack에 있다. 그렇기 때문에 options의 tabBarLabel이 적용되지 않는다. options을 통해서 여러가지를 바꿀 수 있는데 무엇이 있는지 알아보자!!
App.js
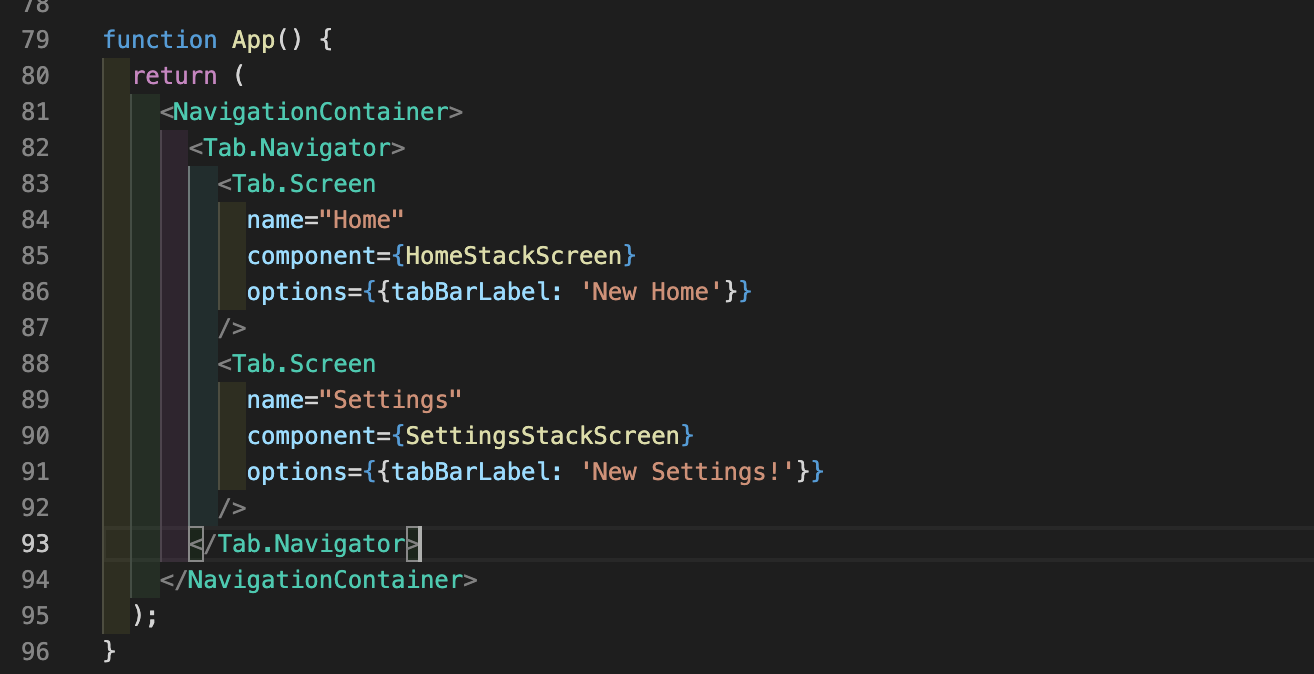
App의 Tab,screen의 options을 수정해서 바꿀 수 있다!
function-after-focusing-screen
(작성중)
