[TIL] 2021 01 07 Thu
1. Javascript 30
Day 5 : Flex Panel Gallery
Day 5는 Flex와 classList.toggle()을 이용해서 패널을 열고 닫는 간단한 DOM을 만드는 미니 프로젝트였다.

1. classList.toggle()
classList.toggle()을 새로 알게 되었다. classList에 찾고자 하는 class가 있는지 체크한 후 없으면 더하고 있으면 제거하는 메소드.
const panels = document.querySelectorAll(".panel");

function toggleOpen() {
  /* classList.toggle : add or remove */
  this.classList.toggle("open");
}

panels.forEach((panel) => panel.addEventListener("click", toggleOpen));
2. flex: 1
CSS에서 "flex: 1" 같이 쓸 수 있다는 것도 처음 알았다! 그리드에서만 쓸 수 있는 줄..
.panels {
  display: flex;
}

.panel {
  flex: 1;
}

.panel.open {
  flex: 5;
}
toggle을 이용해 ".open" 클래스를 토글하여 flex의 사이즈를 1 -> 5 -> 1로 변경할 수 있다. 나머지 패널들은 상대적인 크기로 줄어든다.
Day 6 : AJAX Type Ahead
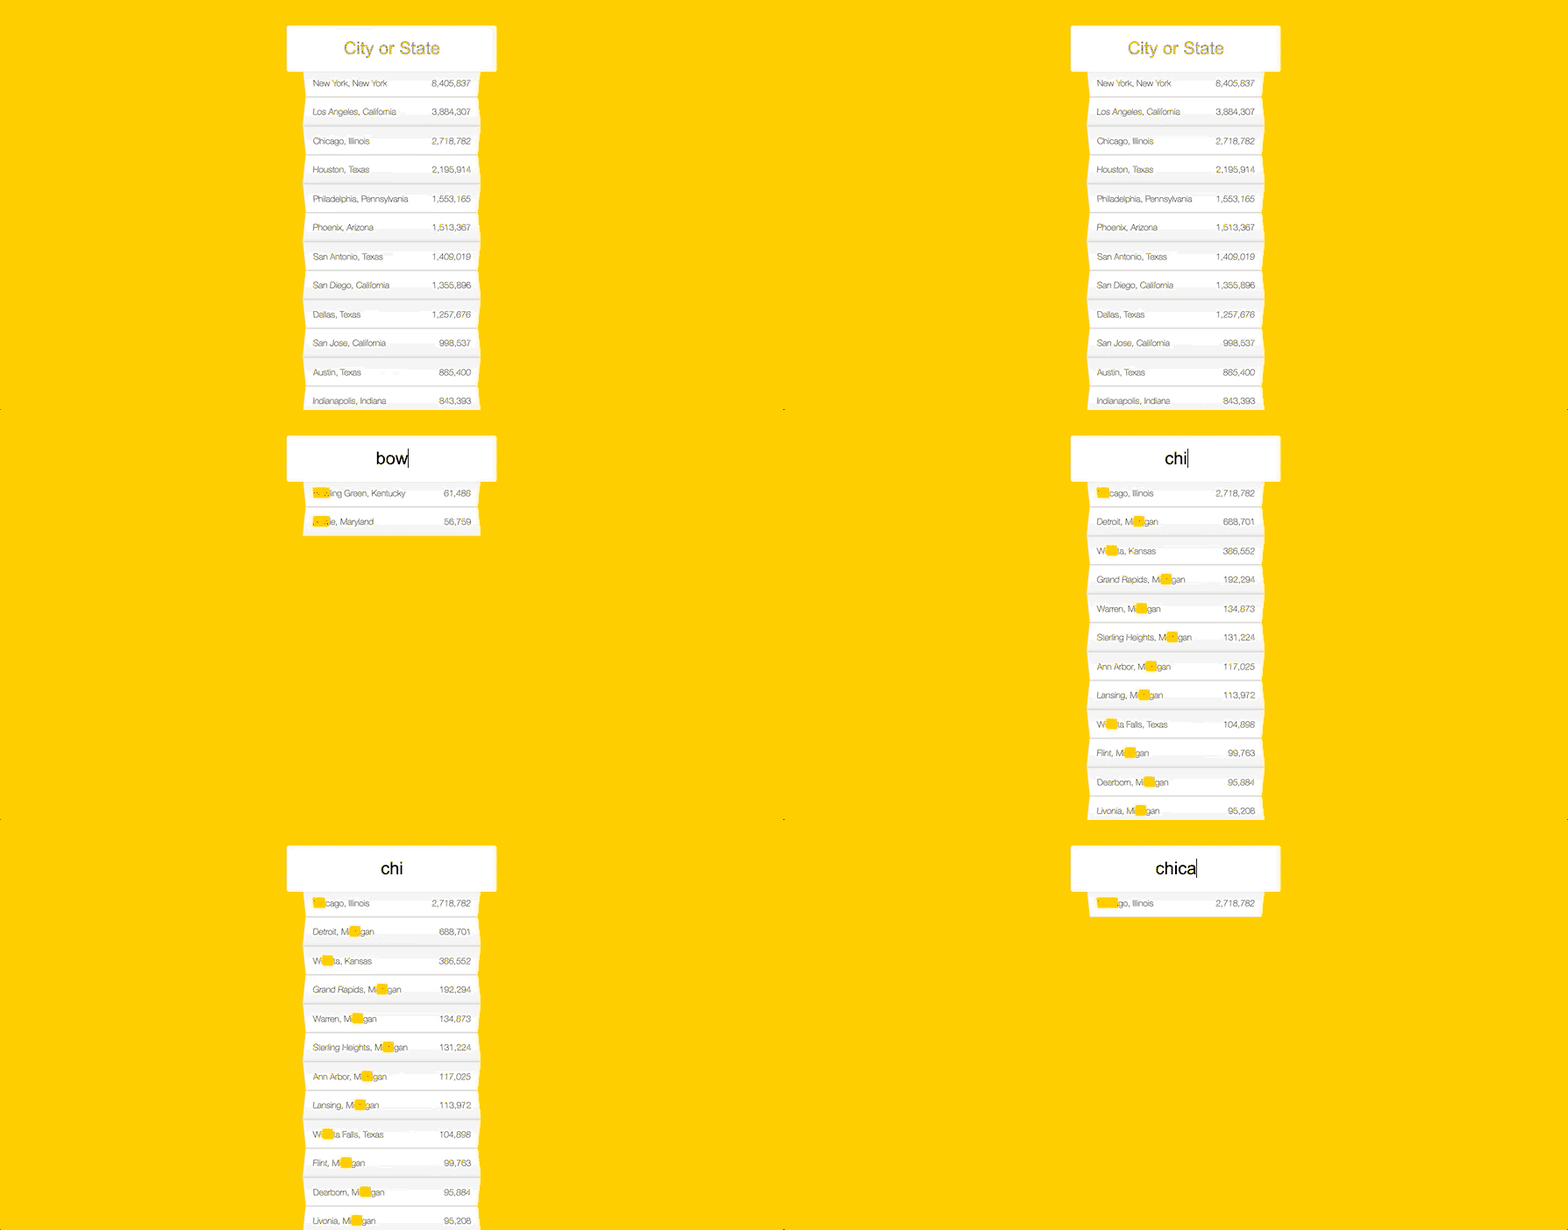
data를 fetch한 후 filter로 검색기능을 구현한 미니 프로젝트.

1. 정규표현식 regex은 정말 넘어야 할 산 같다..
// 숫자에 콤마 찍는 정규표현식 : 2507 -> 2,507
function numberWithCommas(x) {
	return x.toString().replace(/\B(?=(\d{3})+(?!\d))/g, ",");

// 단어를 정규표현식으로 바꾸어 필터링하는 함수
function findMatches(wordToMatch, cities) {
  return cities.filter((place) => {
    // "g"는 전역검색, "i"는 대소문자 구분없는 검색
    const regex = new RegExp(wordToMatch, "gi");
      // match : 대응되는 문자열을 찾는 RegExp 메소드 -> 정보를 가지고 있는 배열 반환
    return place.city.match(regex) || place.state.match(regex);
  });
}
참고자료 : MDN | 정규표현식
2. addEventListener 이벤트 종류
addEventListener에서 사용되는 이벤트 종류도 상세하게 알아야겠다는 생각을 했다. 맨날 "click"만 썼었는데..
// 오늘 사용했던 이벤트 종류

// transitionend : CSS transition이 완료되었을 때
panel.addEventListener("transitionend", toggleActive);

// <input>, <select>, <textarea> 태그에서 유저로 인한 변화가 일어났을 때
searchInput.addEventListener("change", displayMatches);

// keyup: 키 누름이 해제되었을 때
searchInput.addEventListener("keyup", displayMatches);
참고자료: MDN | 이벤트 참조
2. Advanced CSS and Sass Flexbox, Grid, Animations and More!
section 5: Natours Project — Using Advanced CSS and Sass (Part 2)
1. figure 태그

<figure class="story__shape">
  <img src="img.jpg" class="story__img" />
</figure>
<figcaption class="story__caption">This is caption</figcaption>
- figure는 사진, 도표, 삽화, 오디오, 비디오, 코드 등을 담는 컨테이너 역할을 하는 태그
- figcaption은 이에 대한 주석을 담는 태그
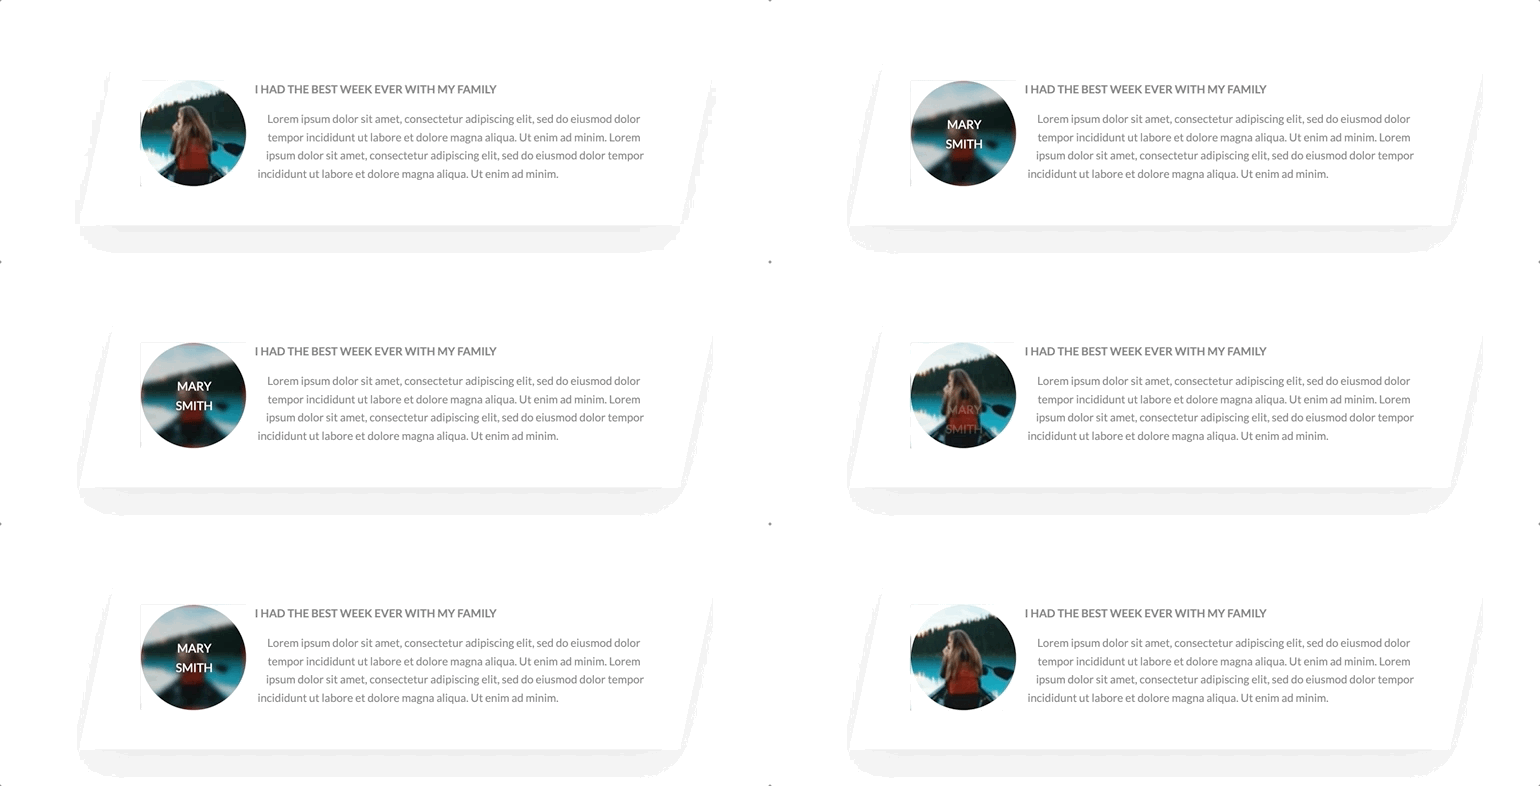
position을 잘 설정하면 figcaption으로 figure을 덮어서 저런 마우스오버 애니메이션도 가능하다! 짱신기
참고자료 : HTML figure tag
2. clip-path & shape-outside

.story {
  &__shape {
    -webkit-shape-outside: circle(50% at 50% 50%); /* firefox*/
    shape-outside: circle(50% at 50% 50%);
    -webkit-clip-path: circle(50% at 50% 50%); /* firefox*/
    clip-path: circle(50% at 50% 50%);
  }
}- clip-path는 다양한 도형을 만들 수 있게 도와주는 CSS 속성이다. 어제는 사다리꼴을 만드는 연습을 했었는데 오늘은 원을 만들었다. 이 사이트에서 clip-path로 다양한 도형을 만들어볼 수 있다.
- shape-outside는 텍스트의 줄바꿈 모양(? 표현을 어떻게 써야할지 모르겠다)을 바꿔주는 속성이다. 위 사진과 같이 동그라미 모양에 따라 텍스트도 동그랗게 줄바꿈하게 만들었다.
참고자료 :
3. filter blur와 brightness
filter를 사용하면 블러와 밝기조절이 가능하다.

.story {
  &__img {
    transform: scale(1.4);
    transition: all 0.5s;
  }
  &:hover &__img {
    transform: scale(1);
    filter: blur(3px) brightness(80%);
  }
}
brightness는 100%를 기준으로 작으면 더 어둡게, 크면 더 밝게 조절이 가능한 듯 하다.
나머지 filter 속성들은 요기 👇
참고자료 : MDN | filter
4. Background Video
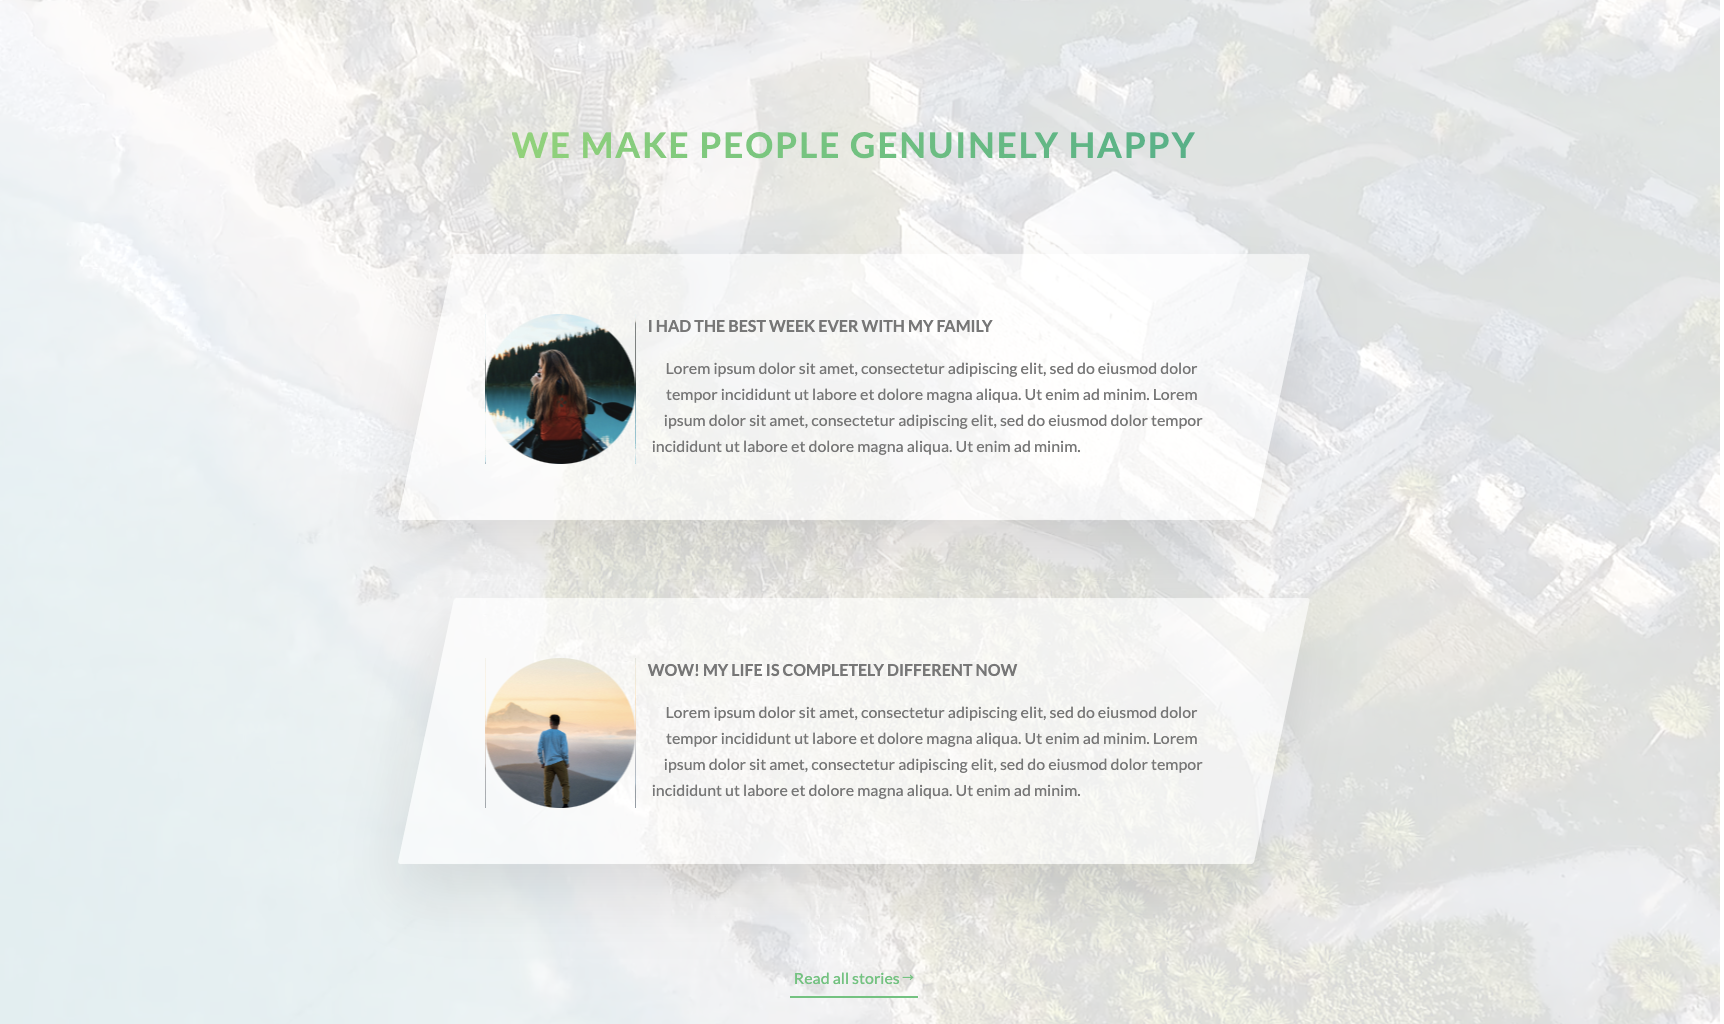
배경으로 비디오 넣기 (gif는 용량이 커서 그냥 사진으로 캡쳐했다. 배경에 보이는 해변이 비디오!)

<section class="section-stories">
  <div class="bg-video">
    <video class="bg-video__content" autoplay muted loop>
      <source src="img/video.mp4" type="video/mp4" />
      <source src="img/video.webm" type="video/webm" />
      Your browser is not supported!
    </video>
  </div>

  <!-- 기타 태그들..-->
</section>
.section-stories {
position: relative;
}
.bg-video {
position: absolute;
top: 0;
left: 0;
height: 100%;
width: 100%;
z-index: -1;
opacity: 0.15;
overflow: hidden;
&__content {
height: 100%;
width: 100%;
object-fit: cover;
}
}
오픈소스 비디오 : coverr
3. JavaScript Algorithms and Data Structures Masterclass
오늘은 bubble sort, insertion sort, selection sort를 혼자 처음부터 구현하고 말로 설명하는 시간을 가졌다. 말로 설명하는 건 여전히 버벅버벅.
👇 구현한 코드는 블로깅까지 완료
- [Javascript] Bubble Sort (버블 정렬) 구현 코드
- [Javascript] Selection Sort (선택 정렬) 구현 코드
- [Javascript] Insertion Sort (삽입 정렬) 구현 코드
4. WOD project
2인 프로젝트 세팅을 오늘부터 시작하..려고 했으나 git에서 막혔다ㅋㅋㅋㅋ git의 submodule이라는 기능을 처음 접하게 되어 사용해보려고 시도했다. 다만 서브모듈에서 어떻게 브랜치를 생성하고 커밋, 푸시를 하는지를 몰라 몇 번의 시행착오를 겪다가 해결하지 못하고 오늘의 일정을 마쳤다.
다음 모임 때까지 각자 서브모듈에 대해 공부하기로.
1. Git Setup
- git submodule add <레포주소> <폴더이름(지정)>
- git submodule init && git submodule update
참고자료
- git push origin --delete branch (브랜치 삭제는 git branch -d라고 생각했는데..)
