개요
- Git 을 오랜만에 접하다보니, 다시 리마인드차 내용 정리와 포스팅을 작성하였다.
- Pull Request 를 위해서 아래와 같은 순서로 진행을 하였다. 먼저 해당 포스팅은 Fork 기능을 사용하지 않고, 하나의 저장소를 통해 PR 하는 방법을 정리하였다.
- 순서
- 1. clone or remote 설정
- 2. branch 생성
- 3. 내용 추가 및 수정 후 add, commit, push 진행
- 4. Github 저장소에서 Pull Request 생성
- 5. 코드 리뷰 & Merge Pull Request
- 6. Merge 이후 Branch 삭제 및 로컬저장소의 Branch 동기화
1. clone or remote 설정
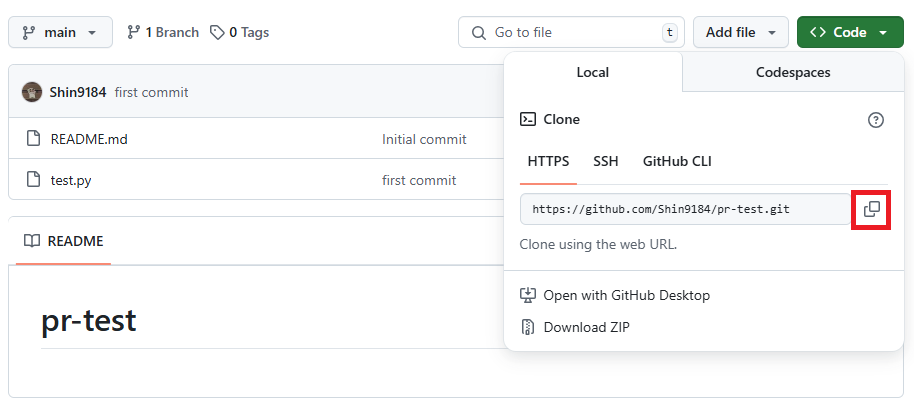
특정 저장소의 파일을 clone 하거나 링크를 복사하여 아래와 같은 명령어로 로컬 저장소에 원격 저장소를 추가한다.
작성자는 아래와 같이 clone 을 하여 진행을 하였다.
git clone https://github.com/Shin9184/pr-test.gitor
# 디렉토리 생성
mkdir pr-test
# README.md 추가
vi README.md
git add . or git add README.md
git commit -m "first commit"
# git branch 확인
git branch
* master
# git remote add <원격별칭> <url>
git remote add pr https://github.com/Shin9184/pr-test.git
# 원격 저장소 확인
git remote -v
pr     https://github.com/Shin9184/ttt.git (fetch)
pr     https://github.com/Shin9184/ttt.git (push)
# 원격저장소에 push
git push -u pr master
만약, 신규 원격 저장소를 만들기만 했다면 위와 같이 로컬저장소 초기화, 저장소 연결과 같은 설정을 진행해야한다.
2. branch 생성
# develop 이라는 이름의 branch를 생성한다.
git checkout -b feature/test
Switched to a new branch 'feature/test'

# 아래와 같이 기본적으로 main 이 기본이며, branch 를 이동했기에 feature/test 인 것을 확인
git branch
* feature/test
  main
위 순서처럼 자신의 로컬 컴퓨터에서 코드를 추가하는 작업은 branch를 만들어서 진행한다.
3. 내용 추가 및 수정 후 add, commit, push 진행
# test.py 파일의 내용
print('main branch')
현재 코드에서 main, feature/test 에서는 test.py 파일의 내용은 위와 같이 되어 있다.
feature branch 에서 내용을 추가하도록 한다.
# feature/test 브렌치에서 test.py 파일의 내용을 수정
print('main branch')

print('feature/test branch')
내용을 변경하였고, 작업이 완료가 되었다면, add, commit, push 를 통해서 원격 저장소 수정사항을 반영한다.
# add 를 통해 staging area 에 저장
git add .

# commit 을 통해 git repository 에 저장
git commit -m "feature/test branch 에서 작업함"
[feature/test e65b7a1] feature/test branch 에서 작업함
 1 file changed, 3 insertions(+), 1 deletion(-)

# push 를 통해 remote repository 에 저장
git push origin feature/test
Enumerating objects: 5, done.
Counting objects: 100% (5/5), done.
Delta compression using up to 16 threads
Compressing objects: 100% (3/3), done.
Writing objects: 100% (3/3), 345 bytes | 345.00 KiB/s, done.
Total 3 (delta 0), reused 0 (delta 0), pack-reused 0 (from 0)
remote:
remote: Create a pull request for 'feature/test' on GitHub by visiting:
remote:      https://github.com/Shin9184/pr-test/pull/new/feature/test
remote:
To https://github.com/Shin9184/pr-test.git
 * [new branch]      feature/test -> feature/test
4. Github 저장소에서 Pull Request 생성
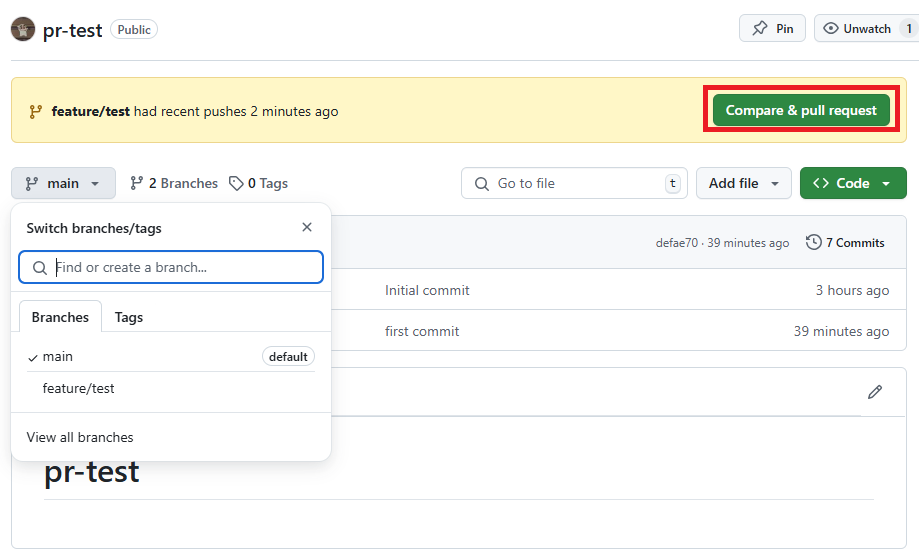
push 완료가 되었다면 깃허브 저장소에서 Compare & pull reqeust 버튼이 활성화 되어 있을 것이고, 생성한 branch 도 확인이 될 것이다.
해당 버튼을 클릭하여 메세지등 작성하고 PR 을 생성한다.
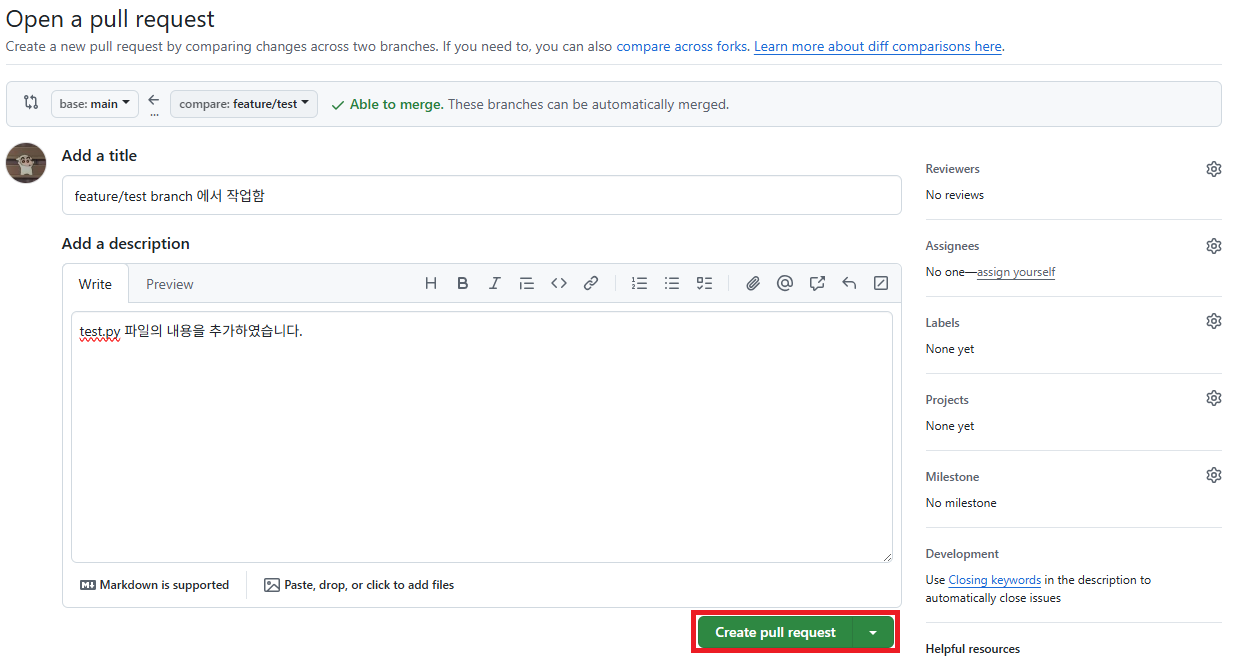
내용 작성을 완료 하였다면 Create pull request 버튼을 클릭한다.
5. 코드 리뷰 & Merge Pull Request
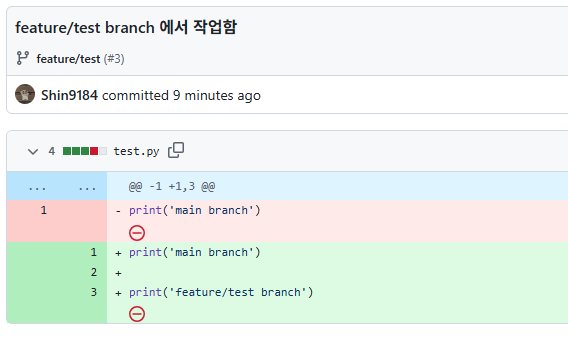
commit 한 내역에서 변경한 사항을 확인을 한다.
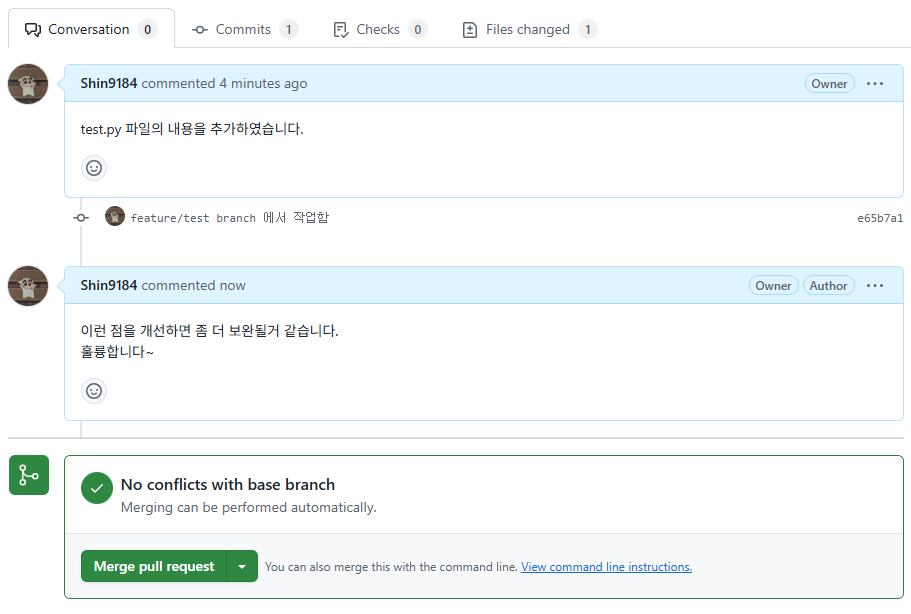
Request 에 대한 내용을 검토하여 코멘트를 추가하거나 Merge pull request 를 클릭한다.
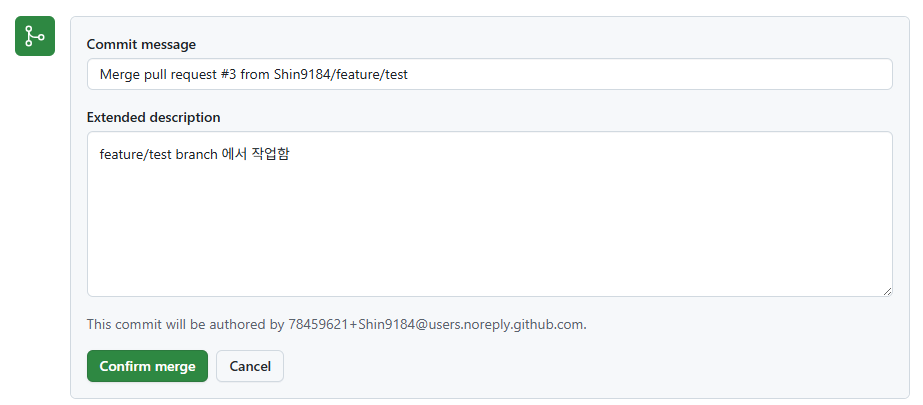
리뷰가 끝난 후 Confirm merge 를 클릭한다.
Merge 작업이 끝났다면 신규로 생성한 branch 는 삭제할지 여부를 묻고, 작성자는 삭제를 하도록 한다.

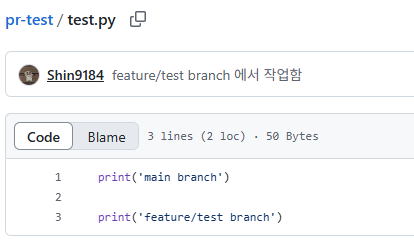
main branch 에서 Merge 가 끝나면 위와 같이 변경된 내용을 확인할 수 있다.
6. Merge 이후 Branch 삭제 및 로컬저장소의 Branch 동기화
# 현재 branch 확인
git branch
* feature/test
  main

# main branch 이동
git checkout main

# 원격 저장소의 내용 pull
git pull origin main

# 생성한 branch 삭제
git branch -d feature/test
Deleted branch feature/test (was e65b7a1).

# 로컬에 존재하는 branch 확인
git branch -r
  origin/HEAD -> origin/main
  origin/feature/test
  origin/main

# 존재하지 않는 branch삭제
git remote prune origin
Pruning origin
URL: https://github.com/Shin9184/pr-test.git
 * [pruned] origin/feature/test

# 재확인
git branch -r
  origin/HEAD -> origin/main
  origin/main
마무리
Git 을 자주 사용하지 않아, 다시 수행하면서 살짝의 어려움이 있었지만 구글링을 금방 금방 찾으면서 진행을 하여 PR 을 생성 후 Merge 까지 진행할 수 있었다.
관련해서 freecodecamp 해당 링크에서 많이 참고하면서 작성하였기에, 추가적인 부분은 해당 포스팅을 확인하는 것도 좋을것 같다.