개요
- Grafana 에서는 Cloudwatch 에 대한 Plugin 을 기본적으로 지원하며, AWS 의 CloudWatch Metric과 Cloudwatch Log group의 내용을 Grafana 대시보드로 구현할 수 있다.
AWS
# Trust Relationship
{
    "Version": "2012-10-17",
    "Statement": [
        {
            "Effect": "Allow",
            "Principal": {
	            "AWS": "arn:aws:iam::<User Account>:role/<Role Name>"
            },
            "Action": "sts:AssumeRole",
            "Condition": {
                "StringEquals": {
                    "sts:ExternalId": "<unique ID>"
                }
            }
        }
    ]
}

# Policy
{
    "Version": "2012-10-17",
    "Statement": [
        {
            "Sid": "AllowReadingMetricsFromCloudWatch",
            "Effect": "Allow",
            "Action": [
                "cloudwatch:DescribeAlarmsForMetric",
                "cloudwatch:DescribeAlarmHistory",
                "cloudwatch:DescribeAlarms",
                "cloudwatch:ListMetrics",
                "cloudwatch:GetMetricData",
                "cloudwatch:GetInsightRuleReport"
            ],
            "Resource": "*"
        },
        {
            "Sid": "AllowReadingResourceMetricsFromPerformanceInsights",
            "Effect": "Allow",
            "Action": "pi:GetResourceMetrics",
            "Resource": "*"
        },
        {
            "Sid": "AllowReadingLogsFromCloudWatch",
            "Effect": "Allow",
            "Action": [
                "logs:DescribeLogGroups",
                "logs:GetLogGroupFields",
                "logs:StartQuery",
                "logs:StopQuery",
                "logs:GetQueryResults",
                "logs:GetLogEvents"
            ],
            "Resource": "*"
        },
        {
            "Sid": "AllowReadingTagsInstancesRegionsFromEC2",
            "Effect": "Allow",
            "Action": [
                "ec2:DescribeTags",
                "ec2:DescribeInstances",
                "ec2:DescribeRegions"
            ],
            "Resource": "*"
        },
        {
            "Sid": "AllowReadingResourcesForTags",
            "Effect": "Allow",
            "Action": "tag:GetResources",
            "Resource": "*"
        }
    ]
}
AWS 의 IAM 에서 나열된 신뢰관계와 정책을 가진 Role 을 생성하도록 한다.
User Account 에는 Cloudwatch Metric 을 확인할 Account 를 입력한다.
Role Name 은 위 신뢰관계와 정책을 가진 Role 을 입력한다.
unique ID 는 임의적인 문자열을 입력해도 무방하다.
좀 더 자세한 정책은 아래의 링크를 참고하면 좋을 것 같다.
Amazon CloudWatch data source 해당 링크에서는 Metric or Log or Metric&Log 를 함께 확인이 필요한 권한이 정리되어 있다.
Grafana

Home > Connection > Add new connection > Cloudwatch
Add new data source 를 클릭하여 Grafana 와 연동을 진행할 수 있다.
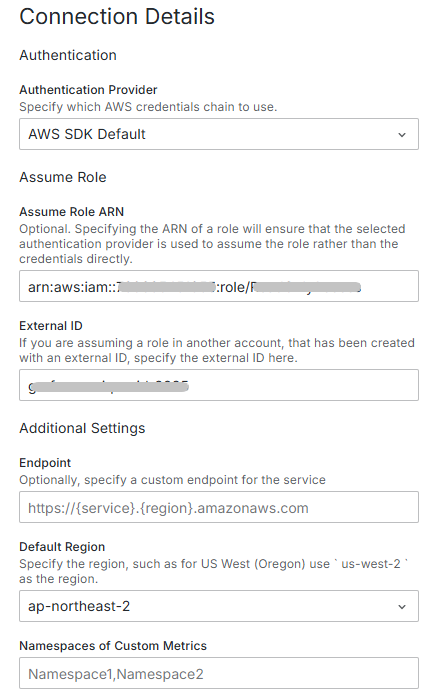
Authentication Provider 에서는 AWS SDK 를 선택하였으며, AccessKey 방식으로도 가능하지만, Role 방법으로 진행을 하도록 한다.
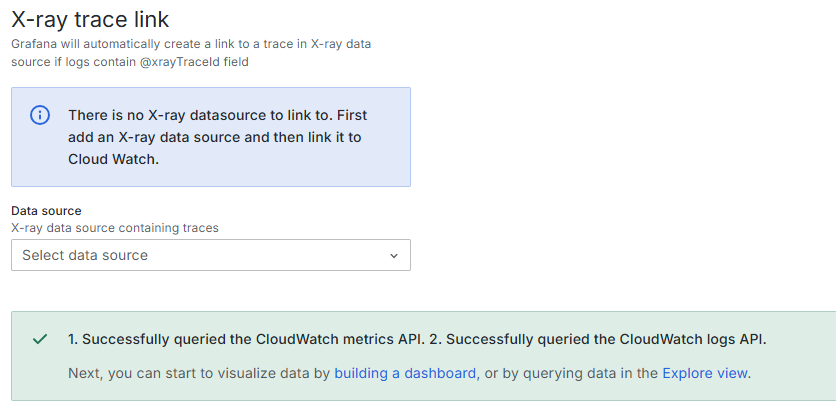
정상적인 설정이 완료되었다면 Successfully 를 확인할 수 있으며, Cloudwatch 의 데이터를 가져올 수 있다.
결과
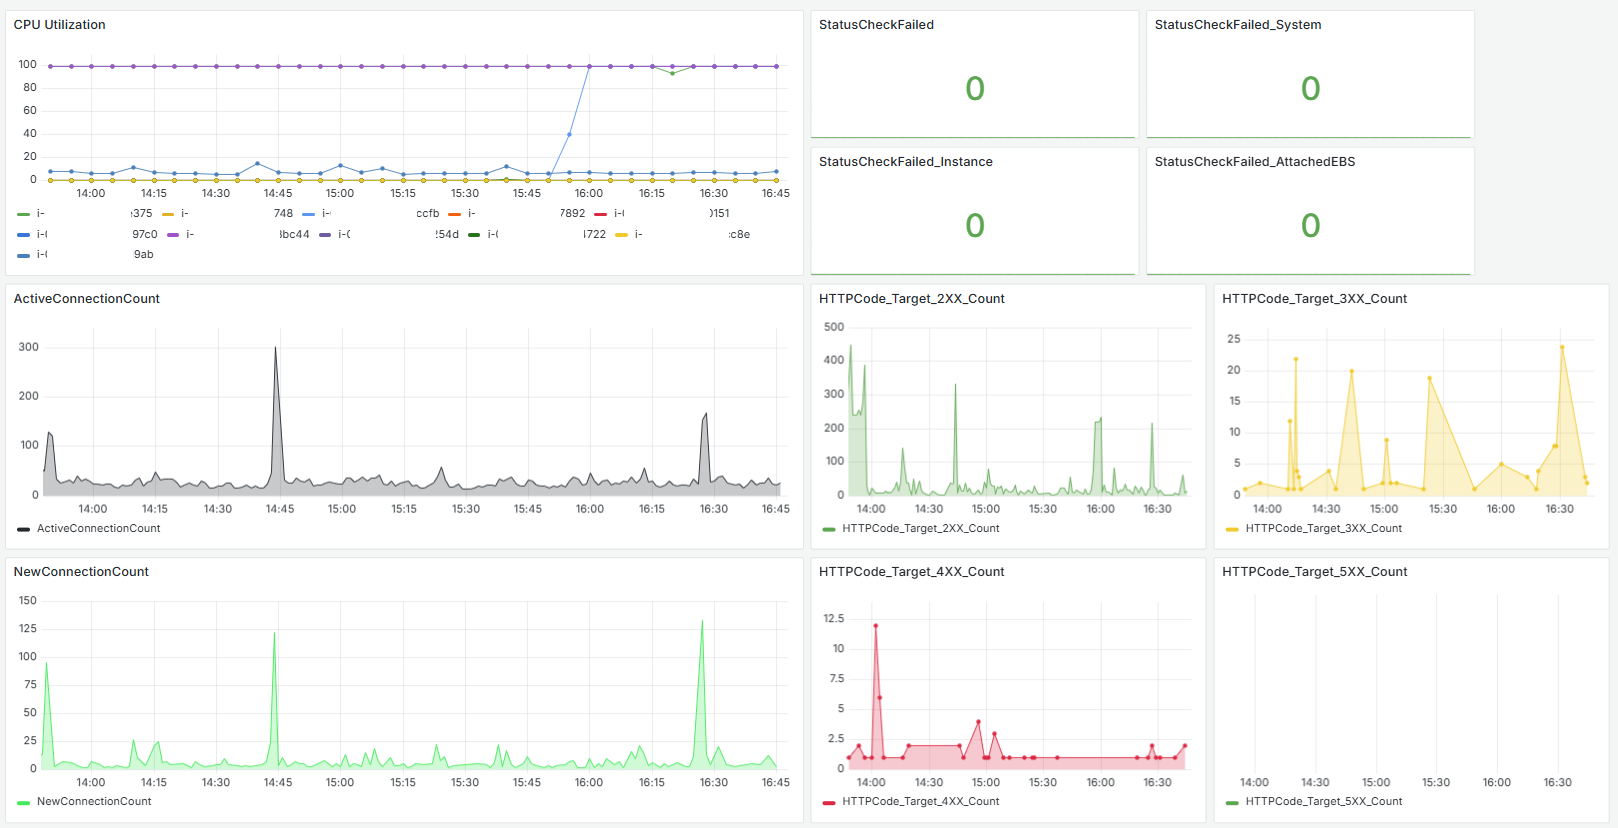
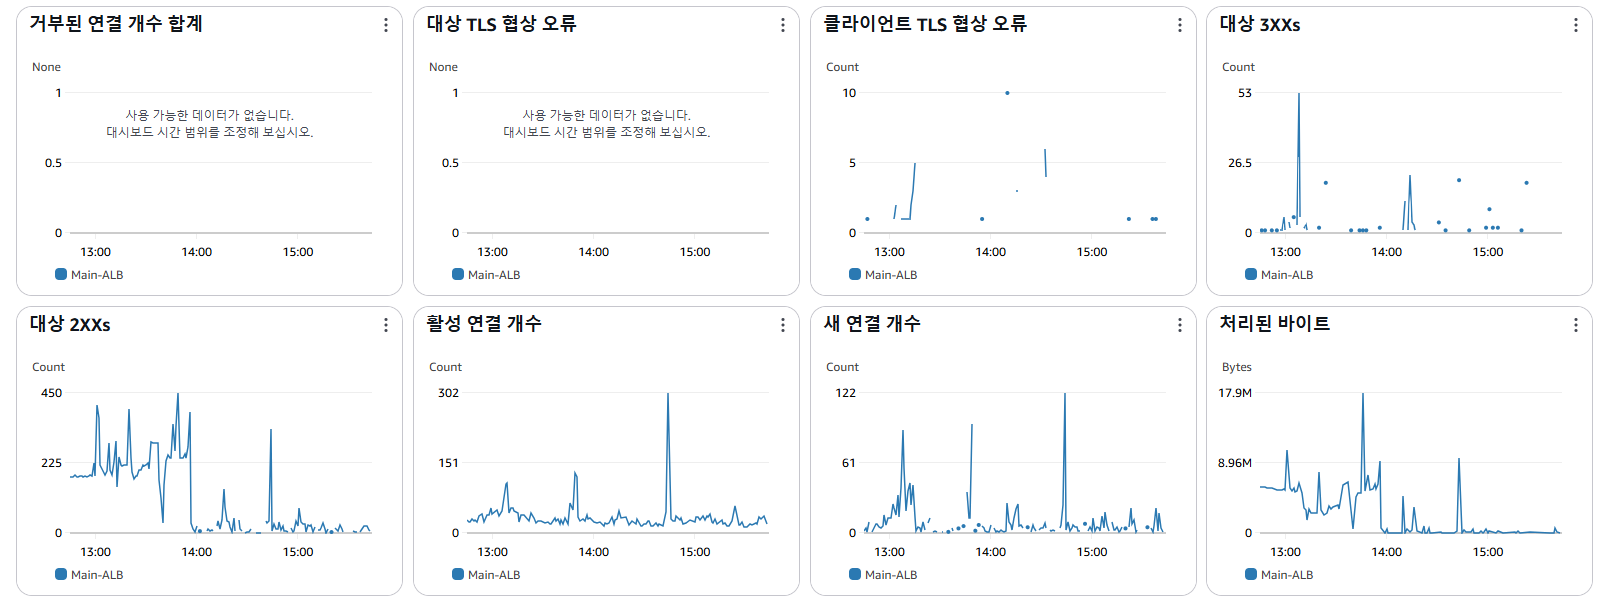
Grafana 에서 확인된 Metric 과 AWS 에서 확인되는 Metric 을 비교 시 동일한 것을 알 수 있었다.
이를 통해 필요한 메트릭들만 나열하여 업무에 도움이 될 것 같다.

조금씩 성장하는 DevOps 엔지니어가 되겠습니다. 😄