
이번에 동계 현장 실습 지원한 곳에서 코딩 과제를 받게 되었다. 과제 내용은 Slash Command를 통해 통신하는 봇을 만드는 것 이였다.
discord.js
디스코드 js는 디스코드 API와 상호작용할 수 있는 node js 모듈이다. 해당 과제는 기업이 node js를 쓰기 때문에 이를 통해 구현하였다. 참고로 한국어 문서도 있긴 한데 최신 버전까지 업데이트가 되지 않은 것 같다. 중요하고 핵심적인 부분이 업데이트 되지 않은 곳이 많기 때문에 꼭 영문 공식 문서를 읽는 것을 추천한다.
또한 공식 문서에 Guide라는 항목이 있는데 나는 여기를 보면서 첨고하여 코드를 작성했다.
공식문서
가이드
초기 설정
디스코드 개발자
해당 링크에서 Application을 생성해주어야 한다. 그러면 General Information 탭에 Public key와 Application ID를 복사해서 env파일에 저장한다. 그런 다음 bot 탭에 들어가서 Add Bot 버튼을 눌러주도록 하자
그런다음 봇의 Token을 복사해 env파일에 넣는다. 안보이면 RESET TOKEN을 눌러주면 된다.

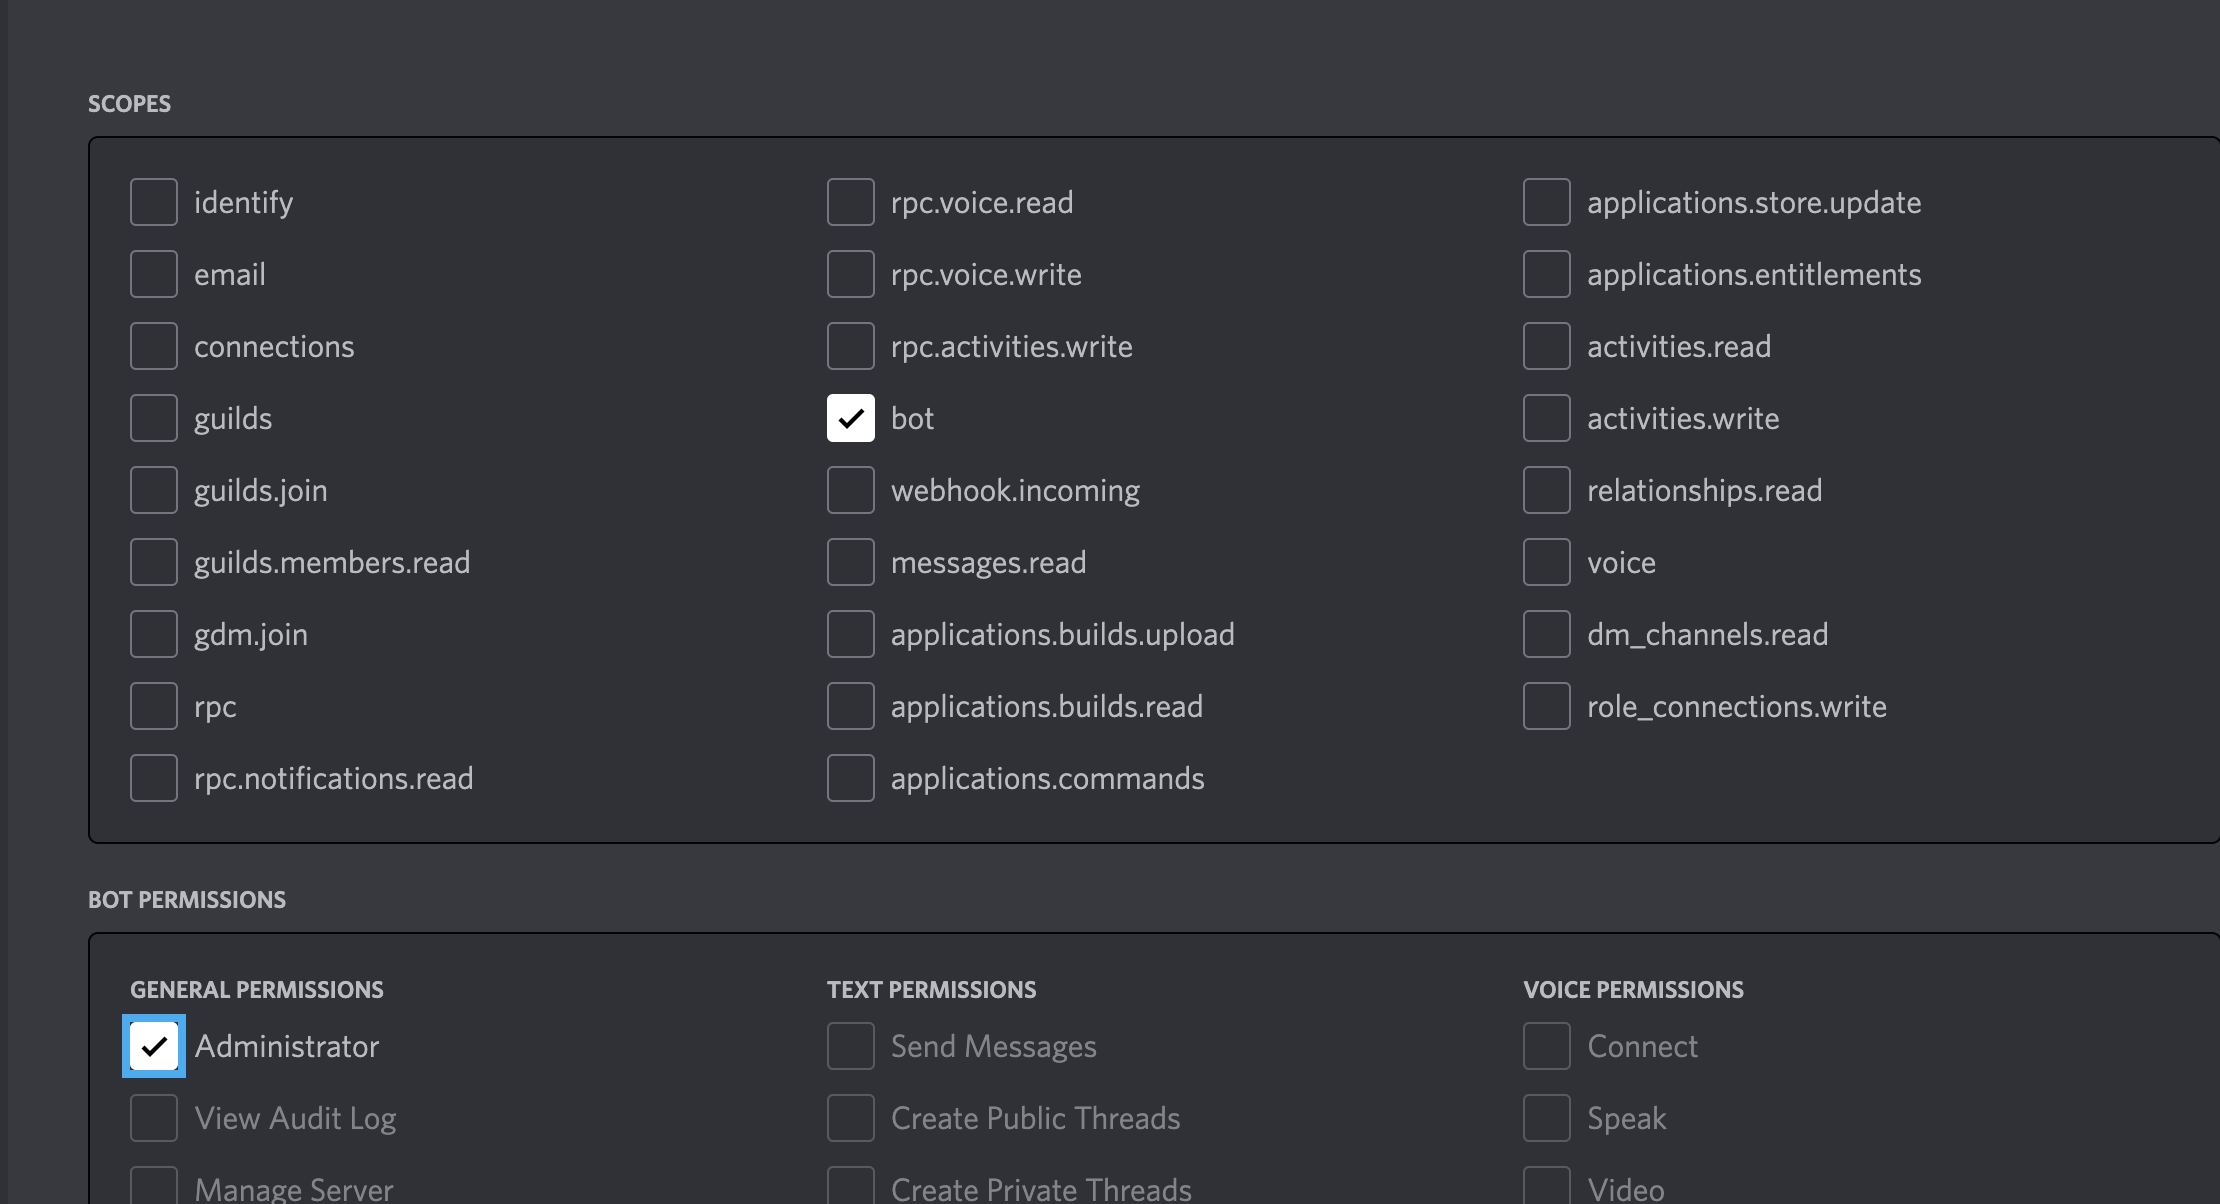
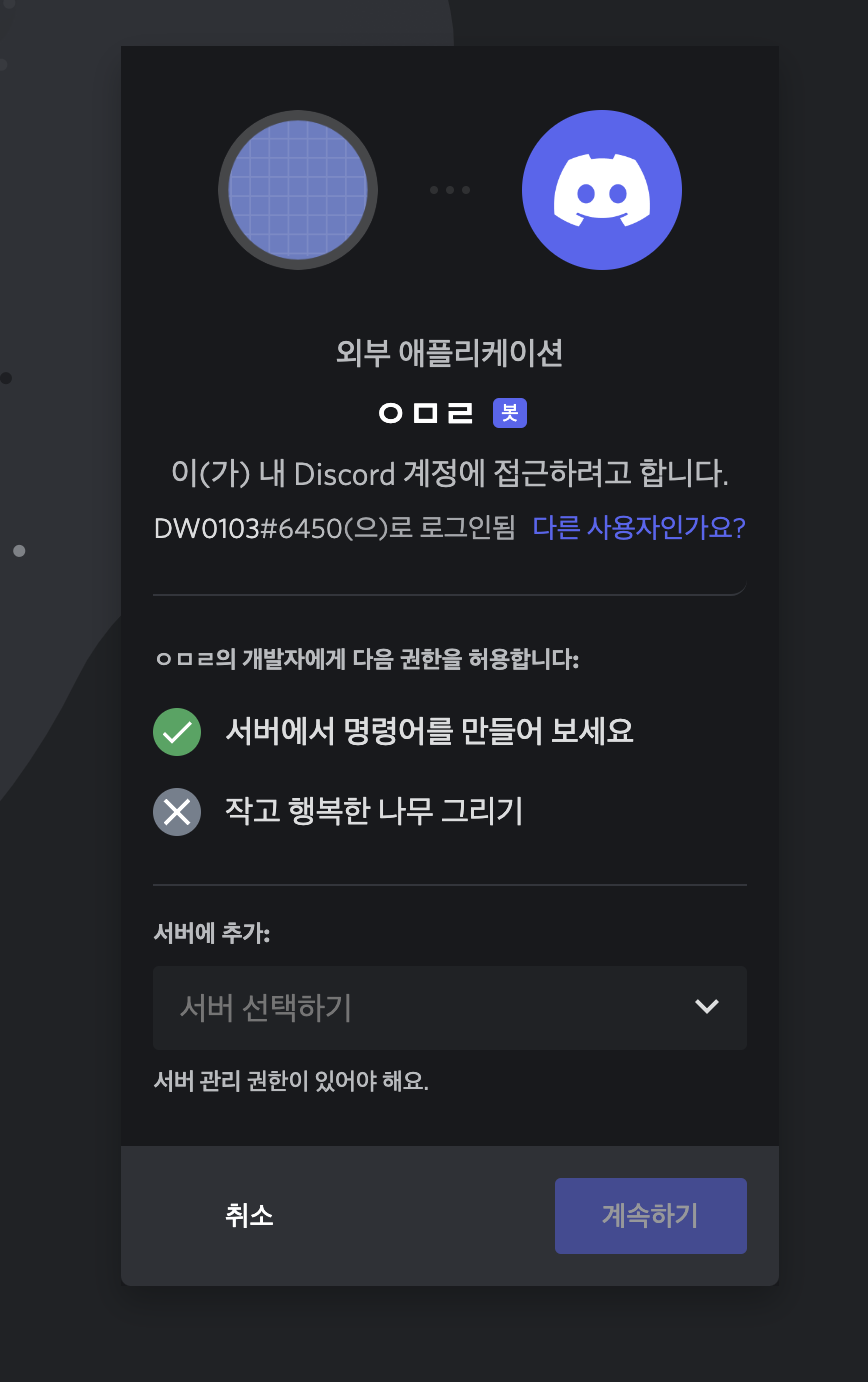
또한 OAuth2 탭에 가서 권한 설정 후 General Url을 복사해 브라우저에서 붙여놓기 하여 특정 서버에서 테스트를 진행하면 된다.(물론 자신이 관리자 계정인 서버에서 진행해야 한다.)
동작 과정
- deploy-command.js로 커맨드 등록
- index.js에서는 컨트롤러 역할을 하며 커맨드 입력이 되면 특정 커맨드와 매칭되는 핸들러를 찾아주어서 실행 하는 것이다.
- index.js가 실시간 실행되어야 하므로 EC2에서 인스턴스를 만들던가 아니면 로컬에서 계속 키고 있어야 한다.
index.js
const {Client, Events, Collection, GatewayIntentBits} = require('discord.js');
const dotenv = require('dotenv');
const fs = require('node:fs');
const path = require('node:path');
const init = require("./deploy-commands.js");

init.deployCommands(); // deploy-commands 실행

dotenv.config(); //env 파일 사용
const client = new Client({intents:[GatewayIntentBits.Guilds]});
client.commands = new Collection();


/*
특정 폴더의 있는 command js 파일들을 다 찾아 컨트롤할 수 있게 만드는 부분이다.
*/
const commandsPath = path.join(__dirname, 'commands');
const commandFiles = fs.readdirSync(commandsPath).filter(file => file.endsWith('.js'));

for (const file of commandFiles) {
    const filePath = path.join(commandsPath, file);
    const command = require(filePath);

    if('data' in command && 'execute' in command) {
        client.commands.set(command.data.name, command);
    } else {
        console.log(`[WARNING] The command at ${filePath} is missing a required "data" or "execute" property.`)
    }
}

// 봇 서버 실행시 한 번만 실행(준비메서드)
client.once(Events.ClientReady, c => {
    console.log(`Ready! Logged in as ${c.user.tag}`);
});

// 상호작용이 온다면
client.on(Events.InteractionCreate, async interaction => {
    if (!interaction.isChatInputCommand()) return;

    const command = interaction.client.commands.get(interaction.commandName);

    if (!command) {
        console.error(`No command matching ${interaction.commandName} was found.`)
    }

    try {
        await command.execute(interaction);
    } catch (error) {
        console.error(error);
        await interaction.replay({content: 'There was an error while executing this command!', ephemeral: true})
    }
});

// env파일에 저장한 봇 토큰
client.login(process.env.TOKEN);
deploy-commands.js
const {REST, Routes} = require('discord.js');
const dotenv = require('dotenv');
const fs = require('node:fs');


// command 등록
const deployCommands = () => {
    dotenv.config();
    const commands = [];
    const commandFiles = fs.readdirSync('./commands').filter(file => file.endsWith('.js'));

    for (const file of commandFiles) {
        const command = require(`./commands/${file}`);
        commands.push(command.data.toJSON());
    }

    const rest = new REST({version: '10'}).setToken(process.env.TOKEN);

    (async () => {
        try {
            console.log(`Started refreshing ${commands.length} application (/) commands.`);

            const data = await rest.put(
                Routes.applicationGuildCommands(process.env.CLIENT_ID, process.env.GUILD_ID),
                {body: commands},
            );

            console.log(`Successfully reloaded ${data.length}`);
        } catch (error) {
            console.log(error);
        }
    })();
}

module.exports = {
    deployCommands
}
rpc-game.js
여기는 commands의 한 파일인데, 가위바위보를 할 수 있는 핸들러를 가져와보았다. 유저의 input을 받고 가위바위보 결과를 도출하는 것이다.
const {SlashCommandBuilder} = require('discord.js');
/**
 * /가위바위보
 * output: win msg, loose msg, draw msg
 */

// 가위바위보 판정
function gameResult(user, bot) {
    if(user=='가위') {
        if(bot=='가위') {
            return "비겼습니다 ㅜㅜ";
        } else if (bot=='바위') {
            return "당신은 looser 입니다.";
        } else {
            return "축하합니다!! 당신이 이겼습니다!";
        }
    } else if(user=='바위') {
        if(bot=='가위') {
            return "축하합니다!! 당신이 이겼습니다!";
        } else if (bot=='바위') {
            return "비겼습니다 ㅜㅜ";
        } else {
            return "당신은 looser 입니다.";
        }
    } else {
        if(bot=='가위') {
            return "당신은 looser 입니다.";
        } else if (bot=='바위') {
            return "축하합니다!! 당신이 이겼습니다!";
        } else {
            return "비겼습니다 ㅜㅜ";
        }
    }
}


module.exports = {
  // slashCommandBuilder 만들기
    data: new SlashCommandBuilder()
        .setName('가위바위보') // 핸들러 이름
        .setDescription('가위바위보 게임입니다.') // 핸들러 설명(디스코드에서 실제로 보인다)
        .addStringOption(option =>
            option.setName("input")
            .setDescription("가위/바위/보 중에 하나를 입력하세요")
            .setRequired(true)),
  /*
  addStringOption == 스트링을 인풋으로 받을 수 있는 옵션
  setName: 해당 옵션의 이름
  setDescription: 해당 옵션의 설명
  setRequired: 필수 옵션인지 아닌지
  */
    async execute(interaction) {
        const input = interaction.options.getString('input');
        const set = ["가위", "바위", "보"];
        var pick = Math.floor(Math.random(0,2));
        var reply = "";

        if (set.includes(input)) {
            reply += `유저: ${input} vs 봇: ${set[pick]}\n`;
            reply += gameResult(input, set[pick]);
        } else {
            reply = "가위 바위 보 중 하나만 입력하세요";
        }

		//봇이 reply를 할 때
        await interaction.reply(reply);

    },
};
결과물
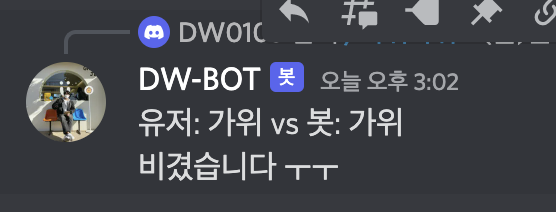
간단하게만 구현하였기에 잘 실행되는 모습을 볼 수 있다. 이외에도 team나누기, ping pong이라는 기능을 구현하였다. 그런데 원래 만들려고 한 것은 인공지능 관련해서 만들려고 했는데 시간이 촉박한 결과로 이렇게 간단한 기능들로만 구성하게 되었고 결국 과제에서는 떨어졌다 ㅜㅜ