
0.서브넷 생성
66038f94-7222-4a61-bba5-3ba4f6e928c8 (newvpc_1_7615e_sn_8)
-
t2-fastapi-vm
-
VPC ID 는 7615e61e-682b-4611-a566-562be5649dcb (newvpc_1)
-
서브넷 이름은 vpc_1_t2_sn_backup2
-
가용영역은 kr-central-2-b
-
IP CIDR 블록 10.0.129.240
-
보안그룹 생성
-
TCP
10.0.112.0/20
8000
fastapi -
TCP
10.0.112.0/20
22
bastion ssh -
TCP
10.0.112.0/20
5173
Vite / React
FastAPI 서버 배포 실습 – SSH · SCP 명령어 전체 정리
1단계. 키 파일 권한 설정 (로컬 Mac)
로컬 터미널에서 실행
chmod 400 /Users/apple/Desktop/keypair2.pem2단계. Bastion 서버 접속 (로컬 → Bastion)
ssh -i /Users/apple/Desktop/keypair2.pem ubuntu@210.xxx.xxx.xxx
성공 시 프롬프트 예시
ubuntu@host-10-0-5-240:~$3단계. FastAPI VM 접속 테스트 (Bastion → FastAPI)
Bastion 서버 안에서 실행
ssh -i keypair2.pem ubuntu@10.0.145.240
성공 시
ubuntu@host-10-0-145-240:~$정상 접속 확인 후 exit 로 Bastion으로 복귀
4단계. FastAPI 프로젝트 위치 확인 (로컬)
로컬 Mac에서 FastAPI 프로젝트 위치로 이동
cd ~/Desktop/react_shoppingmall+springAIchatbot+fastapi
ls
다음이 보여야 함
fastapiBack1
5단계. 로컬 → Bastion으로 프로젝트 복사
로컬 Mac에서 실행
scp -i /Users/apple/Desktop/keypair2.pem \
-r fastapiBack1 \
ubuntu@210.xxx.xxx.xxx:/home/ubuntu/
Bastion에서 확인
ls
결과
fastapiBack16단계. Bastion → FastAPI VM으로 프로젝트 복사
Bastion 서버에서 실행
scp -i keypair2.pem \
-r fastapiBack1 \
ubuntu@10.0.145.240:/home/ubuntu/
7단계. FastAPI 서버 접속 및 프로젝트 확인
ssh -i keypair2.pem ubuntu@10.0.145.240
ls결과
fastapiBack1
8단계. Python 가상환경 생성 (서버)
sudo apt update
sudo apt install -y python3.12-venv

python3 -m venv venv
source venv/bin/activate
확인
which python
9단계. 의존성 설치
pip install --upgrade pip
pip install -r requirements.txt
10단계. FastAPI 실행
uvicorn app.main:app --host 0.0.0.0 --port 8000
Uvicorn running on http://0.0.0.0:8000
11단계.curl로 요청보내보기
ubuntu@host-10-0-145-240:~/fastapiBack1/app$ curl http://210.109.82.105/api/products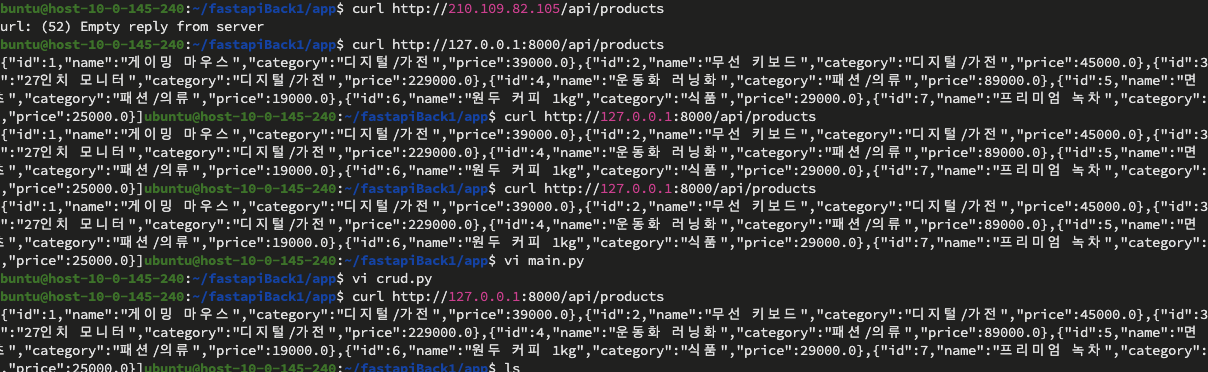
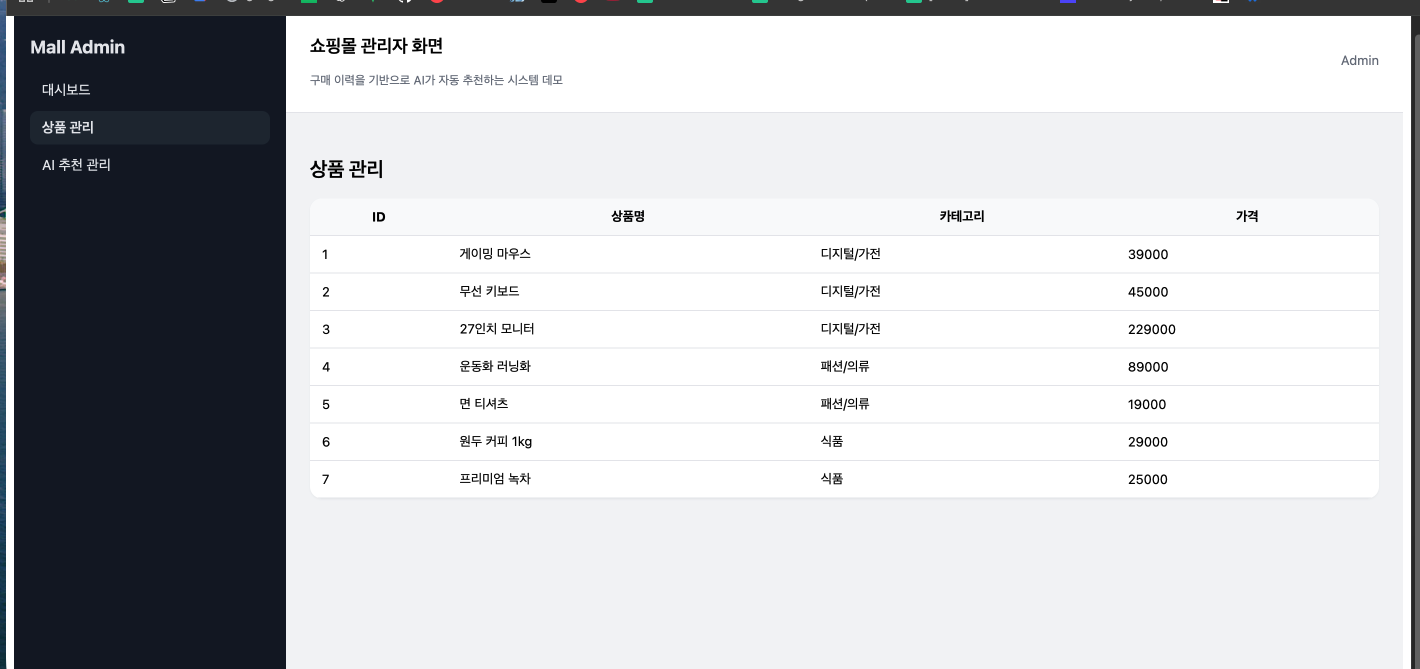
실제로 연동됨

Change Up