
Props
props는 일종의 방식이다.
부모 컴포넌트로부터 자식 컴포넌트에 데이터를 보낼 수 있게 해주는 방법
컴포넌트는 단지 함수이다. 어떤 JSX를 반환하는 함수이다.
prop은 component에 보내지는 argument이다.
prop의 주목적은 설정 가능한 컴포넌트를 재사용하기 위함이다.
Memo
-
function도 props에 넣을 수 있다.
-
부모 컴포넌트가 state(상태)를 변경할 때 어떤 일이 일어나는지 보기
-
button안에 onClick을 넣는다면 이벤트리스너이고
하나의 컴포넌트 안에 onClick을 넣는다면 그건 이벤트리스너가 아니고 단지 하나의 prop일 뿐이다.
function Btn({ coffee, changeValue }) {
        return (<button
            onClick={changeValue}
            style={{
                backgroundColor: "skyblue",
                color: "white",
                padding: "10px 20px",
                border: 0,
                borderRadius: 10
            }}
        >{coffee}</button>);
   }

   const MemorizeBtn = React.memo(Btn);

    function App(){
        const [value, setValue] = React.useState("Save Changes");
        const changeValue = () => setValue("Revert Changes");
        return (
            <div> {/* JSX의 내부 */}
                <MemorizeBtn coffee={value} changeValue={changeValue}/>
                <MemorizeBtn coffee="Continue" />
                 {/* Btn() 함수를 불러서 coffee라는 인자를 보내는 것 */}
            </div>
        )
    }

    const root = document.getElementById("root");
    ReactDOM.render(<App />, root);
Memo : Memorize : 이 컴포넌트가 다시 그려지는 것을 원치 않는다고 설정할 수 있음 다시 re-render될 필요가 없는 부분은 rerender하지 않는 기능을 가지고 있다.
PropType
어떤 타입의 prop을 받고 있는지를 체크해주는 것
string으로 받기로 했는데 number로 잘못 전달해 줄 수 있다.
틀린 code는 아니다.
하지만 내가 사용하고 있는 컴포넌트 방식 내에서는 에러이다.
Btn.propTypes = {
    text: PropTypes.string.isRequired, // isRequired: 필수로 들어가야 하는 것
    fontSize: PropTypes.number
}
그리고 개발자가 원한다면 default value(기본값)을 설정할 수도 있다.
function Btn({text, fontSize = 15}) {
        return (
            <button
                style={{
                    backgroundColor: "white",
                    color: "black",
                    padding: "10px 20px",
                    border: 0,
                    borderRadius: 10,
                    fontSize
                }}>{text}
            </button>
        );
    }
prop의 fontsize에 15를 지정해줌으로써 default value값을 15로 설정해놨다.
create-react-app
리액트 어플리케이션을 만드는 최고의 방식
create-react-app은 엄청나게 많은 스크립트들과 많은 사전 설정들을 준비해준다.
개발 서버에 접근한다든가, 자동으로 새로고침을 시켜준다든가, 즉각적으로 어플리케이션 안에 CSS를 포함시켜 준다든가 하는 기능들이 있다.
src 폴더 : 나의 모든 파일들을 넣을 폴더
Tour of CRA
create-react-app으로 작업함에 있어 전반적인 요점은 개발 환경이 훨씬 낫다는 것이다.
create-react-app으로 작업할 때의 포인트는 "분할하고" "정복하는" 것이다.
css module
Button.js
import React from 'react';
import PropTypes from "prop-types";
import styles from "./Button.module.css";

function Button({ text }) {
  return (
    <button className={styles.btn}>
        {text}
    </button>
  );
}

Button.propTypes = {
    text:PropTypes.string.isRequired,
};

export default Button;
Button.module.css
.btn {
    color: white;
    background-color: tomato;
} /* btn이라는 클래스 만듦 */
useEffect
첫번째 render에만 코드가 실행되고, 다른 state변화에는 실행되지 않도록 하기
: 특정 코드의 실행을 제한하기!
왜? 어떨 때 사용하는데?
예를들어 API를 통해 데이터를 가져올 때 첫번째 component render에서 API를 call 하고, 이후에 state가 변화할 때, 그 API에서 데이터를 또 다시 가져오고 싶진 않을 것이다.
그래서 처음만 (한 번만) render해주는 게 필요하다.
useEffect
두 개의 argument를 가지는 function이다.
첫 번째 argument는 딱 한번만 실행하고 싶은 코드가 될 것이다.
두 번째 argument는 마법같은 친구~!
Deps
내 코드의 특정한 부분만이 변화했을 때, 원하는 코드들을 실행할 수 있는 방법을 배우고 싶다.
useEffect(() => {
    console.log("SEARCH FOR ", keyword);
  }, [keyword]);
  // [keyword] : 'keyword'가 변화할 때 코드를 실행할거라고 REACT.js에게 알려주는 것이다.
Cleanup
component가 destroy될 때도 코드를 실행할 수 있다.
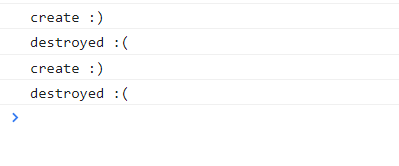
function Hello() {
  useEffect(() => {
    console.log("create :)");
    return () => console.log("destroyed :(");
  }, []);
  return <h1>Hello My Name is 예삐예삐오</h1>;
}

function App() {
  const [ showing, setShowing ] = useState(false);

  const onClick = () => setShowing((prev) => !prev );

  useEffect (()=>{

  }, [showing])

  return (
    <div>
     <button onClick={onClick}>{showing ? "hide" : "show"}</button>
     {showing? <Hello /> : null}
    </div>
  );
}
예를 들어, 누군가는 component가 없어질 때 어떤 분석 결과를 보내고 싶어할 수도 있다.
그러면 그 사람들은 분석 API를 보낼 수 있다.
아니면 component가 사라지거나 없어질 때 event listener를 지우거나, 혹은 console.log에 뭔가를 보여줄 수도 있다.
중요한 건 이걸로 component가 언제 create 됐는지, 언제 destroy 됐는지 알 수 있다는 것이다.
useEffect(() =>{
    console.log("hi :)");
    return () => console.log("bye :(");
  }, []);

  useEffect(function(){
    console.log("hi :)");
    return function(){
      console.log("bye :(");
    }
  }, []);
똑같은 기능을 하는 함수이다!