
SSH(Secure Shell) 이용해 GITHUB 연결
GIT is a revision control system, a tool to manage your source code history.
Github is a hosting service for Git repositories.
So they are not the same thing: Git is the tool, GitHub is the service for projects that use Git.
깃은 하나의 tool이고
깃허브는 클라우드 서비스이다.
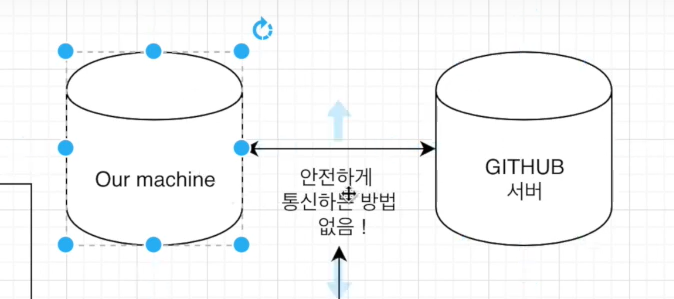
안전하게 통신하기 위해서 ssh를 설정해야한다.
컴퓨터와 깃허브 서버 연결을 위해 ssh 설치과정
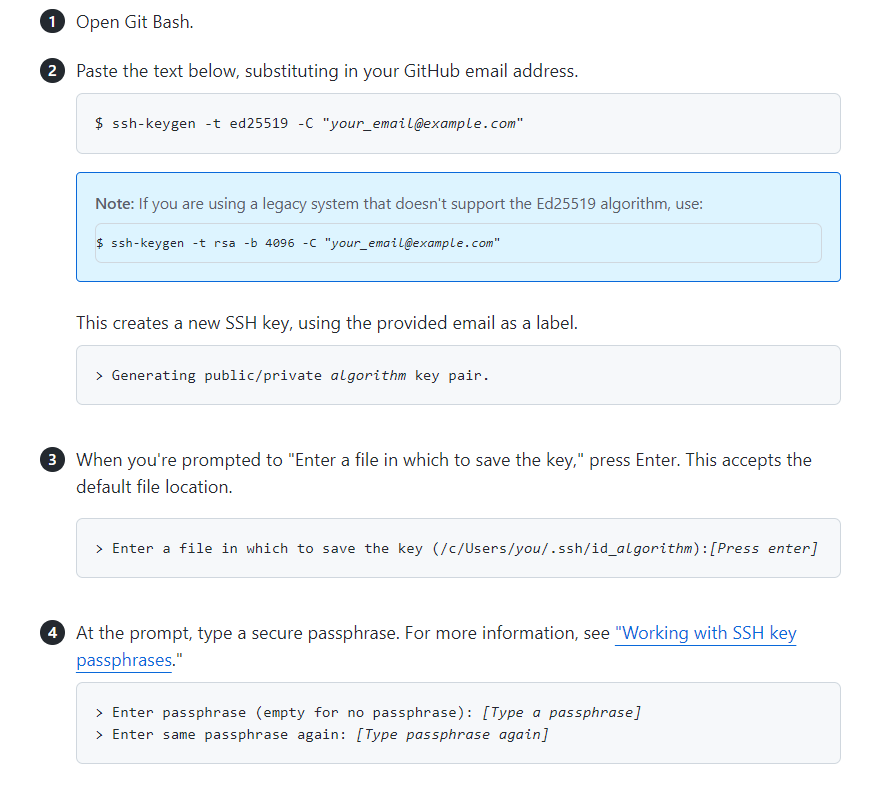
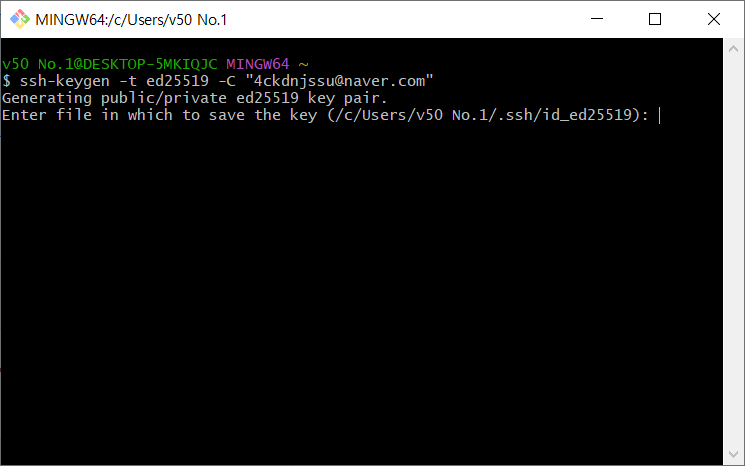
- SSH KEY를 만든다.
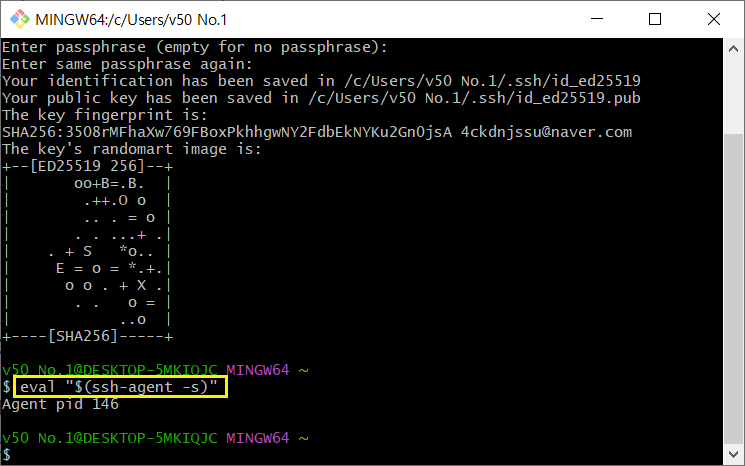
- SSH Agent를 Background에 킨다.
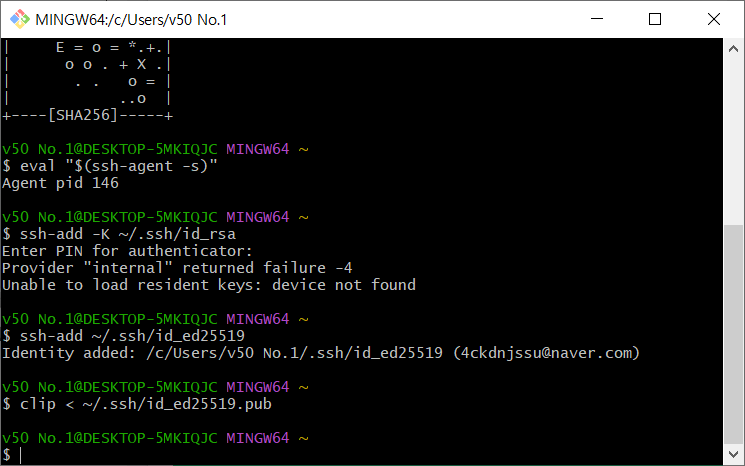
- SSH Private Key를 SSH-AGENT에 넣는다.
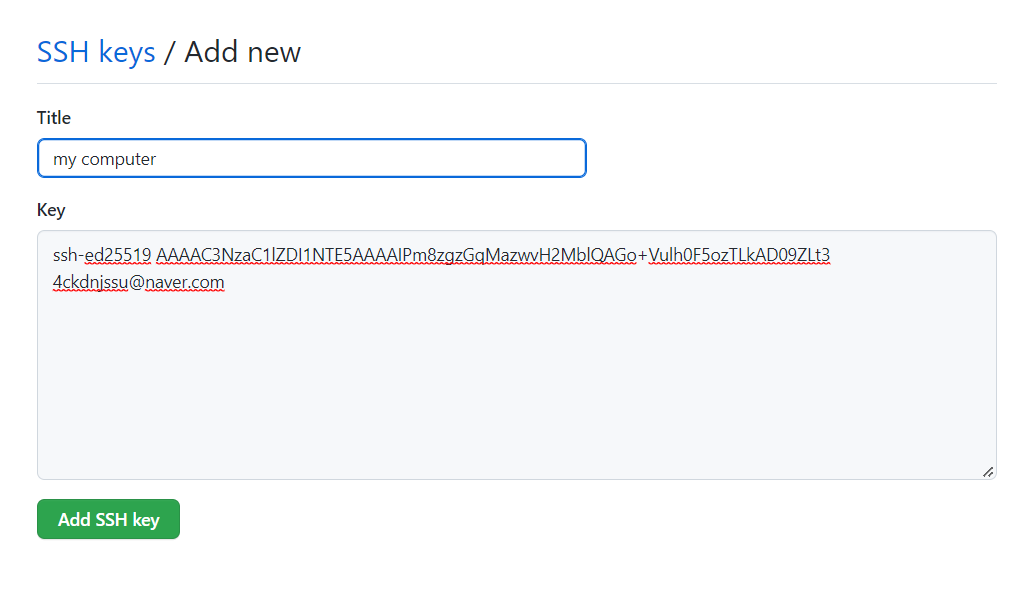
- 생선된 SSH Public Key를 3rd Party(깃헙 등)에 준다.
위 사이트를 보고 따라하면 된다.
이메일은 본인의 이메일을 쓰면 된다.
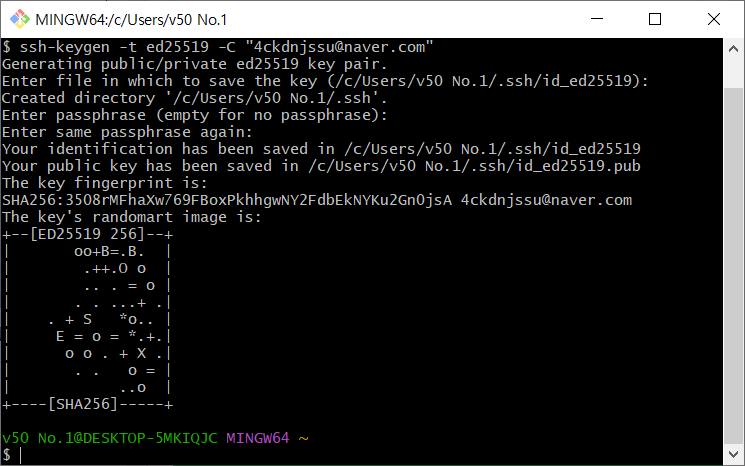
계속 엔터 누르면 됨
이미 SSH가 설정 되었는지 보려면?
ls -a ~/.ssh
-> id_rsa, id_rsa.pub 가 있다면 이미 ssh가 있는 것이다.
위 순서대로 입력하면 된다.
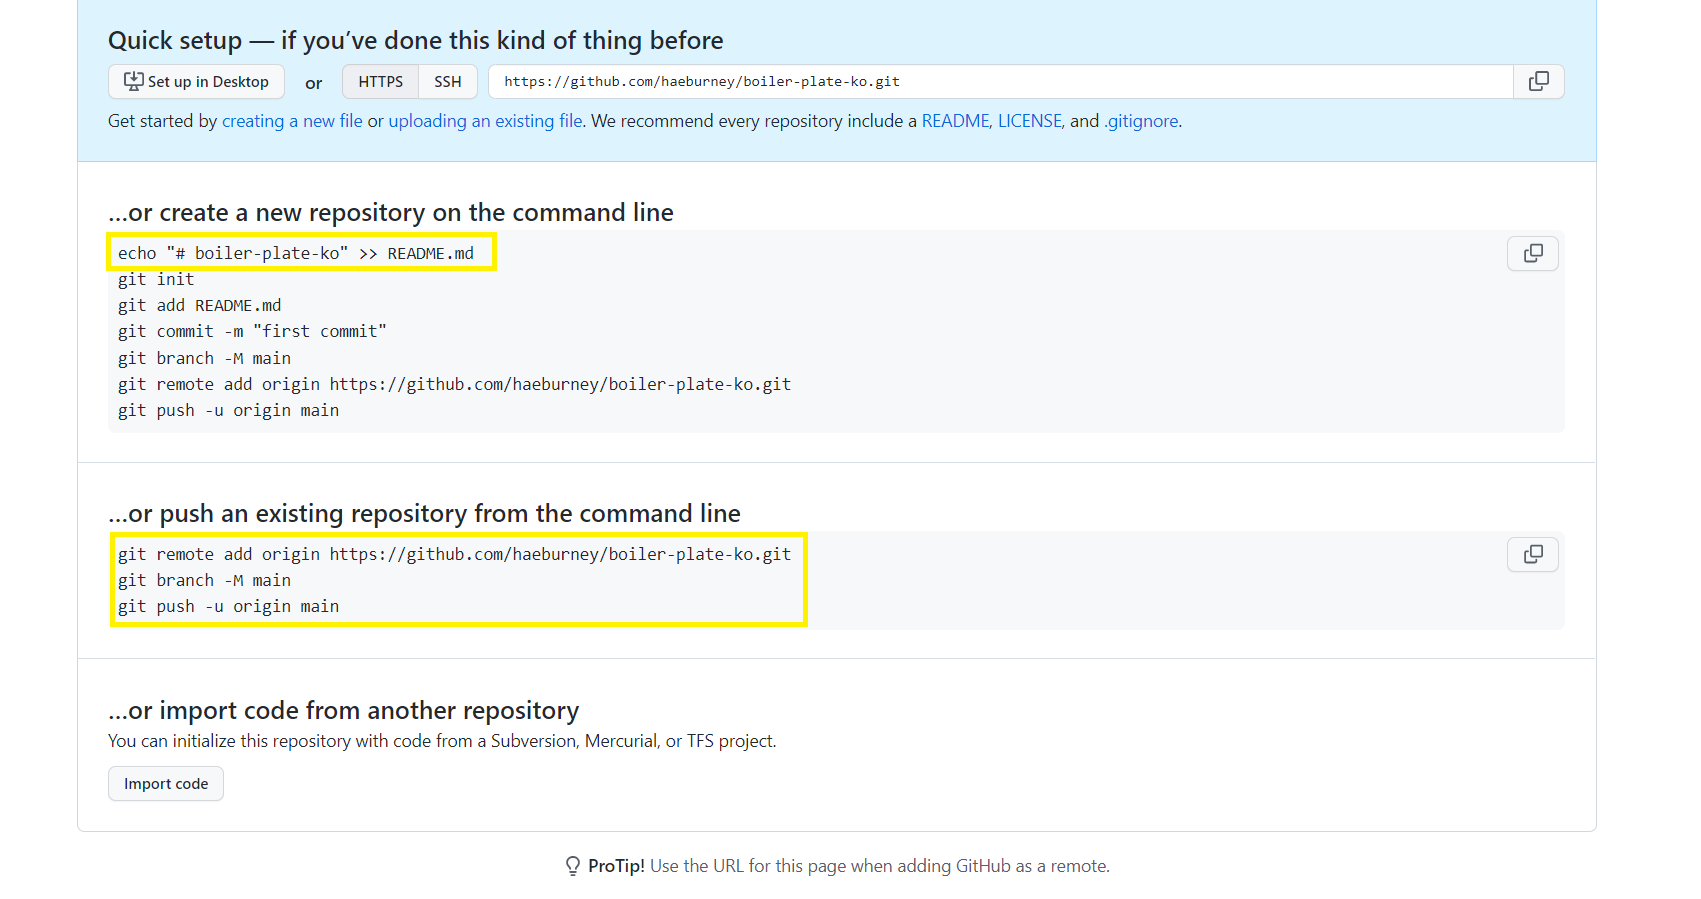

깃허브 연동성공!
BodyParser & PostMan & 회원 가입 기능 만들기
Client - Server 통신하는 법
Client -> Server : Request with Body the JSON, buffer, string and URL encoded data
-> Body 데이터를 분석 (parse) 해서 req.body로 출력해주는 것
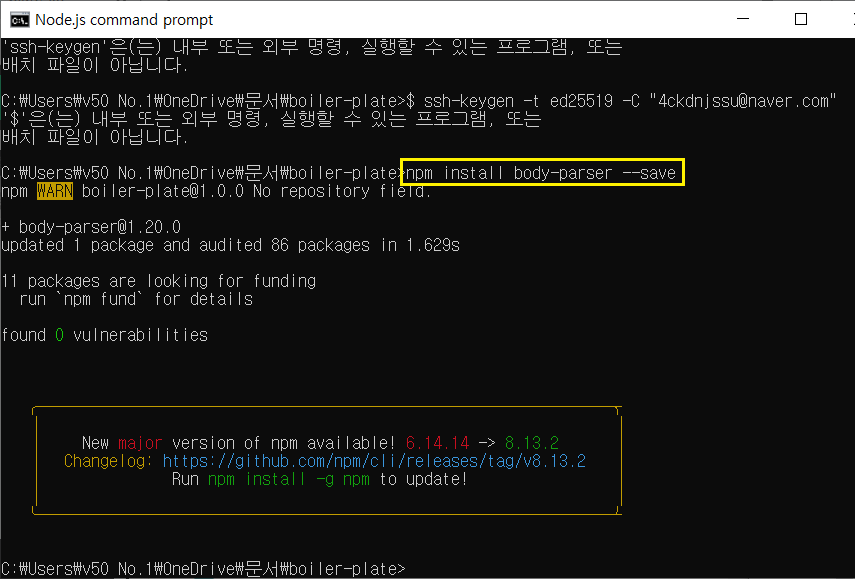
-> Body-parse Dependency
-> npm install body-parser --save
Client에서 Request를 줘야하는데 현재 Client가 없으니 POSTMAN을 이용해서 request를 보낸다.
-> 다운로드 POST MAN
-> 하지만 대체로 VScode에 Thunder client를 사용할 수 있다.
-> Register Route 만들기
-> 먼저 Node SERVER 실행
-> (사용하는 수단으로) Register Route에 Request 보내기
크롬 브라우저 : client 라고 보면 된다.
로그인을 할 때 아이디 비밀번호를 적고 서버로 보내야하는데 서버로 보낼 때 “bodyParser dependency”가 필요하다.
이걸 이용해서 클라이언트에서 보내주는 자료들을 (이메일이나 비밀번호 등등) 서버로 받을 수가 있다.
body-parser 다운받기
postman 도 다운을 받아야 한다.
여기서 무료로 받을 수 있음
깔고 npm 실행 후 postman 들어와서
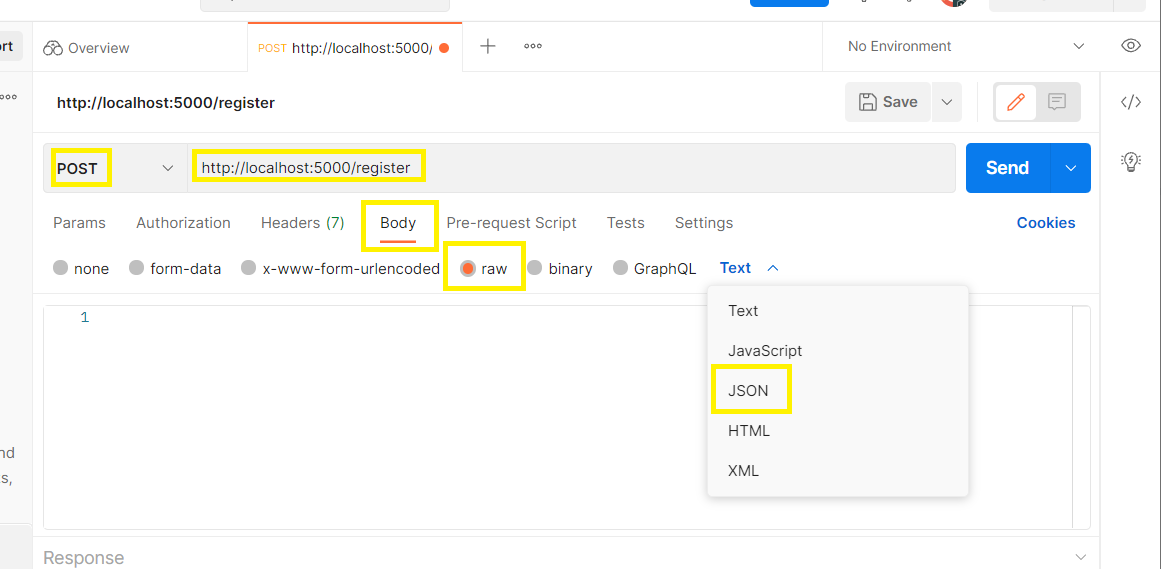
저렇게 설정 한 후 테스트 해보기
근데!!! postman 말고 vs code에서 thunder client 를 설치하고 해도 된다.

success: true 뜨면 성공!!
const bodyParser = requre('body-parser');

app.use(bodyParser.urlencoded(({extended: true}));
// bodyParser가 클라이언트에서 오는 정보를 분석해서 가져올 수 있게 해주는 것.
// application/x-www-from-urlenceded라고 된 데이터를 분석해서 가져올 수 있게 해주는 것.

app.use(bodyParser.json());
// application/json 파일을 분석해서 가져올 수 있게 해주는 것.

const mongoose = require('mongoose')
moongoose.connect(config.mongoURI, {
	// useNerUrlParser: true, useUnifiedTopology: true, useCreateIndex: true, useFindAndModify: false
}).then(() => console.log('MongoDB Connected...'))
  .catch(err => console,log(err))

app.post('/register', (req, res) -> {
	// 회원 가입 할 때 필요한 정보들을 client에서 가져오면
    // 그것들을 데이터 베이스에 넣어준다.
    // User.js 의 모델 가져오기

    const user = new User(req.body)
    // 이 정보들을 데이터베이스에 넣기

    user.save((err, userInfo ) => {
    	if(err) return res.json({ success: false, err})
    	return res.status(200).json({
        	success: true
        })
    })
    // user.save() 는 몽고디비에서 오는 메서드이다.

})
Node mon 다운 받기
- Node Mon 다운로드
- 시작할 때 nodemon으로 시작
- script 하나 더 만들기
Nodemon 이란 소스를 변경할 때 그걸 감지해서 서버를 재시작해주는 tool
노드 서버를 킨 다음에 그 안에서 무언가를 바꿨으면 그 서버를 종료한 뒤 다시 기동해야 같은 소스가 반영이 된다. 근데 Node mon을 이용하면 굳이 서버를 내리고 올리지 않아도 소스를 감지해서 변화된 부분을 감지시켜주는 것이다.
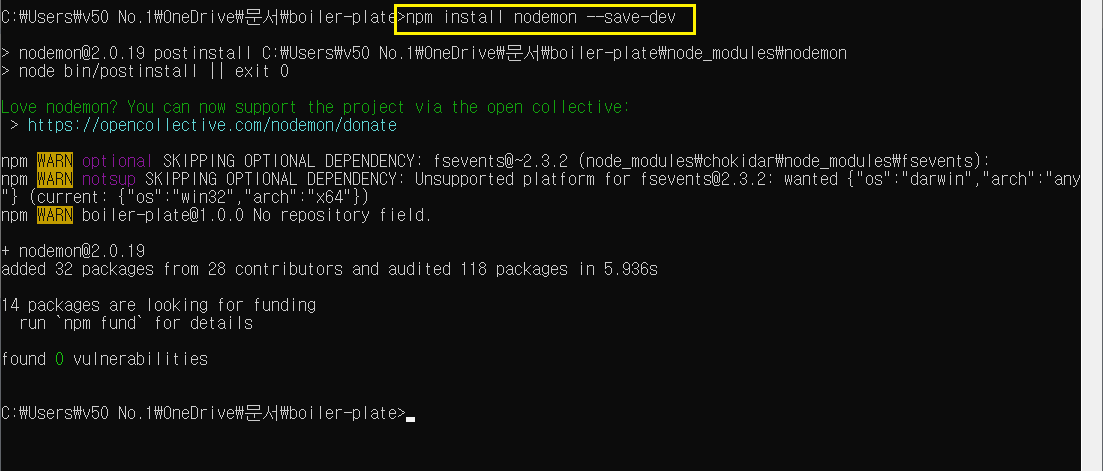
npm install nodemon —save-dev
dev를 붙이면 local에서만 사용을 하겠다 라는 뜻
굳이 안붙여도 되는데 자세하게 할거면 붙여주는게 좋다.
시작할 때 nodemon으로 시작 → script 하나 더 만들기
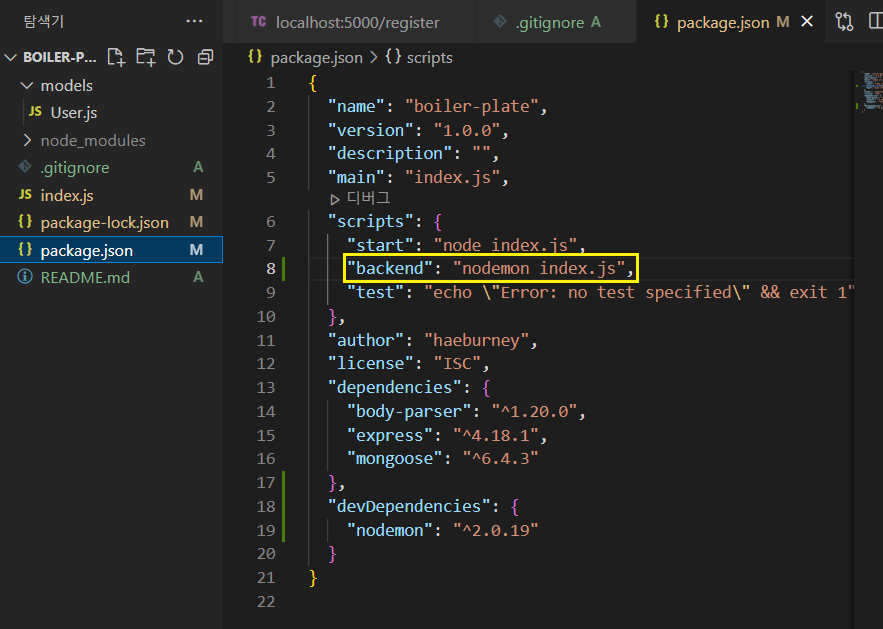
"backend": -> 이 부분은 내가 쓰고 싶은 단어로 쓰면 됨!
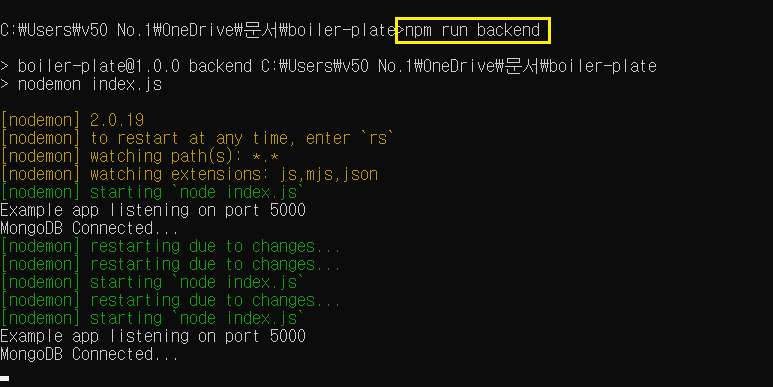
저렇게 하면 서버를 종료하지 않아도 새로고침 하면 바로 페이지에 반영이 된다.
비밀 설정 번호 관리
소스 코드를 Git에 올리면 다른 사람들이 Secret한 정보들을 다 보게 됨.
그래서 비밀 정보들을 다 한 파일에다 몰아둔 후 .gitignore 파일에 넣어준다.
개발환경이 로컬인지 아니면 배포 모드인지에 따라서도 다르게 해줘야 한다.
예를들어 heroku 서비스를 통해 배포 할 때.
소스 안에 있는 정보를 보호해주기
몽고 디비를 연결할 때 아이디와 비밀번호가 노출된다.
이 부분을 따로 떼어 놓기
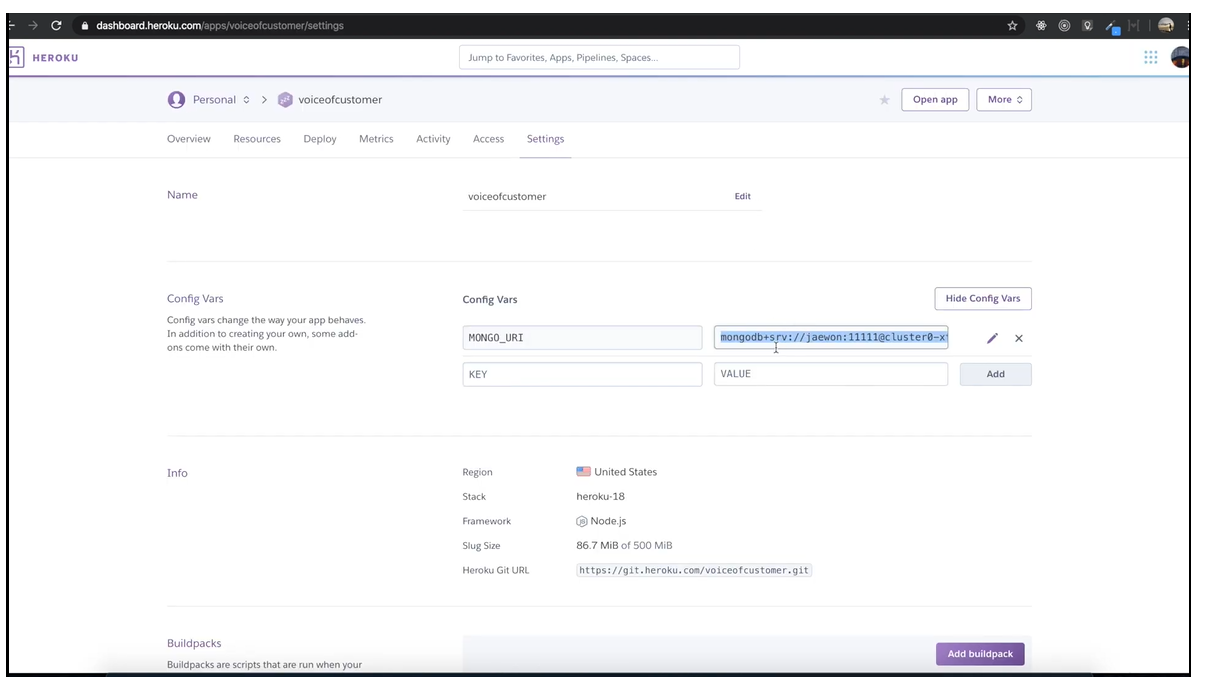
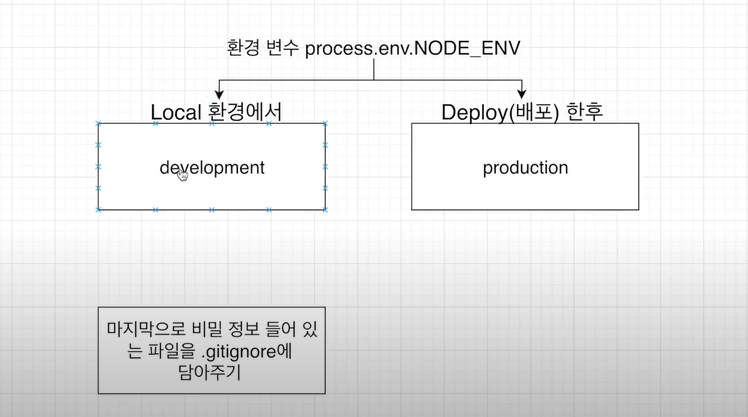
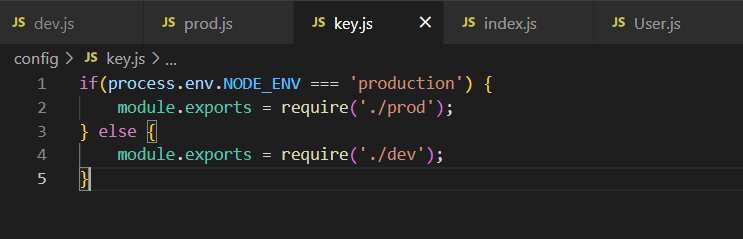
Local 환경에서 접근 할 수도 있고 Deploy(배포한 후)로 접근 할 수가 있는데 이걸 key.js에서 구분한다.
dev.js, key.js, prod.js 파일 생성
dev.js
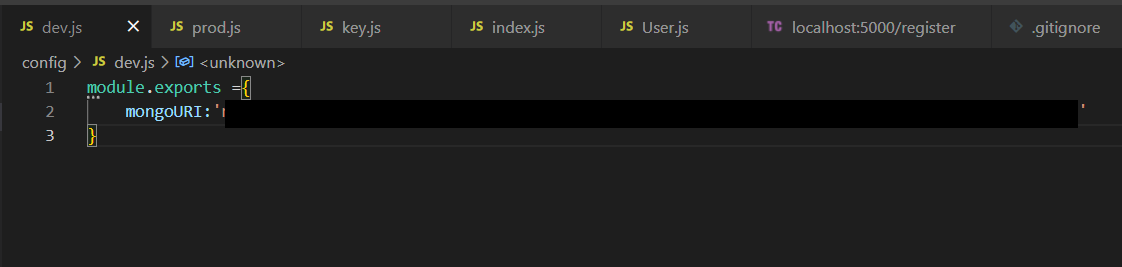
prod.js
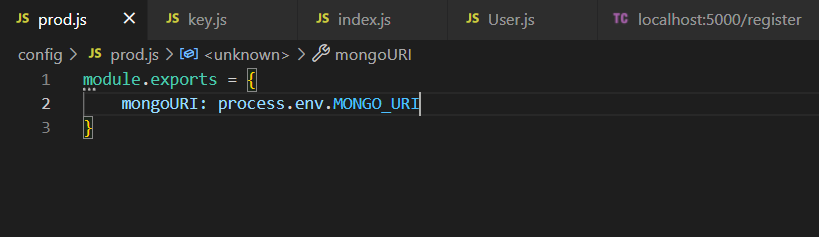
key.js

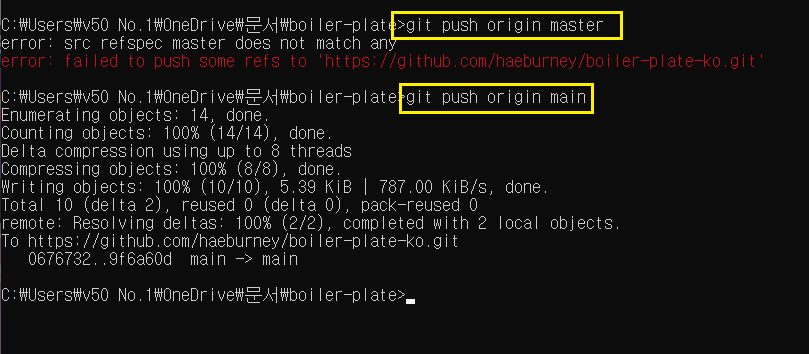
마지막으로 github에 올리려고 하는데 에러가 났다.
git push origin master → git push origin main 으로 입력해야 하는 것 같다.
시간이 지나서 이걸로 바뀐 것 같다.
Bcrypt로 비밀번호 암호화 하기
현재 데이터베이스에 저장되어 있는 비밀번호를 보면 너무 안전하지 못하다.
그래서 Bcrypt를 이용하여 비밀번호를 암호화해줘서 데이터베이스에 저장해줘야 한다.
npm install bcrypt --save
Bcrypt로 비밀번호 암호화하는 순서
- 먼저 Register Route로 가기
- 유저 정보들 (Account, Password 등등)을 데이터 베이스에 저장하기 전에 암호화 할 타이밍
- bcrypt 사이트 보면서 진행
- salt 생성
- salt를 이용하여 hash password(암호화된 비밀번호)를 만들기
- 비밀 번호를 바꿀 때만 작동할 수 있게 조건을 걸어주기
salt = [REQUIRED] - the salt to be used to hash the password. if specified as a number then a salt will be generated with the specified number of rounds and used (see example under Usage).

“npm install bcrypt —save” 입력
https://www.npmjs.com/package/bcrypt
save 하기 전에 비밀번호를 암호화 해줘야 한다.
User.js
// save를 해주면 userModel에 유저 정보를 저장하기 전에 무엇을 할거라는 뜻이다.
// mongoose에서 가져온 메서드
userSchema.pre('save', function( next ){
	// 비밀번호를 암호화 시킨다.

    var user = this;

    // 이메일이나 이름 변경할 때는 비번이 다시 암호화가 안되게 만들어 줘야함
    if(user.isModified('password')){
        bcrypt.genSalt(saltRounds, function(err, salt){
    		if(err) return next(err)

      		  // User.js에 있는 비밀번호를 여기에 가져와야한다.
       		 bcrypt.hash(user.password, salt, function(err, hash){
        		if(err) return next(err)

         	   user.password = hash
         	   //성공하면 hash된 비밀번호로 -> 암호화 완성.

          	  next()
         	 } )
    	})
    }
})
https://www.npmjs.com/package/bcrypt

salt를 생성하고 그것을 이용해서 암호화를 해야함.
그리고 “saltRounds”가 있는데 salt가 몇 글자인지를 나타내는 것?
10자리인 솔트를 만들어서 비밀번호를 암호화 한다는 것이다.
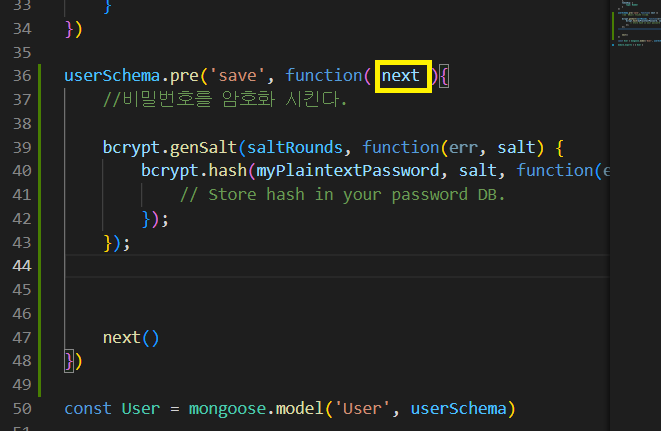
넥스트를 만나면
여기로 넘어간다.
index.js
const express = require('express')
const app = express()
const port = 5000
const bodyParser = require('body-parser');
const config = require('./config/key');
const { User } = require("./models/User");
//application/x-www-form-urlencoded -> 이렇게 된 데이터를 분석해서 가져올 수 있게 해주는 것
app.use(bodyParser.urlencoded({extended: true}));
//클라이언트에서 오는 정보를 서버에서 분석해서 가져올 수 있게 해주는 것
//application/json -> 분석해서 가져올 수 있게 해주는 것
app.use(bodyParser.json());
const mongoose = require('mongoose')
mongoose.connect(config.mongoURI, {
//useNewUrlParser: true, useUnifiedTopology: true, useCreateIndex: true, useFindAndModify: false
}).then(()=> console.log('MongoDB Connected...'))
.catch(err => console.log(err))
app.get('/', (req, res) => {
res.send('Hello World! backend로 run')
})
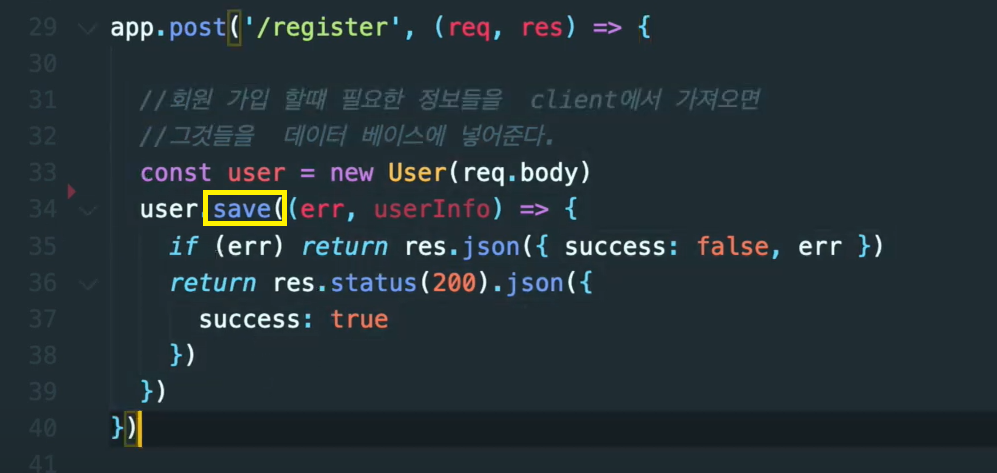
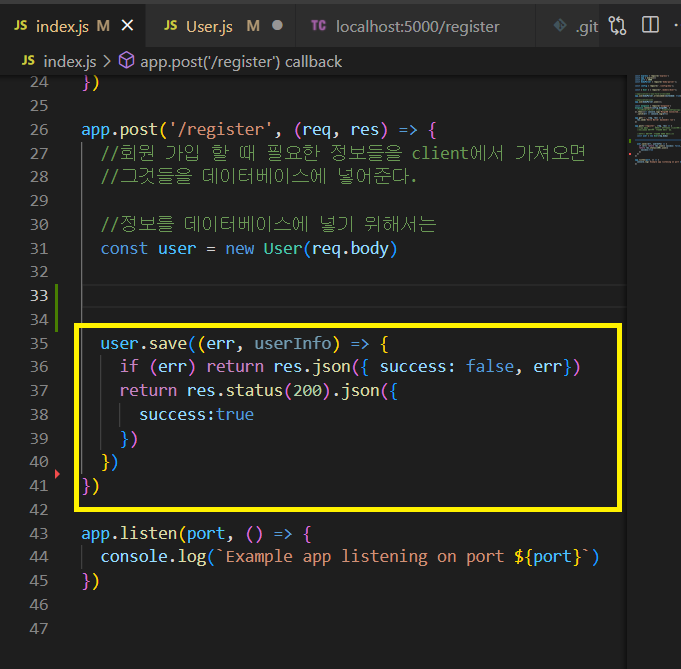
app.post('/register', (req, res) => {
//회원 가입 할 때 필요한 정보들을 client에서 가져오면
//그것들을 데이터베이스에 넣어준다.
//정보를 데이터베이스에 넣기 위해서는
const user = new User(req.body)
//save -> 몽고 DB 메서드
user.save((err, userInfo) => {
if (err) return res.json({ success: false, err})
return res.status(200).json({
success:true
})
})
})
app.listen(port, () => {
console.log(`Example app listening on port ${port}`)
})
User.js
const mongoose = require('mongoose');
const bcrypt = require('bcrypt');
const saltRounds = 10;

const userSchema = mongoose.Schema({
    name: {
        type: String,
        maxLength: 50
    },
    email: {
        type: String,
        trim: true,
        unique: 1
    },
    password: {
        type: String,
        minlength: 5
    },
    lastname: {
        type: String,
        maxlength: 50
    },
    role: {
        type: Number,
        default: 0
    },
    image: String,
    token: {
        type: String
    },
    tokneExp: {
        type: Number
    }
})

userSchema.pre('save', function( next ){
    var user = this;

    //비밀번호를 암호화 시킨다.

    if (user.isModified('password')){
        bcrypt.genSalt(saltRounds, function(err, salt) {
            if (err) return next(err)

            bcrypt.hash(user.password, salt, function(err, hash) {
                if (err) return next(err)
                user.password = hash
                next()
            });
        });
    }
})

const User = mongoose.model('User', userSchema)

module.exports = { User }