Apache 웹 서버
web Server : Web 서비스를 제공하는 서버
HTTP(Hyper Text Transfer Protocol)
- 하이퍼 텍스트 문서(웹 문서)를 전송하기 위한 애플레키에션 프로토콜.
- HTTP는 데이터 전송시 평문으로 데이터를 전송함.
HTTPS(Hyper Text Transfer Protocol Secure)
- HTTP + SSL/TLS = HTTPS
- 웹 문서를 암호화해서 전송하는 애플리케이션 프로토콜
Apache Web Server
- Apache 재단에서 개발한 오픈소스 웹 서버
- 다양한 모듈을 지원함.
- VirtualHost 지원으로 여러 웹 사이트를 하나의 물리적인 웹 서버에서 구성할 수 있음.
Apache Web Server 구성 파일 경로 : /etc/httpd/
- conf : 기본 구성 파일 경로(/etc/httpd/conf/httpd.conf)
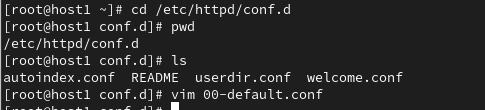
- conf.d : 추가 구성 파일 경로 (*.conf)
- conf.modules.d : 모듈 구성 파일 경로 (*.conf)\
- logs : 로그 저장 경로
- modules : Apache Web Server 모듈 경로
Apache Web Server의 기본 웹 사이트 경로 : /var/www/html/
/var/www/html/ 밑에 index.html을 생성하여 메인 페이지를 구성하였다. >>> /var/www/html/index.html
Apache Web Server 구성
1. Apache Web Server 패키지 설치
$ yum install httpd
2. Apache Web Service(httpd)
$ systemctl start httpd.service
3. Apache Web Service(httpd) 부팅시 자동 시작 설정(영구 설정)
$ systemctl enable httpd.service
4. 방화벽에서 웹 서비스 허용
$ firewall-cmd --add-service=http
$ firewall-cmd --add-service=http --permanent
Apache 웹서버 구성파일 내용
$ vim /etc/httpd/conf/httpd.conf
ServerRoot "/etc/httpd" - Apache 웹서버 구성파일 경로
DocumentRoot "/var/www/html" - 웹 페이지 기본 경로
Listen 80 - 수신대기 포트 지정 (포트, IP주소+포트)
User apache - Apache 웹서버 사용자 지정
Group apache - Apache 웹서버 그룹 지정
ServerAdmin root@localhost - 관리자 정보
#ServerName www.example.com:80 - 웹서버 주소 지정
Directory Block : 웹서버가 접근할 경로에 대해 허용/차단을 정의
- 기본 웹사이트 DocumentRoot 디렉터리(/var/www/html/) 설정 내용
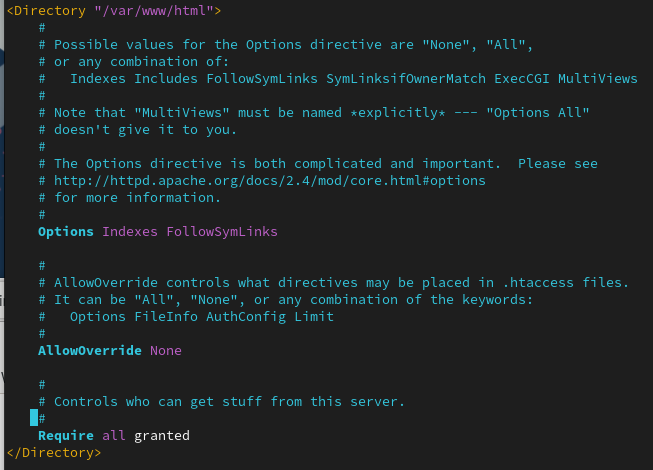
Options Indexes FollowSymLinks - 웹 페이지가 없을 때 목록을 보여줌, Symbolic Link 허용
AllowOverride None - 일반적인 접근 방식만 허용
Require all granted - 접근 허용
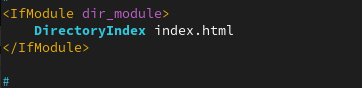
- 기본 웹 페이지 및 우선순위 지정
ErrorLog "logs/error_log"
CustomLog "logs/access_log" combined

VirtualHost
하나의 물리적인 Apache Web Server에서 여러 개의 웹 서버가 동작하는 것처럼 여러 사이트를 운영할 수 있도록 하는 Apache Web Server의 기능.
VirtualHost 구성의 분류
- 이름 기반 가상 호스트(Name Based VirtualHost)
- IP 주소 기반 가상 호스트(IP Based VirtualHost)
- Port 기반 가상호스트(Port Based VirtualHost)
샘플 구성파일 참조 : /usr/share/doc/httpd-core/
VirtualHost 관련 참고 : https://httpd.apache.org/docs/2.4/vhosts/
실습 전에 DNS서버 구축을 해야한다.
$cd /etc/httpd/conf.d 이동 후 VirtualHost 생성.
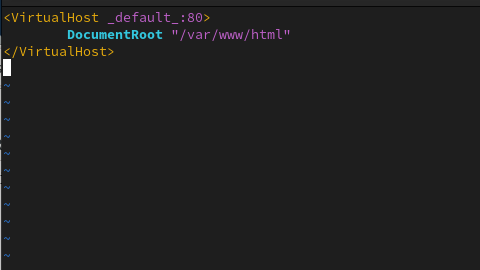
- VirtualHost 구성 파일 기본 틀
<VirtualHost *:80>
ServerAdmin webmaster@dummy-host.example.com
DocumentRoot "DOCUMENT_ROOT"
ServerName dummy-host.example.com
ServerAlias www.dummy-host.example.com
ErrorLog "/var/log/httpd/dummy-host.example.com-error_log"
CustomLog "/var/log/httpd/dummy-host.example.com-access_log" common
</ VirtualHost>
<Directory "DOCUMENT_ROOT">
Options Indexes FollowSymLinks
AllowOverride None
Require all granted
</ Directory>
- default 가상호스트
- 이름 기반 VirtualHost 구성 파일 기본 툴
# vim 01-www.example.com.conf
<VirtualHost *:80>
ServerAdmin webmaster@example.com
DocumentRoot "/var/www/www.example.com"
ServerName www.example.com
ErrorLog "/var/log/httpd/www.example.com-error_log"
CustomLog "/var/log/httpd/www.example.com-access_log" common
</ VirtualHost>
<Directory "/var/www/www.example.com">
Options Indexes FollowSymLinks
AllowOverride None
Require all granted
</ Directory>
vim 설정 후 DocumentRoot로 설정했던 /var/www/www.example.com 생성 후
systemctl restart httpd.service
- IP 기반 VirtualHost 구성 파일 기본 툴
# vim 01-192.168.56.110.conf
<VirtualHost 192.168.56.110:80>
ServerAdmin webmaster@example.com
DocumentRoot "/var/www/192.168.56.110"
ErrorLog "/var/log/httpd/192.168.56.110-error_log"
CustomLog "/var/log/httpd/192.168.56.110-access_log" common
</ VirtualHost>
<Directory "/var/www/192.168.56.110">
Options Indexes FollowSymLinks
AllowOverride None
Require all granted
</ Directory>
- Port 기반 VirtualHost
# vim 01-port-8080.conf
Listen 8080 설정!!
<VirtualHost *:8080>
ServerAdmin webmaster@example.com
DocumentRoot "/var/www/home-port-8080"
ErrorLog "/var/log/httpd/home-port-8080-error_log"
CustomLog "/var/log/httpd/home-port-8080-access_log" common
</ VirtualHost>
<Directory "/var/www/home-port-8080">
Options Indexes FollowSymLinks
AllowOverride None
Require all granted
</ Directory>
# systemctl restart httpd.service
# firewall-cmd --add-port=8080/tcp
# firewall-cmd --add-port=8080/tcp --permanent
# netstat -ant | grep :8080
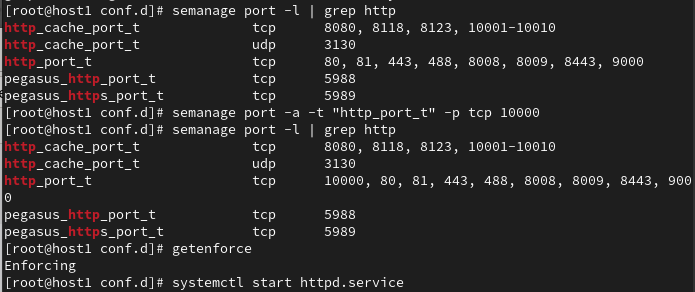
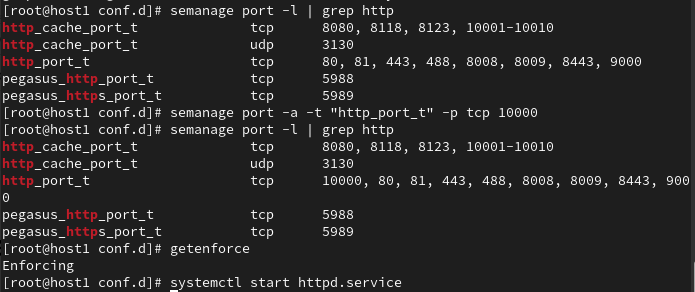
포트 설정할 때 seLinux로 인해 문제가 생긴 경우
# vim /var/log/messages
… sealert -l 0698edd2-8797-4b83-972b-8ece7457f0c3 …
# sealert -l 0698edd2-8797-4b83-972b-8ece7457f0c3
문제확인 후