JDK : 1.8
Tomcat :  8.5.63
Spring : 5.2.3
IntelliJ IDEA : 2020.3.21. IntelliJ Spring MVC 프로젝트 만들기
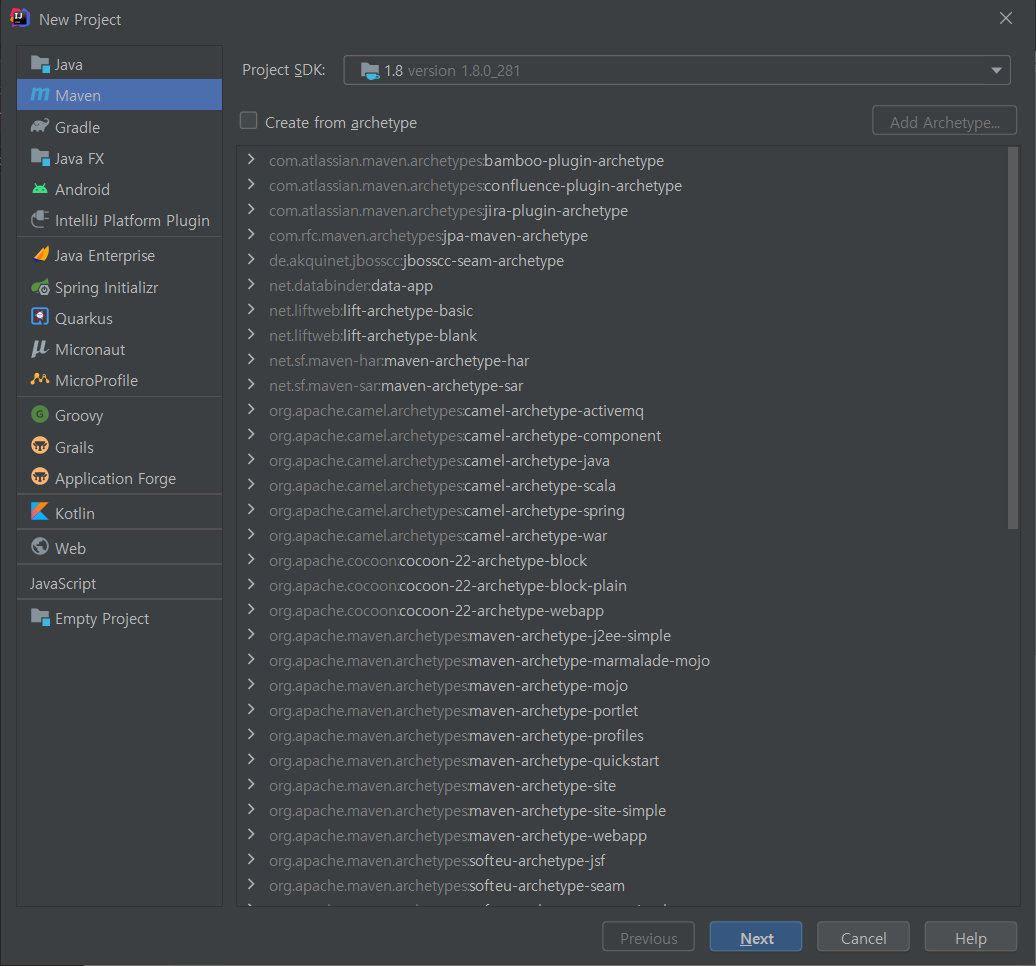
1-1. New Project > Maven(Create from archetype 해제) > Next
▶ Create from archetype
인텔리제이에서 미리 만들어 둔 스프링 프로젝트를 같이 생성한다는 의미
(간단한 웹 프로젝트를 할 경우엔 체크하는 것도 좋음)
1-2. JDK 설정, 프로젝트 폴더 위치, 이름 설정
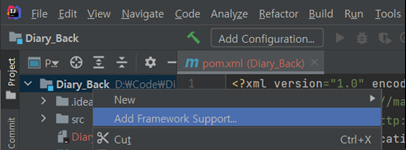
1-3. Add Framework Support
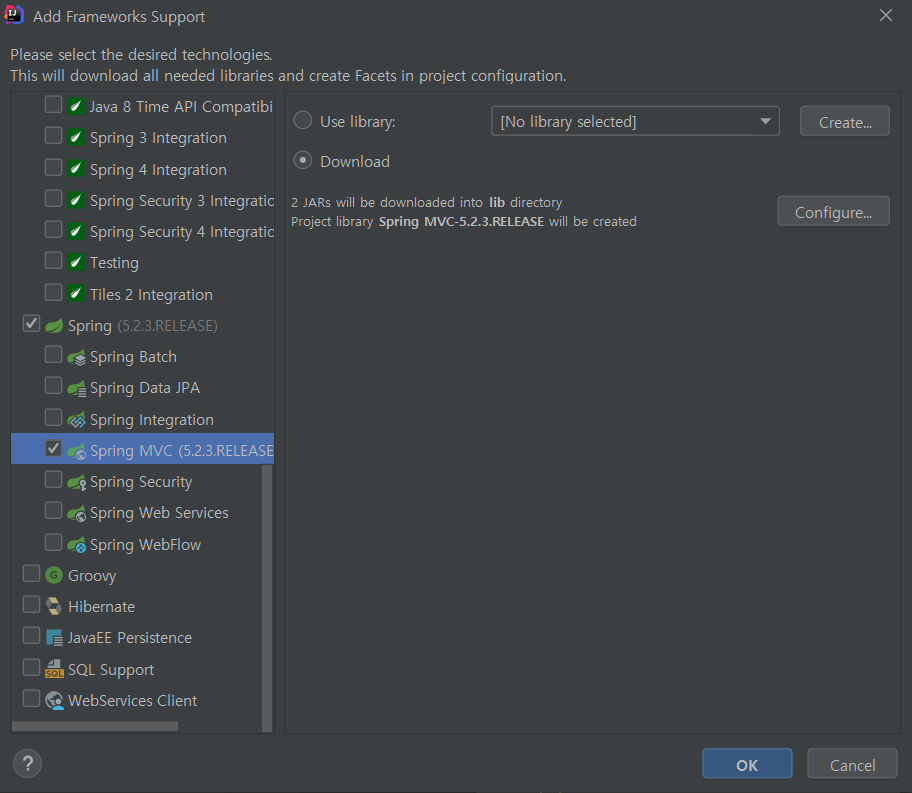
1-4. Spring MVC 체크 후 OK (download 체크)
1-5. web.xml(web/WEB-INF/web.xml) 변경
<url-pattern>*.form</url-pattern> - X
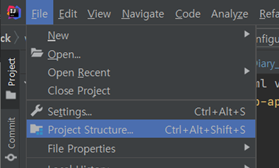
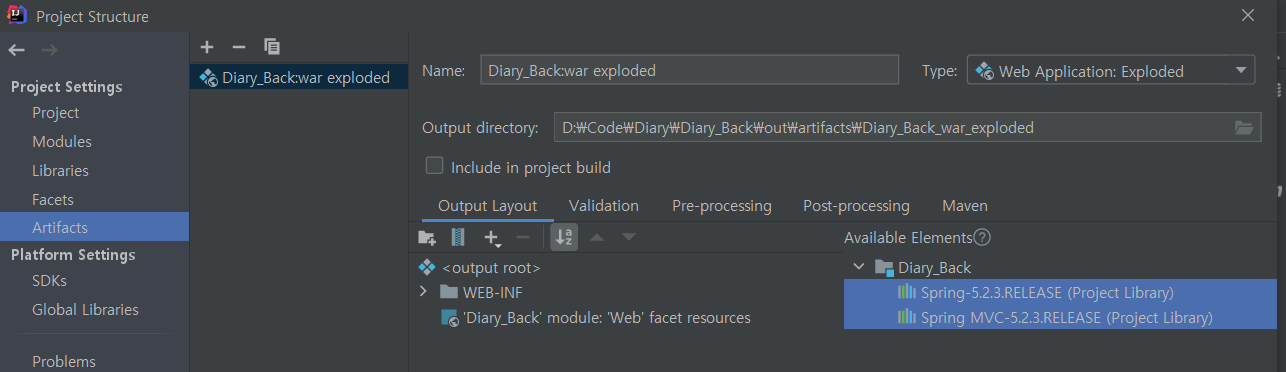
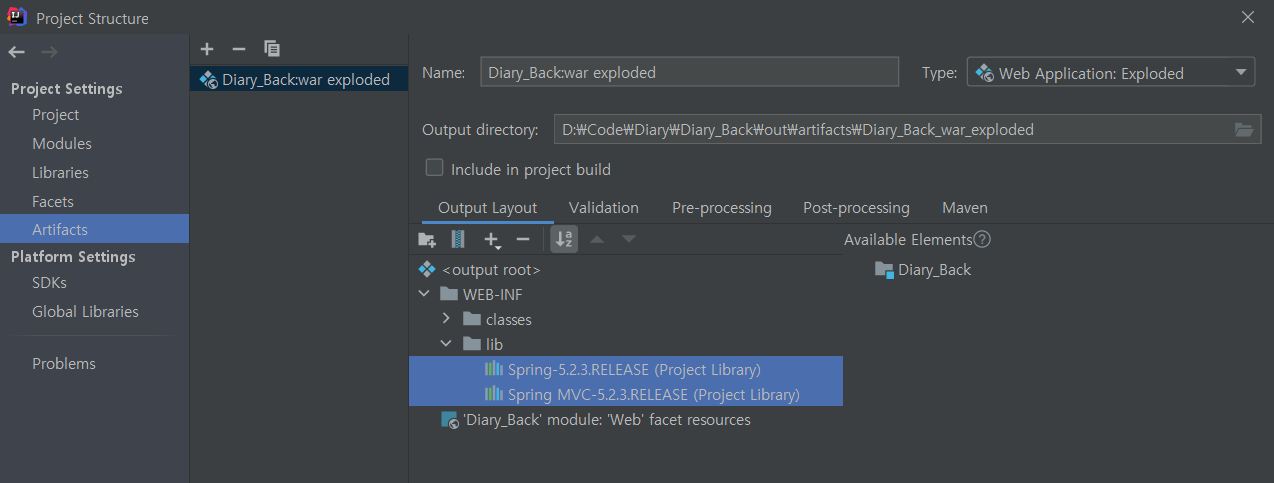
<url-pattern>/</url-pattern> - O1-6. File > Project Structure > Artifacts
-> Available Elements 아래 폴더 안에 있는 파일 더블클릭
(이동전)
(이동후)
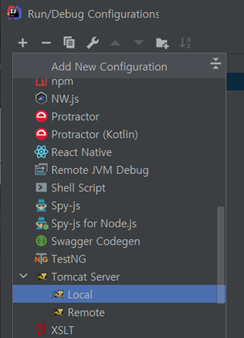
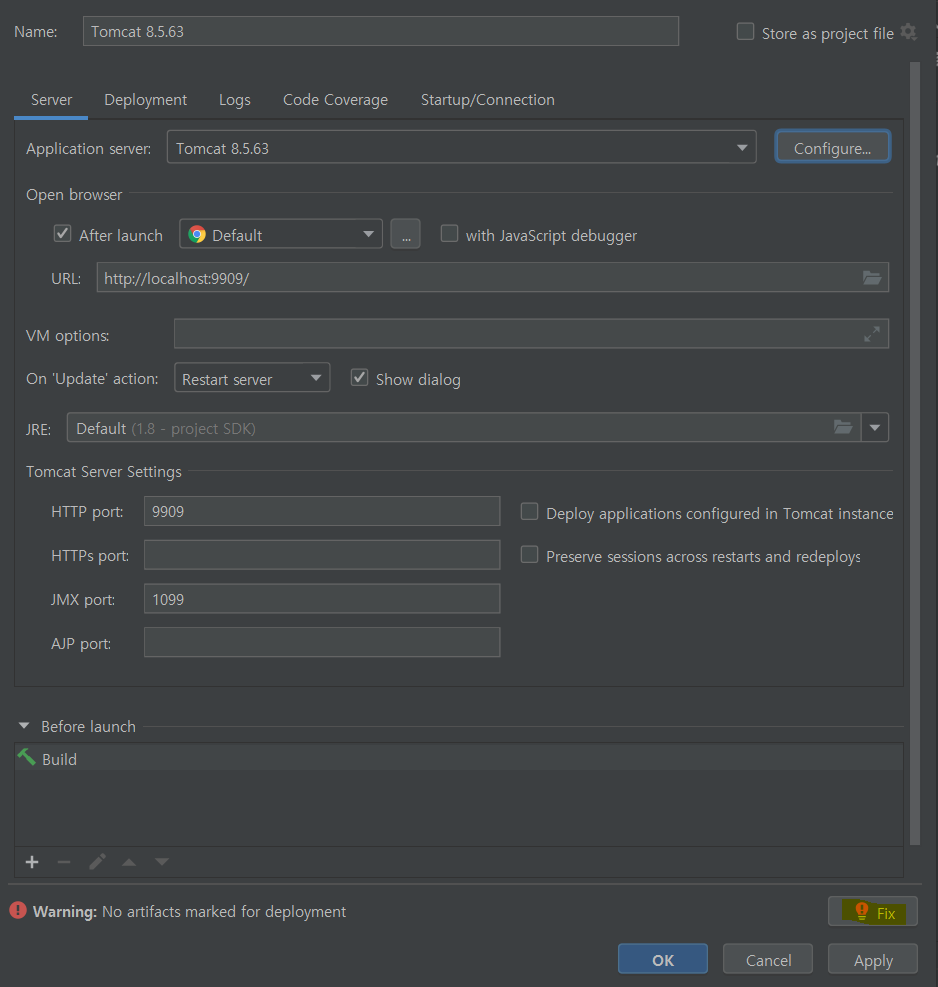
2. Tomcat 추가하기
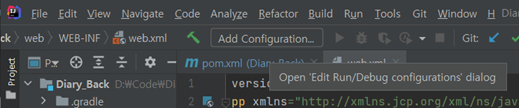
2-1. Add Configuration 클릭
2-2. +(왼쪽상단) 클릭, Tomcat Server>Local 클릭
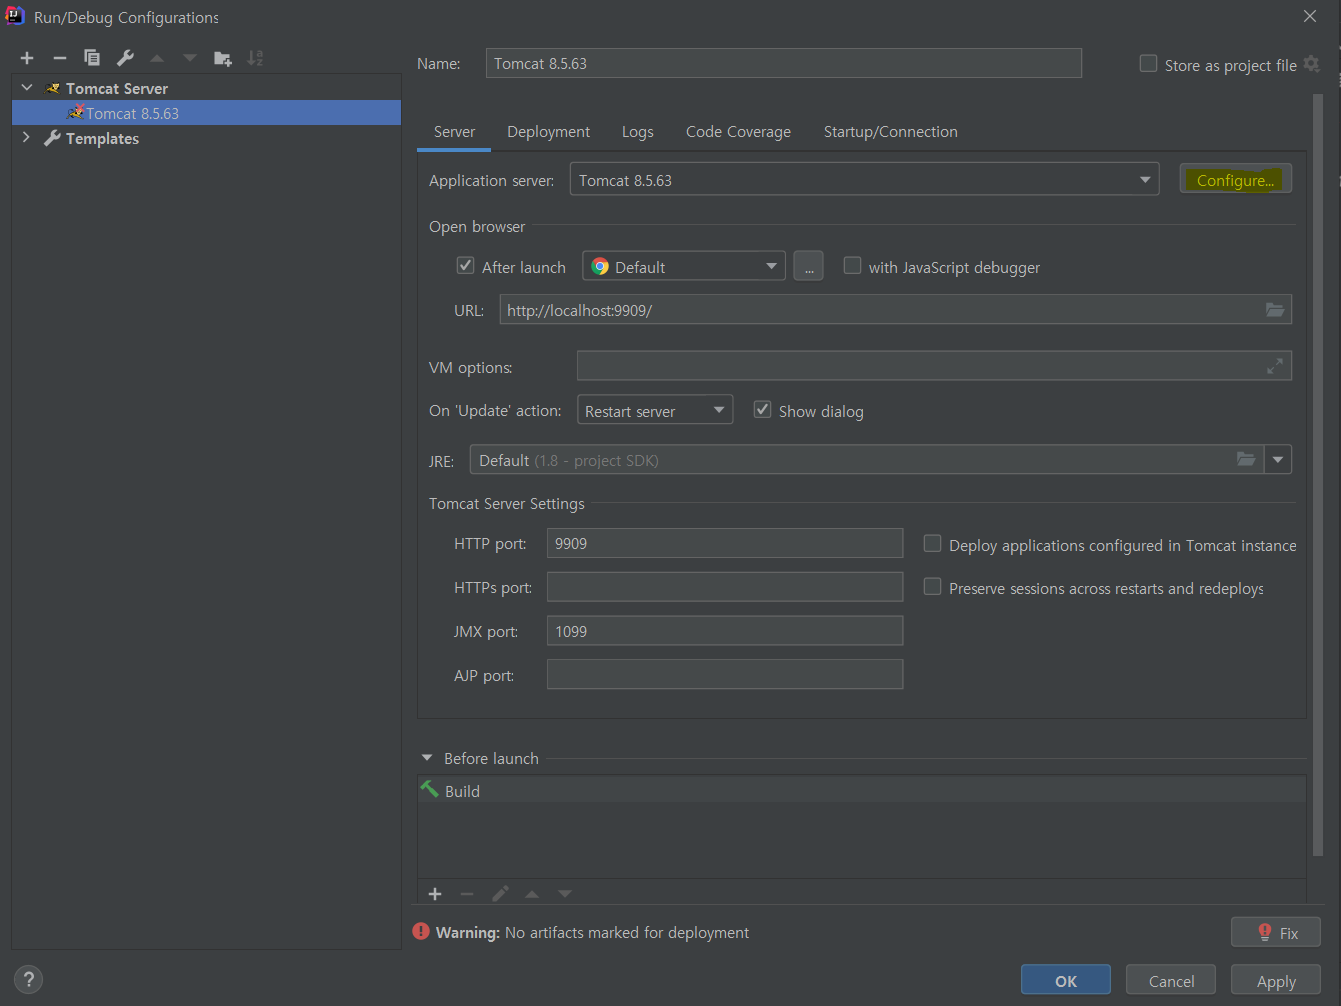
2-3. Configure
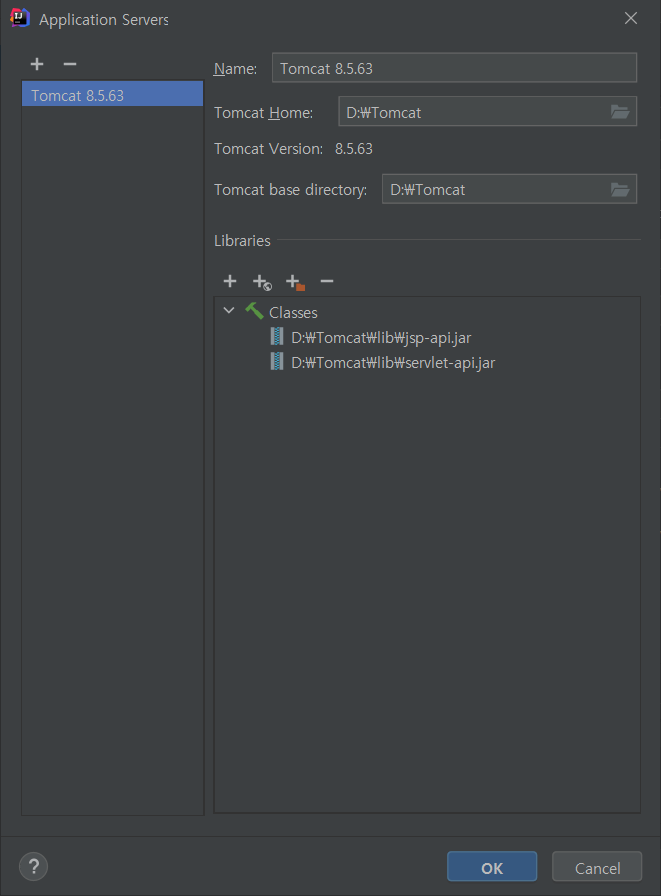
2-4. Tomcat 경로 설정
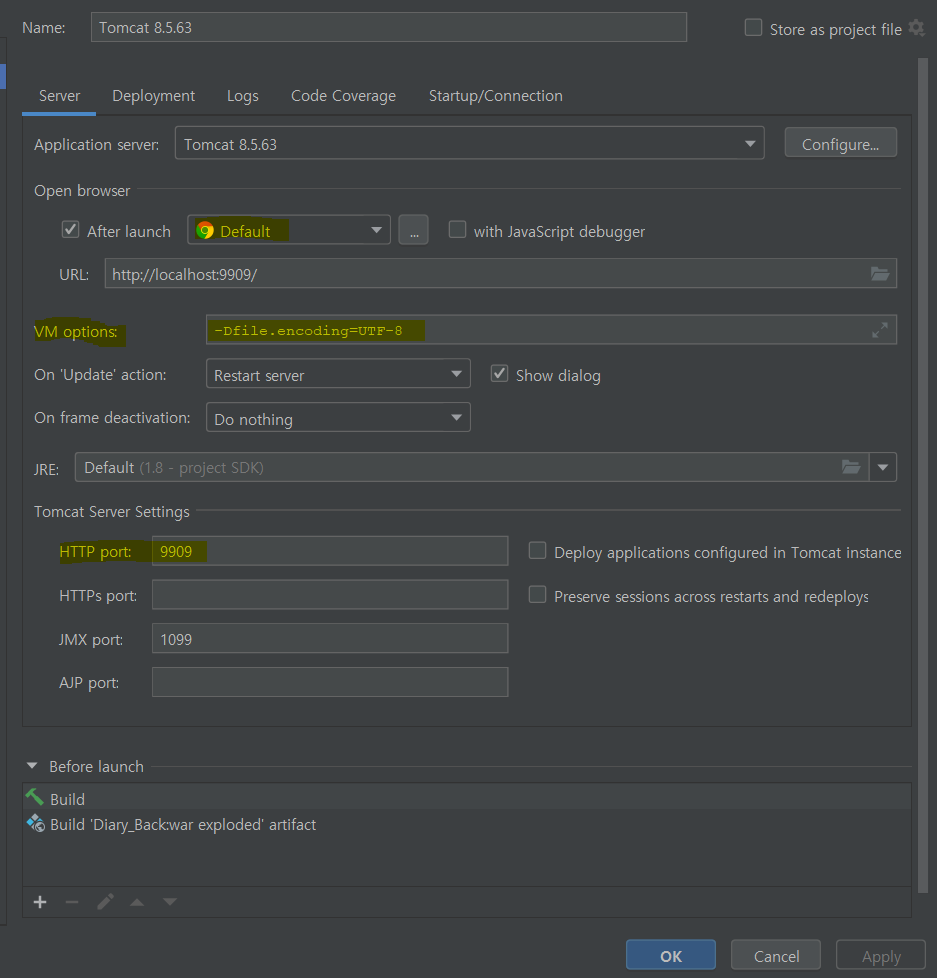
2-5. 기본 브라우저 설정, Port 번호 설정,
VM options (-Dfile.encoding=UTF-8) 입력 (인코딩 설정)
2-6. Fix
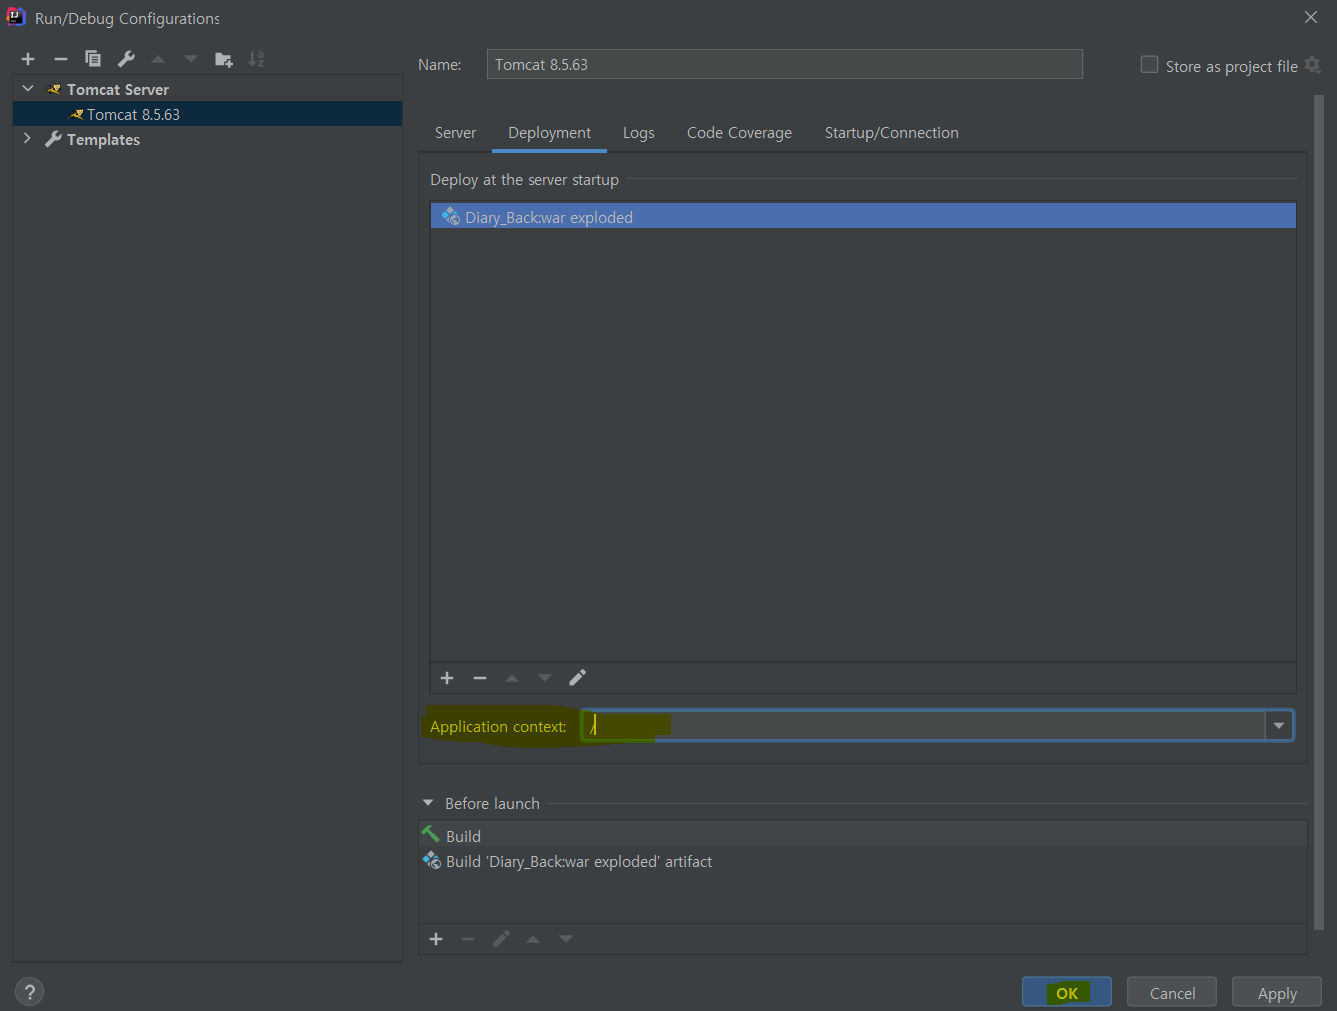
2-7. Application context : /로 설정 후 OK
▶ 필수는 아니지만 URL을 간편하게 할 수 있어 좋음
--> 설정 안했을 때 : http://localhost:{port}/projectName/url
--> 설정했을 때 : http://localhost:{port}/url
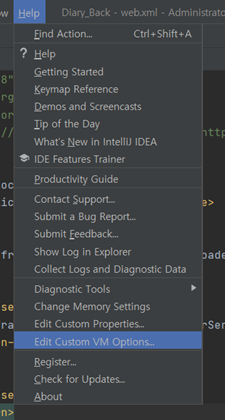
3. UTF-8 설정
3-1. VM 설정
- help > Edit Custom VM Options..
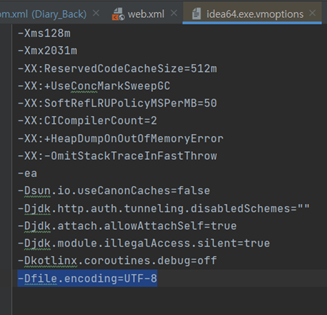
- -Dfile.encoding=UTF-8 입력
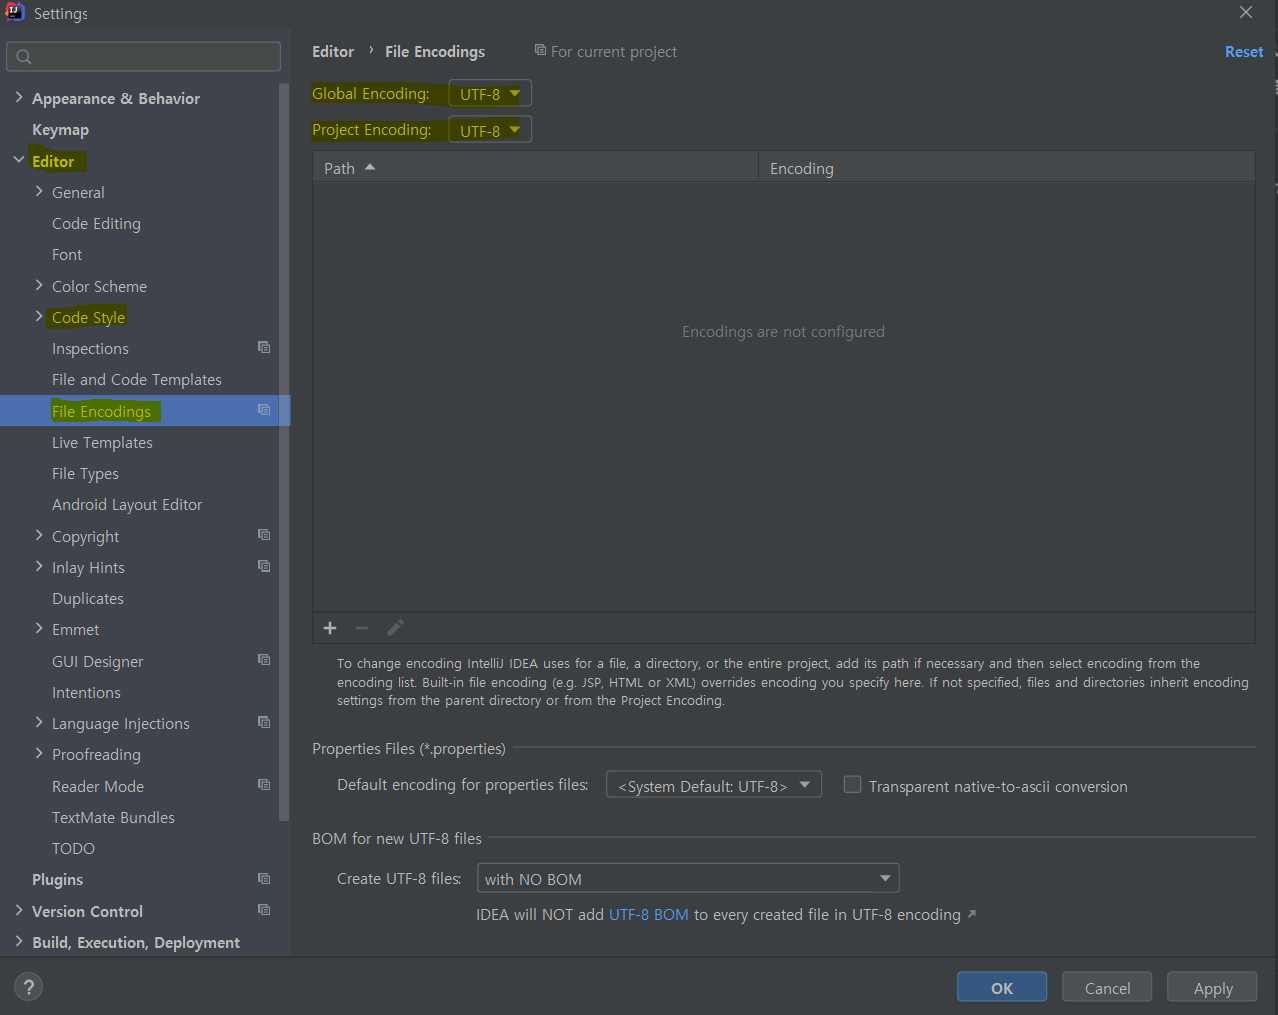
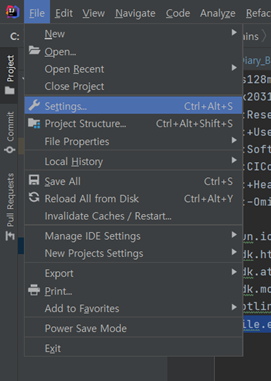
3-2. File 설정
- File > Settings
- Editor > Code Style > File Encodings
Global Encoding, Project - Encoding UTF-8 설정