사전캠프 12일차
오늘은 날씨 API를 활용한 알람 앱 실습을 했다.
그리고 5주차 강의 실전 메모 앱을 구상하고, 파이어베이스 연동까지 완료했다.
4주차 강의(API)
3. API
3-3 알람앱 + 날씨 API
📌 http 설치
flutter pub add http✔ Terminal에 입력해 설치한다.
📌 Members
✔ 가입 후Current Weather Data > Free > Get API KEY를 눌러 API KEY를 받는다.
📌 Current weather data
✔ api 사용법이 적힌 사이트로, API call을 통해 어떻게 사용하는지 확인할 수 있다.
Parameters를 통해 여러 가지 조합으로 요청할 수 있다.
여기서lat/lon은 지도상의 위/경도,appid는 위에서 api keys에서 확인했던 코드이다.
✅ weather
✔ icon (날씨 아이콘)
✅ main
✔ temp(기온)
✔ feels_like(체감기온)
✔ pressure(기압)
✅ wind
✔ speed(풍속 m/s)
💡 temp(기온) , feels_like(체감온도)를 사용하는데, 표시되는 단위는 켈빈으로 우리가 사용하는 섭씨와 다르기 때문에 변환해서 사용한다.
📌 WeatherModel 설계
class WeatherModel {
  final String? icon;
  final double? temp;
  final double? feelsLike;
  final double? pressure;
  final double? speed;
//
  WeatherModel({
    this.icon,
    this.temp,
    this.feelsLike,
    this.pressure,
    this.speed,
  });
//
  factory WeatherModel.fromJson(Map<String, dynamic> json) {
    return WeatherModel(
      icon: json['weather'][0]['icon'],
      temp: json['main']['temp'].toDouble() - 273.15,
      feelsLike: json['main']['feels_like'].toDouble() - 273.15,
      pressure: json['main']['pressure'].toDouble(),
      speed: json['wind']['speed'].toDouble(),
    );
  }
}
✔
weather_model.dart파일을 만들어 소스코드를 넣는다.
temp와feelsLike에 - 273.15를 한 이유는 켈빈에서 섭씨로 변환하기 위해서다.
📌 _wakeUpAlarm함수 전반적인 수정
Widget _wakeUpAlarm() {
 return Container(
   padding: const EdgeInsets.symmetric(horizontal: 10),
   child: FutureBuilder<WeatherModel?>(
     future: null,
     builder: (context, snapshot) {
       if (snapshot.hasData) {
         return Column(
           crossAxisAlignment: CrossAxisAlignment.stretch,
           children: [
             Text(
               '서울 날씨',
               style: TextStyle(fontSize: 40),
             ),
             SizedBox(height: 15),
             Text(
               '🛌 수면 | 기상',
               style: TextStyle(fontSize: 20),
             ),
             Row(
               mainAxisAlignment: MainAxisAlignment.spaceBetween,
               children: [
                 Text(
                   '알람없음',
                   style: TextStyle(color: Color(0xff8d8d93), fontSize: 50),
                 ),
                 Container(
                   padding: const EdgeInsets.symmetric(
                       horizontal: 15, vertical: 5),
                   decoration: BoxDecoration(
                     borderRadius: BorderRadius.circular(20),
                     color: Color(0xff262629),
                   ),
                   child: Text(
                     '변경',
                     style:
                         TextStyle(color: Color(0xffff9f0a), fontSize: 16),
                   ),
                 )
               ],
             )
           ],
         );
       }
       return Center(
         child: CircularProgressIndicator(),
       );
     },
   ),
 );
}
📌 서울 날씨 데이터 로드후 weatherModel 파싱
Future<WeatherModel?> loadWeatherApi() async {
  final url = Uri.parse(
      'https://api.openweathermap.org/data/2.5/weather?lat=37.564214&lon=127.001699&appid=본인apikey');
  final response = await http.get(url);
  if (response.statusCode == 200) {
    return WeatherModel.fromJson(json.decode(response.body));
  }
  return null;
}
📌 http Import
import 'package:http/http.dart' as http;
📌 날씨 위젯 화면 표기
Widget _wakeUpAlarm() {
  return Container(
    padding: const EdgeInsets.symmetric(horizontal: 10),
    child: FutureBuilder<WeatherModel?>(
      future: loadWeatherApi(),
      builder: (context, snapshot) {
        if (snapshot.hasData) {
          return Column(
            crossAxisAlignment: CrossAxisAlignment.stretch,
            children: [
              Text(
                '서울 날씨',
                style: TextStyle(fontSize: 40),
              ),
              SizedBox(height: 15),
              Row(
                children: [
                  Image.network(
                    'https://openweathermap.org/img/wn/${snapshot.data!.icon}@2x.png',
                    width: 100,
                    height: 100,
                  ),
                  Column(
                    crossAxisAlignment: CrossAxisAlignment.start,
                    children: [
                      Text(
                        '${snapshot.data!.temp!.toStringAsFixed(1)}°',
                        style: TextStyle(fontSize: 25, letterSpacing: -1),
                      ),
                      Text(
                        '체감기온 : ${snapshot.data!.feelsLike!.toStringAsFixed(1)}°',
                        style: TextStyle(fontSize: 17, letterSpacing: -1),
                      ),
                    ],
                  ),
                ],
              ),
              Row(
                children: [
                  Text(
                    '풍속 : ${snapshot.data!.speed!.toStringAsFixed(1)}m/s',
                    style: TextStyle(
                      color: Color(0xff8d8d93),
                      fontSize: 20,
                      letterSpacing: -1,
                    ),
                  ),
                  SizedBox(width: 20),
                  Text(
                    '기압 : ${snapshot.data!.pressure!.toStringAsFixed(1)}hPa',
                    style: TextStyle(
                      color: Color(0xff8d8d93),
                      fontSize: 20,
                      letterSpacing: -1,
                    ),
                  ),
                ],
              )
            ],
          );
        }
        return Center(
          child: CircularProgressIndicator(),
        );
      },
    ),
  );
}
✔ 위젯을 사용아여 서울 날씨를 보여줄 수 있도록 배치한다. 정상적으로 표시되는 것을 알 수 있다.
5주차 강의(메모 앱)
1. 실전 앱 만들기 + 앱 배포
📚 학습 내용
- 위젯 사용
- 데이터 > 파이어베이스 저장 (CRUD)
- Getx를 통한 상태관리
- 검색기능을 통한 필터
- 구글 애드몹 사용방법
📚 기능 명세
- 메모는 월별로 그룹화된다.
- 메모에는 제목과 내용으로 나뉘어 저장된다.
- 메모 상세 페이지에는 바로 편집이 된다.
- 구글 광고는 홈 화면에서만 노출이 된다.
- 검색은 입력에 따라 제목에 포함된 내용이 필터링 되어 노출이 된다.
- 제목은 한 줄로 표시되고 한 줄이 넘어가는 긴 제목의 경우는 … 처리한다.
- 모든 메모는 휘발되지 않는다.
- 삭제는 메모 상세 화면 하단에 삭제 버튼을 배치하여 삭제할 수 있다.
📚 할일 정리
- 홈 화면 구성
- 등록/상세 화면 구성
- 파이어베이스 연동
- 메모 등록 기능 개발
- 메모 리스트 개발
- 메모를 눌러 메모 수정 개발
- 메모를 눌러 삭제 개발
- 검색기능을 통해 메모 리스트 필터 개발
- 구글 애드몹 연동
- 앱 배포
2. 메모 앱 만들기
2-1 메모 앱 화면 위젯 구상
📚 화면
- 메모 리스트 화면(홈)
- 메모 등록 화면
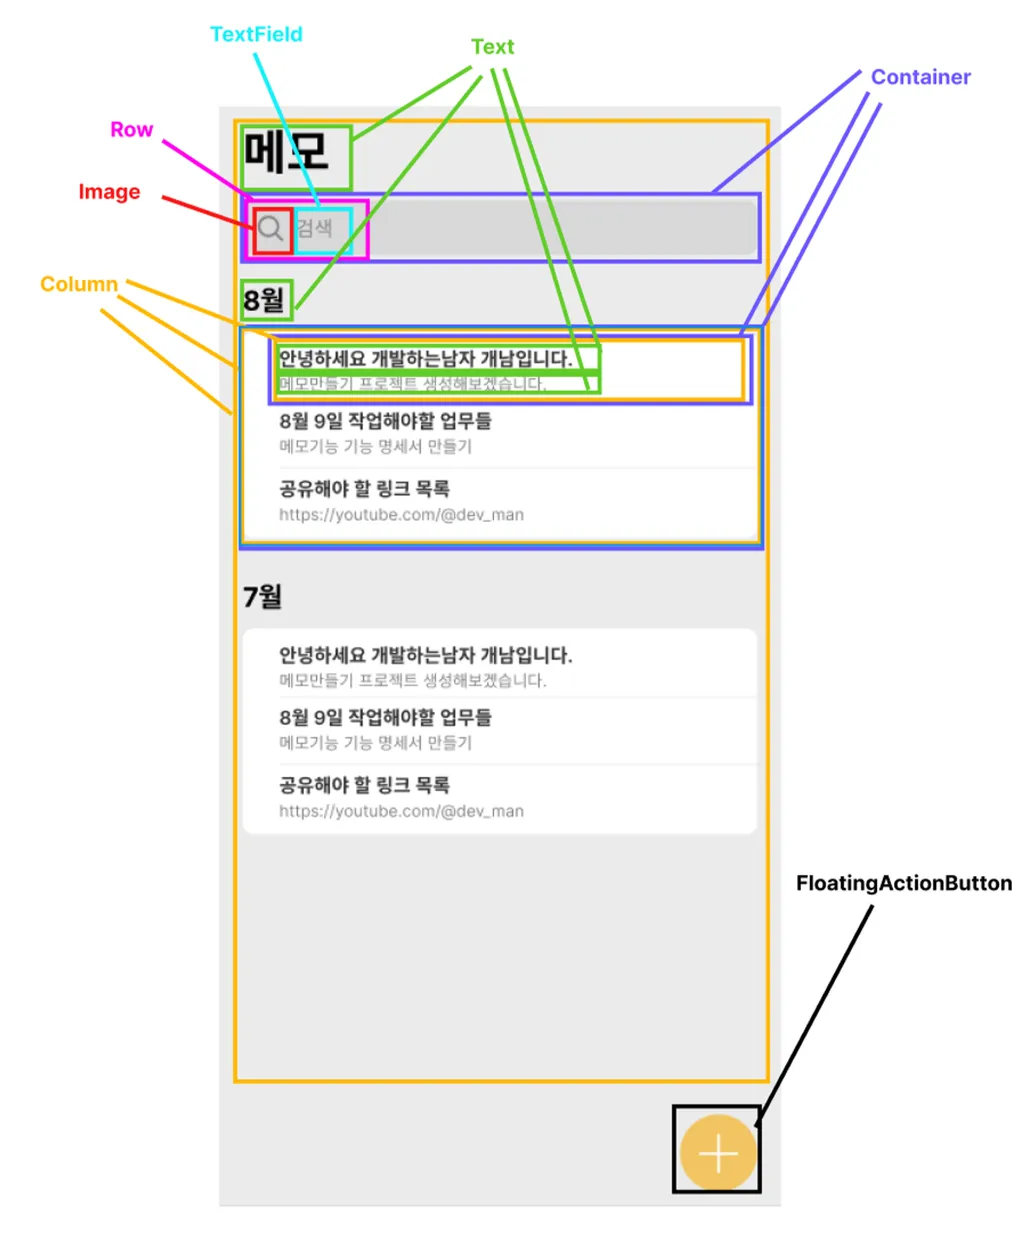
📌 메모 리스트 화면(홈)
📌 메모 등록 화면
2-2 메모 앱 프로젝트 생성 및 실행
📌 프로젝트 생성
flutter create --platforms ios,android flutter_memo_app✔ 명령 프롬프트에 입력해 프로젝트를 생성한다.
📌 라이브러리 생성
flutter pub add get uuid firebase_core cloud_firestore✔
get(상태관리 목적),uuid(고유 id 생성 목적),firebase_core,cloud_firestore(파이어베이스 데이터베이스 이용 목적)이 필요하기 때문에 라이브러리를 설치한다.
📌 main.dart 초기화
import 'package:flutter/material.dart'; import 'package:flutter_memo_app/home.dart'; // void main() { runApp(const MyApp()); } // class MyApp extends StatelessWidget { const MyApp({super.key}); // Widget build(BuildContext context) { return MaterialApp( title: 'Flutter Demo', theme: ThemeData( colorScheme: ColorScheme.fromSeed(seedColor: Colors.deepPurple), useMaterial3: true, ), home: Home(), ); } }
📌 Home 위젯 초기화
import 'package:flutter/material.dart'; // class Home extends StatelessWidget { const Home({super.key}); // Widget build(BuildContext context) { return Scaffold( backgroundColor: Color(0xffEBEBEB), body: SafeArea( child: SingleChildScrollView( child: Column( children: [], ), ), ), ); } }
📌 analysis_options const rules 추가
prefer_const_constructors: false
prefer_const_literals_to_create_immutables: false
✔
analysis_options.yaml파일의rules하단에 붙여넣는다.
✔ 메모의 기본 틀을 Scaffold로 구성하고 메모의 양이 많아졌을 때 스크롤이 생길 수 있도록SingleChildScrollView로 위젯 초기화로 구성한다.
2-3 홈 화면 구성
📌 메모 상단 구성
return Scaffold(
  backgroundColor: Color(0xffEBEBEB),
  body: SafeArea(
    child: SingleChildScrollView(
      padding: const EdgeInsets.symmetric(horizontal: 25),
      child: Column(
        children: [
          Text(
            '메모',
            style: TextStyle(
              fontSize: 35,
              fontWeight: FontWeight.bold,
            ),
          )
        ],
      ),
    ),
  ),
);
✔
SingleChildScrollView로 좌우 간격을 25씩 넣어준다.
📌 pubspec.yaml 애셋 등록
  assets:
    - assets/images/
✔ 이미지를 사용하기 위해
pubspec.yaml에 에셋을 등록한다.
📌 searchBar 함수위젯
Widget _searchBar() {
  return Container(
    margin: const EdgeInsets.only(top: 10),
    padding: const EdgeInsets.symmetric(horizontal: 15),
    decoration: BoxDecoration(
      color: Color(0xffD8D8D8),
      borderRadius: BorderRadius.circular(8),
    ),
    child: Row(
      children: [
        Image.asset('assets/images/search.png'),
        SizedBox(width: 10),
        Expanded(
          child: TextField(
            decoration: InputDecoration(
              border: InputBorder.none,
              hintText: '검색',
              hintStyle: TextStyle(
                color: Color(0xff888888),
                fontSize: 15,
              ),
            ),
          ),
        ),
      ],
    ),
  );
}
📌 home.dart build 함수 수정
Widget build(BuildContext context) { return Scaffold( backgroundColor: Color(0xffEBEBEB), body: SafeArea( child: SingleChildScrollView( padding: const EdgeInsets.symmetric(horizontal: 25), child: Column( crossAxisAlignment: CrossAxisAlignment.stretch, children: [ Text( '메모', style: TextStyle( fontSize: 35, fontWeight: FontWeight.bold, ), ), _searchBar(), ], ), ), ), ); }✔ 검색 바를 배치하니 메모가 중앙 정렬이 되어, 좌측 정렬하기 위해
Column의crossAxisAlignment부분을stretch로 수정한다.
📌 _monthlyMemoGroup 함수 위젯
Widget _monthlyMemoGroup() {
  return Column(
    crossAxisAlignment: CrossAxisAlignment.stretch,
    children: [
      SizedBox(height: 30),
      Text(
        '8월',
        style: TextStyle(fontWeight: FontWeight.bold, fontSize: 20),
      ),
      SizedBox(height: 10),
      Container(
        decoration: BoxDecoration(
          borderRadius: BorderRadius.circular(8),
          color: Colors.white,
        ),
        padding: const EdgeInsets.only(left: 25),
        child: Column(
          crossAxisAlignment: CrossAxisAlignment.stretch,
          children: List.generate(
            5,
            (i) {
              return Container(
                padding: const EdgeInsets.symmetric(vertical: 10),
                decoration: BoxDecoration(
                  border: Border(
                    bottom: BorderSide(
                      color: Color(0xffECECEC),
                    ),
                  ),
                ),
                child: Column(
                  crossAxisAlignment: CrossAxisAlignment.stretch,
                  children: [
                    Text(
                      '안녕하세요 개발하는남자 개남입니다.',
                      style: TextStyle(
                        fontWeight: FontWeight.bold,
                        fontSize: 17,
                      ),
                    ),
                    Text(
                      '메모만들기 프로젝트 생성해보겠습니다.',
                      style:
                          TextStyle(fontSize: 14, color: Color(0xff848484)),
                    ),
                  ],
                ),
              );
            },
          ),
        ),
      )
    ],
  );
}
📌 floatingActionButton 위젯
floatingActionButton: FloatingActionButton(
    onPressed: () {},
    backgroundColor: Color(0xffF7C354),
    shape: RoundedRectangleBorder(
      borderRadius: BorderRadius.circular(50),
    ),
    child: Image.asset('assets/images/plus.png'),
),
✔ Scaffold의 기본 옵션을 통해
FloatingActionButton을 구성한다.
2-4 등록 상세페이지 구성
📌 main.dart 파일 Get라우팅을 위해 MaterialApp수정
return GetMaterialApp(
    title: 'Flutter Demo',
    theme: ThemeData(
      colorScheme: ColorScheme.fromSeed(seedColor: Colors.deepPurple),
      useMaterial3: true,
    ),
    home: Home(),
);
📌 memo_write_page.dart 파일 초기화 소스
import 'package:flutter/material.dart'; // class MemoWritePage extends StatelessWidget { const MemoWritePage({super.key}); // Widget build(BuildContext context) { return Scaffold( body: Center( child: Text('메모등록페이지'), ), ); } }
📌 FloatingActionButton 이벤트 연결
floatingActionButton: FloatingActionButton(
  onPressed: () {
    Get.to(MemoWritePage());
  },
  backgroundColor: Color(0xffF7C354),
  shape: RoundedRectangleBorder(
    borderRadius: BorderRadius.circular(50),
  ),
  child: Image.asset('assets/images/plus.png'),
),
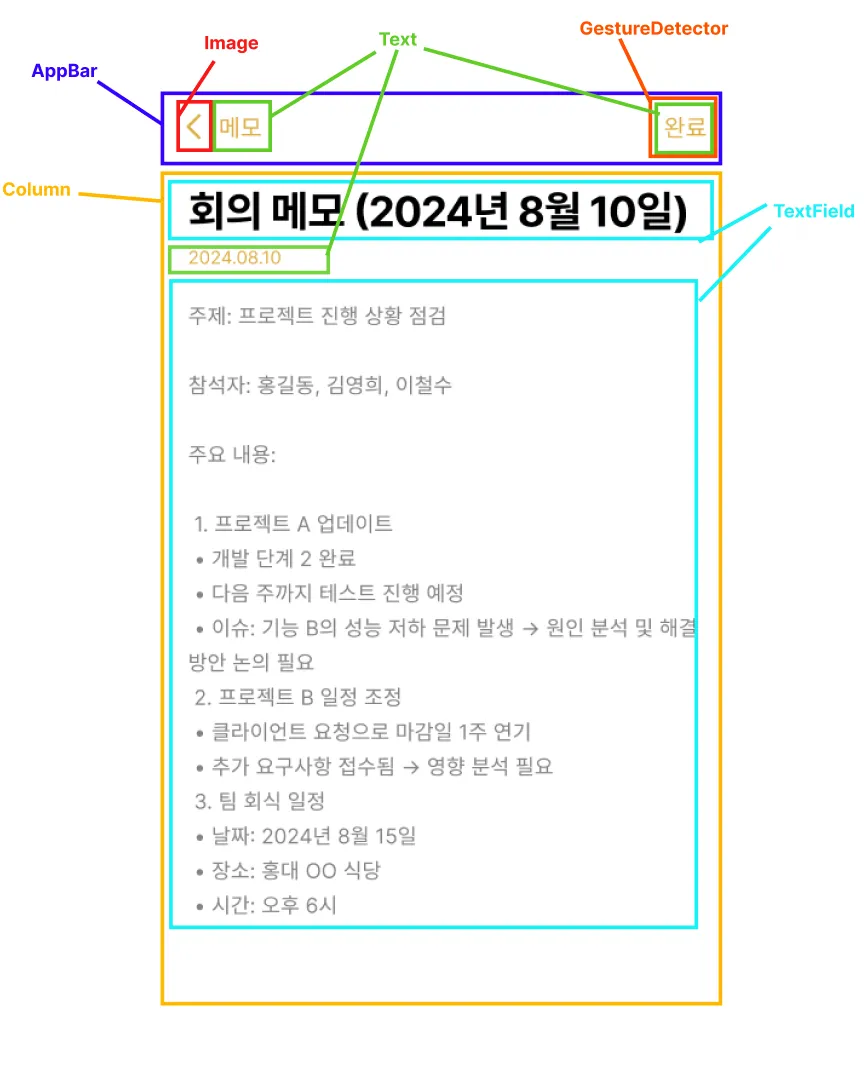
📌 appbar 구성
appBar: AppBar(
  leading: GestureDetector(
    onTap: Get.back,
    child: Image.asset('assets/images/back.png'),
  ),
  centerTitle: false,
  titleSpacing: 0,
  title: Text(
    '메모',
    style: TextStyle(fontSize: 17, color: Color(0xffE3AC34)),
  ),
  actions: [
    GestureDetector(
      onTap: () {},
      child: Padding(
        padding: const EdgeInsets.symmetric(horizontal: 25.0),
        child: Text(
          '완료',
          style: TextStyle(fontSize: 17, color: Color(0xffE3AC34)),
        ),
      ),
    ),
  ],
),
✔
centerTitle에서 ios는true, android는false로 기본값이 설정되어 있기 때문에,true혹은false로 작성해주어야 ios와 android에서 동일한 화면이 보여진다.
📌 메모 작성 영역
body: Padding(
  padding: const EdgeInsets.symmetric(horizontal: 25),
  child: Column(
    crossAxisAlignment: CrossAxisAlignment.stretch,
    children: [
      TextField(
        decoration: InputDecoration(
          border: InputBorder.none,
          hintText: '제목을 입력해주세요.',
        ),
        style: TextStyle(
          fontSize: 27,
          height: 1.5,
          fontWeight: FontWeight.bold,
          letterSpacing: -1,
        ),
        maxLines: null, // 여러 줄 입력 가능
      ),
      Text(
        '2024.08.10',
        style: TextStyle(fontSize: 13, color: Color(0xffE3AC34)),
      ),
      Expanded(
        child: TextField(
          decoration: InputDecoration(
            border: InputBorder.none,
            hintText: '내용을 입력해주세요.',
          ),
          style: TextStyle(
            fontSize: 15,
            height: 1.5,
            color: Color(0xff848484),
            letterSpacing: -1,
          ),
          maxLines: null, // 여러 줄 입력 가능
        ),
      ),
    ],
  ),
),
3. 파이어베이스
3-1 파이어베이스 생성
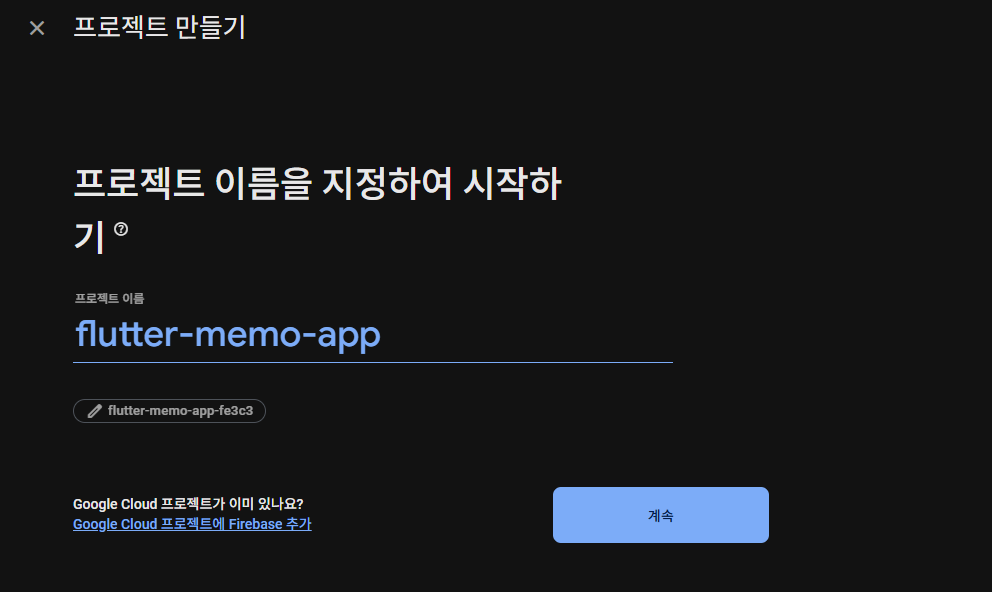
📌 파이어베이스 프로젝트 생성
✔ 새 프로젝트 만들기를 눌러 지난 시간에 배웠던 것처럼 프로젝트 명 flutter-memo-app로 생성한다.
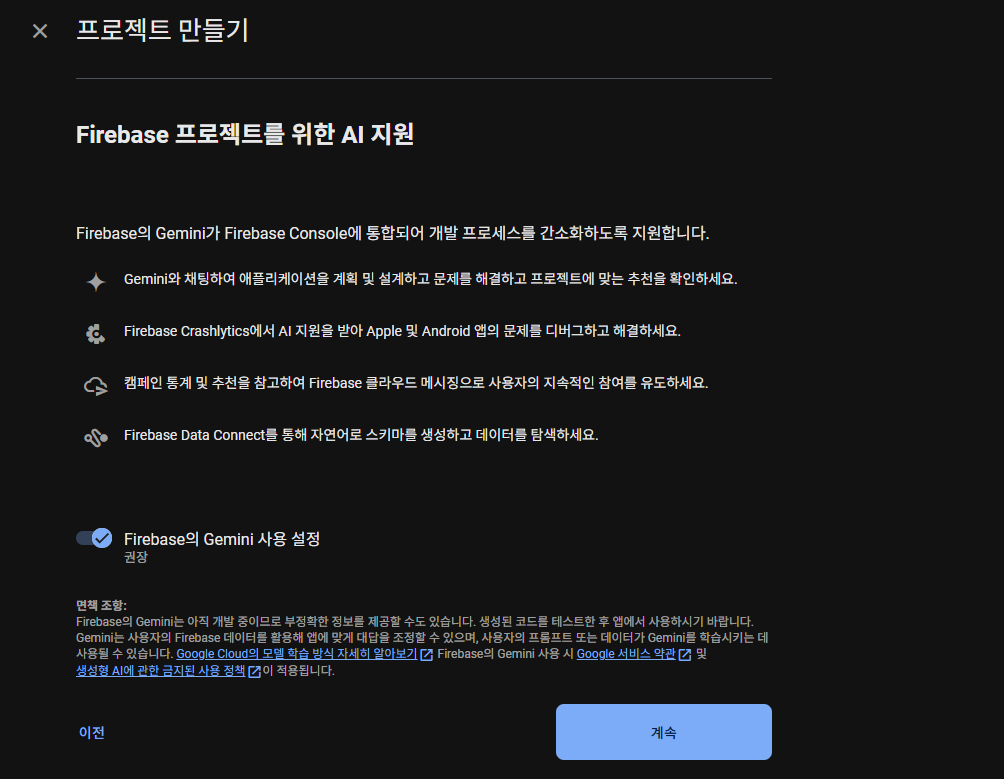
📌 Firebase 프로젝트를 위한 AI 지원
✔ 강의에는 없지만 계속하기를 눌러 진행한다.
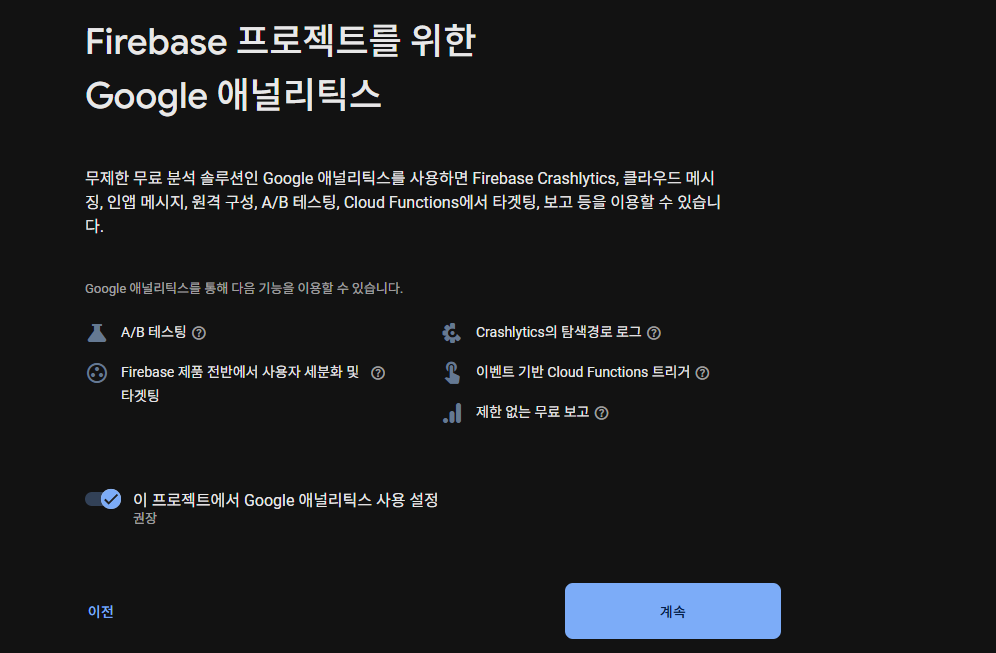
📌 Google 애널리틱스
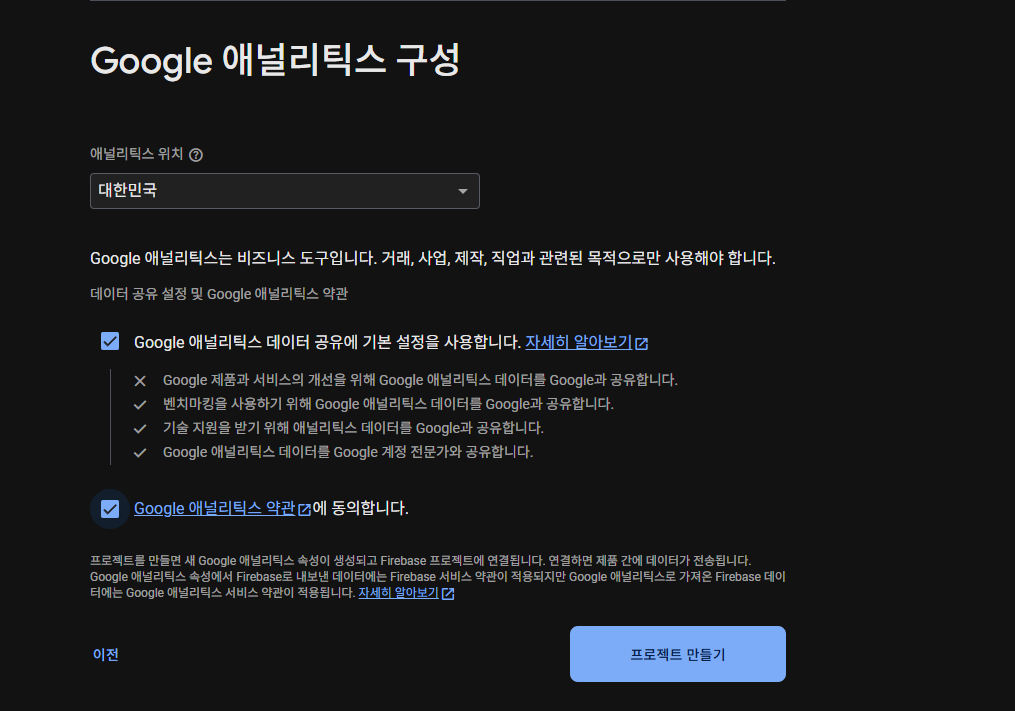
📌 Google 애널리틱스 구성
✔ 여기도 강의랑 다른 부분인데 계정을 선택해야 하지만, 최근 파이어베이스에서는 위치를 선택하게 되어있다.
선택하고 프로젝트 만들기를 진행한다.
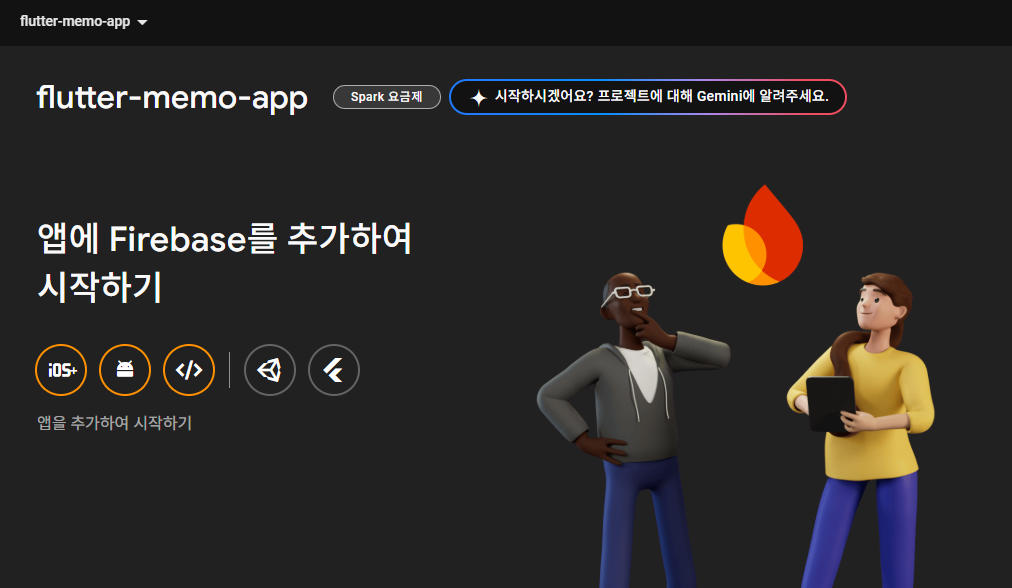
📌 프로젝트 생성 완료
3-2 파이어베이스 연동
ios의 경우 개발자 등록과 비용, Mac 환경이 필요하기 때문에 Android만 연동한다.
📌 android > app > build.gradle > namespace
✔example이라는 명으로는 배포를 할 수 없기 때문에, 패키지명을 임의로 velog 명으로 변경했다.
✔ 또한, 명을 바꿨으면 하단의applicationId에서도 변경해야한다.
✔ 오류가 나기 때문에src > main > kotlin\com\example\flutter_memo_app우클릭 >Reveal in File Explorer클릭, 폴더 명도 변경해준다.
✔MainActivity.kt파일에서 상단의 package 부분도 수정해준다.
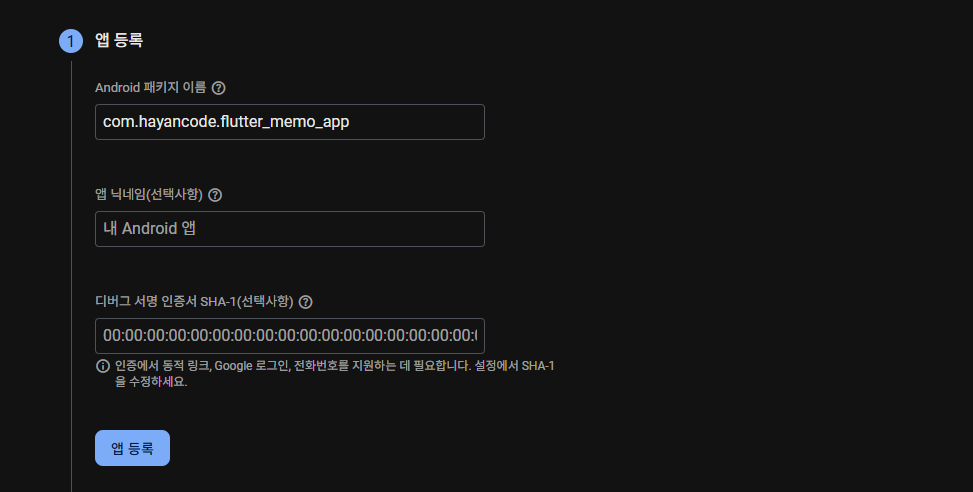
📌 앱 등록
📌 파일 다운로드 후 추가
✔ 해당 파일을 다운로드한 후에 프로젝트 안의 app에 추가한다.
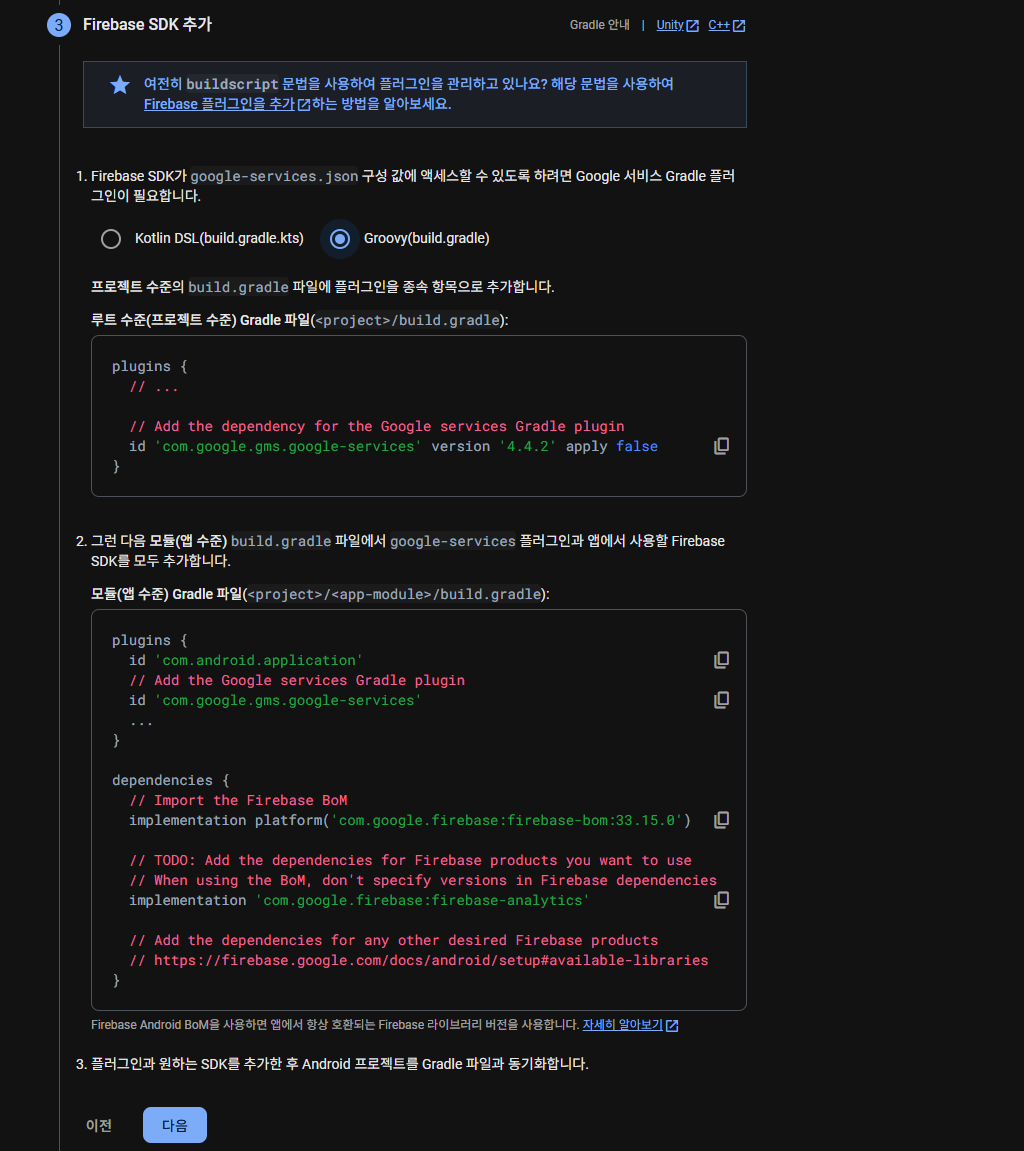
📌 Groovy 선택
📌 google 라이브러리 import
id 'com.google.gms.google-services' version '4.4.2' apply false✔
settings.gradle파일의plugins에 붙여넣는다.
id 'com.google.gms.google-services'✔
app > build.gradle의plugins에 붙여넣는다.
dependencies {
  // Import the Firebase BoM
  implementation platform('com.google.firebase:firebase-bom:33.15.0')
//
//
  // TODO: Add the dependencies for Firebase products you want to use
  // When using the BoM, don't specify versions in Firebase dependencies
  implementation 'com.google.firebase:firebase-analytics'
//
//
  // Add the dependencies for any other desired Firebase products
  // https://firebase.google.com/docs/android/setup#available-libraries
}
✔
dependencies부분을 전체 복사해서 하단 빈 영역에 붙여넣어준다.
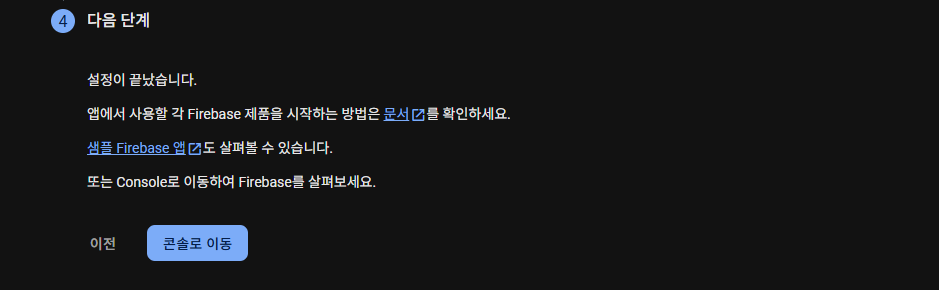
📌 콘솔로 이동
💡 오류 발생 시
settings.graldle파일에서pluginskotlin 부분의 버전을 낮춰준다.

📌 WidgetsFlutterBinding.ensureInitialized()
void main() {
  WidgetsFlutterBinding.ensureInitialized();
  runApp(const MyApp());
}
📌 Firebase 초기화 데이터 적용
void main() async {
 WidgetsFlutterBinding.ensureInitialized();
 await Firebase.initializeApp(
   options: FirebaseOptions(
     apiKey: 'AIzaSyCJnDFVVo14msN_SVDgCL5pxzeQanvBYifaU',
     appId: '1:576219428700:android:ece6bde2438de1b126e1b399',
     messagingSenderId: '57621944429828700',
     projectId: 'flutter-memo-app-46e5b',
   ),
 );
 runApp(const MyApp());
}
✔ 다운로드 받았던 google-services.json 파일에서 찾아서
apiKey,appID,messagingSenderID(=project_number),projectId값을 바꿔넣는다.
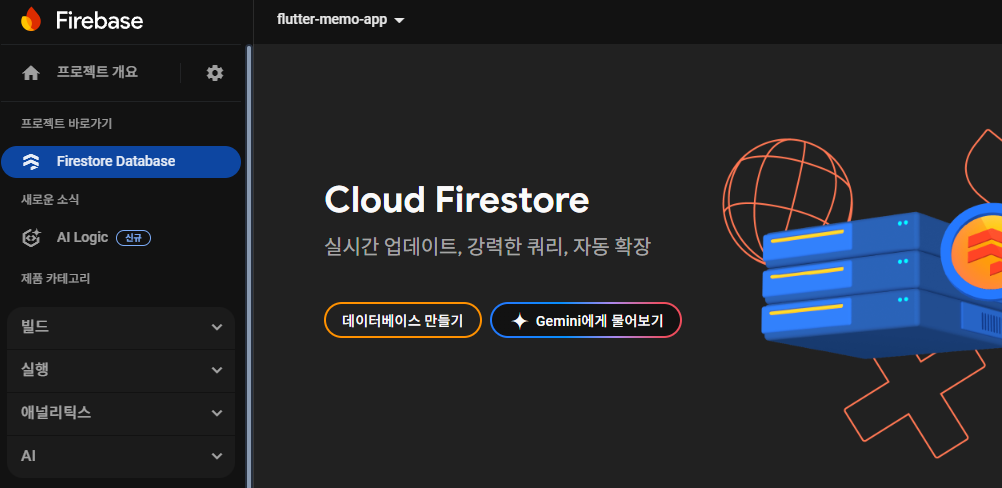
3-3 파이어베이스 데이터 베이스 생성 및 연동
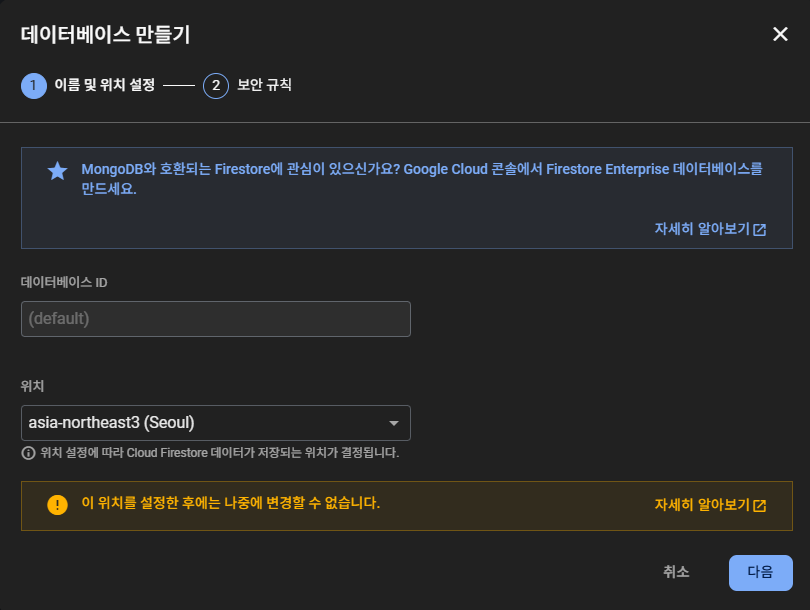
📌 데이터베이스 만들기
📌 위치 설정
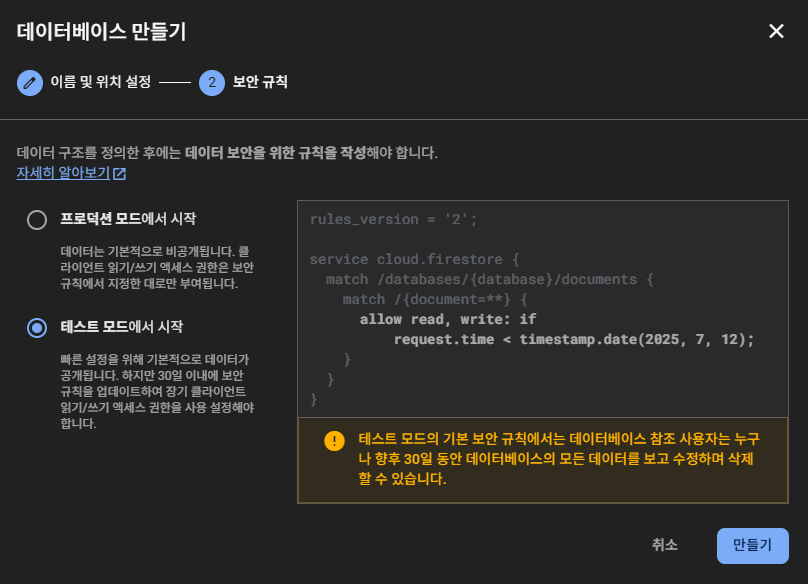
📌 테스트 모드에서 시작
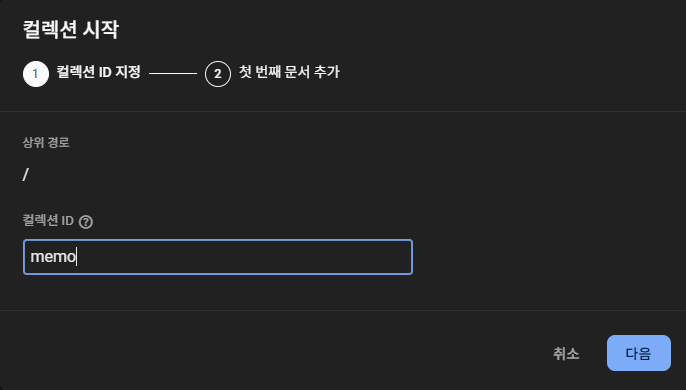
📌 컬렉션 시작
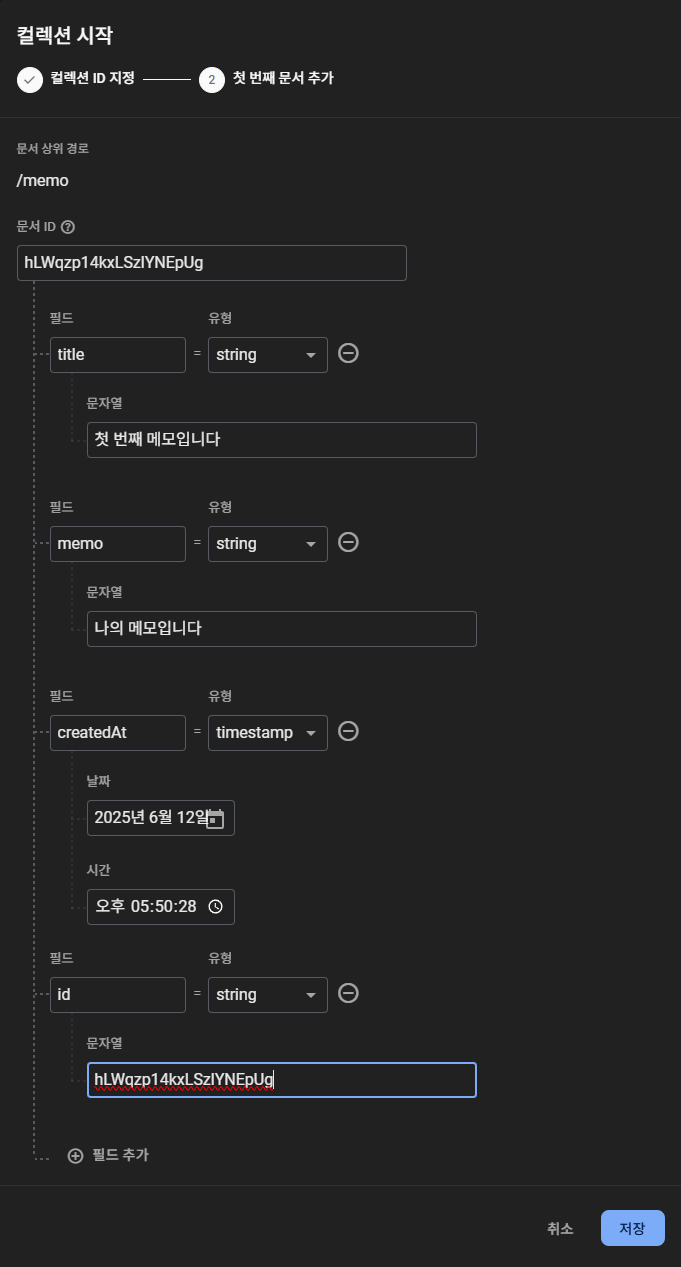
📌 필드 추가
📌 main.dart 파일의 MyApp build 함수에 파이어베이스 데이터베이스 데이터 로드
FirebaseFirestore.instance.collection('memo').get().then((value) {
  print(value.docs.length);
});
날씨 API를 적용해보았는데, 실제로 적용되는 모습을 보니 신기하기도 하고 편리했다.
메모앱 화면 구성은 어느정도 이해는 되는 것 같은데 후에 기능 추가하면 복잡해질 것 같다.
그리고 파이어베이스는 저번에 했던 것과 비슷해서 어려움은 없었으나, 버전 때문에 오류가 자꾸 떠서 머리가 아프다...
해결 방안처럼 버전을 낮추기도 해봤는데 계속 오류가 떠서 일단 강의는 마무리까지 했다.
그리고 구글링이나 챗gpt한테 물어서 해결방법을 찾거나, 플러터 버전을 업그레이드 하거나 여러 방법을 시도해봐야된다.