
gfx-rs를 더 잘 이해하기위해 작은 토이 프로젝트 작성하고 있다. 부수적으로 다른 사람들도 gfx-rs를 배울 수 있도록 작은 튜토리얼을 작성한다.
cargo init sqtoy
Cargo.toml의 dependencies 내용 추가
[dependencies]
gfx = "0.16"
gfx_window_glutin = "0.16"
glutin = "0.8"
main.rs 수정
#[macro_use]
extern crate gfx;
extern crate gfx_window_glutin;
extern crate glutin;
use gfx::traits::FactoryExt;
use gfx::Device;
use gfx_window_glutin as gfx_glutin;
pub type ColorFormat = gfx::format::Srgba8;
pub type DepthFormat = gfx::format::DepthStencil;
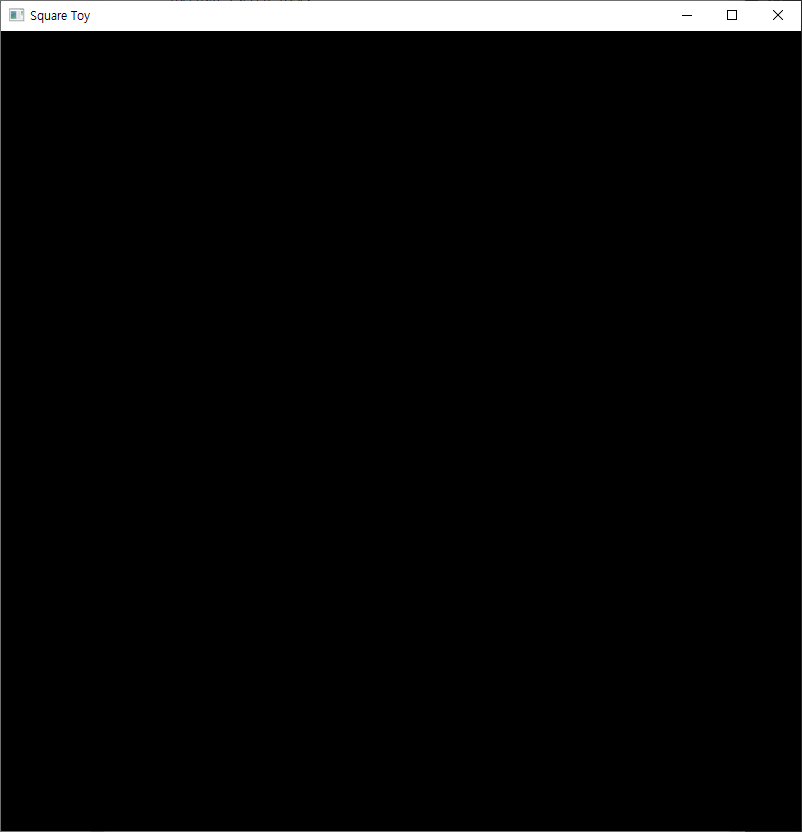
const BLACK: [f32; 4] = [0.0, 0.0, 0.0, 1.0];
pub fn main() {
let events_loop = glutin::EventsLoop::new();
let builder = glutin::WindowBuilder::new()
.with_title("Square Toy".to_string())
.with_dimensions(800, 800)
.with_vsync();
let (window, mut device, mut factory, mut main_color, mut main_depth) =
gfx_glutin::init::<ColorFormat, DepthFormat>(builder, &events_loop);
let mut encoder: gfx::Encoder<_, _> = factory.create_command_buffer().into();
let mut running = true;
while running {
events_loop.poll_events(
|glutin::Event::WindowEvent {
window_id: _,
event,
}| {
use glutin::WindowEvent::*;
match event {
KeyboardInput(_, _, Some(glutin::VirtualKeyCode::Escape), _) | Closed => {
running = false
}
Resized(_, _) => {
gfx_glutin::update_views(&window, &mut main_color, &mut main_depth);
}
_ => (),
}
},
);
encoder.clear(&main_color, BLACK);
encoder.flush(&mut device);
window.swap_buffers().unwrap();
device.cleanup();
}
}
glutin, OpenGL, gfx를 사용
1. 이벤트 루프 생성 및 "Square Toy"라는 제목의 창 생성 준비
2. glutin::Window, gfx_device_gl::Deviced 와 다른 것들을 얻기위해 gfx_window_glutin::init() 함수 호출
3. factory를 사용하여 OpenGL 함수들의 직접 호출을 피할 수 있게 해주는 Encoder 생성
4. 매 Frame
4.1 종료할 시간인지 확인
4.2 원하는 색상으로 화면 채우기(현재는 BLACK)
4.3 실행
4.4 더블 버퍼링, 백/프론트 버퍼 스위칭
4.5 정리

Mickey