회원 관련 기능
POST 방식으로 회원가입 저장 시키려함
로그인 정보가 어디에 저장되느냐에 따라
클라이언트에 저장 - 토큰
서버에 저장 - 세션
여기서는 토큰방식으로 많이 함
-
라이브러리 설치
- rest api의 회원 기능을 구현한 라이브러리 사용 할 것
- pip install dj-rest-auth
- pip install django-allauth
- pip install djangorestframework-simplejwt
-
accounts app 추가
- python .\manage.py startapp accounts
-
settings.py 설정
- INSTALLED_APP
INSTALLED_APPS = [ 'django.contrib.admin', 'django.contrib.auth', 'django.contrib.contenttypes', 'django.contrib.sessions', 'django.contrib.messages', 'django.contrib.staticfiles', 'django.contrib.sites', 'rest_framework', 'rest_framework.authtoken', 'dj_rest_auth', 'allauth', 'allauth.account', 'allauth.socialaccount', 'dj_rest_auth.registration', 'product', 'review', 'accounts', ] SITE_ID = 1-
migrate
- python .\manage.py makemigrations
- migrate .\manage.py migrate
-
config urls.py
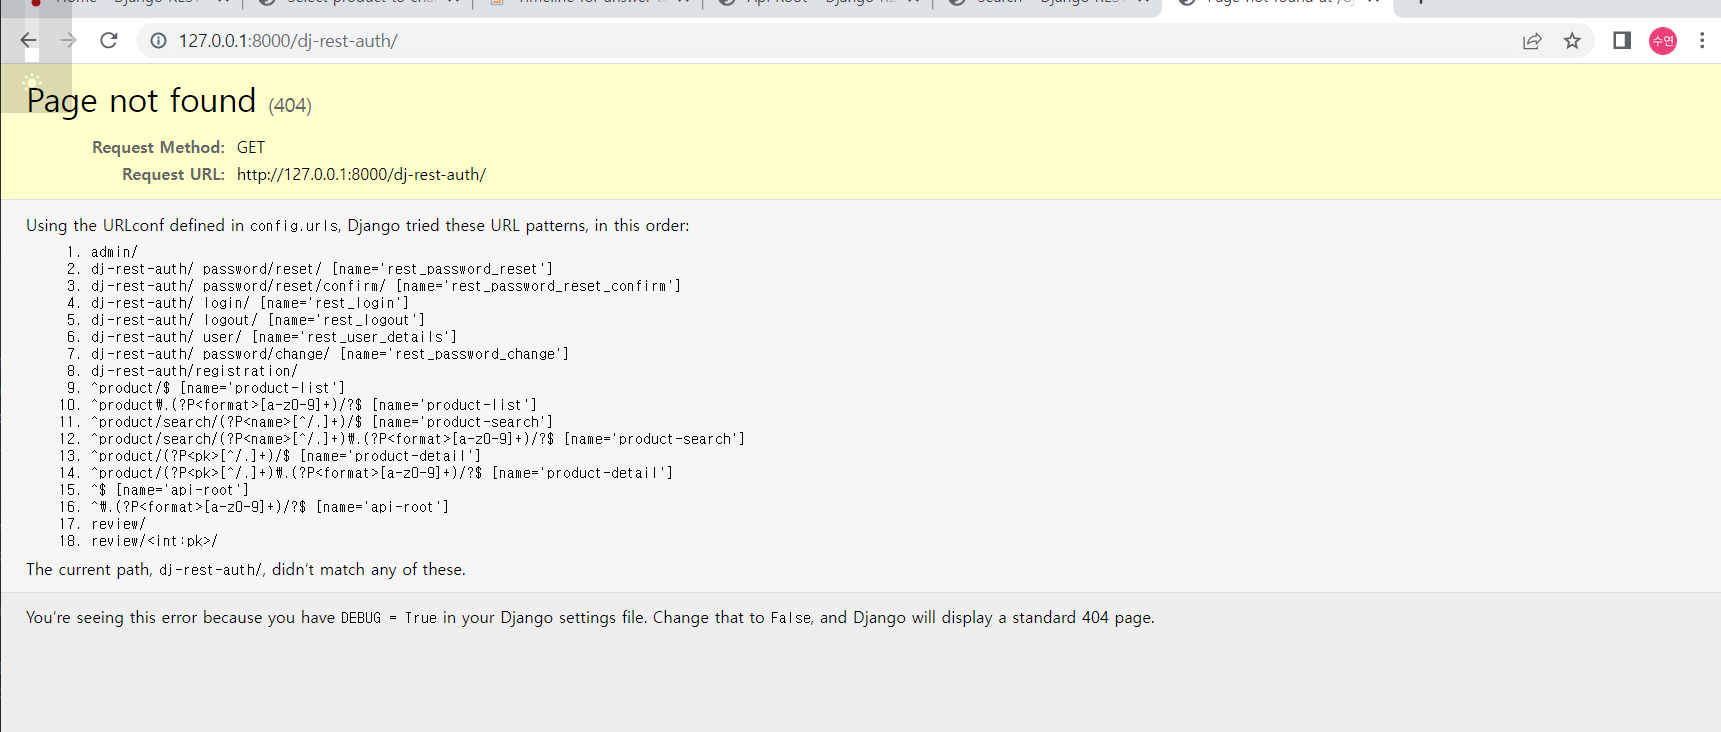
from django.contrib import admin
from django.urls import path, include

urlpatterns = [
    path('admin/', admin.site.urls),
    # path('api-auth/', include('rest_framework.urls')),
    path('dj-rest-auth/', include('dj_rest_auth.urls')),
    path('dj-rest-auth/registration/', include('dj_rest_auth.registration.urls')),

    path('', include('product.urls')),
    path('', include('review.urls')),
]
url 치면 기능 어떤 것 있는 지 알 수 있음 (login, logout 등)
- 설치https://dj-rest-auth.readthedocs.io/en/latest/installation.html#json-web-token-jwt-support-optional
- settings.py SITE_ID 밑에다
   REST_FRAMEWORK = {
       'DEFAULT_AUTHENTICATION_CLASSES': (
           'dj_rest_auth.jwt_auth.JWTCookieAuthentication',
       )
   }

   REST_USE_JWT = True
   JWT_AUTH_COOKIE = 'jwt_token' # 만료시간 짧은 토큰
   JWT_AUTH_REFRESH_COOKIE = 'jwt_refresh_token' #만료된 토큰을 갱신 시켜주기위한 토큰
JWT 쿠키 값을 서버가 열어서 사용자가 맞는지 확인 함.
다른 사용자가 쿠키 값만 가지고 가면 뚫림. 그래서 만료 시간이 굉장히 짧게 함
refresh token을 길게
풀어서 볼 수 있는 값, 풀어서 볼 수 없는 값들은 서버에서 확인 (서버키로 토큰 만들어줌)
- DB 만들어서 create database 등등
- http://127.0.0.1:8000/dj-rest-auth/registration/ POST 접속 후 회원가입 후 DB확인하면 들어가있음
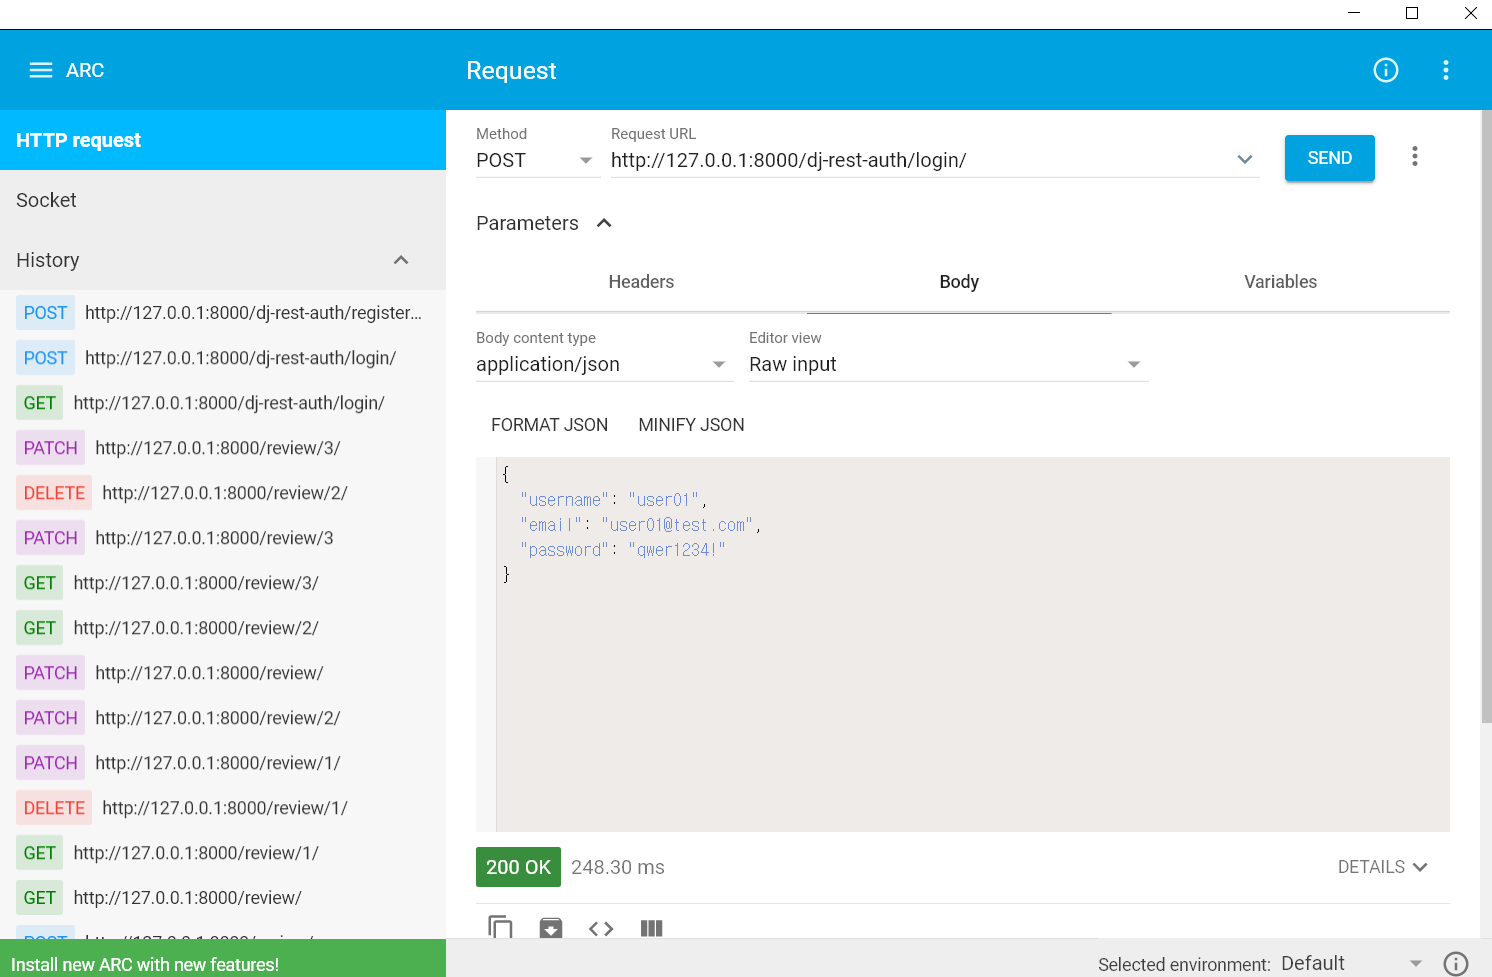
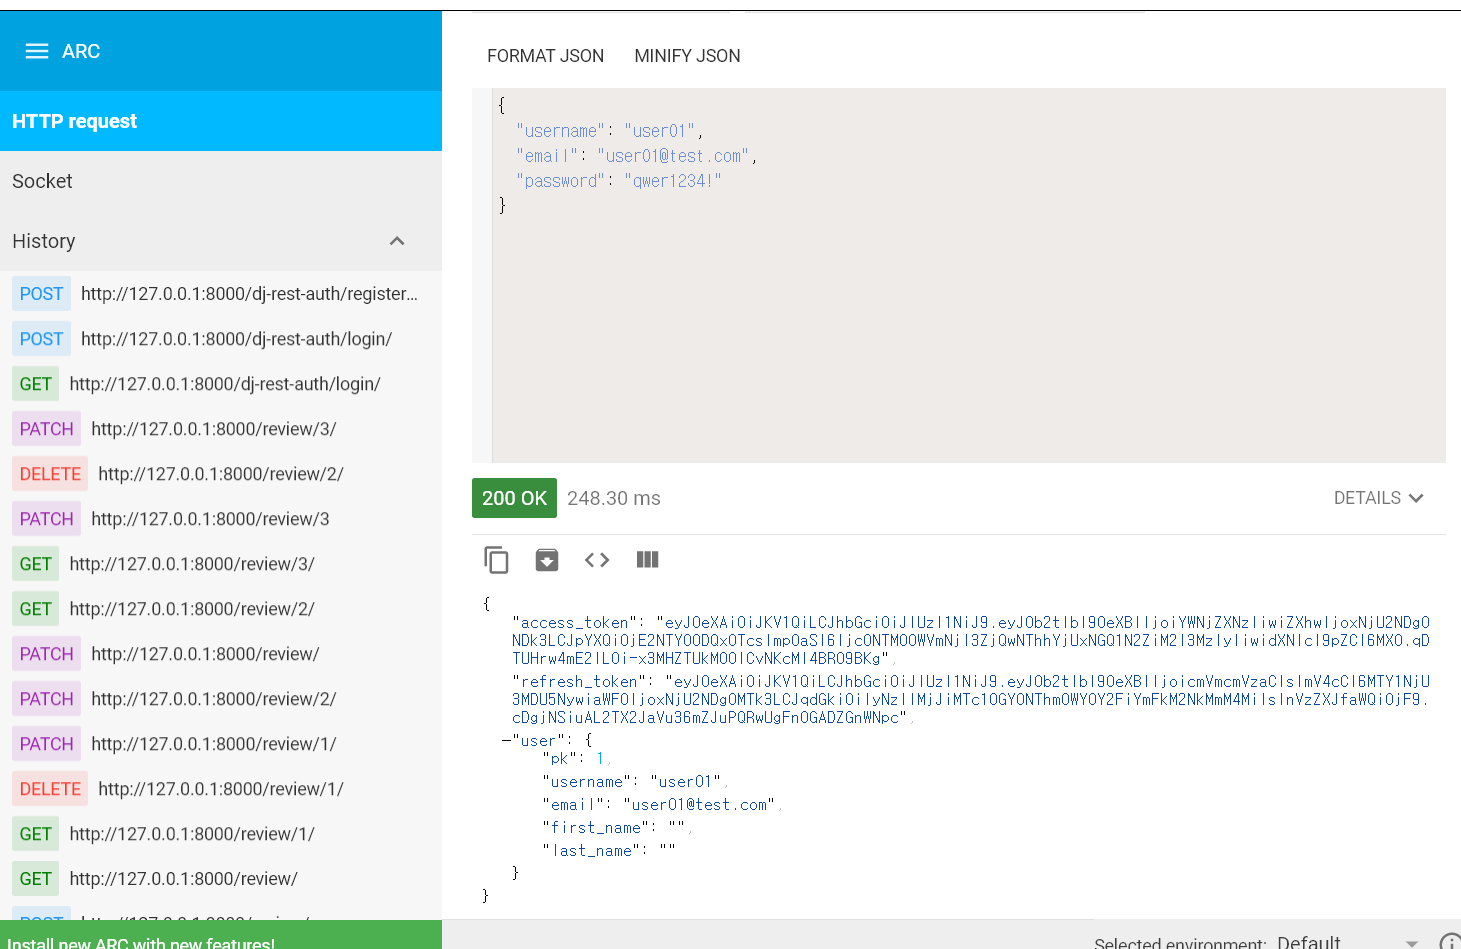
- http://127.0.0.1:8000/dj-rest-auth/login/ POST 로그인 해서 SEND하면 토큰 확인가능
- 현재 메일서버가 저기서 제공해주는 걸 쓰는데 그걸로 접속 못하니까 소켓 에러가 뜸. 그래서 이메일 관련해서 하지않게 하기위해 settings.py에서
ACCOUNT_EMAIL_VERIFICATION = "none"추가
클라이언트에서 보면 쿠키 jwt랑 refresh 생긴 거 볼 수 있고, F12해서 >> 눌러서 Application의 Local Storage에 저장됨
jwt 들어가서 토큰을 encoding, decoding 할 수 있는데 가장 끝에 값은 암호값
login_required 기능 적용
product views.py ProductViewSet
class ProductViewSet(viewsets.ModelViewSet):
permission_classes = [IsAuthenticated]
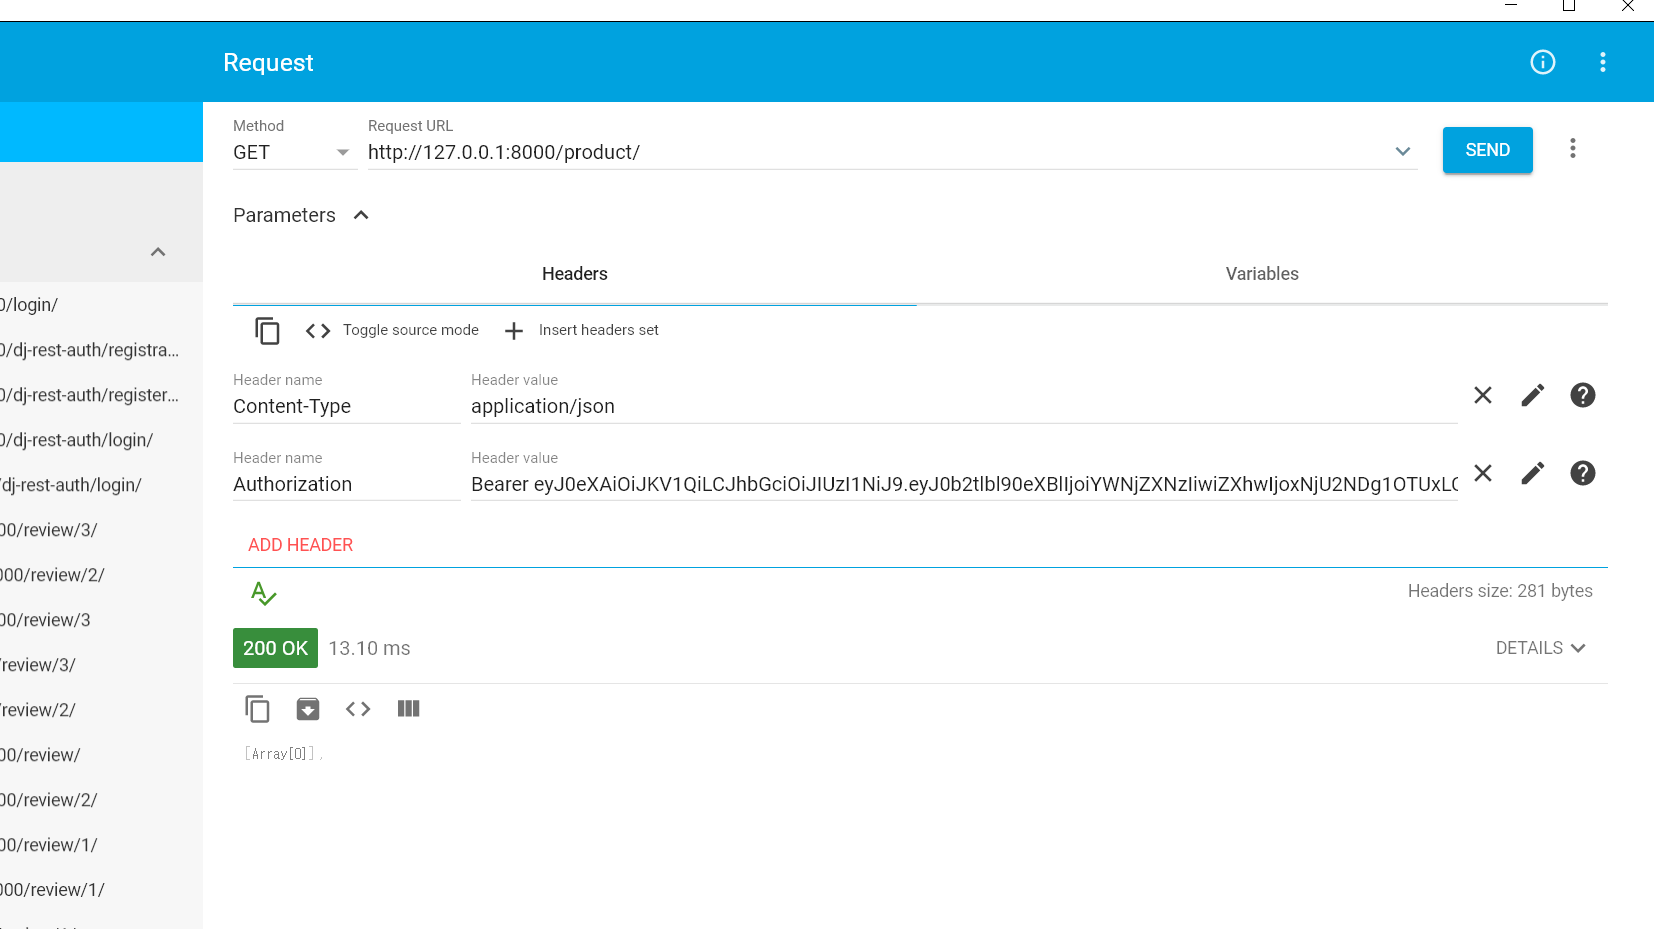
...이상태로는 아직 안됨. 클라이언트(Header name, Header value)에서 담겨서 가야하기때문
헤더에 jwt 토큰을 담아야함.
- Header name에 Authorization 선택
- Header value에 Bearer [Access Token]
사용자가 오래 머물러있을 때 토큰 갱신 시키기
https://jwt.io/ : 만료시간 보기
https://www.epochconverter.com/ : 만료시간 우리가 알 수 있는 시간으로 바꿔주기
로그인 해서 얻은 토큰으로 jwt.io에서 붙여넣기
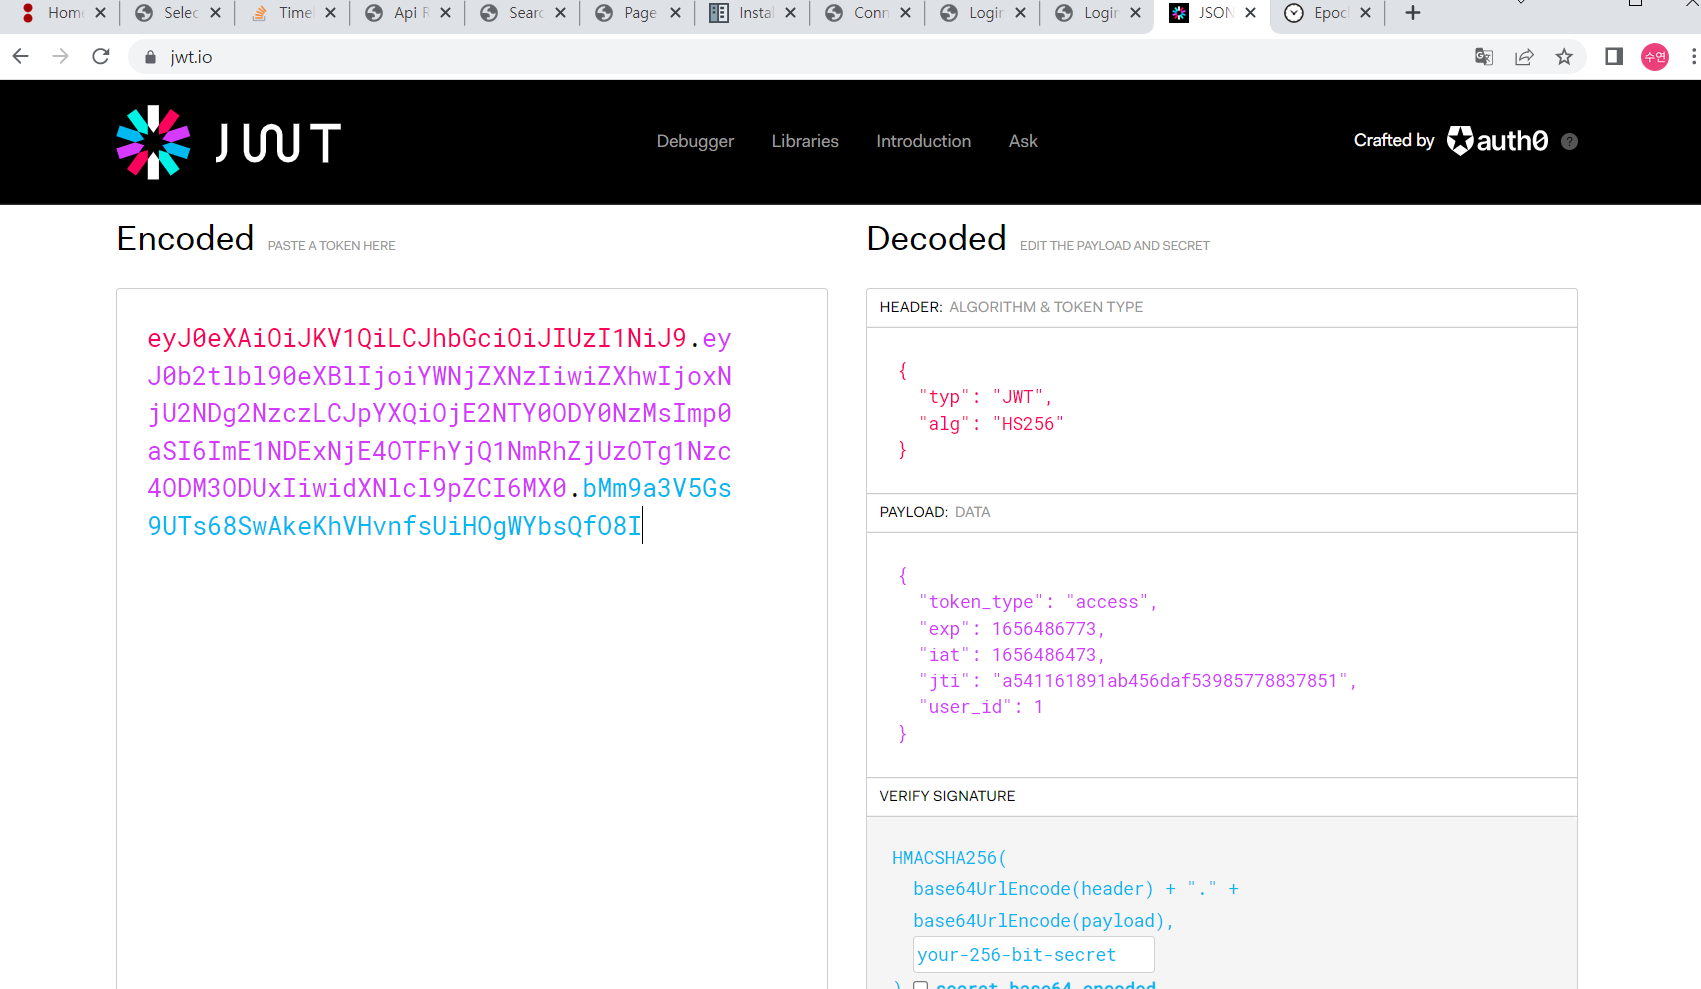
- exp 시간을 epoch~ 사이트에서 붙여 넣어 몇시까지인지 확인
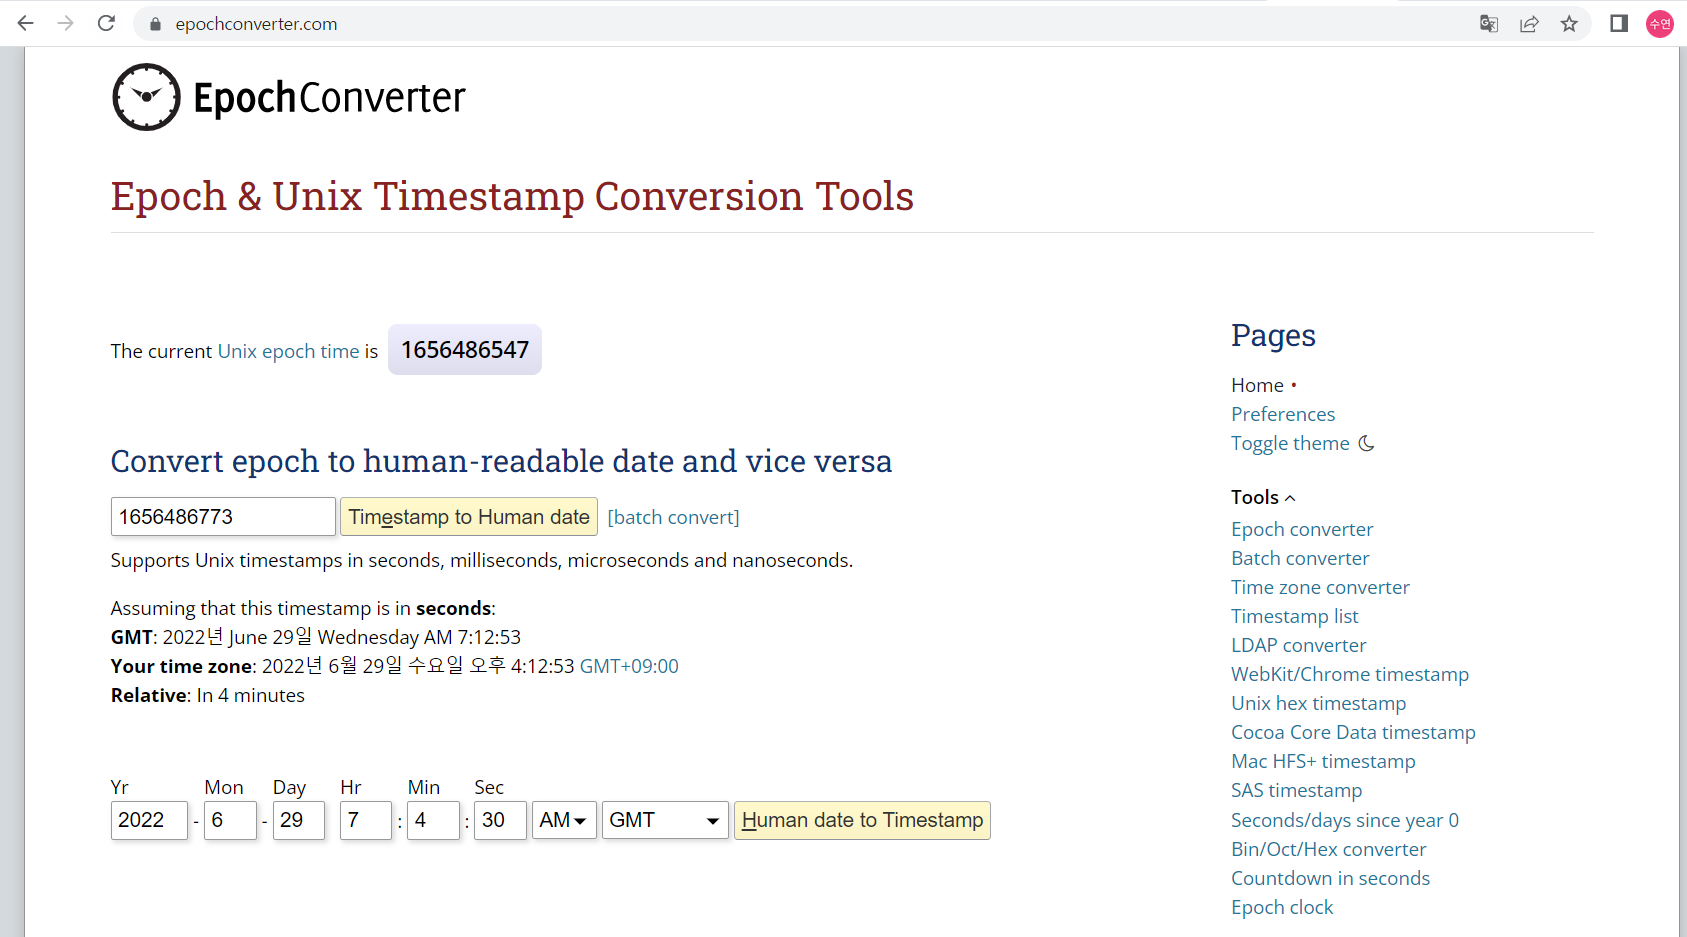
저 시간은 지금 시간보다 9시간빠르므로, 저 시간에서 9시간 더한게 지금시간임
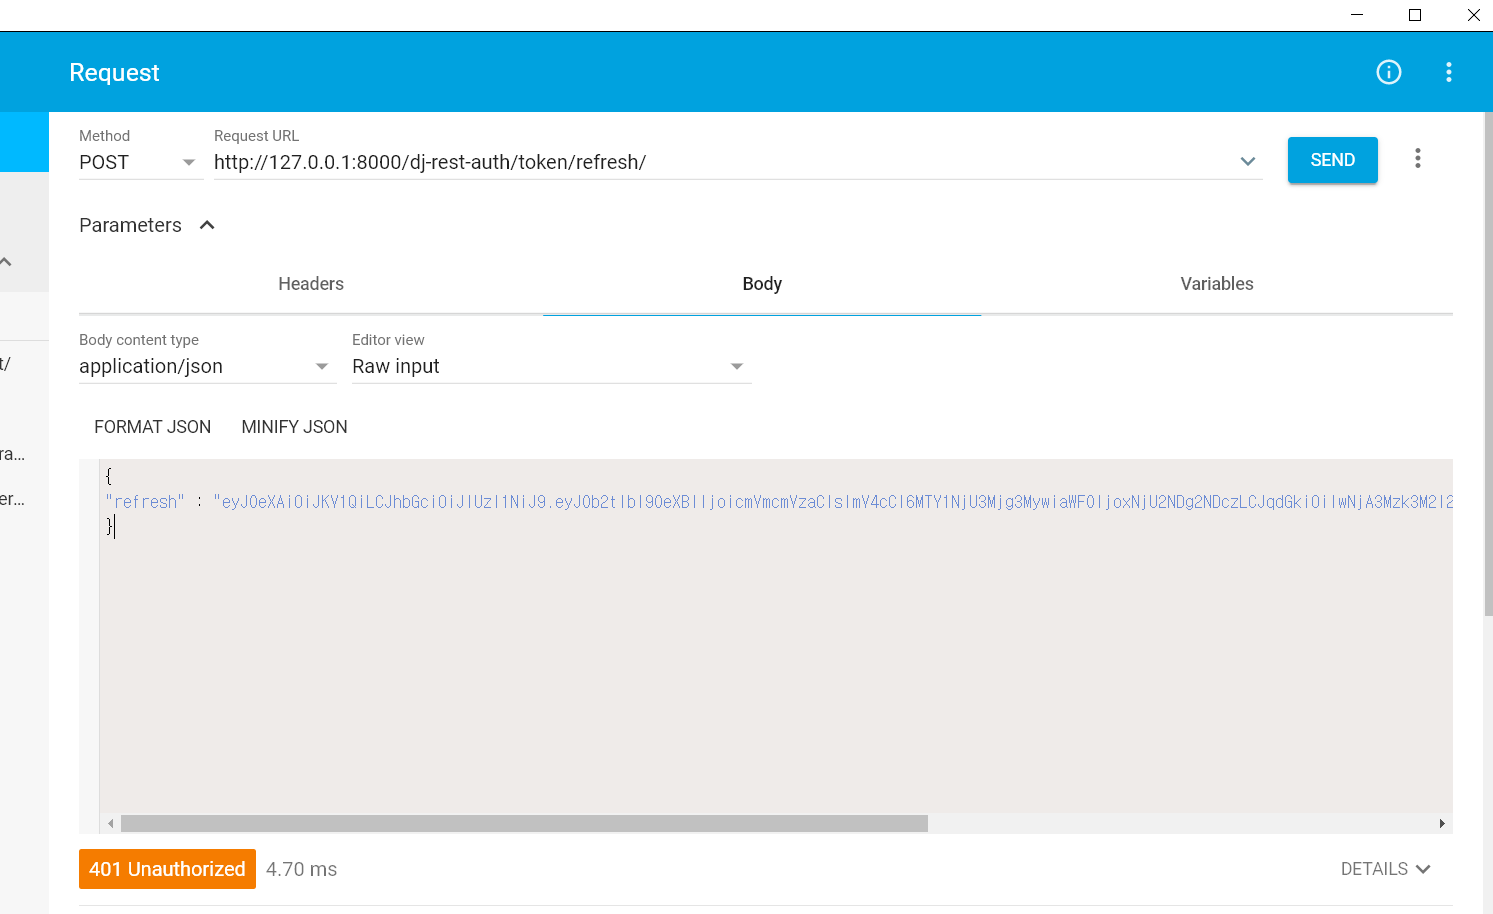
Method : POST
Request URL : http://127.0.0.1:8000/dj-rest-auth/token/refresh/
- 여기서FORMAT에 refresh를 키로 refresh값을 붙여넣고 SEND하면 새 엑세스 토큰을 발급해줌 (이걸 갱신하는거는 프론트에서)