Daily Issue #4
안녕하세요 dvHuni입니다!
3월입니다 날이 많이 따뜻해 졌습니다 ㅎㅎㅎ
나들이 가기 좋은날인데 코로나 때문에 어딜 가질 못하겠네요
마스크 벗고 여유롭게 나들이 갈 수 있는 날이
하루 빨리 왔으면 좋겠네요 😆
그러면 데일리 이슈의 네번째 포스트 !! 시작해보겠습니다~!
무엇이 문제입니까?
UITableView, cell 영역을 제외한 상단 하단 영역에 무언가를 표시하고 싶을때 사용하는 Header View / Footer View에 대한 이슈입니다!
UITableView에 Header/Footer를 삽입하고 싶은데,
제가 개발하고있는 환경에서는 한번에 뷰를 원하는 데로 그리지 못하는 경우가 많았습니다.
HeaderView를 추가 했는데 보이지 않는다던가,
맨 첫번째 셀에 HeaderView가 겹쳐있다거나... 하는 이슈로 인해 View를 그리는데 꽤 시간을 소비합니다...
그래서 !!! Header/Footer View를 한번에 그릴 수 있도록 연습해보는 시간을 가지려 합니다!
다음은 실제 코드로 Header/Footer를 삽입해 보겠습니다!
삽입하기전에 간단하게 tableView를 얹어주고 ... (저는 코드로 layout을 잡았습니다!)
테이블 뷰 각 셀을 알 수 있도록 row를 표시해두었습니다~
ViewController.swift

private let tableView = UITableView()

override func viewDidLoad() {
  super.viewDidLoad()
  setUp()
}

private func setUp() {
  attribute()
  layout()
}

private func attribute() {
  tableView.delegate = self
  tableView.dataSource = self
}

private func layout() {
  view.addSubview(tableView)
  tableView.translatesAutoresizingMaskIntoConstraints = false
  NSLayoutConstraint.activate([
      tableView.topAnchor.constraint(equalTo: view.topAnchor),
      tableView.leadingAnchor.constraint(equalTo: view.leadingAnchor),
      tableView.trailingAnchor.constraint(equalTo: view.trailingAnchor),
      tableView.bottomAnchor.constraint(equalTo: view.bottomAnchor)
  ])
}

extension ViewController: UITableViewDelegate {

}

extension ViewController: UITableViewDataSource {
	func tableView(_ tableView: UITableView, numberOfRowsInSection section: Int) -> Int {
	  return 10
	}

	func tableView(_ tableView: UITableView, cellForRowAt indexPath: IndexPath) -> UITableViewCell {
	  let cell = UITableViewCell()
	  cell.textLabel?.text = "\(indexPath.row)"
	  return cell
	}
}
그러면 준비는 끝났고 !
먼저 tableHeaderView를 만들어볼까요!
UIView를 하나 만들어서, background를 brown색으로 변경해서.. 그냥 tableHeaderView에 넣으면...
private let tableHeaderView = UIView()

private func attribute() {
    tableView.delegate = self
    tableView.dataSource = self
    tableView.tableHeaderView = tableHeaderView
    tableHeaderView.backgroundColor = .brown
}

private func layout() {
    view.addSubview(tableView)
    tableView.translatesAutoresizingMaskIntoConstraints = false
    NSLayoutConstraint.activate([
        tableView.topAnchor.constraint(equalTo: view.topAnchor),
        tableView.leadingAnchor.constraint(equalTo: view.leadingAnchor),
        tableView.trailingAnchor.constraint(equalTo: view.trailingAnchor),
        tableView.bottomAnchor.constraint(equalTo: view.bottomAnchor)
    ])
}
안되네요 ㅋㅋㅋㅋㅋㅋ 어림도없지 ㅋㅋㅋㅋㅋ
그렇다면 뭐가 문제일까 ..
hierarchy를 보면 ??

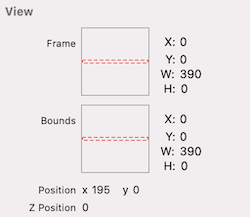
UIView가 들어갔는데!! Height이 잡히지 않아서 나오지 않는거였군요!!
자, 그럼 height을 잡아볼까용
private func layout() {
    view.addSubview(tableView)
    tableView.translatesAutoresizingMaskIntoConstraints = false
    NSLayoutConstraint.activate([
        tableView.topAnchor.constraint(equalTo: view.topAnchor),
        tableView.leadingAnchor.constraint(equalTo: view.leadingAnchor),
        tableView.trailingAnchor.constraint(equalTo: view.trailingAnchor),
        tableView.bottomAnchor.constraint(equalTo: view.bottomAnchor)
    ])
    headerViewLayout()
}

private func headerViewLayout() {
    tableHeaderView.translatesAutoresizingMaskIntoConstraints = false
    NSLayoutConstraint.activate([
        tableHeaderView.heightAnchor.constraint(equalToConstant: 100)
    ])
}
ㅋㅋㅋㅋㅋㅋㅋㅋㅋㅋㅋㅋㅋ
맨땅에 헤딩은 어렵군요 ...
아오... width를 지정해봅시다.
private func layout() {
    view.addSubview(tableView)
    tableView.translatesAutoresizingMaskIntoConstraints = false
    NSLayoutConstraint.activate([
        tableView.topAnchor.constraint(equalTo: view.topAnchor),
        tableView.leadingAnchor.constraint(equalTo: view.leadingAnchor),
        tableView.trailingAnchor.constraint(equalTo: view.trailingAnchor),
        tableView.bottomAnchor.constraint(equalTo: view.bottomAnchor)
    ])
    headerViewLayout()
}

private func headerViewLayout() {
    tableHeaderView.translatesAutoresizingMaskIntoConstraints = false
    NSLayoutConstraint.activate([
				tableHeaderView.widthAnchor.constraint(equalToConstant: 100),
        tableHeaderView.heightAnchor.constraint(equalToConstant: 100)
    ])
}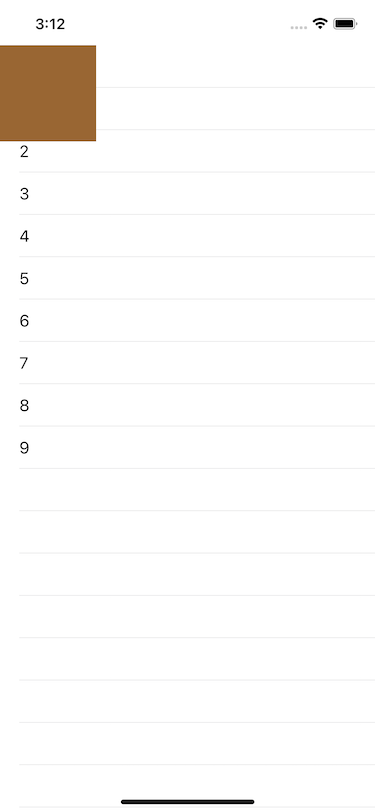
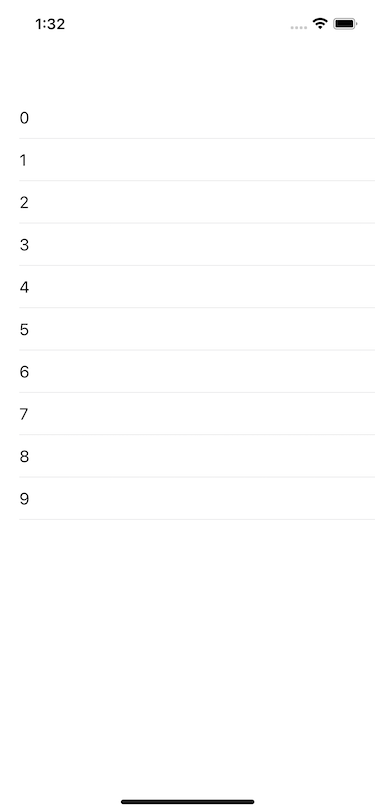
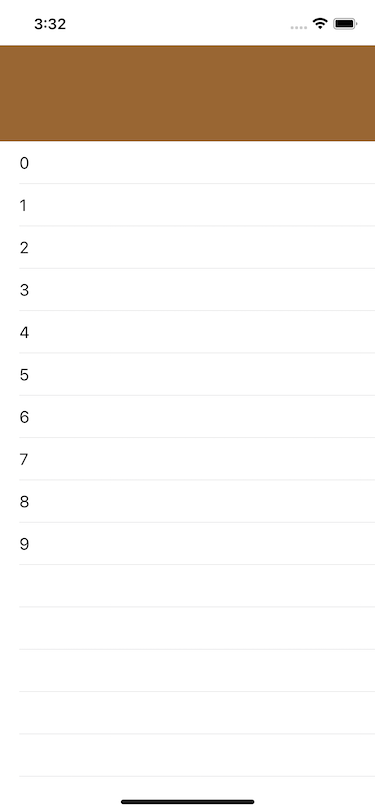
아흑.. 드디어.. 구경이라도 했네요 ㅠㅠㅠㅠㅠㅠㅠㅠ
width를 대충 100으로 줬었는데,
width는 어차피 tableView의 width를 constraint를 따라갈 테니까 tableView.bounds.width를 걸어주면 ..???
당연히 안되죠!!
왜 why
headerView의 constraint를 잡는 시점의 tableView의 width는 아직 잡히지 않았기 때문에 width는 0으로 잡힙니다.
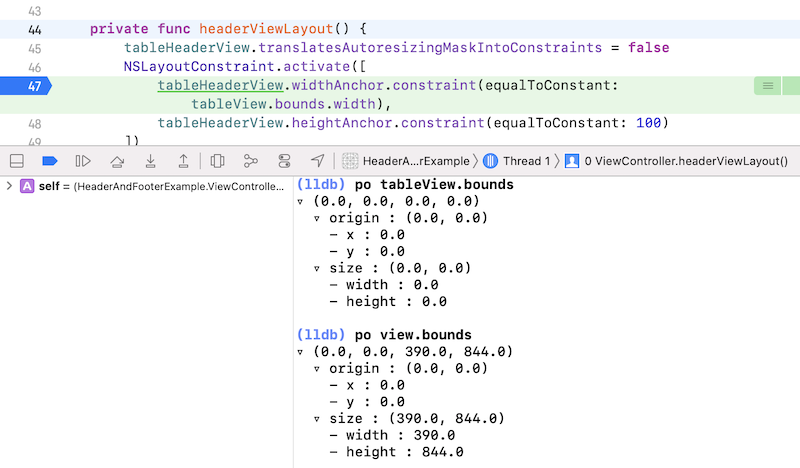
그렇기 때문에 tableView의 width와 같은 조건이면서, 이미 width를 가지고있는?
ViewController.view의 width를 잡아줍시다.
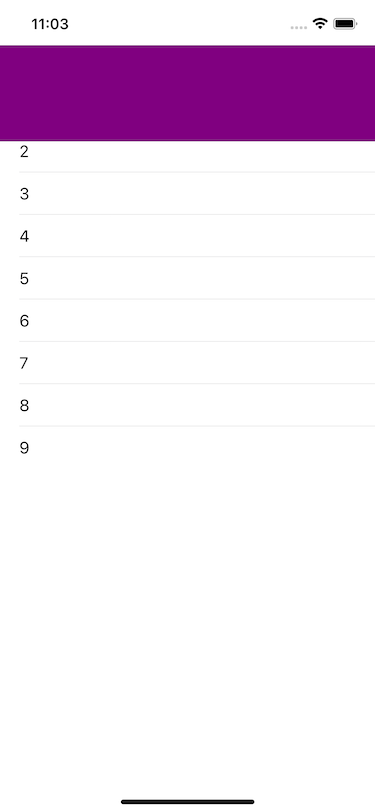
매우 불편하네요..🤯
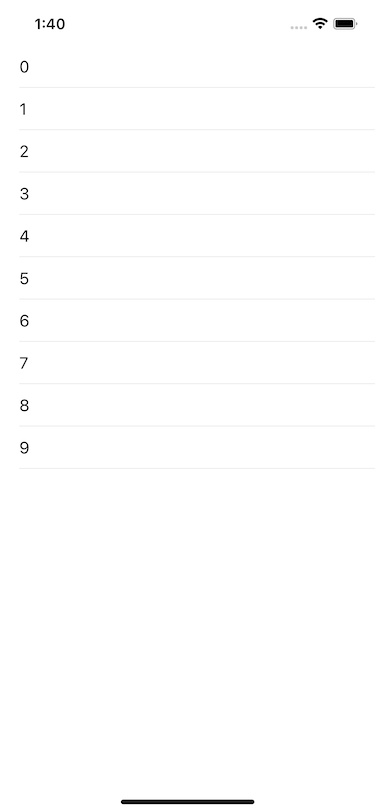
지금 index가 적힌 cell이 2부터 시작하죠 ???
hierarchy를 보면?
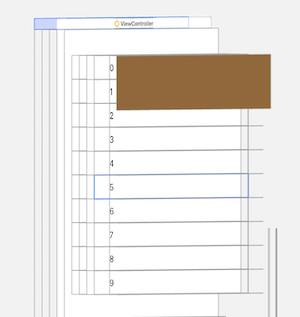
ㅎㅎ... 너무 적나라하네요
뭐가 문제일까... constraint 잘 잡았고..
코드 구조를 보면..
attribute에서 headerView를 지정한 후, headerView의 layout을 변경시켰으니,
headerView의 layout이 변경된것을 layoutIfNeeded로 명시해 줍시다!
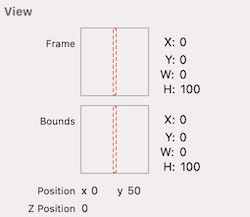
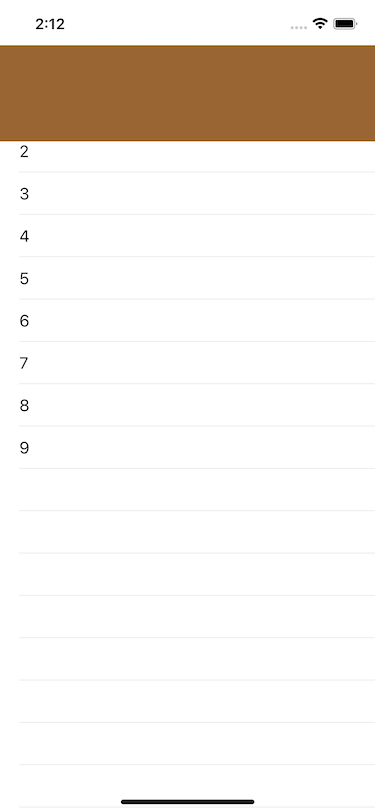
크으 이제야 잘나오네요!!
다음 Footer로 넘어가 봅시다!!
똑같이 진행하면 되겠죠 ?!
private let tableFooterView = UIView()
private func attribute() {
tableView.delegate = self
tableView.dataSource = self
tableView.tableFooterVoe = tableHeaderView
tableFooterView.backgroundColor = .purple
}
private func layout() {
view.addSubview(tableView)
tableView.translatesAutoresizingMaskIntoConstraints = false
NSLayoutConstraint.activate([
tableView.topAnchor.constraint(equalTo: view.topAnchor),
tableView.leadingAnchor.constraint(equalTo: view.leadingAnchor),
tableView.trailingAnchor.constraint(equalTo: view.trailingAnchor),
tableView.bottomAnchor.constraint(equalTo: view.bottomAnchor)
])
footerViewLayout()
}
private func footerViewLayout() {
tableFooterView.translatesAutoresizingMaskIntoConstraints = false
NSLayoutConstraint.activate([
tableFooterView.widthAnchor.constraint(equalToConstant: view.bounds.width),
tableFooterView.heightAnchor.constraint(equalToConstant: 100)
])
tableFooterView.layoutIfNeeded()
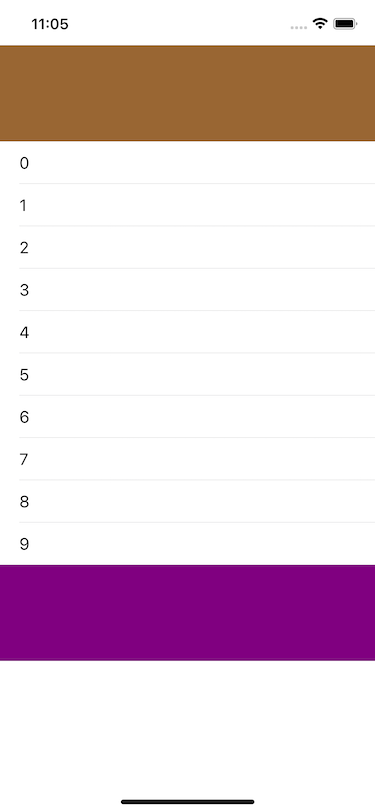
}짠~ HeaderView와 동일하게 작성했습니다!
실행을 해보면 ?
엥.. 원하는데로 안되네요 ...😭
뭐가문제지 ....
한참을 돌아돌아 시도한 결과... frame을 설정해 주는 방법을 찾았는데 ..
이것말고 constraint로 사용할 방법이 있는지 더 찾아보겠습니다 ..
private func footerViewLayout() {
  tableFooterView.frame = CGRect(x: 0, y: 0, width: view.bounds.width, height: 100)
}
headerView 또한 frame을 지정하면 constraint를 적용하는 방법보다 잘 작동합니다!
HeaderView와 Footer뷰에 대한 공식 문서의 Discussion입니다.
Discussion
Use this property to specify a header view for your entire table. The header view is the first item to appear in the table's view's scrolling content, and it is separate from the header views you add to individual sections. The default value of this property is nil.
When assigning a view to this property, set the height of that view to a nonzero value. The table view respects only the height of your view's frame rectangle; it adjusts the width of your header view automatically to match the table view's width.
tableHeaderView
Discussion
Use this property to specify a footer view for your entire table. The footer view is the last item to appear in the table's view's scrolling content, and it is separate from the footer views you add to individual sections. The default value of this property is nil.
When assigning a view to this property, set the height of your view to a nonzero value. The table view respects only the height of your view's frame rectangle; it adjusts the width of your footer view automatically to match the table view's width.
tableFooterView
결론은
tableView.tableheaderView or tableView,tableFooterView로
property 할당 전에 아래처럼 height을 잡아주어야 할 것 같네요
tableHeaderView.frame = CGRect(x: 0, y: 0, width: view.bounds.width, height: 100)아!! 그리고 HeaderView를 그리면서 height을 항상 고정값으로 부여했는데,
가변 height은 어떻게 적용하면 좋을지 시도해보고 해결 방안을 포스팅 하겠습니다!! 😚
기대해주세요
가변 height을 적용하는 글을 작성했습니다~! 요기서 확인 부탁드려요~
해당 글부터 포스트를 작성하며 테스트 했던 코드들을 깃에 업로드 해 볼생각입니다!
전체 코드는 깃허브를 참조해주시면 감사하겠습니다 😆
지적이나 질문은 저에게 큰 도움이 됩니다 🤓
오늘도 읽어주셔서 감사합니다 🙇🏻♂️
업데이트 이력
- 글을 읽기 쉽도록 이미지 사이즈 조정 (2021.11.20)
- 가변 height 포스트 연결 (2022.03.01)

선생님 좋은글 감사합니다.
attribute에서 headerView를 지정한 후, headerView의 layout을 변경시켰으니,
headerView의 layout이 변경된것을 layoutIfNeeded로 명시해 줍시다!
이부분 이해가 잘안가는데 뭐라고 검색해야 좀더 자세히 배울 수 있을 까요 ?