1. 레이아웃 만들기 연습
1-1. div 태그로 html 레이아웃 만들기
<!DOCTYPE html>
<html lang="ko">

<head>
    <meta charset="UTF-8">
    <meta http-equiv="X-UA-Compatible" content="IE=edge">
    <meta name="viewport" content="width=device-width, initial-scale=1.0">
    <title>Document</title>
</head>

<body>
    <div>
        <h1>MY HOMEPAGE</h1>
        <hr>
    </div>
    <div>
        <ul>
            <li>HTML5</li>
            <li>CSS3</li>
            <li>JAVASCRIPT</li>
            <li>JQUERY</li>
        </ul>
        <hr>
    </div>
    <div>
        <h1>What is HTML5?</h1>
        <p>HTML5 is gooooooooood</p>
        <hr>
    </div>

    <div>
        <p>xxx 주식회사 서울시 oo구 oo동</p>
    </div>
</body>

</html>
1-2. div 태그를 semantic으로 변경
- semantic 태그 : 의미가 담겨있는 태그. (HTML5 부터 적용되어 div를 대체하기 시작)
- header, main, nav, section, footer 등
2. CSS 기초 연습
- CSS : Cascading Style Sheets
- head 안에 style 태그를 만들어서 적용한다.
- 모든 태그는 default 값을 갖고 있다.
2-1. 예시
<!DOCTYPE html>
<html lang="ko">

<head>
    <meta charset="UTF-8">
    <meta http-equiv="X-UA-Compatible" content="IE=edge">
    <meta name="viewport" content="width=device-width, initial-scale=1.0">
    <title>Document</title>
    <style>
        div {
            background: #ffd800;
        }
      /* div의 배경색을 정한다. 16진수에 맞춰서 R,G,B 코드 적는다.*/
    </style>
</head>

<body>
    <h1>제목</h1>
    <p>본문</p>

    <div>
        <h1>제목</h1>
        <p>본문</p>
    </div>
</body>

</html>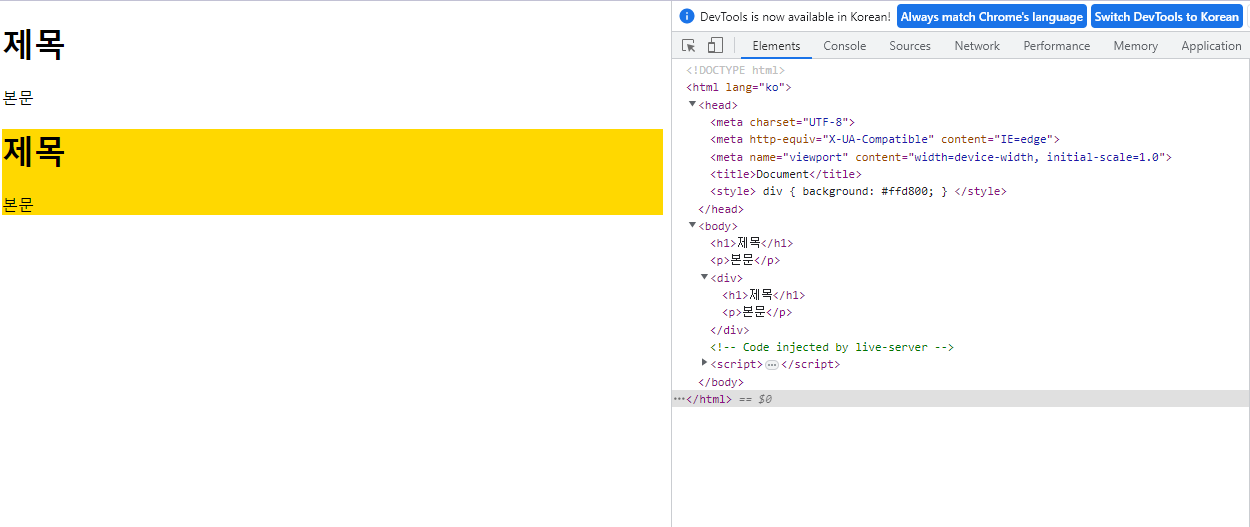
<!DOCTYPE html>
<html lang="ko">

<head>
    <meta charset="UTF-8">
    <meta http-equiv="X-UA-Compatible" content="IE=edge">
    <meta name="viewport" content="width=device-width, initial-scale=1.0">
    <title>Document</title>
    <style>
        li {
            color: #ffd800;
        }

        p {
            background-color: #ff0000;
        }
    </style>

</head>

<body>
    <header>
        <h1>oo 주식회사</h1>
    </header>

    <nav>
        <ul>
            <li>회사소개</li>
            <li>제품소개</li>
            <li>고객센터</li>
            <li>공지사항</li>
        </ul>
    </nav>

    <section>
        <p>
            우리 회사는 50년 전통의 역사와 뛰어난 기술을 바탕으로 좋은 회사 입니다.
        </p>
    </section>

    <footer>
        <p>서울시 oo구 oo동 oo빌딩</p>
    </footer>
</body>


</html>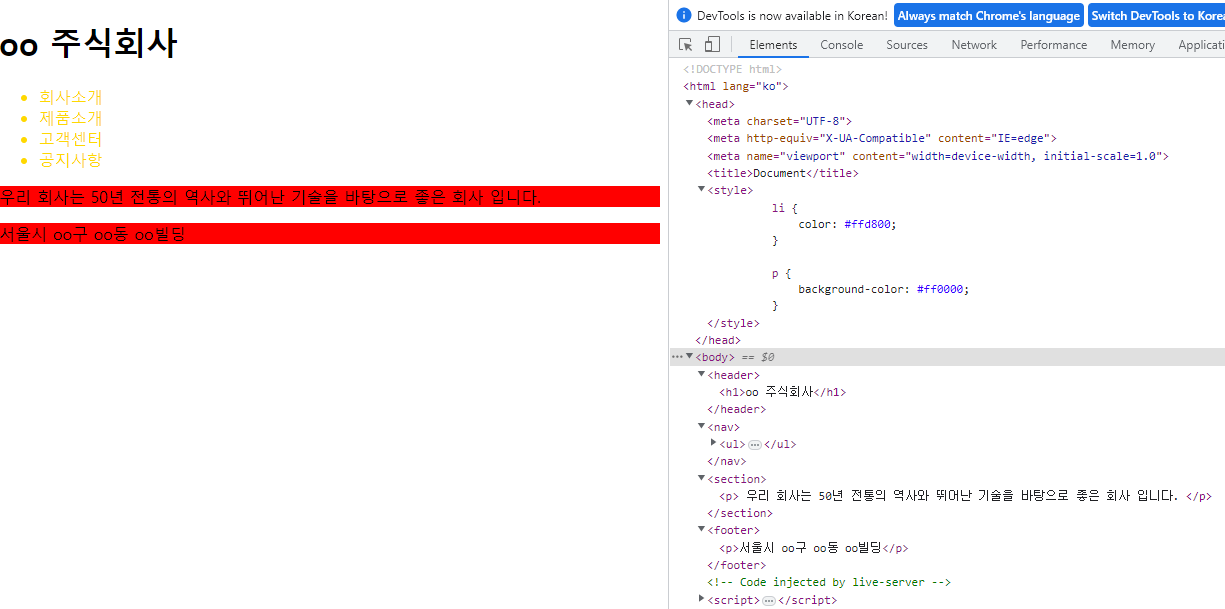
2-2. style
- background : 배경색
- color : 글자색
- font-weight : 글자의 두께
- font-size : 글자의 크기
- text-decoration : 글자 꾸미기
- border : 윤곽선
(두께-모양-색깔 순으로 적기 : 5px solid green / 3px dotted yellow / 4px dashed pink)
2-3. 규칙
- 선택자는 같이 묶을 수 있다.
li, p, div {
/* 원하는 기능 넣기 */
}- 제일 뒤에 있는 속성이 적용된다.
li, p, h1 {
	color : blue;
}

h1 {
	color : yellow;
} /* h1은 yellow가 적용된다 */- "*" 표시로 전체 태그를 제어할 수 있다.
* {
	background : aquamarine;
	color : yellow;
}
3. CSS의 속성을 이용하여 꾸미기
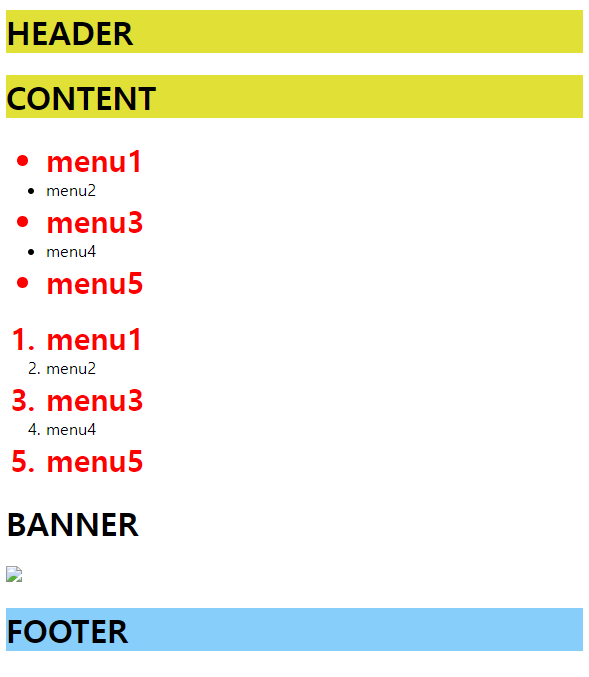
3-1. id(#)와 class(.)
- id : 하나밖에 주지 못하는 유일한 식별자
- class : 다양한 태그들을 공통 그룹으로 묶어서 관리할 수 있는 식별자
html에 줄 때는 class="menu", id="footer"
css에서는 .menu{}, #footer{}
<!DOCTYPE html>
<html lang="en">

<head>
    <meta charset="UTF-8">
    <meta http-equiv="X-UA-Compatible" content="IE=edge">
    <meta name="viewport" content="width=device-width, initial-scale=1.0">
    <title>Document</title>

    <style>
        .menu {
            color: red;
            font-weight: bold;
            font-size: 30px;
        }

        .yellow {
            background: #e0e036;
        }

        #footer h1 {
            background: lightskyblue;
        }
    </style>
</head>

<body>
    <div id="header">
        <h1 class="yellow">HEADER</h1>
    </div>

    <div id="wrap">
        <div id="content">
            <h1 class="yellow">CONTENT</h1>
            <ul>
                <li class="menu">menu1</li>
                <li>menu2</li>
                <li class="menu">menu3</li>
                <li>menu4</li>
                <li class="menu">menu5</li>
            </ul>
            <ol>
                <li class="menu">menu1</li>
                <li>menu2</li>
                <li class="menu">menu3</li>
                <li>menu4</li>
                <li class="menu">menu5</li>
            </ol>
        </div>
        <div id="side_banner">
            <h1>BANNER</h1>
            <a href="http://www.sba.seoul.kr" target="_blank"><img
                    src="http://www.sba.seoul.kr/kr/images/footer/f_logo.png"></a>
        </div>
    </div>
    <div id="footer">
        <h1>FOOTER</h1>
    </div>
</body>

</html>
3-2. 속성 선택자
- 속성을 넣고 싶다면 input[type=text], img[src] 처럼 적는다.
3-3. 후손과 자손
- div p : div 안에 있는 p면 모두 해당
- div > p : div 바로 밑에 있는 p만 해당
(div 안의 ul 안의 li 안의 p 같은 것은 해당 X)
#header, #wrap, #footer {
		border: 1px solid #cccccc;
		width: 500px;
}

div li {
	background-color: red;
}

div p {
	font-size: 25px;
}

div>h1 {
	font-weight: bold;
	color: yellow;
}
3-4. 동위 선택자
- A~B : A 밑에 있는 B 모두
- A+B : A 바로 밑에 있는 B만
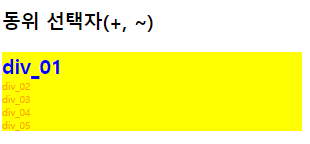
<!DOCTYPE html>
<html lang="en">

<head>
    <meta charset="UTF-8">
    <meta http-equiv="X-UA-Compatible" content="IE=edge">
    <meta name="viewport" content="width=device-width, initial-scale=1.0">
    <title>Document</title>
    <style>
        h3~div {
            font-size: 10px;
            color: orange;
        }

        /* h3 기준으로 밑에 있는 div 모두 */

        h3+div {
            font-size: 20px;
            font-weight: bold;
            color: blue;
        }

        /* h3 기준으로 바로 밑에 있는 div */

        #title~div {
            width: 300px;
            background: yellow;
        }
        /* id="title" 적용된 태그 기준으로 밑에 있는 div 모두 */

    </style>
</head>

<body>
    <h3 id="title">동위 선택자(+, ~)</h3>
    <div>div_01</div>
    <div>div_02</div>
    <div>div_03</div>
    <div>div_04</div>
    <div>div_05</div>
</body>

</html>
3-5. hover
- li:hover : li 태그에 마우스를 올리면 해당하는 스타일이 적용된다
4. 기타 새로운 코드
- margin : 0 auto (가운데 정렬)
- text-align : 텍스트 정렬 (left, center, right)
4-1. CSS에서 사용되는 단위
- pixel (pics element) : 해상도에 따라 변한다. (상대 단위) / 절대적인 크기를 표시할 때도 있다. 1px = 0.104166inch (절대 단위)
- em, rem : (상대 단위) 1em = 16px
- % : (상대 단위)
- cm (centimeter) : 정해져 있는 값이다. (절대 단위)
4-2. background image url
- background-image : url(이미지 링크 복사)
- background-repeat : no-repeat (반복 X)
5. 예제 - hiseoul
예제 파일
내가 만든 파일

velog, GitHub, Notion 등에 작업물을 정리하고 있습니다.