오늘은 스토리보드 없는 UiKit을 세팅해보겠습니다. 스토리보드가 없으면 뭐가 좋은지도 알아 보겠습니다.
No Storyboard 장단점
장점:
- 버전 관리 및 병합 충돌 방지 코드 기반 UI는 텍스트 파일 혙애로 관리되기 때문에 Git 등의 버전 관리 시스템 에서 변경 사항 추적하고 병합하는 것이 용이합니다 반면 스토리보드는 XML 파일로 병합 충돌이 발생하면 해결하기 어렵습니다.
- 재사용성과 모듈화 코드로 작성된 UI 컴퍼넌트는 쉽게 재사용이 가능, 별도 파일이나 클래스로 분리하여 모듈화가 가능합니다.
단점:
- 디자이너와의 협업 문제 디자이너와의 협업 시 스토리보드르 ㄹ사용하면 디자이너가 직접 UI를 수정하거나 검토할 수 있지만 코드 기반 접근 방식에서는 개발자가 직접 코드를 수정해야 하므로 협업이 어려울 수 있음
- 코드 증가 코드 양 증가 모든 UI를 코드로 작성하면 프로젝트의 코드 양이 급격히 증가하여 코드베이스가 커지고 복잡해질 수 있습니다. 이는 유지보수와 관리에 부답이 될 수 있습니다.
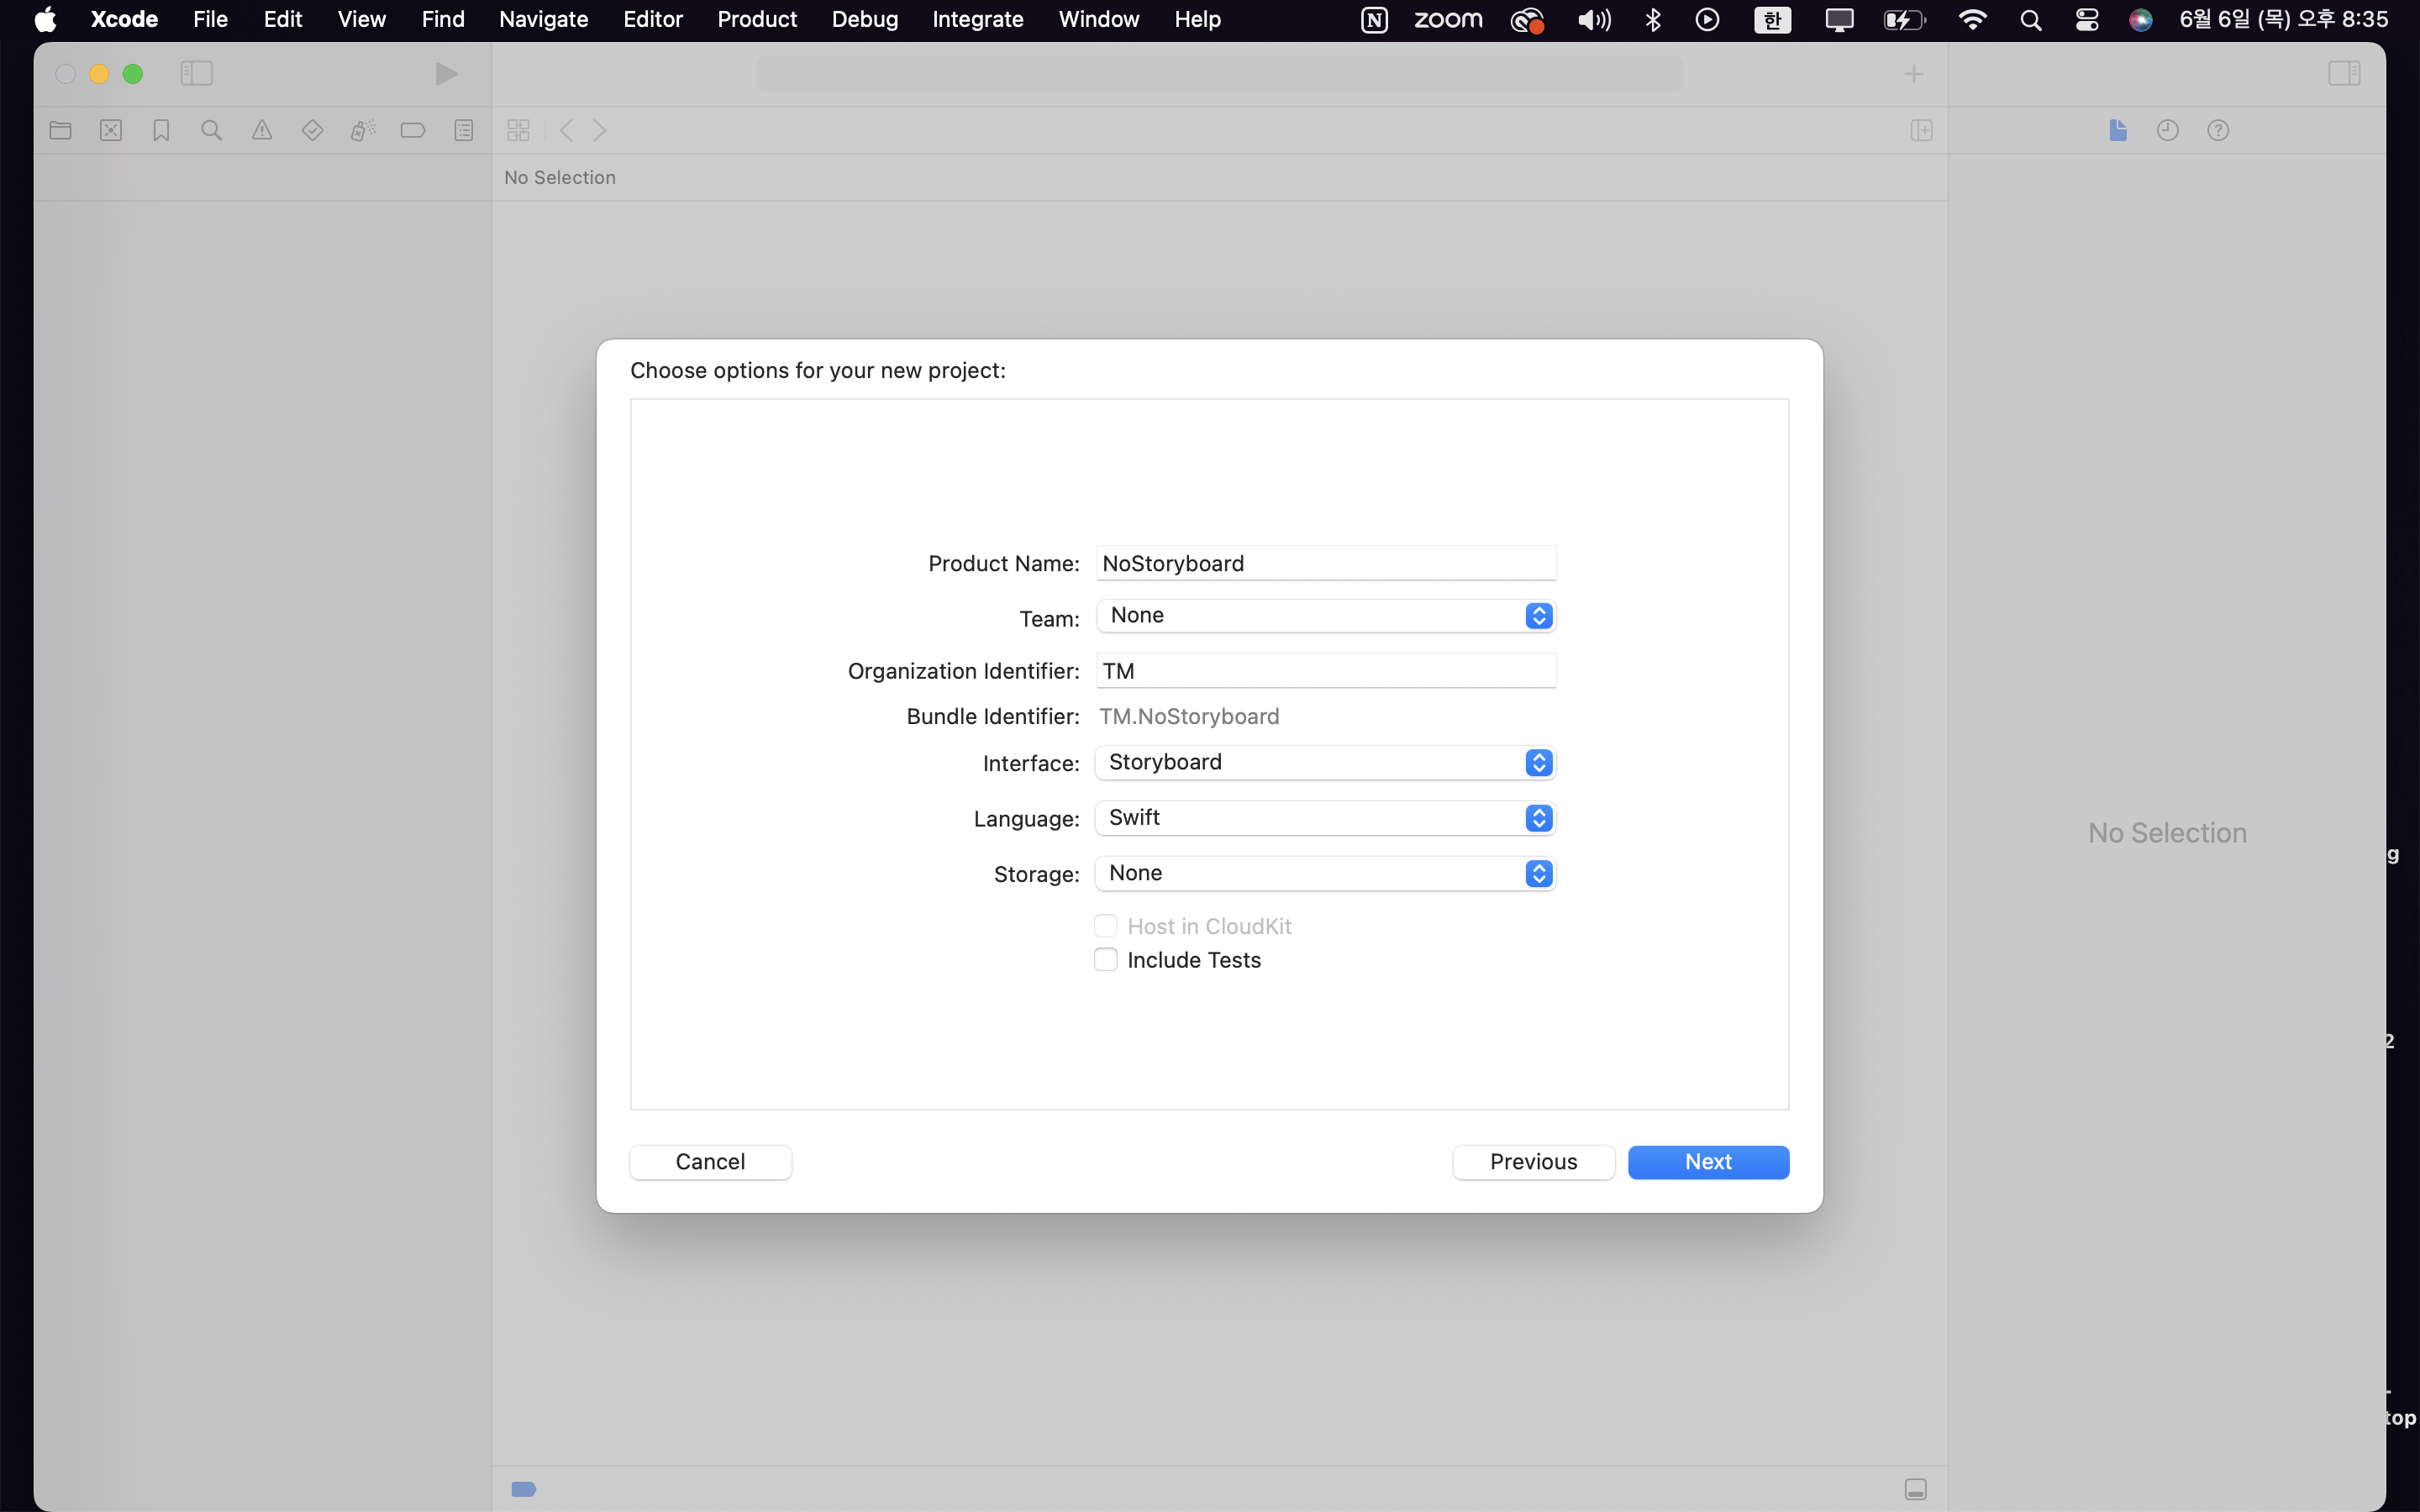
No Storyboard Setting
- Interface를 stotyboard로 설정해주고 파일을 만들어주세요
-
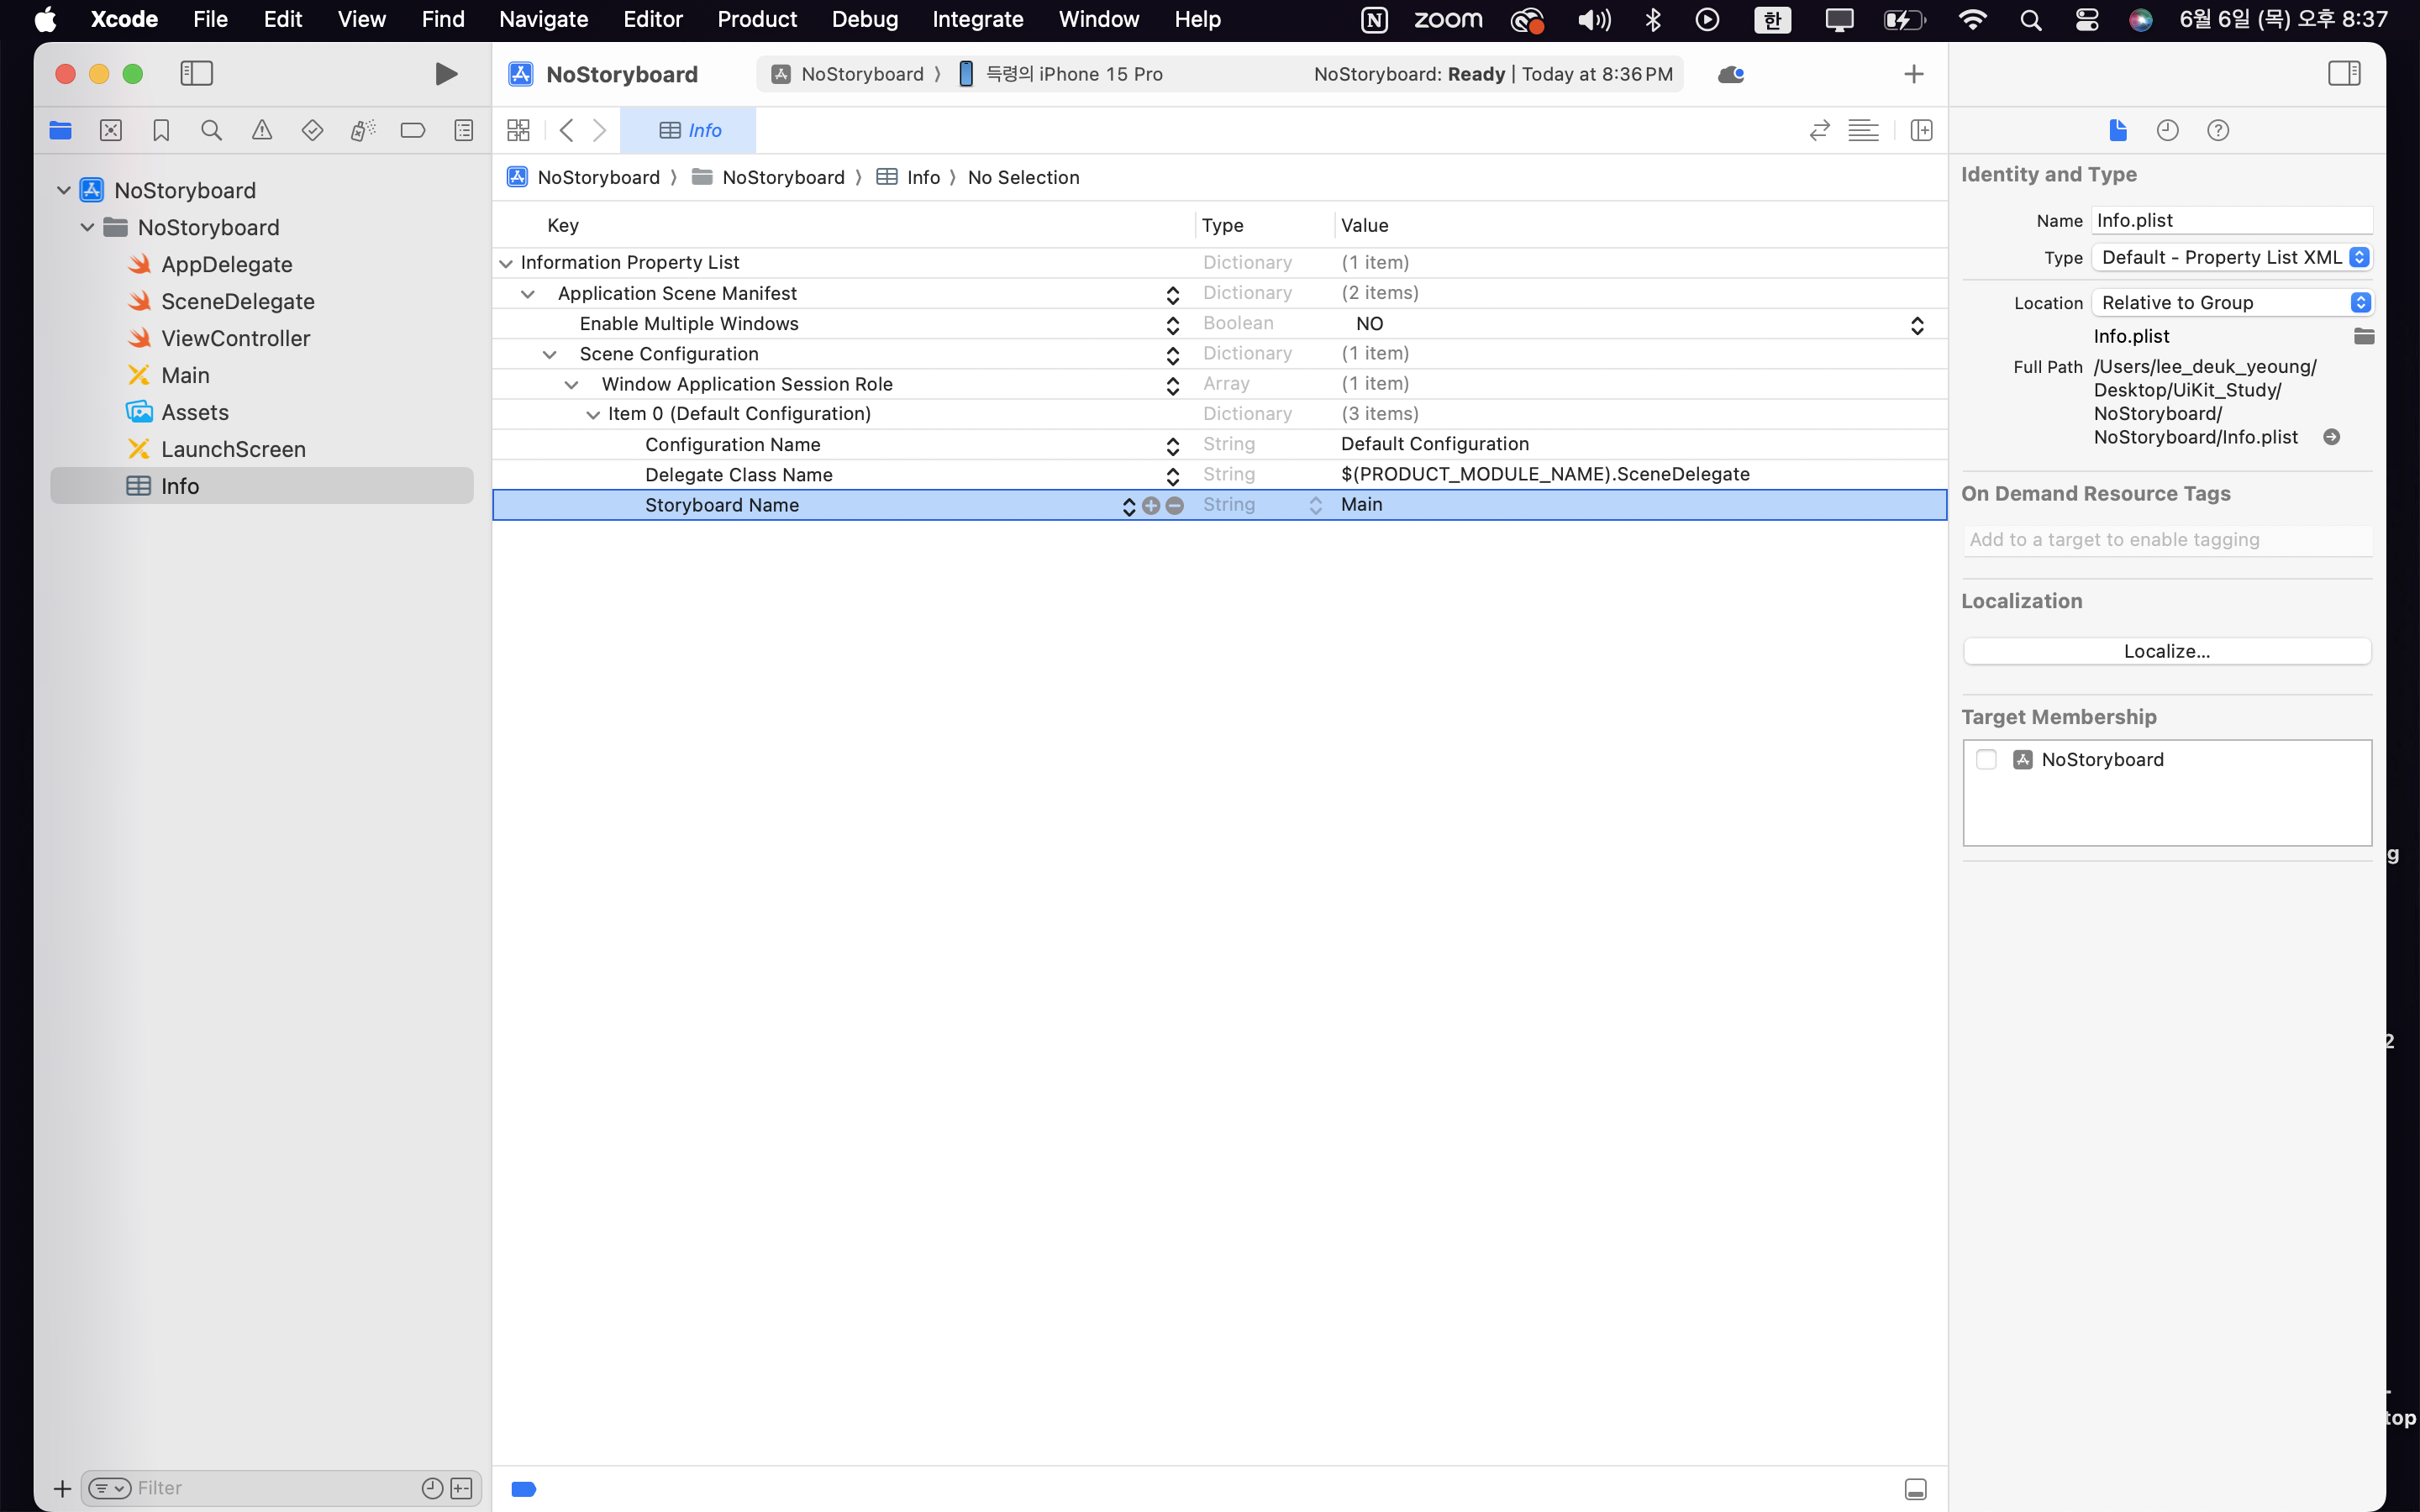
Info → Application Scene Manifest → Scene Configuration → Window Application Session Role → Item 0 → Storyboard Name 경로로 오셔서 Storyboard Name을 삭제해주세요
-
Main.storyboard를 삭제해주세요.
-
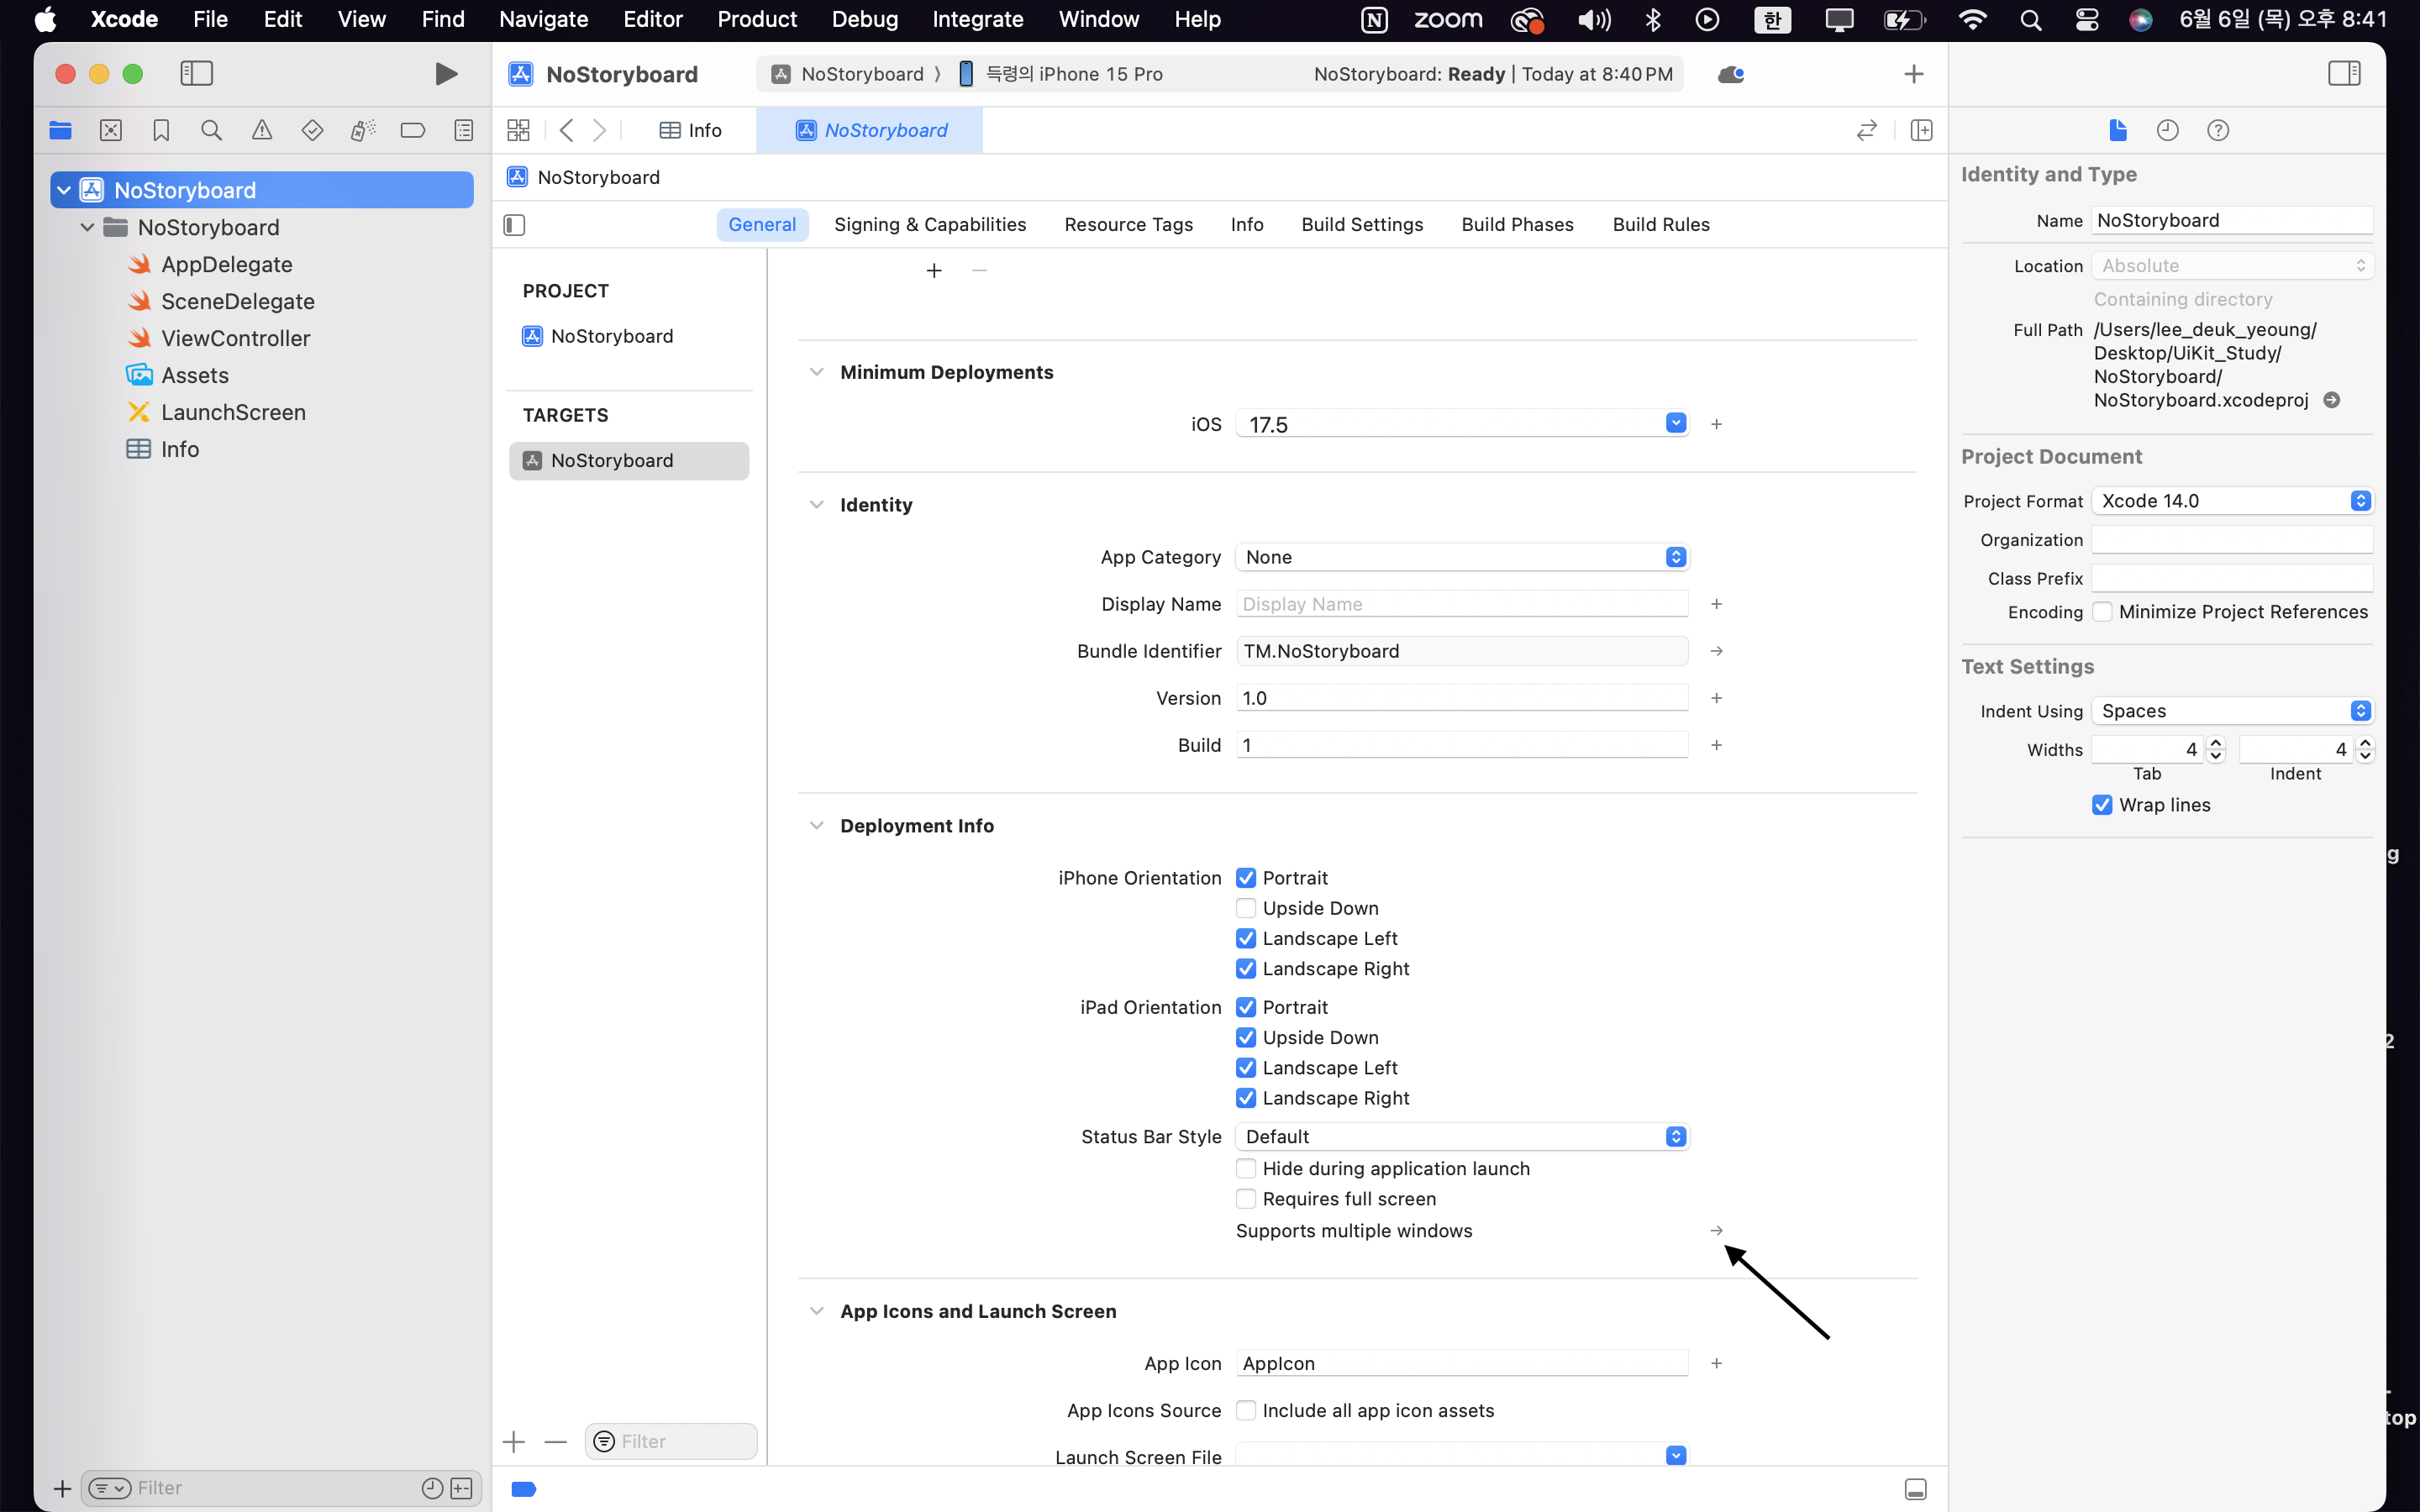
supports multiple windows로 클릭해주세요
-
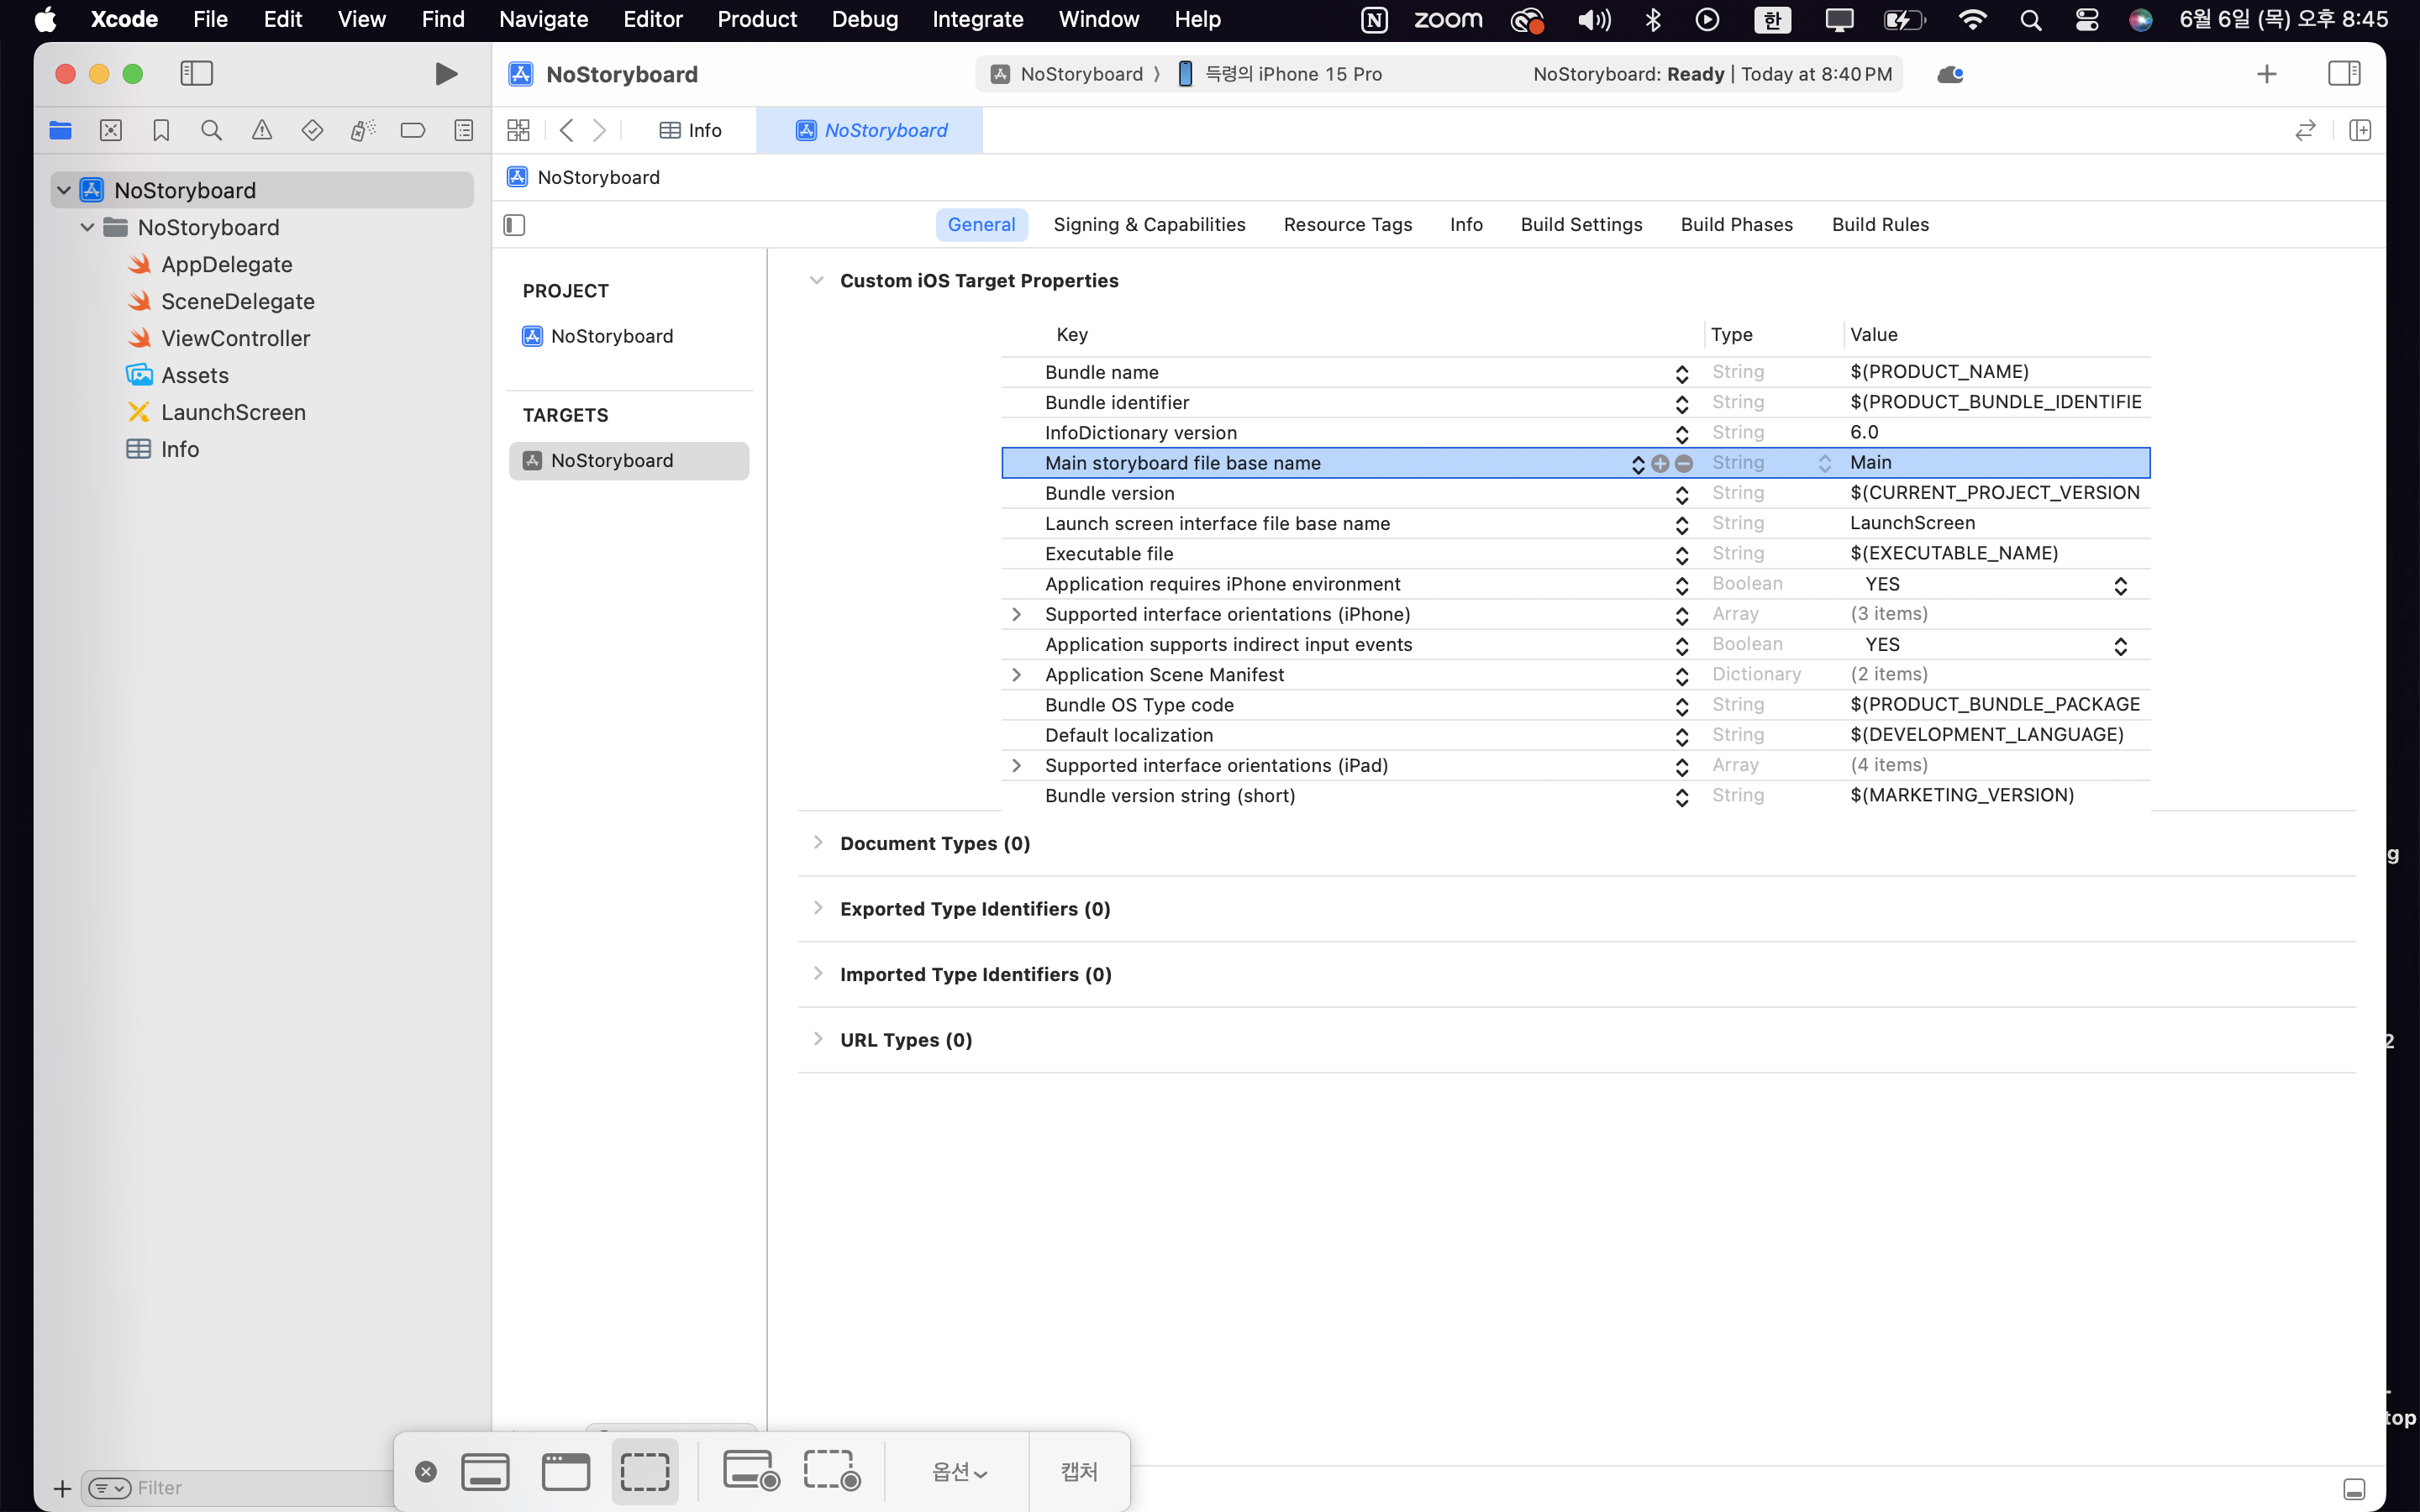
Main storyboard file base name 의 Value를 삭제해주세요
-
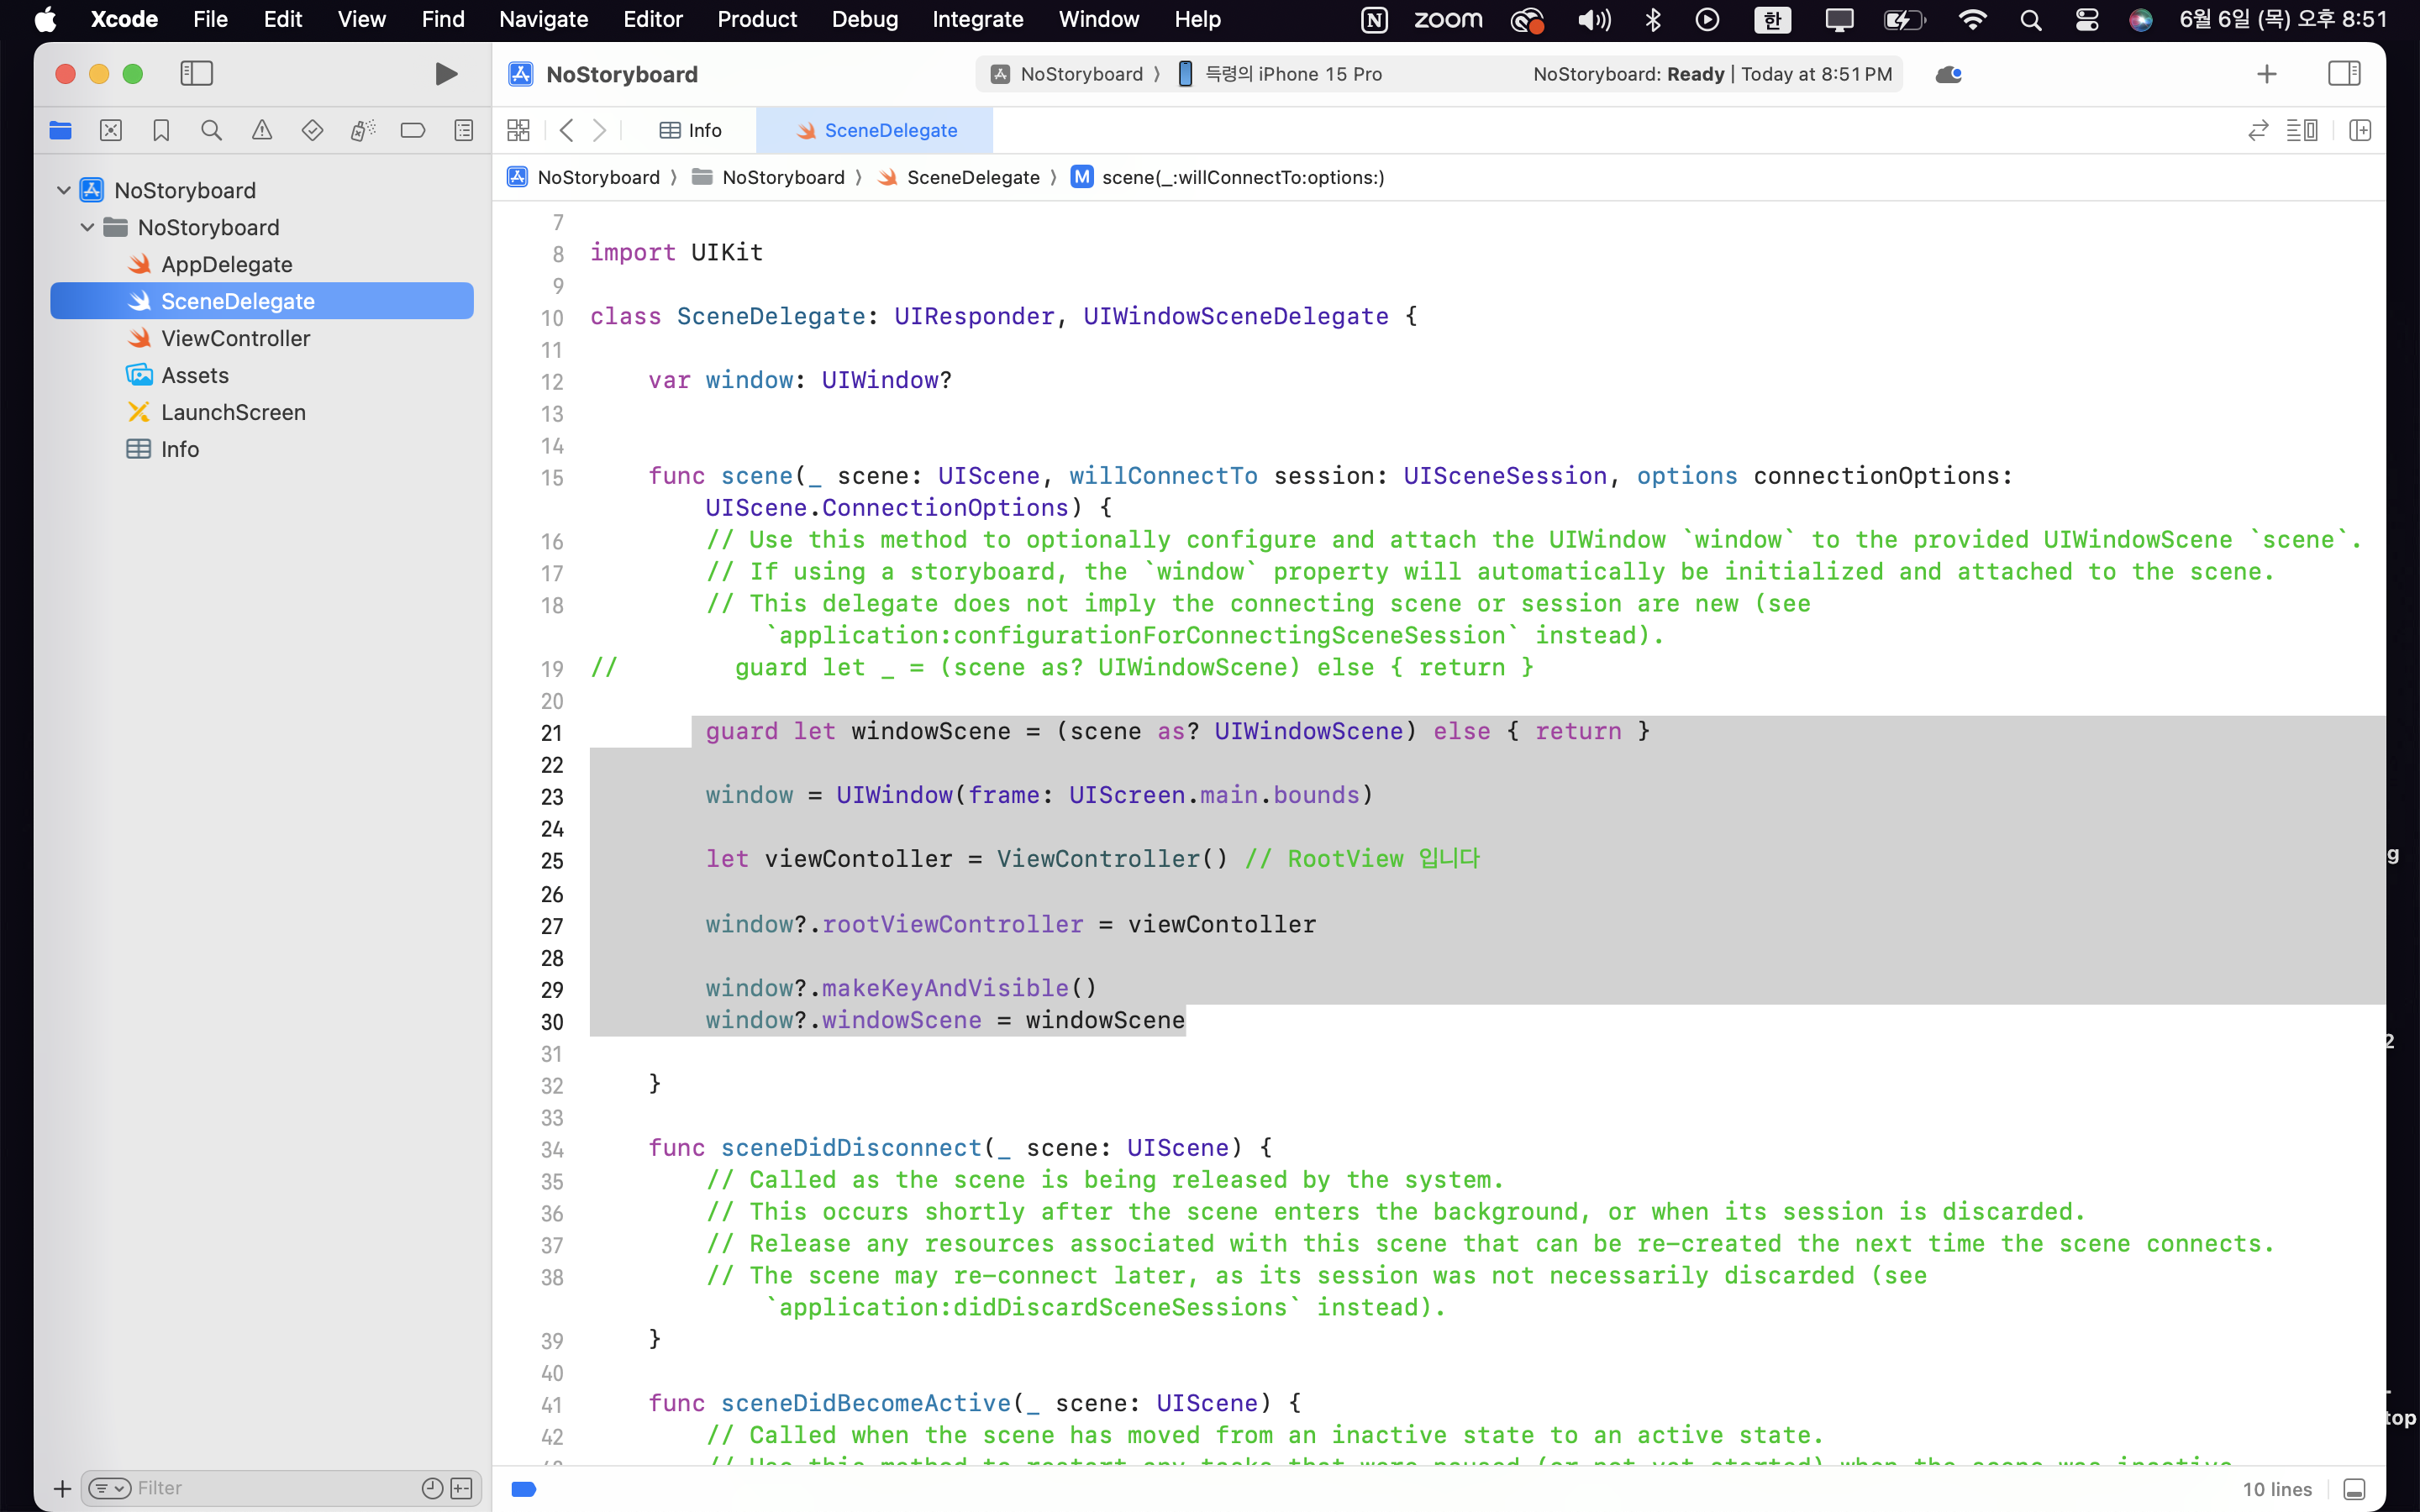
SceneDelegate로 이동해주세요 SceneDelegate 안에 있는
func scene(_ scene: UIScene, willConnectTo session: UISceneSession, options connectionOptions: UIScene.ConnectionOptions)이 함수 안에 있는
guard let _ = (scene as? UIWindowScene) else { return }삭제 혹은 주석처리해주세요 그리고
 guard let windowScene = (scene as? UIWindowScene) else { return }

        window = UIWindow(frame: UIScreen.main.bounds)

        let viewContoller = ViewController() // RootView 입니다

        window?.rootViewController = viewContoller

        window?.makeKeyAndVisible()
        window?.windowScene = windowScene
이코드를 넣어주세요.
이렇게 해주시면 끝 입니다 !!
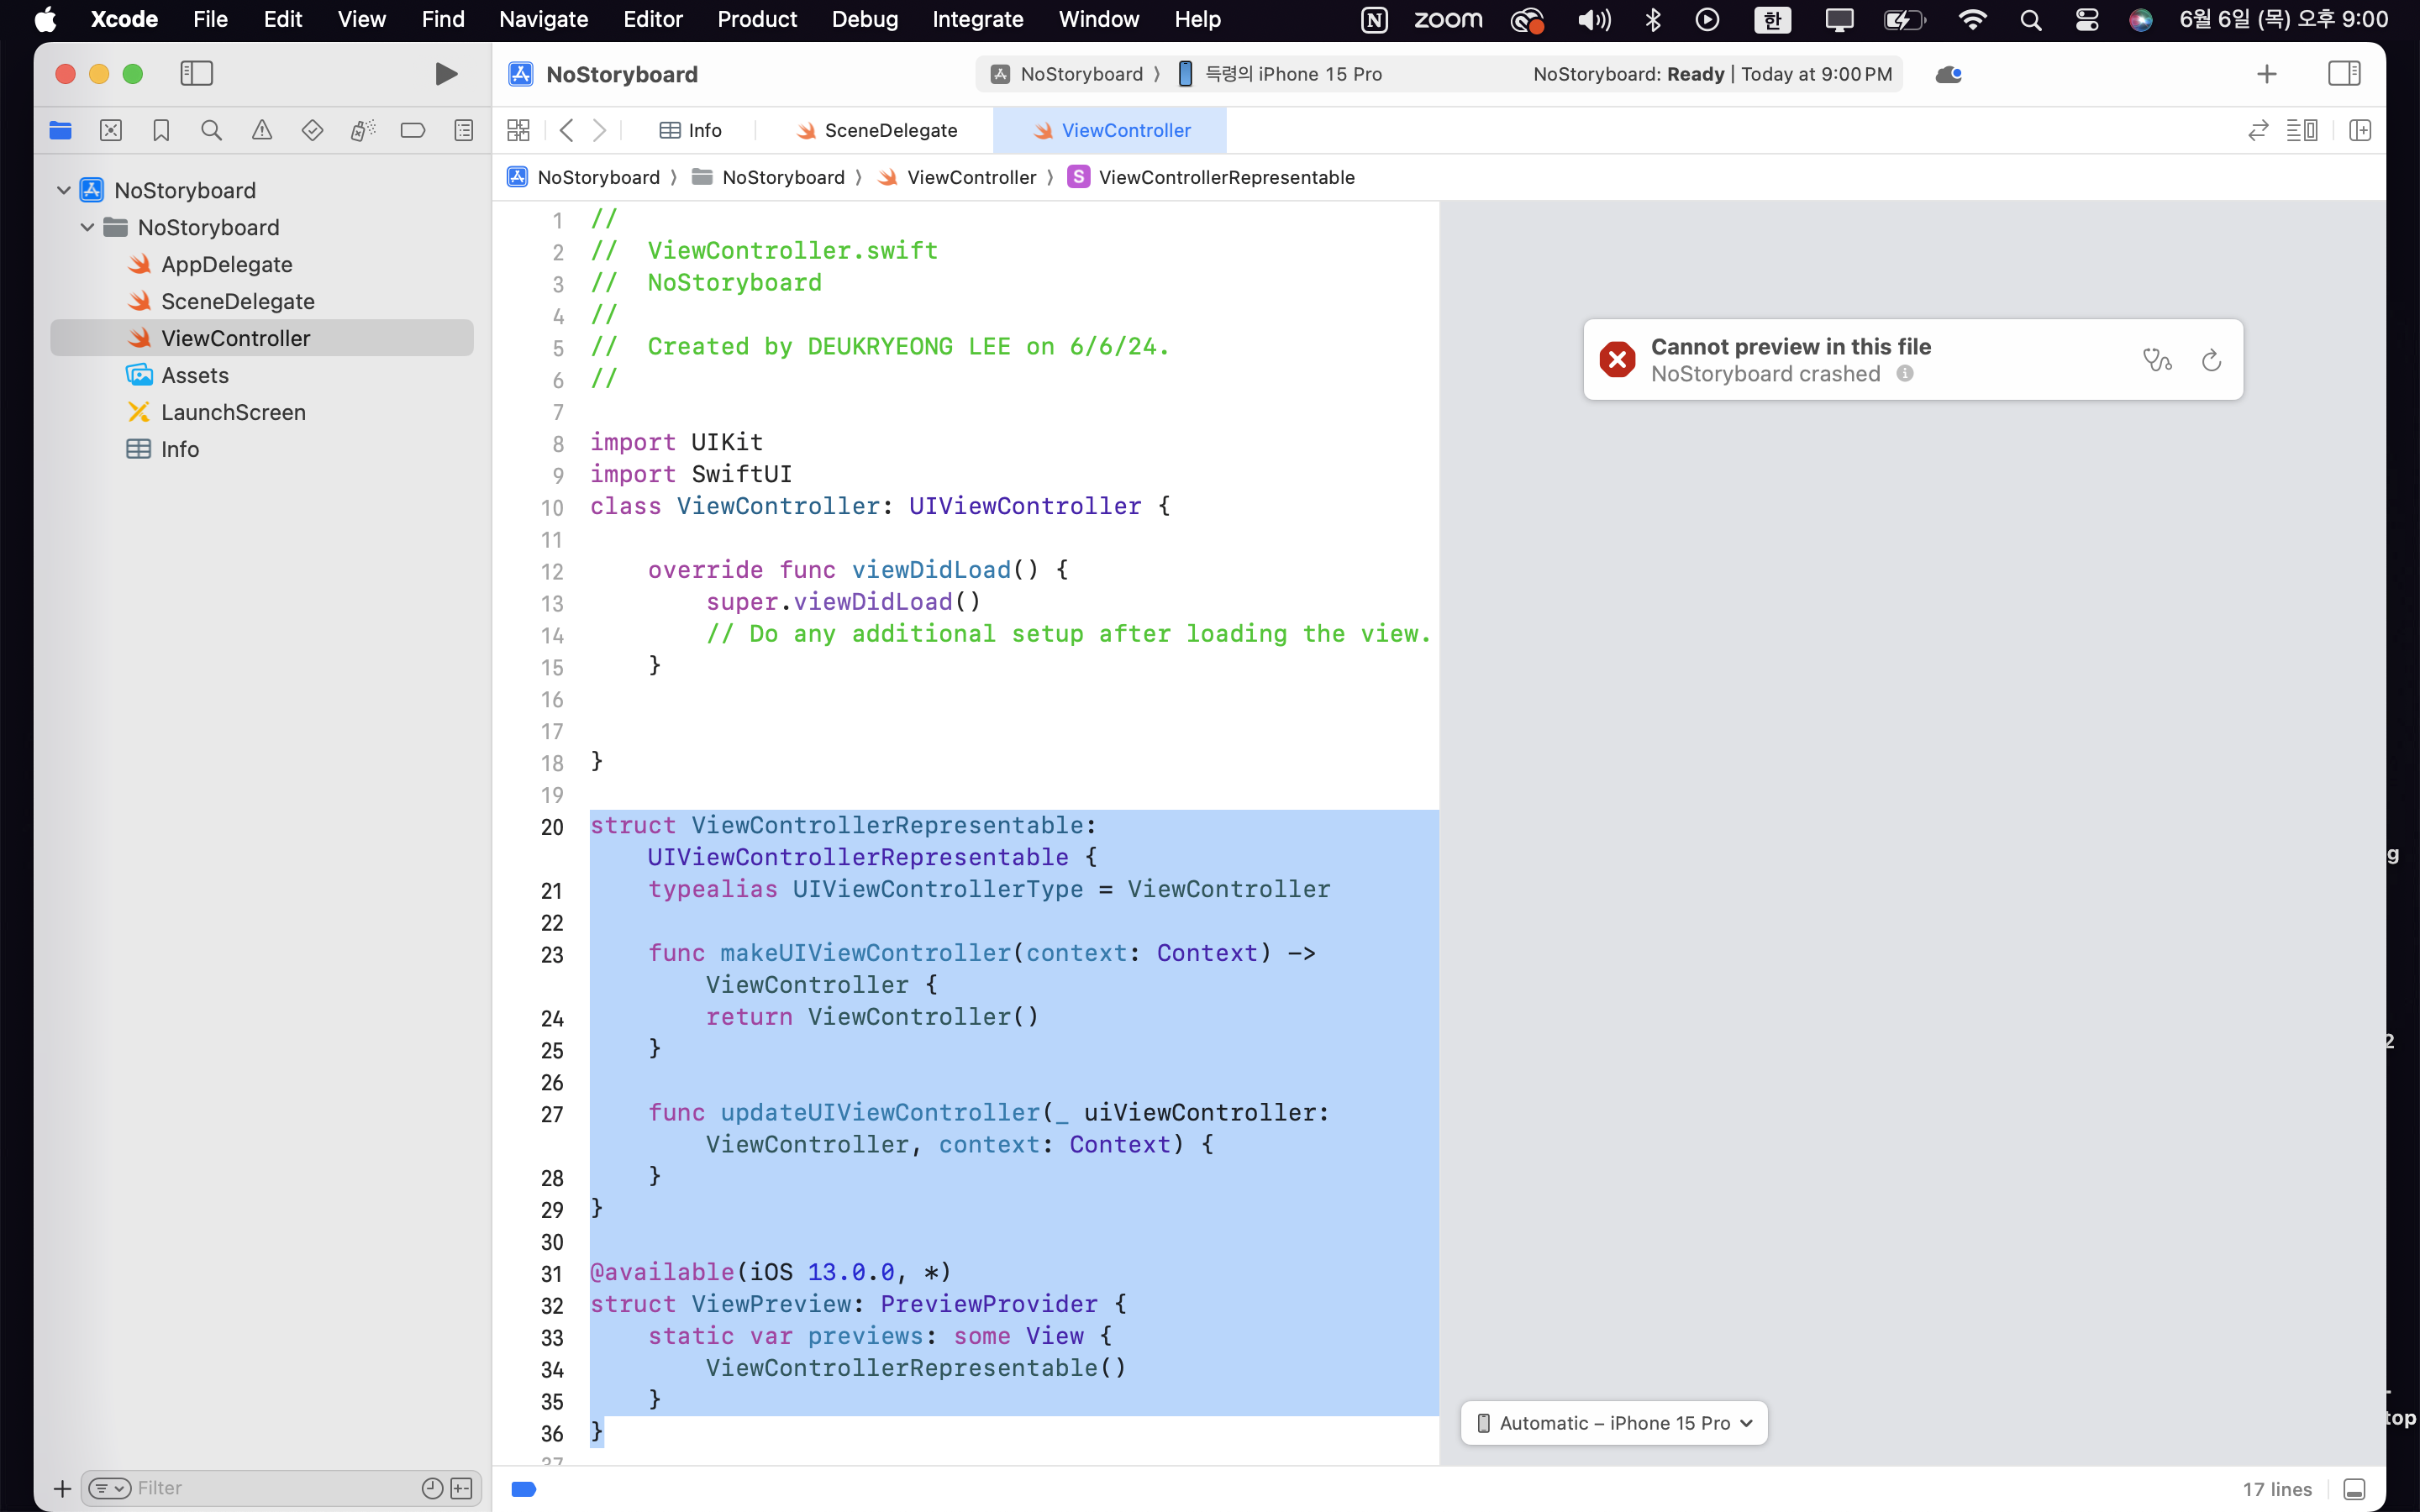
Canvas 추가하는 법
ViewController 아래 이코드를 추가해주세요.
struct ViewControllerRepresentable: UIViewControllerRepresentable {
    typealias UIViewControllerType = ViewController

    func makeUIViewController(context: Context) -> ViewController {
        return ViewController()
    }

    func updateUIViewController(_ uiViewController: ViewController, context: Context) {
    }
}

@available(iOS 13.0.0, *)
struct ViewPreview: PreviewProvider {
    static var previews: some View {
        ViewControllerRepresentable()
    }
}
끝

프로그래머 아님
참고해서 설정했어요!! 감사합니다 득령님~~