
자기소개 페이지 작성 및 JS 추가
- 사전스터디 1주차 과제로 제출했던 자기소개 페이지에 바닐라 JS로 동적인 요소들을 추가해보았다.
- 참고 사이트: 수코딩, JavaScript30 chapter1(Drum kit)
커서 깜빡임, 타이핑 효과
- 나름 생각해서 여백의 미를 강조 ??
(음? ..)해 사이트를 만들어보았지만..intro가 너무 밋밋했기에 위와 같은 효과를 넣어봤다. 전에 유튜버 수코딩님이 올려주신 간단한 예제들을 풀어보다가 굉장히 인상적인 파트가 있었기에 참고하여 구현을 해보았다.

1. 커서 깜빡임 효과
'use strict';
//
const intro = document.querySelector('.intro-title');
const infor = document.querySelector('.information-title');
const favor = document.querySelector('.favorite-title');
const inwecode = document.querySelector('.inwecode-title');
//
// function blink() { intro.classList.toggle('active'); infor.classList.toggle('active'); favor.classList.toggle('active'); inwecode.classList.toggle('active'); } // setInterval(blink, 500);⬇// 중복 요소들을 줄이고자 선택 요소들 및 toggle 메소드를 한 객체에 묶음 const blinkObject = { list: [intro, infor, favor, inwecode], addActiveClass: function () { for (const item of this.list) { // this.list: list array를 가리킨다. item.classList.toggle('active'); // } }, }; // // function blink() { blinkObject.addActiveClass(); } // setInterval(blink, 500);
-
classList.toggle()메소드를 사용하였다. (소괄호 안 클래스가 없을 시 추가, 있을 시 삭제, MDN 참고) -
active클래스가 있을 때와 없을 때의CSS스타일링을 모두 한 후setInterval을 통해 0.5초 간격으로 지속 실행되는 코드를 작성하였다.
(cursor는CSS의Pseudo-elements로 작성,active가 있을 때는 커서 나타남,active클래스가 없을 시 클래스 사라짐) -
기존에는
blink()안intro.classList.toggle('active')처럼toggle을 적용한 요소들을 일일이 나열했지만, 중복을 줄여보고자 위처럼array,object및for..of을 사용하여 리팩토링을 해보았다. -
물론 전자가 코드 줄은 짧고 간단하지만,
중복 제거를 연습해보고자 한다는 것에 의의를 두고 작업했다.
2. 타이핑 효과
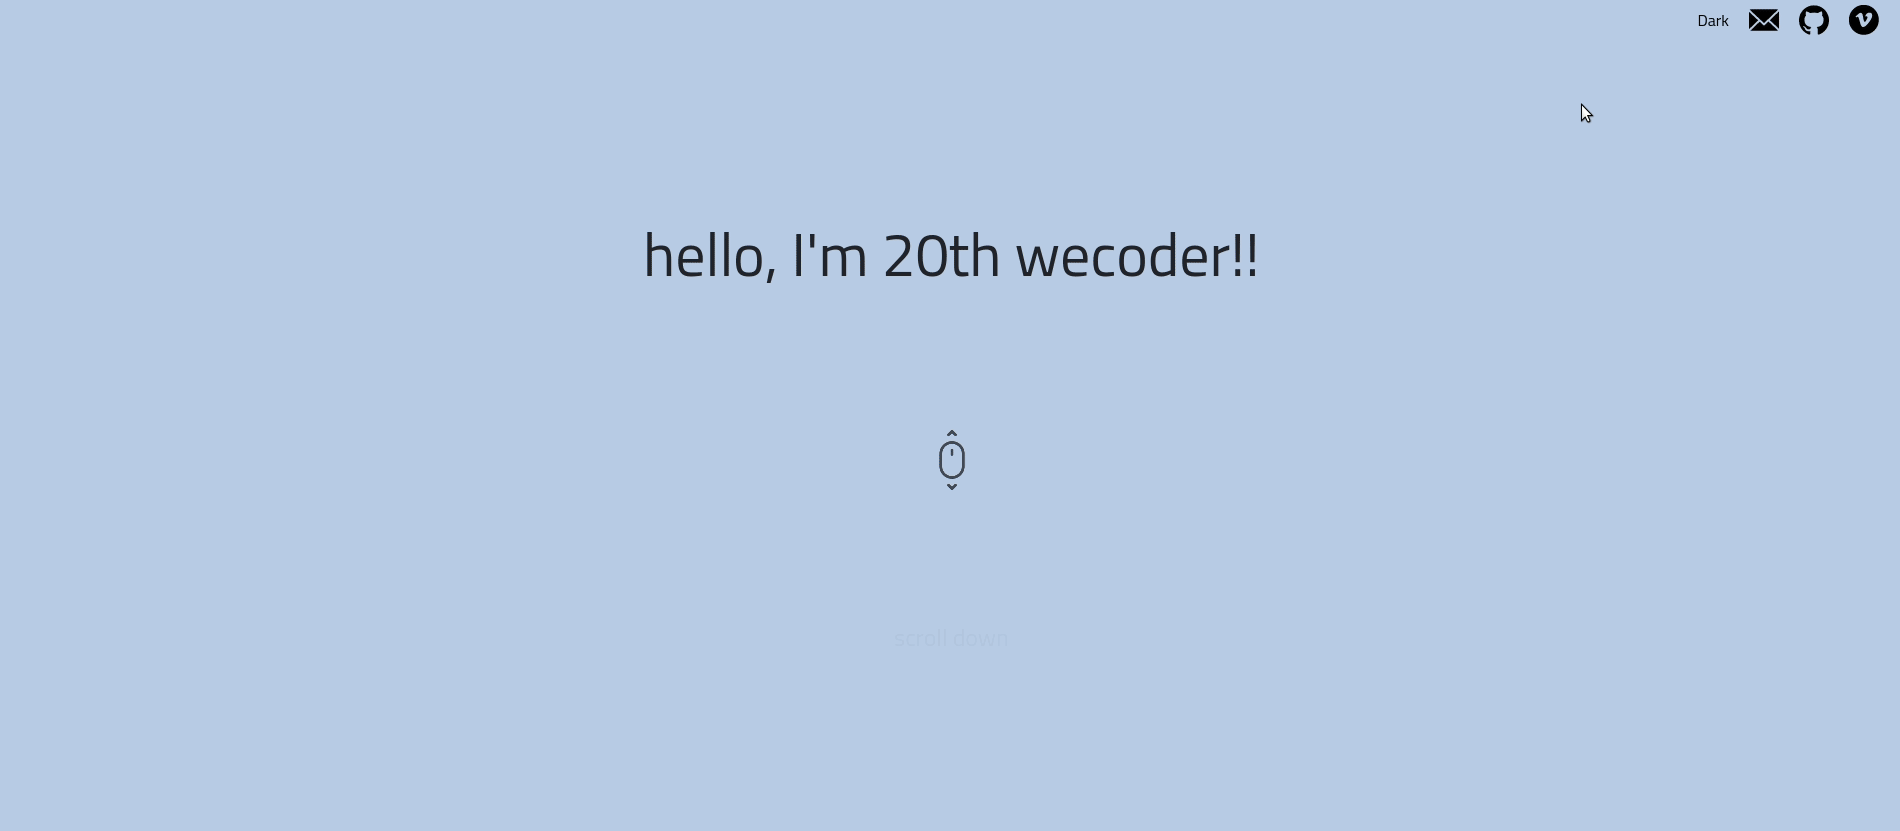
'use strict';
//
const intro = document.querySelector('.intro-title');
//
// 문장 및 글자로 분할하는 함수
function introRandomArr() {
  const stringArr = ["hello, I'm yongmin!!", "hello, I'm 20th wecoder!!"];
  const selectString = stringArr[Math.floor(Math.random() * stringArr.length)];
  const selectStringToArr = selectString.split('');
  return selectStringToArr;
}
//
// resetTyping
function resetTyping() {
  intro.textContent = '';
  print(introRandomArr());
}
//
// typing text
function print(randomArr) {
  if (randomArr.length > 0) {
    intro.textContent = intro.textContent + randomArr.shift();
    setTimeout(() => print(randomArr), 80);
  } else {
    setTimeout(() => resetTyping(), 3000);
  }
}
//
print(introRandomArr());
1. 문장 선택 및 글자 분할하기
-
Math.floor()(소수점 내림),Math.random()(0~1사이 랜덤 숫자 출력),String.prototype.split()을 통해 배열 안의 문장을 무작위로 선택 후 글자들을 분할 및 배열로 리턴하였다. -
Math.floor(Math.random() * stringArr.length)부분에서 소숫점, 랜덤, 배열 길이를 응용한 것이 매우 인상적이었다.(수학적인 요소가 들어가니 좀 신기하기도 했다!!!)
2. 문장 초기화 함수
-
textContent = ''을 통해 출력된 글자들을 없애는 기능을 구현했다. -
innerText로도 사용이 가능했지만, 좀더 자유도가 높은textContent를 선택했다.
3. 분할된 글자 출력하기
-
introRandomArr의 최종 리턴값인selectStringToArr(분할된 글자 배열)을 인자로 전달하여 한글자씩 출력이 되도록 하였다. -
shift()를 통해 맨 앞글자부터 하나씩 빼내어intro.textContent에 추가하였다. -
selectStringToArr의 글자들이 모두 빠져나가length값이 0이 되면resetTyping함수를 실행시켰다.(이해하기 가장 어려웠던 부분이었다.... 😢😢😢)
다크 모드 버튼
- 최근 브라우저 및 휴대폰 모두 다크모드를 사용하다보니 눈에 피로감이 덜해졌다. 또한 구글, 네이버 등 많은 웹에서 지원을 한다. 때문에 직접 해보고자 작업을 하였다.
1. Dark 버튼 클릭시 Bright 글자 변경
<!-- html button 태그--!>
<button type = "button" class="handler" data-value="Bright">Dark</button>
// Javascript 'use strict'; const handlerButton = document.querySelector('.handler'); // handlerButton.addEventListener('click', function () { if (handlerButton.dataset.value === 'Bright') { handlerButton.textContent = 'Bright'; handlerButton.dataset.value = 'Dark'; } else { handlerButton.textContent = 'Dark'; handlerButton.dataset.value = 'Bright'; } });
-
addEventListener('click', ~~)와data attribute를 통해 적용하였다.
(MDN 데이터속성, JavaScript30 chapter1(Drum kit)참고) -
if문을 통해서html의 요소가 해당하는data attribute값을 갖고 있는 경우,JavaScript의dataset을 통해 접근하여data-값을 변경하고textContent를 통해button태그의 text를 변경할 수 있었다.
2. Dark 클릭 시 색 변경
'use strict';
//
const header = document.querySelector('.header');
const introPage = document.querySelector('.intro');
const informationPage = document.querySelector('.information');
const favoritePage = document.querySelector('.favorite');
const inwecodePage = document.querySelector('.inwecode');
const items = [header, introPage, informationPage, favoritePage, inwecodePage];
//
// dark Class 추가 함수
function addDarkClass(parameter) {
  parameter.forEach((item) => item.classList.toggle('dark'));
}
//
// 클릭시 dark class를 추가하는 함수 실행
handlerButton.addEventListener('click', function () {
  addDarkClass(items);
});
-
classList.toggle()메소드를 사용하였다. (소괄호 안 클래스 없을 시 추가, 있을 시 삭제) -
dark클래스가 있을 때와 없을 때의CSS스타일링을 모두 한 후 이벤트 리스너를 통해dark클래스를 추가하는 코드를 작업했다.
(dark클래스가 있을 때는dark mode스타일링 적용,active클래스가 없을 시 기존 스타일 적용) -
기존에는
for..of를 통해items를 순환하면서toggle메소드를 통한dark를 추가했지만,forEach를 사용하니 훨씬!!!! 간결해졌다.(조금씩 응용하는 맛이 생기는 것 같다 ~) -
커서 깜빡임 코드와 거의 비슷하다.
(toggle을 통한 클래스 추가 및 제거이이므로 ..)
리뷰를 마치며...
자기소개 페이지 JS파일을 작성하면서 중복의 최소화에 대한 고민이 생각의 폭을 넓히는데 가장 좋았던 것 같다. 단순히 나열식보다는 '어떻게 하면 간결하게 작성할 수 있을까' '가독성을 어떻게 좋게 할까' 등의 생각들을 하면서 얕은 지식으로 뭔가 해보려고 노력했다는 것에 의의를 두고 싶다.

4개의 댓글

blinkObject.addActiveClass() 로 중복제거하신거 👀 저도 비슷한 상황에서 어떻게 하면 중복을 최대한 제거할 수 있을지 그랬을때 가독성은 무엇이 좋은지 가독성과 중복이 충돌한다면 뭘 택하는게 더 좋은지, 실무에선 어떻게 활용하는지 궁금하고 고민스러웠는데 비슷한 고민을 용민님 글에서 보니까 넘 반갑네요 👍👍👍
크으으👍🏻👍🏻