자주 사용하는 몇 가지 쿠퍼티노 위젯들을 정리해보았다.
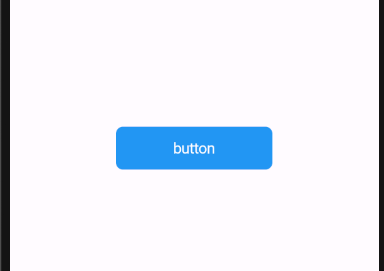
CupertinoButton
일반 TextButton이나 ElevatedButton과 같은 기능의 버튼이다.
Widget build(BuildContext context) {
return CupertinoPageScaffold(
child: Container(
child: Center(
child: Column(
mainAxisAlignment: MainAxisAlignment.center,
children: [
CupertinoButton(
child: Text('button'), color: Colors.blue, onPressed: () {})
],
),
),
),
);
}
CupertinoActivityIndicator
iOS 스타일의 로딩 표시기다.
radius 속성을 이용해 크기를 조절할 수 있다.
CupertinoActivityIndicator(radius: 20,)
CupertinoAlertDialog
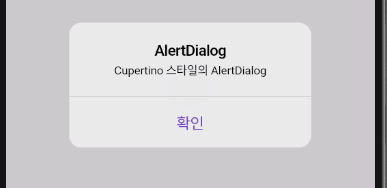
iOS 스타일의 알림 창이다
Widget build(BuildContext context) {
return CupertinoPageScaffold(
child: Container(
child: Center(
child: Column(
mainAxisAlignment: MainAxisAlignment.center,
children: [
CupertinoButton(
child: Text('dialog'),
onPressed: () {
showCupertinoDialog(
context: context,
builder: (context) {
return CupertinoAlertDialog(
title: Text('AlertDialog'),
content: Text('Cupertino 스타일의 AlertDialog'),
actions: [
CupertinoButton(
child: Text('확인'),
onPressed: () {
Navigator.of(context).pop();
})
],
);
});
})
],
),
),
),
);
}CupertinoButton을 하나 만들고 버튼을 누르면
showCupertinoDialog() 함수를 통해 CupertinoAlertDialog를 띄워주도록 만들었다.
CupertinoActionSheet
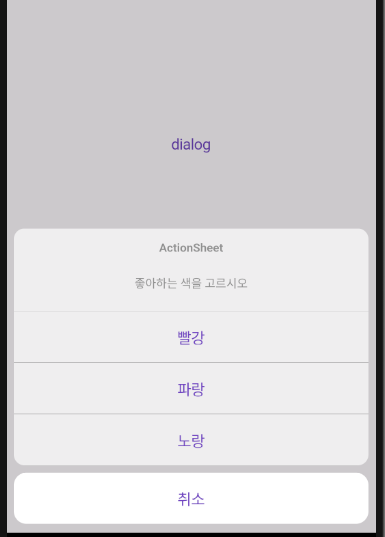
안드로이드의 알람 창으로 다양한 동작을 구현하는 것을, iOS에선 알람 창 이외에 하단에 표시되는 액션시트를 이용해 선택 사항을 나열할 수 있다.
showCupertionModalPopup() 함수를 통해 CupertinoActionSheet를 호출한다.
Widget build(BuildContext context) {
return CupertinoPageScaffold(
child: Container(
child: Center(
child: Column(
mainAxisAlignment: MainAxisAlignment.center,
children: [
CupertinoButton(
child: Text('dialog'),
onPressed: () {
showCupertinoModalPopup(
context: context,
builder: (context) {
return CupertinoActionSheet(
title: Text('ActionSheet'),
message: Text('좋아하는 색을 고르시오'),
actions: [
CupertinoButton(
child: Text('빨강'), onPressed: () {}),
CupertinoButton(
child: Text('파랑'), onPressed: () {}),
CupertinoButton(
child: Text('노랑'), onPressed: () {}),
],
cancelButton: CupertinoButton(
child: Text('취소'),
onPressed: () {
Navigator.of(context).pop();
},
),
);
});
})
],
),
),
),
);
}
CupertinoPicker
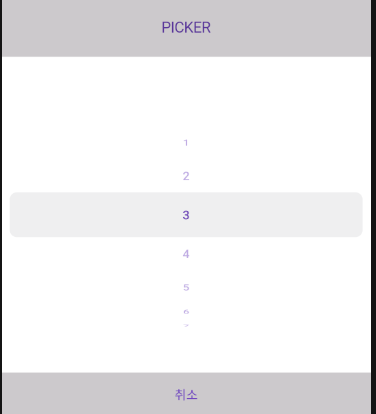
피커는 스크롤을 이용해 이벤트를 처리하는 위젯이다.
액션시트처럼 showCupertinoModalPopup() 위젯으로 호출한다.
보통 컨테이너를 이용해 높이를 정하고, Expanded() 함수로 스크롤하는 CupertinoPicker의 길이를 최대한 길게 설정한다.
scrollController를 이용해 Controller를 선언하고 초기화한다.
class _MyHomePageState extends State<MyHomePage> {
FixedExtentScrollController? firstController;
void initState() {
super.initState();
firstController = FixedExtentScrollController(initialItem: 0);
}
Widget build(BuildContext context) {
return CupertinoPageScaffold(
child: Container(
child: Center(
child: Column(
mainAxisAlignment: MainAxisAlignment.center,
children: [
CupertinoButton(
child: Text('PICKER'),
onPressed: () {
showCupertinoModalPopup(
context: context,
builder: (context) {
return Container(
height: 400,
child: Column(
children: [
Expanded(
child: CupertinoPicker(
itemExtent: 50,
backgroundColor: Colors.white,
scrollController: firstController,
onSelectedItemChanged: (index) {},
children: List<Widget>.generate(10, (index) {
return Center(
child: TextButton(
child: Text((++index).toString()),
onPressed: () {
Navigator.of(context).pop();
},
),
);
}),
)),
TextButton(
onPressed: () {
Navigator.of(context).pop();
},
child: Text('취소'))
],
),
);
});
},
)
],
),
),
),
);
}
}
CupertinoNavigationBar
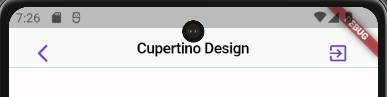
내비게이션 바를 표시한다. 스캐플드에서 appBar의 역할에 대응한다.
Widget build(BuildContext context) {
return CupertinoPageScaffold(
navigationBar: CupertinoNavigationBar(
leading: CupertinoButton(child: Icon(Icons.arrow_back_ios), onPressed: (){}),
middle: Text('Cupertino Design'),
trailing: CupertinoButton(child: Icon(Icons.exit_to_app), onPressed: (){}),
),
CupertinoSlider
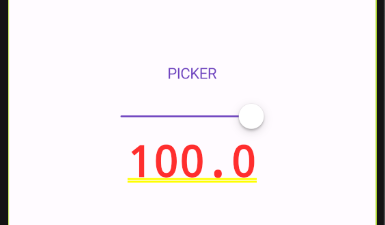
iOS 스타일의 슬라이더
class _MyHomePageState extends State<MyHomePage> {
FixedExtentScrollController? firstController;
double _value = 0.0;
...
Widget build(BuildContext context) {
return CupertinoPageScaffold(
...
child: Column(
mainAxisAlignment: MainAxisAlignment.center,
children: [
...
CupertinoSlider(
value: _value,
max: 100,
onChanged: (double value) {
setState(() {
_value = value;
});
}),
Text(_value.toString())
],
...
더 많은 위젯과 자세한 사용법은 이곳에서 확인할 수 있다.