11/24 월 - 리액트와 라즈베리파이 브로커 간의 pub
assignment
review
- dom, 이벤트, https://blog.naver.com/heaves1/224068149159
- https://blog.naver.com/heaves1/224075584701 다시 보기
- 용어정리 : ssr, 의존성 주입, jpa, spring, springboot, DI, AOP
vscode - reactwork - state
state : 새로고침 안 하고 화면이 바뀌게 하는 것
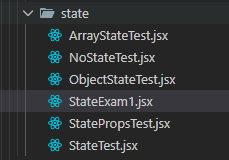
리액트
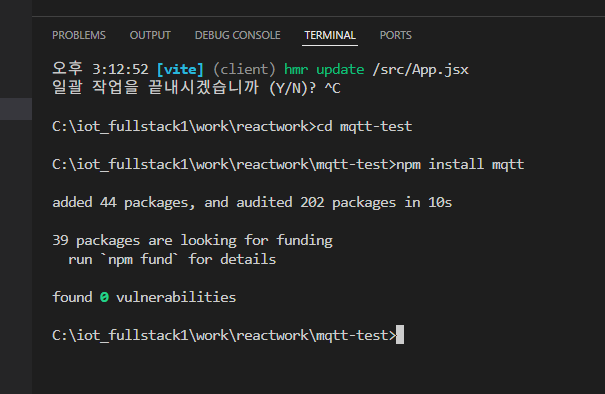
mqtt-test 만듦
프로젝트 구조
브라우저 <->웹소켓으로 통신 브로커
리액트 웹페이지 (pub,sub 가능해야함) -> broker - (pub,sub 가능해야함) - 라즈베리파이
스프링 부트 <-> (pub,sub 가능해야함) <-> broker
라즈베리파이는 led, 온습도센서 연결, 카메라도 같이
설정파일
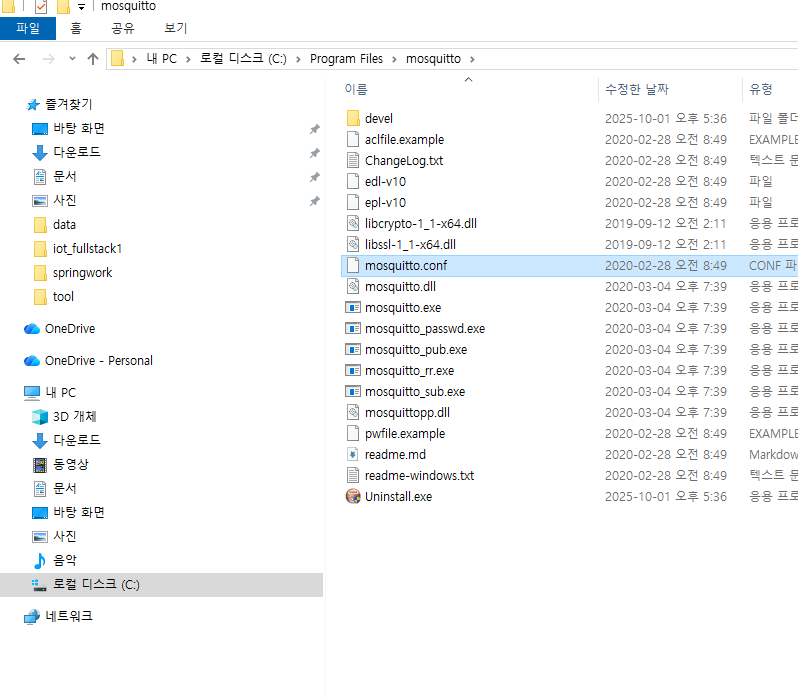
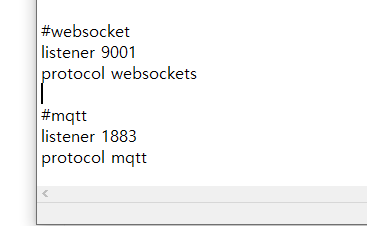
- 메모장으로 열어서 관리자로 열어서 맨 밑에 입력 열때 모든파일로 하고 열어야 함.
- 포트 2개 열어서 한쪽으로는 mqtt 라즈베리파이, 리액트는 웹소캣

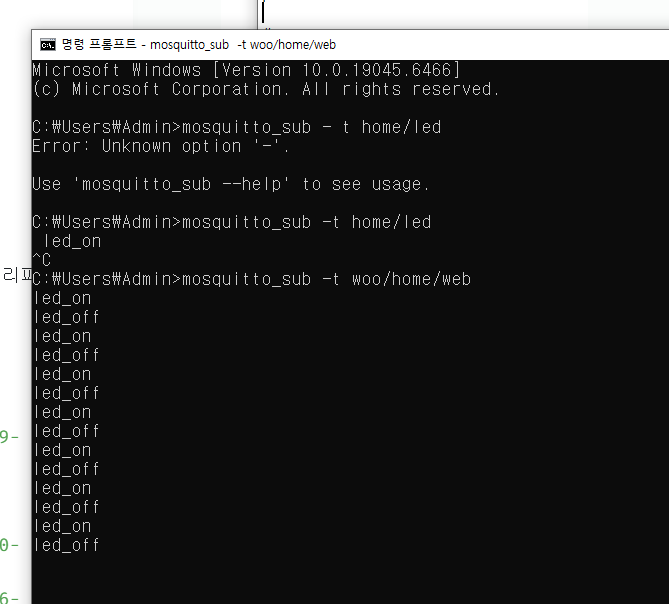
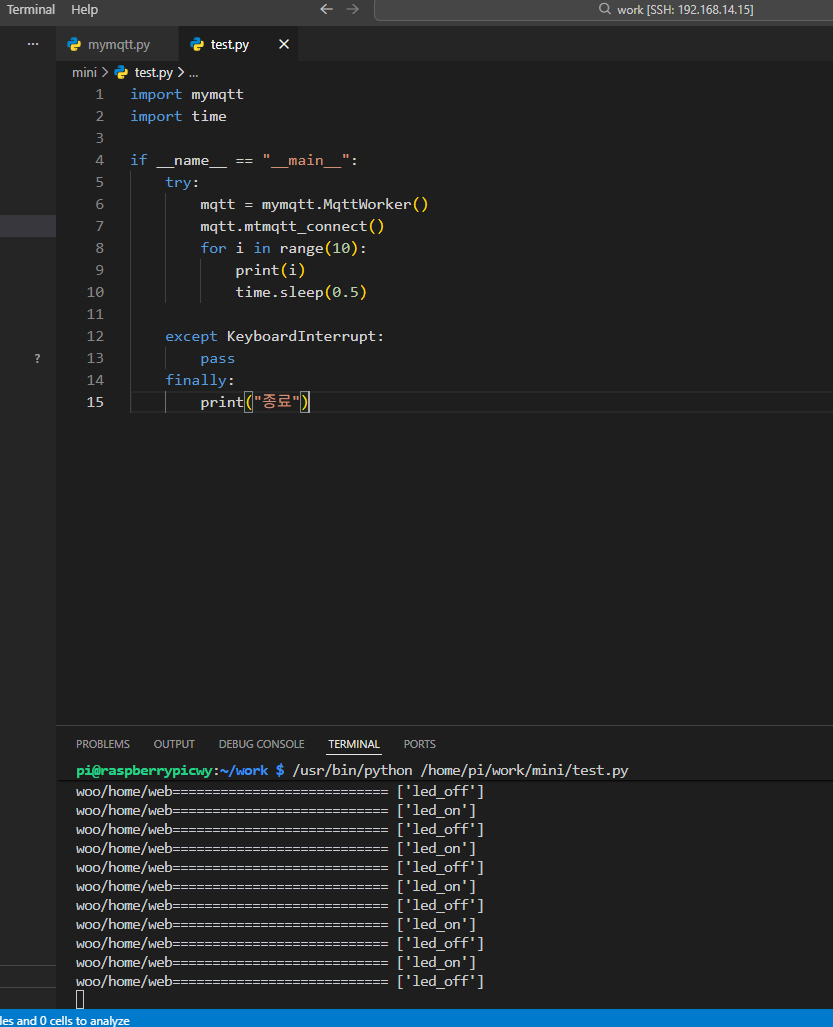
- 라즈베리 통신해서 하는 코드
import paho.mqtt.client as client
import RPi.GPIO as gpio
from threading import Thread
from sensor import  DHTSensor
from led import LED

class MqttWorker:
    #생성자에서 mqtt통신할 수 있는 객체생성, 필요한 다양한 객체생성, 콜백함수등록
    def __init__(self):
        self.client = client.Client()
        self.client.on_connect = self.on_connect
        self.client.on_message = self.on_message
        # self.client.on_disconnect = self.on_disconnect
        # self.led_pins = [13 , 21]
        self.led = LED(13)
        # self.leds = [LED(pin) for pin in self.led_pins] #LED 넘기는 작업은 생성할때밖에 안됨
        # self.dht11 = DHTSensor(self.client, 25)
        # self.dht11.start()

    # broker에 연결되면 sub에 연결해야 함
    # broker연결 후 실행될 콜백 - rc가 0이면 성공접속, 1이면 실패
    def on_connect(self, client, userdata, flags, rc):
        print("connect..." + str(rc))
        if rc==0: #연결성공하면 구독신청
            client.subscribe("woo/home/web/#") #구독신청 - 우리집 장비의 데이터만 받기 위해서
        else:
            print("연결실패...")

    # 메시지가 수신되면 자동으로 호출되는 메소드
    # LED랑 servo는 sub, 모두 초기화하는 작업
    # 라즈베리 커넥트 브로커 하면 패킷을 서로 받고 연결되어 있어야함
    def on_message(self, client, userdata, message):
        myval = message.payload.decode("utf-8").split(":")
        print(message.topic+"===========================", myval)
        # deive_type = myval[0] # LED인지 servo모터인지 구분하기 위해서 사용
        # led_index = int(myval[1])
        command = myval[0]
        if command == "led_on":
            self.led.led_on()
        elif command == "led_off":
            self.led.led_off()


    # mqtt서버연결을 하는 메소드 - 사용자 정의
    def mtmqtt_connect(self):
        try:
            print("브로커 연결 시작하기")
            self.client.connect("192.168.14.62", 1883, 60)
            # 내부적으로 paho-mqtt는 이벤트기반
            # mqtt통신을 유자하기 위해서 지속적으로 broker와 연결을 테스트(ping교환), 수신메세지를 읽기,
            # 연결이 끊어지면 재연결........
            # 이 모든 직업이 처리되려면 별도의 실행흐름으로 쓰레드에서 이런 일들이 지속되도록 loop_forever를
            # 쓰레드로 작업할 수 있도록 지정
            # loop_forever가 계속 통신을 유지해야 메시지가 도착하면 콜백으로 등록한 on_message가 호출
            # 지속적으로 통신을 유지하는 처리를 해야 하므로 쓰레드로 작업
            mymqtt_obj = Thread(target = self.client.loop_forever)
            mymqtt_obj.start()
        except KeyboardInterrupt:
            pass
        finally:
            print("종료")
- 리액트
import React from "react";
import mqtt from "mqtt";
import { useEffect } from "react";
import { useState } from "react";
//1. 필요한 정보 정의
// const BROKER_URL = "wss://test.mosquitto.org:8081";
const BROKER_URL = "ws://192.168.14.62:9001";
const TOPIC_NAME = "woo/home/web";
const MqttTest = () => {
  //useEffect에서 만들어진 mqttClient객체를 다른 곳에서 사용하기 위해서 state로 정의
  //
  const [client, setClient] = useState(null);
  useEffect(() => {
    //2. 브로커와 연결생성
    const mqttClient = mqtt.connect(BROKER_URL, {
      clientId: `react_client_${Math.random()
        .toString(16)
        .substring(2, 8)}`, //고유아이디
      //clientId: "test",
      keepalive: 60,
      protocolId: "MQTT",
      clean: true,
      reconnectPeriod: 1000,
      connectTimeout: 30 * 1000,
    });
    //1. 연결이 완료되면 실행할 콜백함수
    mqttClient.on("connect", () => {
      console.log("연결성공...");
    });
    //연결시 에러가 발생되면 처리
    mqttClient.on("error", (err) => {
      console.log("Connection오류:", err);
      mqttClient.end();
    });
    setClient(mqttClient);
    return () => {
      if (mqttClient) {
        mqttClient.end();
        console.log("MQTT연결종료");
      }
    };
  }, []);
  const sendMessage = () => {
    //버튼을 누르면 라즈베리파이로 메시지 전송(publish)
    console.log(client);
    client.publish(TOPIC_NAME, "led_on");
  };
  const sendMessage2 = () => {
    //버튼을 누르면 라즈베리파이로 메시지 전송(publish)
    console.log(client);
    client.publish(TOPIC_NAME, "led_off");
  };
  return (
    <div>
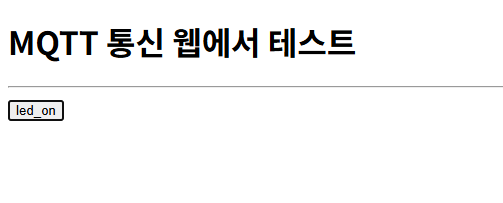
      <button onClick={sendMessage}>
        LED켜기
      </button>
      <button onClick={sendMessage2}>
        LED끄기
      </button>
    </div>
  );
};

export default MqttTest;
- state 버전
import React from "react";
import mqtt from "mqtt";
import { useEffect } from "react";
import { useState } from "react";
//1. 필요한 정보 정의
// const BROKER_URL = "wss://test.mosquitto.org:8081";
const BROKER_URL = "ws://192.168.14.62:9001";
const TOPIC_NAME = "woo/home/web";
const MqttTest = () => {
  //useEffect에서 만들어진 mqttClient객체를 다른 곳에서 사용하기 위해서 state로 정의
  //
  const [client, setClient] = useState(null);
  const [ledstate, setLedState] =
    useState("led_off");
  useEffect(() => {
    //2. 브로커와 연결생성
    const mqttClient = mqtt.connect(BROKER_URL, {
      clientId: `react_client_${Math.random()
        .toString(16)
        .substring(2, 8)}`, //고유아이디
      //clientId: "test",
      keepalive: 60,
      protocolId: "MQTT",
      clean: true,
      reconnectPeriod: 1000,
      connectTimeout: 30 * 1000,
    });
    //1. 연결이 완료되면 실행할 콜백함수
    mqttClient.on("connect", () => {
      console.log("연결성공...");
    });
    //연결시 에러가 발생되면 처리
    mqttClient.on("error", (err) => {
      console.log("Connection오류:", err);
      mqttClient.end();
    });
    setClient(mqttClient);
    return () => {
      if (mqttClient) {
        mqttClient.end();
        console.log("MQTT연결종료");
      }
    };
  }, []);
  const sendMessage = () => {
    //버튼을 누르면 라즈베리파이로 메시지 전송(publish)
    console.log("현재 LED 상태=>" + ledstate);
    if (client) {
      if (ledstate == "led_on") {
        setLedState("led_off");
      } else {
        setLedState("led_on");
      }
    }
    client.publish(TOPIC_NAME, ledstate);
  };
  const sendMessage2 = () => {
    //버튼을 누르면 라즈베리파이로 메시지 전송(publish)
    console.log(client);
    client.publish(TOPIC_NAME, "led_off");
  };
  return (
    <div>
      <button onClick={sendMessage}>
        {ledstate}
      </button>
    </div>
  );
};

export default MqttTest;
11/25 화 - 리액트와 라즈베리파이 브로커 간의 pub, sub
assignment
review
- dom, 이벤트, https://blog.naver.com/heaves1/224068149159
- https://blog.naver.com/heaves1/224075584701 다시 보기
- 용어정리 : ssr, 의존성 주입, jpa, spring, springboot, DI, AOP
vscode - reactwork - state
state : 새로고침 안 하고 화면이 바뀌게 하는 것
- putty 에서 입력
카메라 테스트
libcamera-hello -t 5000
사진찍어서저장? 폴더 새로 생김
libcamera-jpeg -o test.jpg
rpicam-jpeg -o test.jpg
rpicam-jpeg -o image2.jpg --width 1920 --height 1080 --nopreview
rpicam-vid -o video.h264 -t 5000
설치
sudo apt install python3-picamera2
sudo apt install python3-opencv
- 시스템 패키지 연동 카메라를 가상환경에서도 사용할 수 있음
python3 -m venv --system-site-packages .myvenvwork
가상환경 들어가기
source .myvenvwork/bin/activate


# 촬영한 사진 한장으로 mqtt통신으로 pub하기(파일저장후)
# 리액트프로젝트의 server의 파일을 수정해서 pub된 이미지파일을 저장할 수 있도록 작업하기
# home/mydata

import time
from picamera2 import Picamera2
import paho.mqtt.publish as publisher

picam = Picamera2()
config = picam.create_preview_configuration(main={"format":"XRGB8888", "size" : (1200,720)}) # x는 투명도 알파값256칼라 다쓰겠다
picam.configure(config)
picam.start()
print("촬영준비중")
time.sleep(2)
imagepath = "/home/pi/work/mqtt/camera/image-test1.jpg"
picam.capture_file(imagepath)
picam.stop()

with open(imagepath, "rb") as file:
    image_data = file.read()

bytefiledata = bytearray(image_data)


publisher.single("home/mydata/file", bytefiledata,hostname="192.168.14.62")
11/26 수 - AI 특강
assignment
review
- dom, 이벤트, https://blog.naver.com/heaves1/224068149159
- https://blog.naver.com/heaves1/224075584701 다시 보기
- 용어정리 : ssr, 의존성 주입, jpa, spring, springboot, DI, AOP
vscode - reactwork - state
state : 새로고침 안 하고 화면이 바뀌게 하는 것
- 컴퓨터 비전, 비전 센서, 솔루션 조사
오전
코딩 잘한다의 의미 : 키워드를 정해서 빠르게 찾아보는 능력
컴퓨터 비전 : 시각 데이터를 처리하는 분야
카메라 : 열화상, 심도 카메라(정확한 거리등등), x-ray, 라이다 (레이저를 쏴서 돌아오는 값을 측정),
오후
비전 센서들이 꽤 조건이 까다로움
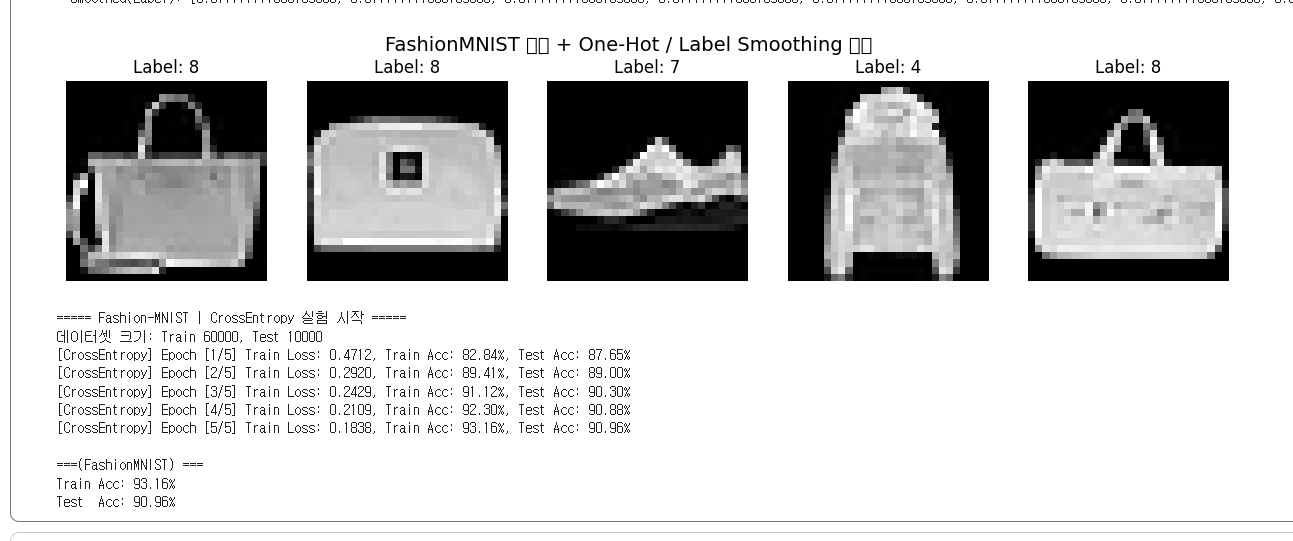
기본 딥러닝 실습 - 1~9까지의 손글씨 6만개를 학습시켜 보자
면접
- 포트폴리오에서 자기 역할을 구체적으로 잘 적어라. 구체화를 하면 할수록 좋음
- 회사를 위해서 준비를 한 느낌이 나게끔 톤앤매너가 지원한 회사에 맞게끔 별 거 아니고 귀찮지만 차별화가 될 수 있음
11/27 수 - AI 특강, 컴퓨터 비전
assignment
review
- dom, 이벤트, https://blog.naver.com/heaves1/224068149159
- https://blog.naver.com/heaves1/224075584701 다시 보기
- 용어정리 : ssr, 의존성 주입, jpa, spring, springboot, DI, AOP
딥러닝
-
벽돌깨기 영상 - 구글 딥러닝
-
IP CV,CG , 영상처리의 역사,
-
영상처리 , 컴퓨터 비전 - 입력은 영상 출력은 정보, 컴퓨터 그래픽스 - 입력은 정보 출력은 그래픽스
-
영상의 형상과정
- 양자화, 샘플링
-
파이썬 실습
-
AI
- Claude, chatGpt, gemini, perplexity(회사에 관련된 정보를 잘 알려줌 취업시 용이), LLama,
