24.01.16 최초 작성
1. 프로비저닝
1.1 Vagrant File 생성
VAGRANTFILE_API_VERSION = "2"

Vagrant.configure(VAGRANTFILE_API_VERSION) do |config|
  config.vm.box = "ubuntu/focal64"                  #ubuntu 20.04 / 64bit
  config.vm.hostname = "ansible.local"              #
  config.vm.provider "virtualbox" do |vb|           #virtualbox config (memory allocation )
		vb.memory = 1024
  end

	if Vagrant.has_plugin?("vagrant-vbguest")
    config.vbguest.auto_update = false              #auto update disable
  end
  config.vm.network "private_network", ip: "192.168.56.46"																#virtual machine network configuration
  config.vm.synced_folder ".", "/vagrant", type: "rsync", rsync__exclude: [".git/"]				#host file(".") changed text would admit to virtual box("\vagrant")
																																													# rsync : synchronized, exclude : would not admit to

  config.vm.provision "shell", inline: <<-SHELL			#OS provisioning start (shellscript)
		export DEBIAN_FRONTEND=noninteractive						#yes or no question disabled
		sudo apt -y update
		sudo apt install -y ca-certificates apt-transport-https
		sudo apt install -y software-properties-common curl
		sudo apt install -y python3-pip python-is-python3
		sudo add-apt-repository --yes --update ppa:ansible/ansible
		sudo apt install -y ansible
		sudo pip3 install docker
	SHELL
end
1.2 vagrant로 virtual machine 생성
#VagrantFile이 존재하는 경로에서 다음과 같은 명령어 실행
vagrant up					#VagrantFile에서 설정한 대로 가상머신 생성 및 설정
vagrant ssh					#해당 가상머신에 ssh 접속
오류 발생
- 링크에 따르면 리눅스 환경에서는
192.168.56.0/21대역의 ip주소를 할당해야 한다고 한다On Linux, Mac OS X and Solaris Oracle VM, VirtualBox will only allow IP addresses in 192.168.56.0/21 range to be assigned to host-only adapters. For IPv6 only link-local addresses are allowed. If other ranges are desired, they can be enabled by creating /etc/vbox/networks.conf and specifying allowed ranges there.
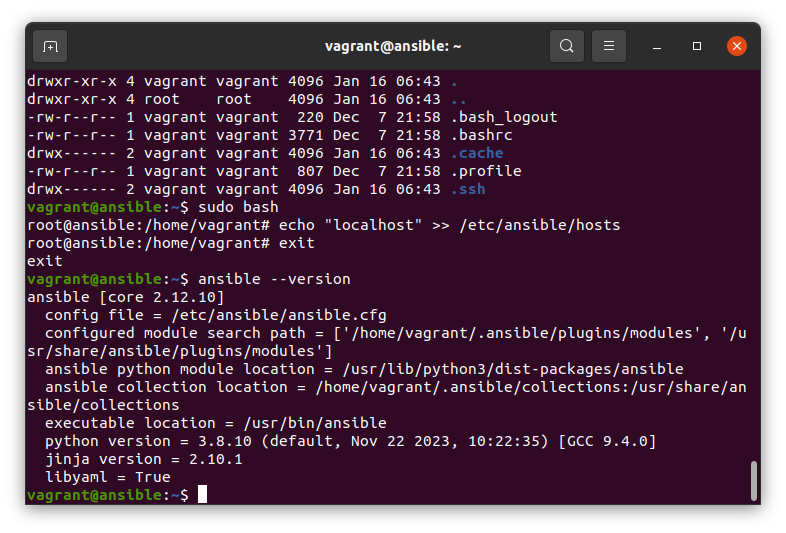
1.3 ANSIBLE에 호스트 등록
sudo bash
echo "localhost" >> /etc/ansible/hosts		#ANSIBLE에 "localhost"가 접근할 수 있도록 등록
exit
2. NGINX 서비스 시작
2.1 ANSIBLE을 통해 서비스 시작
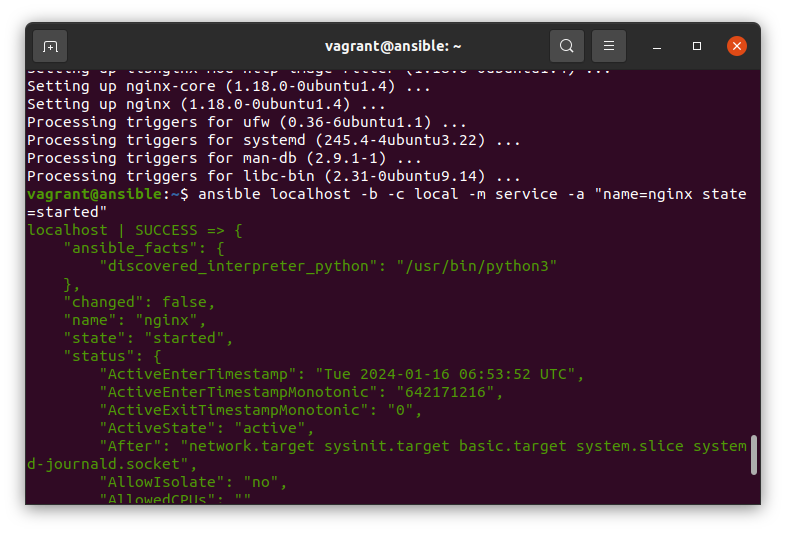
sudo apt install -y nginx
ansible localhost -b -c local -m service -a "name=nginx state=started"Localhost: 인벤토리(/etc/ansible/hosts)에 기재된 서버 중 명령을 수행하는 대상-b: 원격 실행되는 대상 서버에서 어떤 사용자에 의해 실행되는 지 결정 (-b: root 권한)-c local: 대상 서버가 자기 자신인 경우local, 일반적으로ssh사용-m service:ansible module의service module을 사용함을 선언-a “name=nginx state=started”:-m에 기술한 모듈에 전달하는 인수
(name=nginx: nginx인 서비스에 대해,state=start: 시작된 상태여야 함)
2.2 ansible-playbook
- 환경 설정 및 구축 절차를 기술
- 매개 변수를 통해 환경의 차이를 관리
- 실행 전에 변경되는 부분 파악 가능
ansible-playbook-sample
git clone https://github.com/devops-book/ansible-playbook-sample.git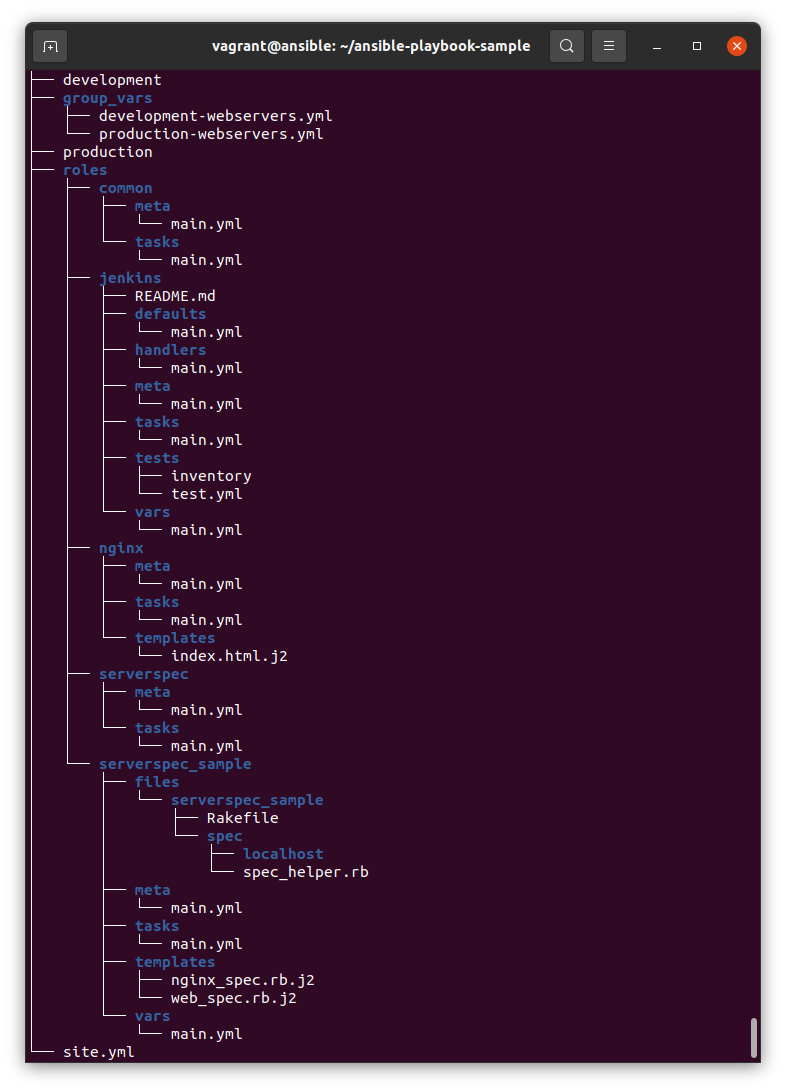
-
development: 파일로 관리하는 개발용 인벤토리 -
production: 파일로 관리하는 운영용 인벤토리 -
group_vars: 각각development,production에 적용할 환경변수에 대한 데이터 관리 -
site.yml: -
rolescommons:commons role에 대한 메타데이터 관리tasks:commons role을 적용하기 위한 작업에 대한 정보 관리
-
nginxcommons:commons role에 대한 메타데이터 관리tasks:commons role을 적용하기 위한 작업에 대한 정보 관리templates:
2.2.1 .yml파일 분석
./roles/common/tasks/main.yml
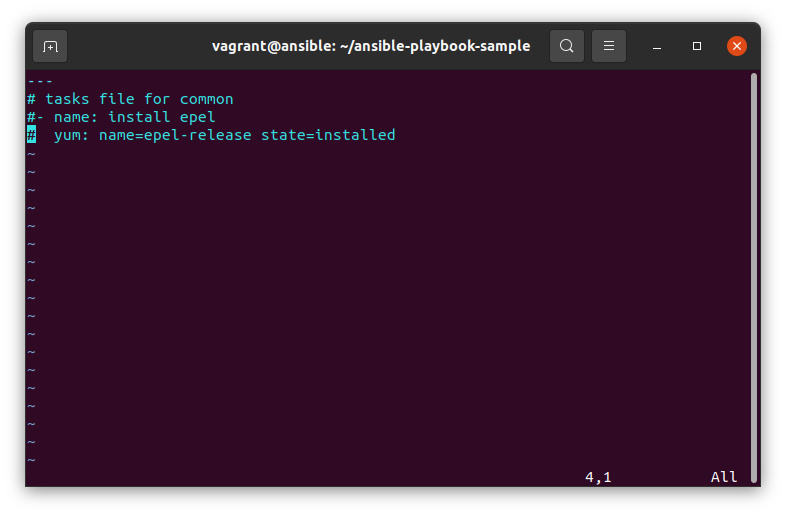
name: 처리해야 할 작업 이름 지정yum: ~:epel-release의state가installed가 되도록 설정 되야 함을 나타냄
(yum install -y epel-release) 수행
./roles/nginx/tasks/main.yml
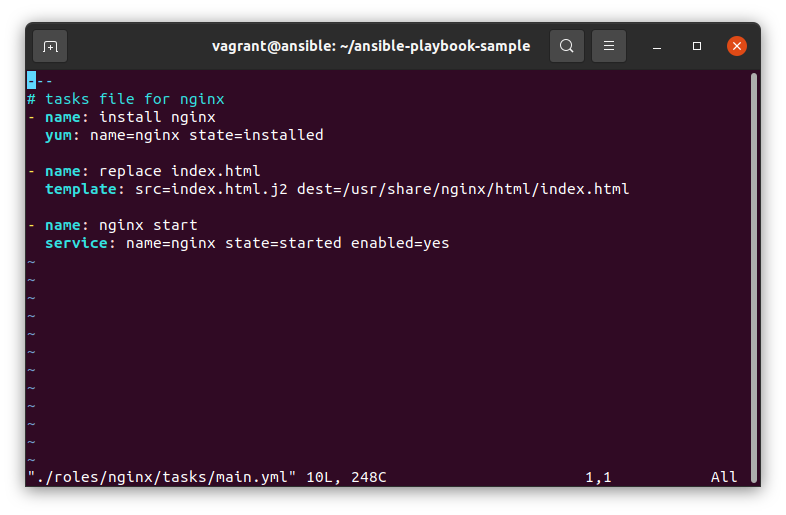
yum: ~:nginx의state가present(installed)가 되도록 설정 되야 함을 나타냄
(yum install -y nginx) 수행template:./roles/nginx/templates에 존재하는service: ~:nginx서비스가start되고enable된 상태로 설정 되야 함을 나타냄
(systemctl start nginx && systemctl enable nginx)
./site.yml
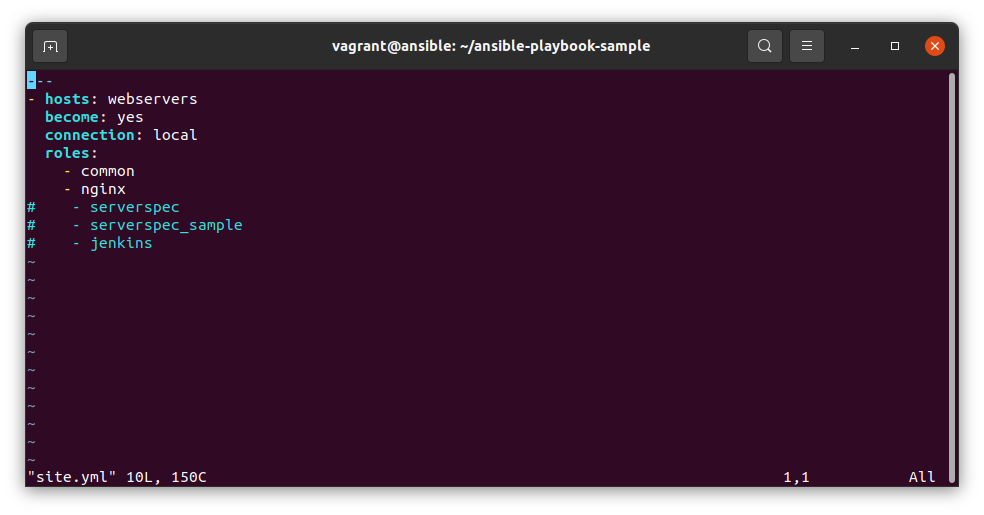
hosts: webserver: 인벤토리에 정의된 그룹을 대상으로 실행대상 결정
2.2.2 인벤토리 분석
./development
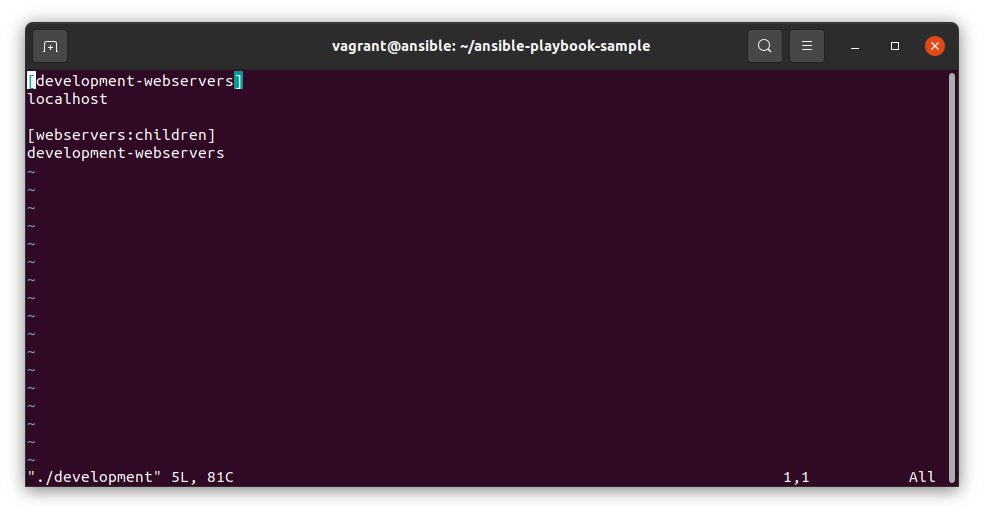
[development-webservers]: 그룹 설정[webservers:children]: 하위 리스트의[development-webservers]형식으로 된 그룹 확인
2.2.3 group_vars 분석
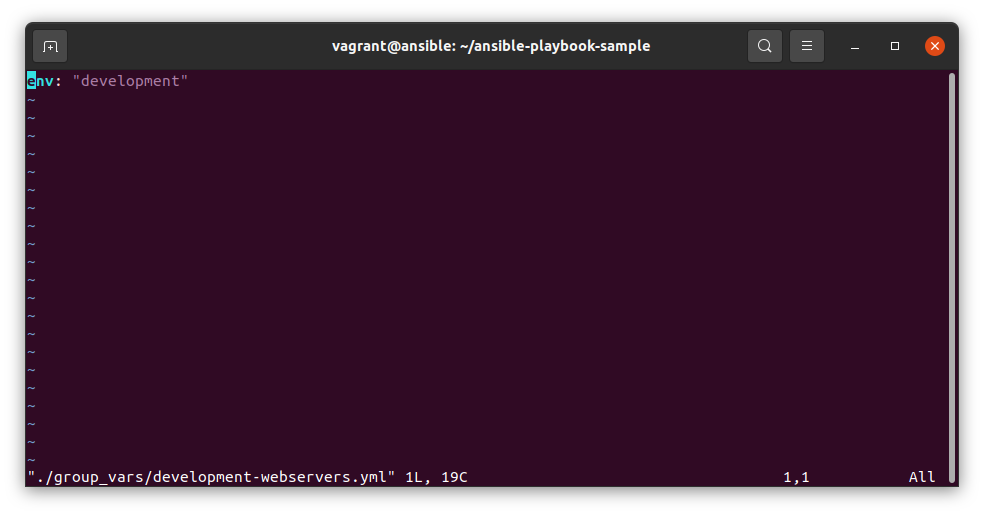
./group_vars/development-webservers.yml
./roles/nginx/templates/index.html.j2
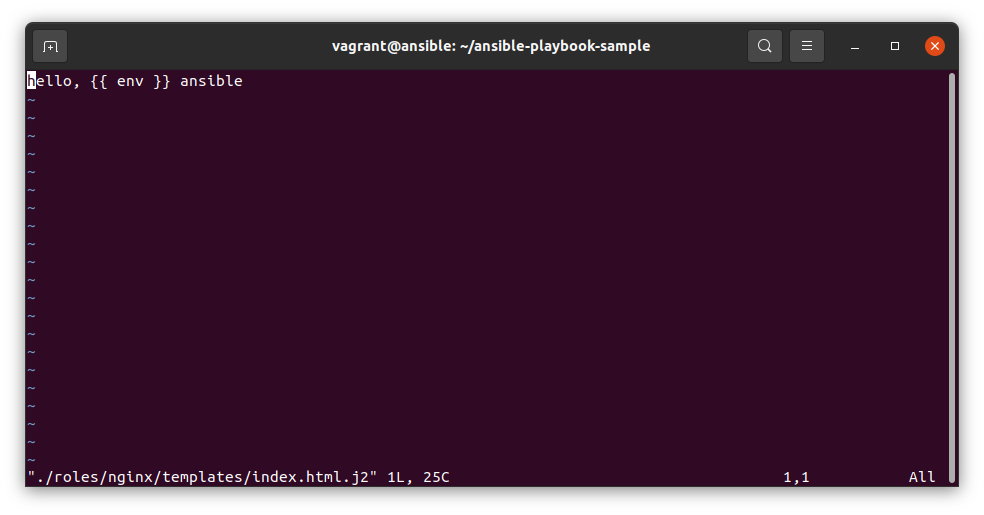
- 환경변수가
./group_vars/development-webservers.yml에서 정의되어 다른 파일에서 활용 됨
2.2.4 playbook 실행
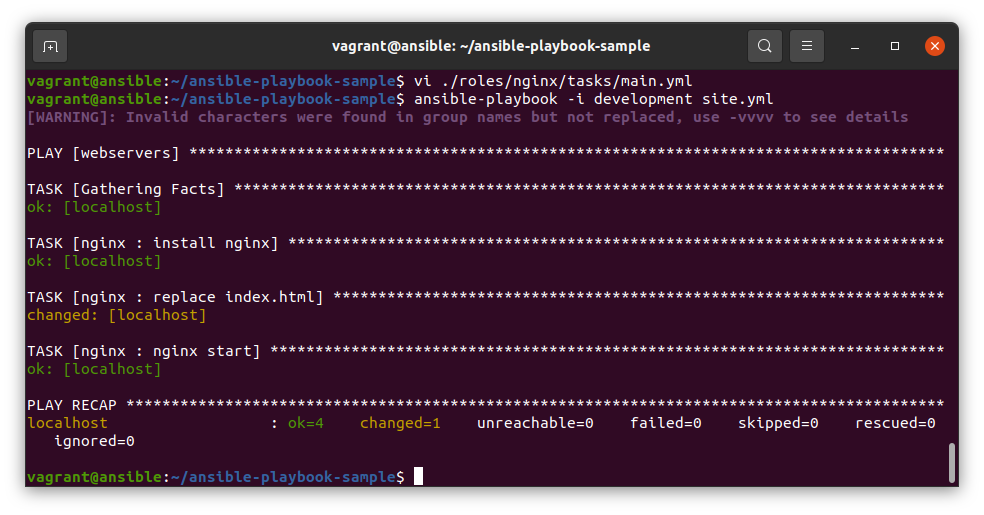
- 개발용으로
site.yml에 설정한 내용대로 실행
ansible-playbook –i development site.ymlok: 작업이 이미 완료된 상태였음changed: 지정한 작업을 완료함skip: 명기한 조건에 부합해 작업을 생략함unreachable: 원래 실행 대상 호스트에 도달 불가failed: 원래 실행 대상 호스트에 도달했으나 작업 실패
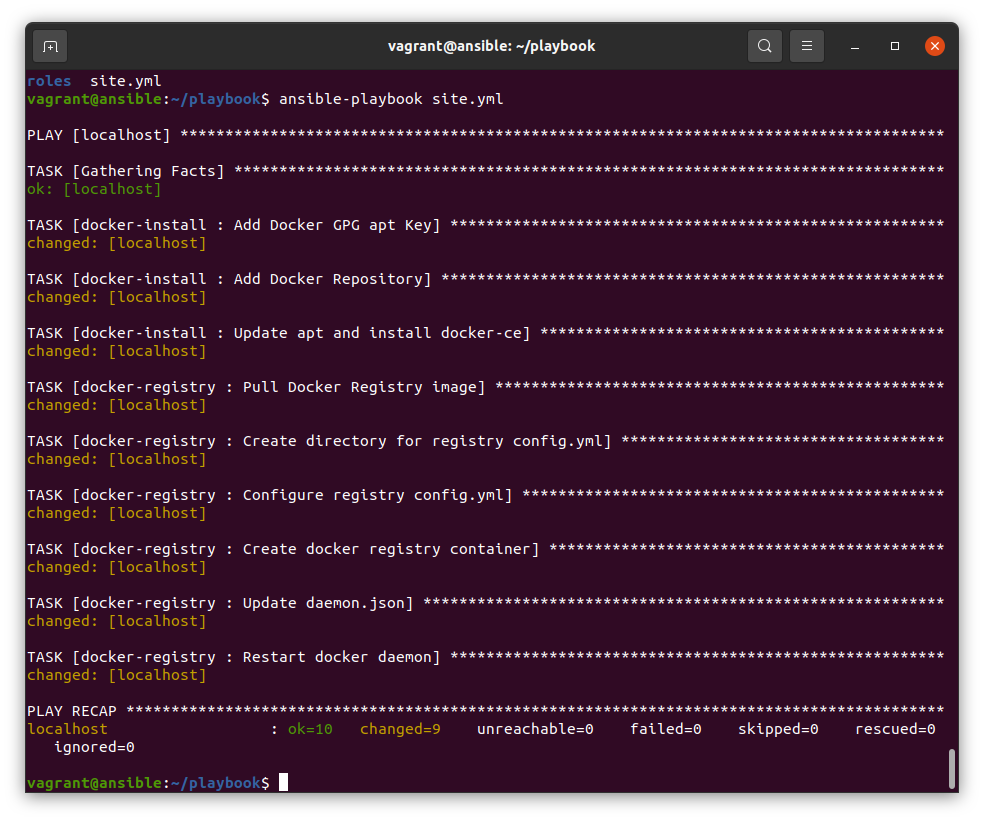
3. Docker 설치
-
/home/vagrant/playbook에 기록 -
playbook/roles/docker-registry/tasks/main.yml
# Setup Docker Registry
- name: Pull Docker Registry image
  community.docker.docker_image:
    name: registry:2
    source: pull
- name: Create directory for registry config.yml
  file:
    path: /etc/docker/registry
    state: directory
- name: Configure registry config.yml
  copy:
    dest: /etc/docker/registry/config.yml
    content: |
      proxy:
        remoteurl: https://registry-1.docker.io
- name: Create docker registry container
  community.docker.docker_container:
    name: registry
    image: registry:2
    detach: true
    recreate: true
    restart_policy: unless-stopped
    mounts:
    - type: bind
      source: /etc/docker/registry/
      target: /etc/registry
    ports:
    - 5000:5000
    state: started
- name: Update daemon.json
  copy:
    dest: /etc/docker/daemon.json
    content: |
      {
        "registry-mirrors": ["http://localhost:5000"]
      }
- name: Restart docker daemon
  systemd:
    name: docker
    state: restarted
playbook/roles/docker-install/tasks/main.yml
- name: Add Docker GPG apt Key
  apt_key:
    url: https://download.docker.com/linux/ubuntu/gpg
    state: present

- name: Add Docker Repository
  apt_repository:
    repo: deb https://download.docker.com/linux/ubuntu focal stable
    state: present

- name: Update apt and install docker-ce
  apt:
    name: docker-ce
    state: latest
    update_cache: true
playbook/site.yml
- hosts: localhost
  connection: local
  become: yes
  roles:
    - docker-install
    - docker-registry