NestJS(Node) Debugging in Docker
하는 이유!
server    | <--- Last few GCs --->
server    |
server    | [18:0x55f7f9026640]   174870 ms: Scavenge 483.4 (494.6) -> 482.0 (494.6) MB, 9.4 / 0.0 ms  (average mu = 0.866, current mu =
 0.543) allocation failure
server    | [18:0x55f7f9026640]   174914 ms: Scavenge 483.6 (494.6) -> 483.1 (495.4) MB, 14.4 / 0.0 ms  (average mu = 0.866, current mu
= 0.543) allocation failure
server    | [18:0x55f7f9026640]   174938 ms: Scavenge 484.3 (495.4) -> 484.0 (500.4) MB, 14.2 / 0.0 ms  (average mu = 0.866, current mu
= 0.543) allocation failure
server    |
server    |
server    | <--- JS stacktrace --->
server    |
server    | FATAL ERROR: MarkCompactCollector: young object promotion failed Allocation failed - JavaScript heap out of memory
AWS EC2 Micro(프리티어)에서 작업한 NestJS 프로젝트를 Pull 하고 Build 하려니깐
힙 메모리의Young space에서 오류가 발생했습니다.
사전 조건
- 1 Docker for Desktop
- 2 Docker extension in VSCode
- 3 Node && Nest
1 launch.json 생성
Docker extension을 설치 했다면
왼쪽 Run and Debug버튼이 생성된다.
익스텐션으로 json 생성하기
Debug버튼 클릭create a launch.json file클릭NodeJS선택 (launch.josn 자동 생성)
직접 json 생성하기
- root 폴더에
.vscode폴더 생성 .vscode폴더 안에launch.json파일 생성
launch.json
{
    "version": "0.2.0",
    "configurations": [
      {
        "type": "node",
        "request": "attach",
        "name": "Debug: app-name",
        "remoteRoot": "/app",
        "localRoot": "${workspaceFolder}",
        "protocol": "inspector",
        "port": 9229,
        "restart": true,
        "address": "0.0.0.0",
        "skipFiles": ["<node_internals>/**"]
      }
    ]
   }
2 NestJS script && docker-compose 수정
package.json
NestJS에서는 "start:debug" : "nest start --debug" 같이 디버깅모드를 제공합니다.
이 스크립트를
"start:debug": "nest start --debug 0.0.0.0:9229 --watch", 와같이 수정한다.
모든 ip에서 9229 포트를 통해 디버그 모드로 접근
Tip
Node 또는 Express에서 디버깅을 할 때는
node --inspect-brk app.js, inspect를 사용한다.
docker-compose.yml
서버PORT가 아래와 같이 열려 있을 텐데
inspect를 위한 9229포트를 추가로 개방해줍니다.
    ports:
      - 3000:3000
디버깅 모드 시작하기
사전 준비는 모두 완료 되었고
Docker를 실행 해줍니다.
- 1
docker-compose up --build실행

Debugger listeing on이 출력되야 한다.
- 2 크롬 브라우저에서
chrome://inspect/#devices접속 - 3 Remote Target에서
inspect실행 (새탭이 생김)

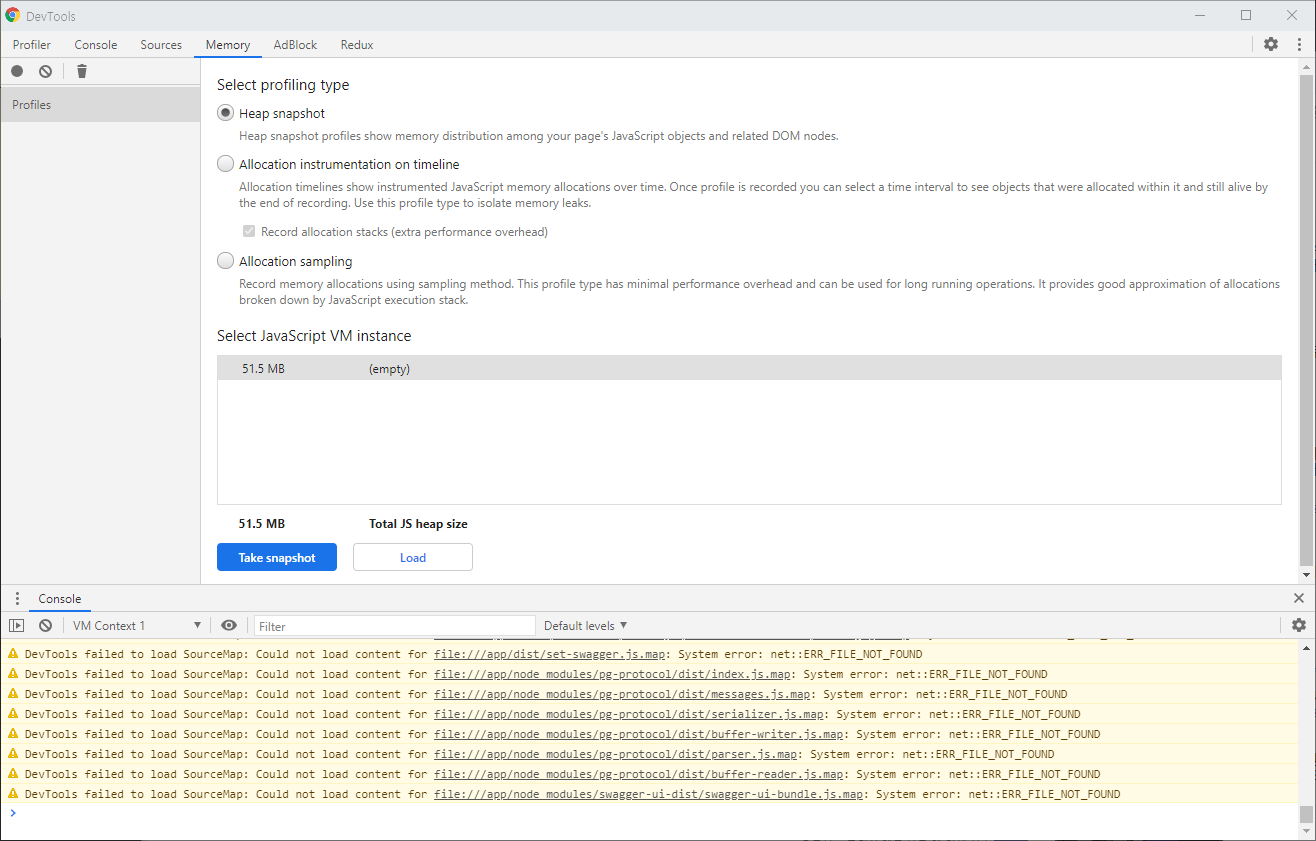
마침
디버깅 모드의 프로파일링을 통해 메모리 누수를 찾아 볼 수 있게 되었습니다만 저의 문제를 해결하지는 않았습니다.
EC2 Micro의 메모리가 1G인것이 문제여서(너무작아서)
Nest build 자체가 불가능 했는데 scp를 이용해서 로컬의 .dist폴더를 ec2 인스턴스로 전송해서 사용해 메모리 문제를 해결했습니다.