
현재 오즈코딩스쿨 강의를 통해 프론트엔드를 학습하고 있습니다.
본 포스트는 해당 강의에 대한 내용 정리를 목적으로 합니다.
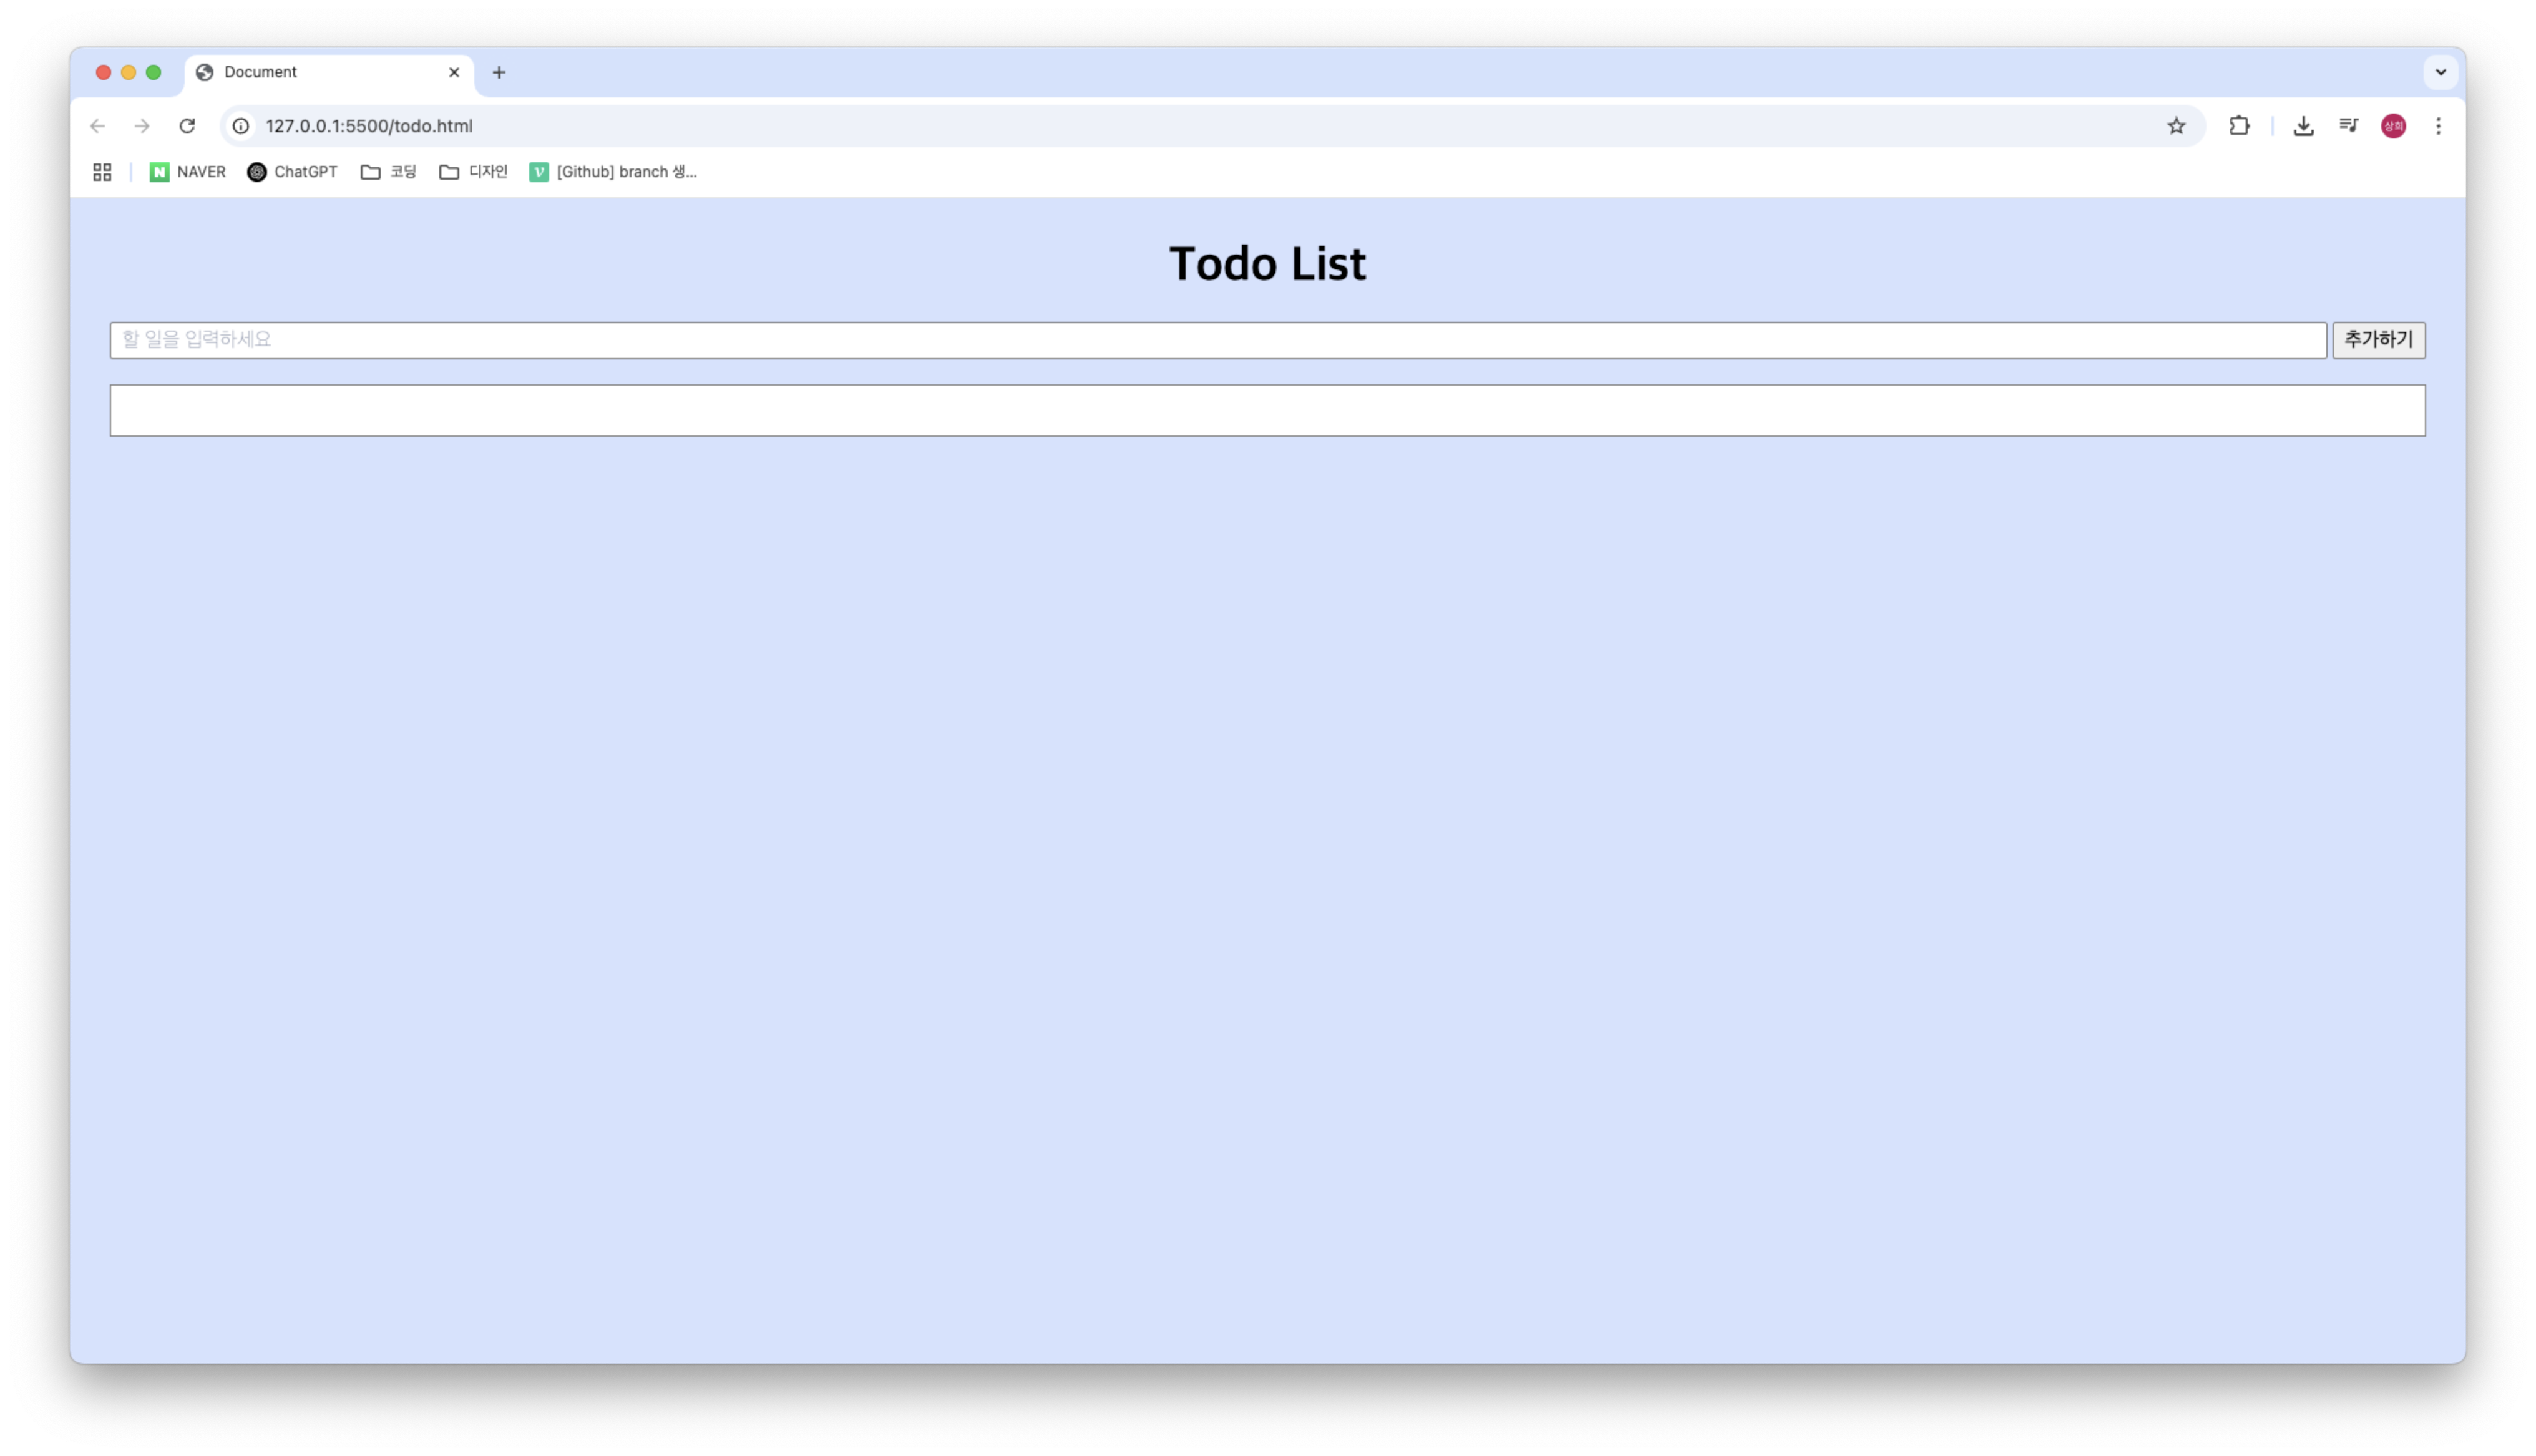
1. Node.js 서버 만들기 실습
server.js
// Node.js의 내장 http 모듈 불러오기 (Import the built-in http module in Node.js)
const http = require('http')

// 메모리에 Todo 목록을 저장할 배열 (Array to store Todo list in memory)
// 실제 서비스에서는 데이터베이스에 저장해야 합니다. (In a real service, you should store this in a database.)
let todo = [
  { id: 1, content: '더미데이터' },
  { id: 2, content: '터미네이터' }
]

// http 서버 인스턴스 생성 (Create an http server instance)
// 이 서버는 들어오는 모든 HTTP 요청을 처리합니다. (This server handles all incoming HTTP requests.)
const server = http.createServer((req, res) => {
  // 어떤 method (GET, POST, PUT, DELETE 등)의 요청이 들어왔는지 콘솔에 표시 (Display which method (GET, POST, PUT, DELETE, etc.) the request came in with on the console)
  console.log(req.method + '요청이 들어왔어요!')

  // CORS (Cross-Origin Resource Sharing) 설정을 위한 응답 헤더 설정 (Set response headers for CORS (Cross-Origin Resource Sharing) configuration)
  // client 주소를 꼭 확인하고 작성하세요. 주소 마지막에 '/'가 들어가지 않도록 주의하세요. (Make sure to check the client address and write it. Be careful not to include '/' at the end of the address.)
  // 특정 오리진(http://127.0.0.1:9000)에서의 요청만 허용합니다. (Allow requests only from the specific origin (http://127.0.0.1:9000).)
  res.setHeader('Access-Control-Allow-Origin', "http://127.0.0.1:9000")
  // 허용할 HTTP 메서드 목록을 설정합니다. (Set the list of allowed HTTP methods.)
  // OPTIONS는 Preflight 요청을 위해 필요합니다. (OPTIONS is needed for Preflight requests.)
  res.setHeader('Access-Control-Allow-Methods', 'OPTIONS, GET, POST, PUT, DELETE')
  // 허용할 헤더를 설정할 수도 있습니다 (예: 'Content-Type'). 필요에 따라 추가하세요. (You can also set allowed headers (e.g., 'Content-Type'). Add as needed.)
  // res.setHeader('Access-Control-Allow-Headers', 'Content-Type');

  // Preflight 요청 처리 (Handle Preflight request)
  // 복잡한 요청(POST, PUT, DELETE 등)이나 특정 헤더가 있는 요청 전에 브라우저가 자동으로 OPTIONS 메서드로 보내는 요청입니다. (This is a request automatically sent by the browser with the OPTIONS method before complex requests (POST, PUT, DELETE, etc.) or requests with specific headers.)
  if (req.method === 'OPTIONS') {
    // Preflight 요청에 대한 응답을 보냅니다. 보통 204 No Content 상태 코드를 사용하기도 합니다. (Send a response for the Preflight request. Often uses a 204 No Content status code.)
    // 여기서 .end()는 응답을 완료하고 연결을 닫습니다. 본문은 비어 있어도 됩니다. (Here, .end() completes the response and closes the connection. The body can be empty.)
    res.statusCode = 204; // 204 No Content는 응답 본문이 없음을 나타냅니다. (204 No Content indicates no response body.)
    return res.end(); // 응답 본문 없이 응답을 종료합니다. (End the response without a body.)
  }

  // 응답의 기본 Content-Type을 설정하는 것이 좋습니다. (It's good practice to set the default Content-Type for the response.)
  // 데이터 형식이 JSON일 경우 'application/json'으로 설정해야 합니다. (If the data format is JSON, it should be set to 'application/json'.)
  res.setHeader('Content-Type', 'application/json'); // 기본 Content-Type을 JSON으로 설정 (Set default Content-Type to JSON)

  // GET 요청 처리 - Todo 목록 조회 (Handle GET request - Retrieve Todo list)
  if (req.method === "GET") {
    // 응답 상태 코드를 200 OK로 설정 (Set response status code to 200 OK)
    res.statusCode = 200;
    // 참조자료형(배열, 객체)은 응답 본문으로 보내기 전에 JSON 형태의 문자열로 변환해야 합니다. (Reference types (arrays, objects) must be converted to a JSON string before sending as the response body.)
    return res.end(JSON.stringify(todo)); // Todo 배열을 JSON 문자열로 변환하여 응답 (Convert Todo array to JSON string and send as response)
  }

  // POST 요청 처리 - 새로운 Todo 추가 (Handle POST request - Add new Todo)
  if (req.method === 'POST') {
    let data = ''; // 요청 본문 데이터를 저장할 변수 (Variable to store request body data)

    // 'data' 이벤트는 요청 본문의 데이터 청크가 도착할 때마다 발생합니다. (The 'data' event is emitted whenever a chunk of data from the request body arrives.)
    req.on('data', (chunk) => {
      // 도착한 데이터 청크를 문자열로 변환하여 data 변수에 추가합니다. (Convert the arrived data chunk to a string and append it to the data variable.)
      data += chunk.toString();
    });

    // 'end' 이벤트는 요청 본문의 수신이 완료되었을 때 발생합니다. (The 'end' event is emitted when the reception of the request body is complete.)
    req.on('end', () => {
      // 데이터를 다 받아오고 나면 여기서 Todo를 추가하는 로직을 수행합니다. (After all data is received, perform the logic to add the Todo here.)

      // 클라이언트에서 보낸 데이터 (data)를 사용하여 새로운 Todo 객체를 생성합니다. (Create a new Todo object using the data sent from the client.)
      // ID는 임시로 현재 시간을 숫자로 변환하여 사용 (Using current time converted to a number for ID temporarily)
      // 이 방식은 빠르게 연속된 요청에서 ID 충돌이 발생할 수 있습니다. UUID나 증가하는 숫자를 사용하는 것이 더 안전합니다. (This method can cause ID collisions with rapidly consecutive requests. Using UUID or an incrementing number is safer.)
      const newTodo = { id: Number(new Date()), content: data }; // 가정: 클라이언트가 본문에 content만 보냄 (Assumption: Client sends only content in the body)
      // 실제 POST 요청에서는 보통 JSON 형태의 본문을 파싱해야 합니다. (In a real POST request, you usually need to parse the JSON body.)
      // 예: const newTodo = JSON.parse(data); // 클라이언트가 { content: '...' } 형태로 보낼 경우 (Example: const newTodo = JSON.parse(data); // If client sends in { content: '...' } format)

      todo.push(newTodo); // Todo 배열에 새로운 항목 추가 (Add the new item to the Todo array)

      // Todo 추가 성공 응답 (Response for successful Todo addition)
      // 보통 201 Created 상태 코드를 사용하거나, 추가된 항목 정보를 함께 보냅니다. (Often uses 201 Created status code, or sends the added item information along.)
      res.statusCode = 201; // 201 Created 상태 코드 (201 Created status code)
      // return res.end('Todo가 추가됐습니다.'); // 간단한 확인 메시지 응답 (Simple confirmation message response)
       return res.end(JSON.stringify(newTodo)); // 추가된 Todo 항목을 JSON 형태로 응답 (Respond with the added Todo item in JSON format)
    });

    // 주의: req.on('end') 콜백 내에서 응답을 보내야 합니다. (Caution: The response must be sent within the req.on('end') callback.)
    // 여기서 return res.end()를 즉시 실행하면, 데이터 수신이 완료되기 전에 응답이 보내집니다. (If you execute return res.end() immediately here, the response will be sent before data reception is complete.)
    // return res.end('Todo가 추가됐습니다.'); // 이 줄은 req.on('end') 안으로 이동해야 합니다. (This line should be moved inside req.on('end').)
    // 따라서 POST/PUT/DELETE 요청의 경우, 응답은 req.on('end') 콜백 내에서만 호출되어야 합니다. (Therefore, for POST/PUT/DELETE requests, the response should only be called within the req.on('end') callback.)

    // 위 주석에 따라 이 return 문은 제거하거나, 응답을 기다리는 형태로 변경해야 합니다.
    // (According to the comment above, this return statement should be removed or changed to wait for the response.)
    // 클라이언트가 응답을 기다리도록 하려면, req.on('end') 콜백에서 응답을 보내야 합니다.
    // (To make the client wait for the response, the response must be sent in the req.on('end') callback.)

    // TODO: 요청 본문 파싱 오류, 데이터 유효성 검사 등 에러 처리가 필요합니다. (TODO: Error handling for request body parsing errors, data validation, etc. is needed.)
    // TODO: req.on('error') 이벤트 처리도 추가하는 것이 좋습니다. (TODO: It's also good to add handling for the req.on('error') event.)
  }

  // PUT 요청 처리 - 특정 Todo 수정 (Handle PUT request - Update specific Todo)
  if (req.method === 'PUT') {
    let data = ''; // 요청 본문 데이터를 저장할 변수 (Variable to store request body data)

    req.on('data', (chunk) => {
      data += chunk.toString(); // 데이터 청크 누적 (Accumulate data chunks)
    });

    req.on('end', () => {
      // 데이터 수신 완료 (Data reception complete)
      try {
        // 요청 본문의 JSON 문자열을 JavaScript 객체로 파싱합니다. (Parse the JSON string in the request body into a JavaScript object.)
        const updatedTodo = JSON.parse(data); // 가정: 클라이언트가 { id: ..., content: '...' } 형태로 보냄 (Assumption: Client sends in { id: ..., content: '...' } format)

        // 파싱된 객체에 id와 content 속성이 있는지 확인하는 등의 유효성 검사가 필요합니다. (Validation check, such as ensuring the parsed object has id and content properties, is needed.)
        if (typeof updatedTodo.id === 'undefined' || typeof updatedTodo.content === 'undefined') {
            res.statusCode = 400; // Bad Request 상태 코드 (Bad Request status code)
            return res.end(JSON.stringify({ message: 'Invalid data format' })); // 오류 메시지 응답 (Error message response)
        }

        // todo 배열을 순회하며 해당 id를 가진 항목을 찾아서 수정합니다. (Iterate through the todo array, find the item with the corresponding id, and update it.)
        let found = false;
        todo = todo.map(el => {
          if (el.id === updatedTodo.id) {
            found = true;
            return updatedTodo; // 해당 항목을 새로운 데이터로 교체 (Replace the item with the new data)
          } else {
            return el; // 다른 항목은 그대로 유지 (Keep other items as they are)
          }
        });

        if (!found) {
            res.statusCode = 404; // Not Found 상태 코드 (Not Found status code)
            return res.end(JSON.stringify({ message: `Todo with id ${updatedTodo.id} not found` })); // 항목이 없을 경우 오류 응답 (Error response if item not found)
        }

        // 수정 성공 응답 (Response for successful update)
        // 보통 200 OK 상태 코드를 사용하거나, 수정된 항목 정보를 함께 보냅니다. (Often uses 200 OK status code, or sends the updated item information along.)
        res.statusCode = 200; // 200 OK 상태 코드 (200 OK status code)
        return res.end(JSON.stringify(updatedTodo)); // 수정된 Todo 항목을 JSON 형태로 응답 (Respond with the updated Todo item in JSON format)

      } catch (error) {
        // JSON 파싱 오류 또는 다른 예외 발생 시 에러 처리 (Error handling for JSON parsing errors or other exceptions)
        console.error("Error parsing PUT request body:", error);
        res.statusCode = 400; // Bad Request 상태 코드 (Bad Request status code) - 파싱 오류 시 (On parsing error)
        return res.end(JSON.stringify({ message: 'Error processing request body' })); // 오류 메시지 응답 (Error message response)
      }
    });

    // TODO: req.on('error') 이벤트 처리 추가 (TODO: Add handling for req.on('error') event)
  }

   // DELETE 요청 처리 - 특정 Todo 삭제 (Handle DELETE request - Delete specific Todo)
  if (req.method === 'DELETE') {
    let data = ''; // 요청 본문 데이터를 저장할 변수 (Variable to store request body data)

    req.on('data', (chunk) => {
      data += chunk.toString(); // 데이터 청크 누적 (Accumulate data chunks)
    });

    req.on('end', () => {
      // 데이터 수신 완료 (Data reception complete)
      try {
        // 요청 본문에서 삭제할 항목의 ID를 숫자로 파싱합니다. (Parse the ID of the item to delete from the request body into a number.)
        // 가정: 클라이언트가 본문에 삭제할 ID만 문자열 형태로 보냄 (Assumption: Client sends only the ID to delete in string format in the body)
        const idToDelete = Number(data);

        // 숫자로 변환 가능한 유효한 ID인지 확인 (Check if it's a valid ID that can be converted to a number)
        if (isNaN(idToDelete)) {
            res.statusCode = 400; // Bad Request 상태 코드 (Bad Request status code)
            return res.end(JSON.stringify({ message: 'Invalid ID format' })); // 오류 메시지 응답 (Error message response)
        }

        // filter 메서드를 사용하여 해당 id를 제외한 새로운 배열을 만듭니다. (Use the filter method to create a new array excluding the item with that ID.)
        const initialLength = todo.length;
        todo = todo.filter(el => el.id !== idToDelete );
        const newLength = todo.length;

        // 실제로 항목이 삭제되었는지 확인 (Check if an item was actually deleted)
        if (initialLength === newLength) {
            res.statusCode = 404; // Not Found 상태 코드 (Not Found status code)
            return res.end(JSON.stringify({ message: `Todo with id ${idToDelete} not found` })); // 항목이 없을 경우 오류 응답 (Error response if item not found)
        }

        // 삭제 성공 응답 (Response for successful deletion)
        // 보통 200 OK 또는 204 No Content 상태 코드를 사용하며, 응답 본문은 비워두거나 성공 메시지를 보냅니다. (Often uses 200 OK or 204 No Content status code, and leaves the response body empty or sends a success message.)
        res.statusCode = 200; // 200 OK 상태 코드 (200 OK status code)
        // return res.end('Todo가 삭제됐습니다.'); // 간단한 확인 메시지 응답 (Simple confirmation message response)
        return res.end(JSON.stringify({ message: `Todo with id ${idToDelete} deleted successfully` })); // 삭제된 ID 정보와 함께 응답 (Respond with deleted ID information)

      } catch (error) {
        // 데이터 파싱 오류 또는 다른 예외 발생 시 에러 처리 (Error handling for data parsing errors or other exceptions)
        console.error("Error processing DELETE request body:", error);
        res.statusCode = 400; // Bad Request 상태 코드 (Bad Request status code)
        return res.end(JSON.stringify({ message: 'Error processing request body' })); // 오류 메시지 응답 (Error message response)
      }
    });

    // TODO: req.on('error') 이벤트 처리 추가 (TODO: Add handling for req.on('error') event)
  }

  // 위에서 어떤 메서드에도 해당하지 않는 경우 (If none of the above methods match)
  // 보통 404 Not Found (경로가 없을 때) 또는 405 Method Not Allowed (경로는 있지만 해당 메서드를 지원하지 않을 때) 상태 코드를 사용합니다. (Usually uses 404 Not Found (when the path doesn't exist) or 405 Method Not Allowed (when the path exists but the method is not supported) status codes.)
  res.statusCode = 404; // 404 Not Found 상태 코드 설정 (Set 404 Not Found status code)
  res.setHeader('Content-Type', 'text/plain'); // 응답 본문 타입을 일반 텍스트로 설정 (Set response body type to plain text)
  return res.end('Not Found or Method Not Allowed'); // 오류 메시지 응답 (Error message response)

})

// 만들어준 서버를 3000번 포트에서 수신 대기하도록 설정 (Set the created server to listen on port 3000)
server.listen(3000, () => {
  // 서버가 성공적으로 시작되면 실행될 콜백 함수 (Callback function to be executed when the server starts successfully)
  console.log('서버가 열렸어요! 포트: 3000'); // 서버 시작 알림 메시지 출력 (Print server start notification message)
})
todo.html
<!DOCTYPE html>
<html lang="en">
<head>
  <meta charset="UTF-8">
  <meta name="viewport" content="width=device-width, initial-scale=1.0">
  <title>Document</title>
  <link rel="stylesheet" href="todo.css" />
</head>
<body>
  <h1>Todo List</h1>
  <div id="todo-input">
    <input type="text" placeholder="할 일을 입력하세요" />
    <button>추가하기</button>
  </div>
  <ul id="todo-list"></ul>
  <script src="todo.js"></script>
</body>
</html>
todo.css
* {
    margin: 0;
    padding: 0;
    box-sizing: border-box;
    font-size: 1rem;
}

body {
    padding: 32px;
    background-color: rgb(213, 226, 255);
}

h1 {
    text-align: center;
    font-size: 2.4rem;
}

div {
    display: grid;
    grid-template-columns: 1fr auto;
    margin-top: 20px;
    gap: 4px;
}

input {
    padding: 4px 8px;
}
input::placeholder {
    color: rgb(161, 169, 188);
    font-weight: 100;
}

button {
    padding: 0 8px;
    height: 30px;
}

ul {
    border: 1px solid gray;
    width: 100%;
    padding: 20px;
    margin-top: 20px;
    background-color: white;
}

li {
    width: 100%;
    display: grid;
    grid-template-columns: auto 1fr auto auto auto;
    align-items: center;
    border-bottom: 1px solid gray;
    padding: 4px 12px;
    gap: 4px;
}

li::before {
    content: '-';
    padding: 0 4px;
}
todo.js
const todoInput = document.querySelector('input')
const createButton = document.querySelector('button')
const ul = document.querySelector("#todo-list")


// Todo List -> CRUD
// Create -> 서버에 Todo 추가할 때
// Read -> 서버에서 Todo 정보를 가져올 때
// Update -> 서버의 Todo 정보를 수정할 때
// Delete -> 서버의 Todo 정보를 삭제할 때

// 화면에 그리는 것
// 화면을 지우는 것

// Create -> 서버에 Todo 추가할 때
const createTodo = () => {
  const newTodo = todoInput.value

  return fetch('http://localhost:3000', {
    method: "POST",
    body: newTodo
  })
    .then(res => res.text())
    .then(res => console.log(res))
}

// Read -> 서버에서 Todo 정보를 가져올 때
const readTodo = async () => {
  const res = await fetch('http://localhost:3000')
  const data = await res.json()
  return data
}

// Update -> 서버의 Todo 정보를 수정할 때
const updateTodo = (newTodo) => {
  return fetch('http://localhost:3000', {
    method: "PUT",
    body: JSON.stringify(newTodo)
  })
    .then(res => res.text())
    .then(res => console.log(res))
}

// Delete -> 서버의 Todo 정보를 삭제할 때
const deleteTodo = (id) => {
  return fetch('http://localhost:3000', {
    method: "DELETE",
    body: id
  })
    .then(res => res.text())
    .then(res => console.log(res))
}


// 화면에 그리는 것
const renderDisplay = (data) => {
  for (let el of data) {
    const list = document.createElement('li')
    list.textContent = el.content

    const updateInput = document.createElement('input')
    const updateButton = document.createElement('button')

    updateButton.textContent = '수정'
    updateButton.onclick = () => {
      updateTodo({
        id: el.id,
        content: updateInput.value
      })
      .then(() => readTodo())
      .then((res) => {
        removeDisplay()
        renderDisplay(res)
      })
    }

    const deleteButton = document.createElement('button')
    deleteButton.textContent = '삭제'
    deleteButton.onclick = () => {
      deleteTodo(el.id)
      .then(() => readTodo())
      .then((res) => {
        removeDisplay()
        renderDisplay(res)
      })
    }

    list.append(updateInput, updateButton, deleteButton)
    ul.append(list)
  }
}

// 화면을 지우는 것
const removeDisplay = () => {
  while (ul.children.length) {
    ul.removeChild(ul.children[0])
  }
}

createButton.addEventListener('click', () => {
  createTodo()
    .then(() => readTodo())
    .then((res) => {
      removeDisplay()
      renderDisplay(res)
    })
})

readTodo().then(res=> renderDisplay(res))
2. Express.js 서버 만들기 실습
1) 모듈 설치하기
npm init -y package.json 기본형태
npm i express
npm i cors
express
Node.js를 위한 빠르고 간결한 웹 애플리케이션 프레임워크입니다.
웹 서버를 쉽게 구축하거나 RESTful API 서버를 만드는 데 가장 널리 사용됩니다.
요청 라우팅(어떤 URL로 요청이 왔을 때 어떤 코드를 실행할지), 미들웨어(요청과 응답 사이에서 특정 작업을 처리하는 함수들), 템플릿 엔진 연동 등 웹 개발에 필요한 다양한 기능을 제공하여 개발 생산성을 높여줍니다.
cors
CORS (Cross-Origin Resource Sharing, 교차 출처 리소스 공유) 문제를 해결하기 위한 Node.js 미들웨어입니다.
웹 브라우저는 보안상의 이유로 기본적으로 다른 "출처(Origin)" (프로토콜, 도메인, 포트가 다른 경우)로의 HTTP 요청을 제한합니다 (이를 동일 출처 정책이라고 합니다).
프런트엔드(예: React, Vue로 만든 웹사이트)가 백엔드 API 서버(프런트엔드와 다른 도메인에 있는 경우)로 요청을 보낼 때 이 동일 출처 정책에 의해 요청이 차단되는 경우가 발생하는데, 이를 CORS 오류라고 합니다.
cors 모듈은 서버 측에서 특정 출처(또는 모든 출처)에서의 요청을 허용하도록 응답 헤더를 설정하여, 다른 출처에서의 요청도 정상적으로 처리될 수 있도록 도와줍니다. 주로 Express와 함께 사용하여 CORS 설정을 간편하게 적용합니다.
2) Express.js 변환
server.js
// Express 모듈을 불러옵니다. Express는 Node.js에서 웹 서버 및 API를 구축하기 위한 빠르고 유연한 프레임워크입니다.
const express = require('express');
// cors 모듈을 불러옵니다. cors는 Cross-Origin Resource Sharing (교차 출처 리소스 공유) 문제를 해결하기 위한 미들웨어입니다.
// 웹 브라우저 보안 정책에 따라 다른 도메인/포트에서 서버로 요청을 보낼 때 발생하는 CORS 오류를 방지해 줍니다.
const cors = require('cors');

// 간단한 TODO 목록 데이터를 저장할 배열을 선언합니다.
// 이 데이터는 서버가 실행되는 동안에만 메모리에 유지되며, 서버를 다시 시작하면 초기화됩니다.
let todo = [
  { id: 1, content: '더미데이터' },
  { id: 2, content: '터미네이터ㅋㅋ' }
];

// Express 애플리케이션 인스턴스를 생성합니다. 이 'app' 객체를 통해 서버 설정을 하고 라우트를 정의합니다.
const app = express();

// 미들웨어를 설정합니다. app.use()는 모든 요청에 대해 특정 함수(미들웨어)를 실행하도록 등록합니다.

// cors 미들웨어를 사용합니다.
app.use(cors({
  // 'origin' 옵션: 특정 출처(Origin)에서의 요청만 허용하도록 설정합니다.
  // 여기서는 http://127.0.0.1:9000 에서 온 요청만 허용합니다. 실제 서비스에서는 허용할 클라이언트의 URL을 명시합니다.
  origin: "http://127.0.0.1:9000",
  // 'methods' 옵션: 허용할 HTTP 메서드들을 지정합니다.
  // OPTIONS (CORS 사전 요청), GET (조회), POST (생성), PUT (수정), DELETE (삭제) 메서드를 허용합니다.
  methods: ['OPTIONS', 'GET', 'POST', 'PUT', 'DELETE']
}));

// express.json() 미들웨어: 클라이언트에서 JSON 형식으로 데이터를 보낼 경우,
// 요청 본문(request body)을 파싱하여 req.body 객체로 사용할 수 있게 해줍니다.
app.use(express.json());
// express.text() 미들웨어: 클라이언트에서 Text 형식으로 데이터를 보낼 경우,
// 요청 본문(request body)을 파싱하여 req.body 객체로 사용할 수 있게 해줍니다.
// NOTE: 보통 JSON이나 Text 중 하나만 사용하거나, 필요한 라우트에만 적용하는 것이 일반적입니다.
// 이 코드에서는 PUT, DELETE 라우트에서 req.body를 어떻게 사용하는지에 따라 이 미들웨어 설정이 중요합니다.
app.use(express.text());

// 라우트 핸들러를 정의합니다. 각 HTTP 메서드 및 경로에 따라 실행될 코드를 지정합니다.

// '/' 경로에 대한 OPTIONS 요청 처리:
// CORS 설정에 따라 브라우저는 실제 요청(POST, PUT, DELETE 등)을 보내기 전에 OPTIONS 메서드로 사전 요청(Preflight request)을 보냅니다.
// 여기서 '요청 보내세요.'라는 응답을 보내지만, 보통 cors 미들웨어가 이 부분을 자동으로 처리해 줍니다.
app.options('/', (req, res) => {
  console.log('OPTIONS 요청 받음'); // 확인을 위한 로그 추가
  return res.send('요청 보내세요.'); // 클라이언트에 응답 전송
});

// '/' 경로에 대한 GET 요청 처리: TODO 목록을 조회합니다.
app.get('/', (req, res) => {
  console.log('GET 요청 받음'); // 확인을 위한 로그 추가
  // 현재 todo 배열을 JSON 형식으로 변환하여 응답합니다.
  return res.json(todo);
});

// '/' 경로에 대한 POST 요청 처리: 새 TODO 항목을 추가합니다.
app.post('/', (req, res) => {
  console.log('POST 요청 받음', req.body); // 확인을 위한 로그 추가 (요청 본문 포함)
  // 새 TODO 객체를 생성합니다. ID는 현재 시간을 숫자로 변환하여 간단하게 생성합니다.
  // NOTE: req.body가 어떤 형식으로 올지 (JSON 또는 TEXT) express.json() 및 express.text() 미들웨어 설정과 연관됩니다.
  // 여기서는 content가 req.body로 바로 들어오는 것을 보니 express.text() 미들웨어가 처리하는 형태를 예상할 수 있습니다.
  // 만약 JSON으로 { "content": "새 할일" } 처럼 보낸다면 req.body.content로 접근해야 합니다.
  const newTodo = { id: Number(new Date()), content: req.body };
  // TODO 목록 배열에 새 항목을 추가합니다.
  todo.push(newTodo);
  console.log('TODO 추가 후:', todo); // 확인을 위한 로그 추가
  // 클라이언트에 응답을 보냅니다.
  return res.send('Todo가 추가됐습니다.');
});

// '/' 경로에 대한 PUT 요청 처리: 기존 TODO 항목을 수정합니다.
app.put('/', (req, res) => {
  console.log('PUT 요청 받음', req.body); // 확인을 위한 로그 추가 (요청 본문 포함)
  // 클라이언트에서 보낸 수정된 TODO 객체(req.body)를 이용해 목록을 업데이트합니다.
  // NOTE: 여기서는 req.body가 { id: ..., content: ... } 형태의 JSON 객체일 것으로 예상됩니다.
  // 이는 express.json() 미들웨어가 처리하는 형태입니다. POST 라우트와 req.body 처리 방식이 다릅니다.
  // map 함수를 사용하여 TODO 목록을 순회하며, ID가 일치하는 항목은 req.body로 교체하고 나머지는 그대로 유지합니다.
  todo = todo.map(el => {
    if (el.id === req.body.id) {
      return req.body; // ID가 일치하면 요청 본문의 객체로 교체
    } else {
      return el; // ID가 일치하지 않으면 기존 항목 유지
    }
  });
  console.log('TODO 수정 후:', todo); // 확인을 위한 로그 추가
  // 클라이언트에 응답을 보냅니다.
  return res.send('Todo가 수정됐습니다.');
});

// '/' 경로에 대한 DELETE 요청 처리: TODO 항목을 삭제합니다.
app.delete('/', (req, res) => {
  console.log('DELETE 요청 받음', req.body); // 확인을 위한 로그 추가 (요청 본문 포함)
  // 클라이언트에서 삭제할 TODO의 ID를 요청 본문으로 보낸다고 예상합니다.
  // NOTE: PUT 라우트에서는 req.body가 JSON 객체였는데, 여기서는 ID 값만 텍스트로 오는 것을 예상하는 듯 합니다.
  // req.body를 숫자로 변환하는 것으로 보아 express.text() 미들웨어가 처리하는 형태입니다.
  // API 일관성을 위해 삭제 요청도 JSON 형식으로 { "id": 5 } 처럼 받는 것을 고려해 볼 수 있습니다.
  const id = Number(req.body); // 요청 본문의 텍스트를 숫자로 변환 (삭제할 ID)
  // filter 함수를 사용하여 ID가 삭제할 ID와 다른 항목들만 남겨 새 배열을 만듭니다.
  todo = todo.filter(el => el.id !== id );
  console.log('TODO 삭제 후:', todo); // 확인을 위한 로그 추가
  // 클라이언트에 응답을 보냅니다.
  return res.send('Todo가 삭제됐습니다.');
});

// 설정된 포트(3000번)에서 서버를 시작하고 대기합니다.
app.listen(3000, () => {
  // 서버가 성공적으로 시작되면 콘솔에 메시지를 출력합니다.
  console.log('서버가 열렸어요! 포트: 3000');
});
3) axios
https://axios-http.com/kr/docs/intro
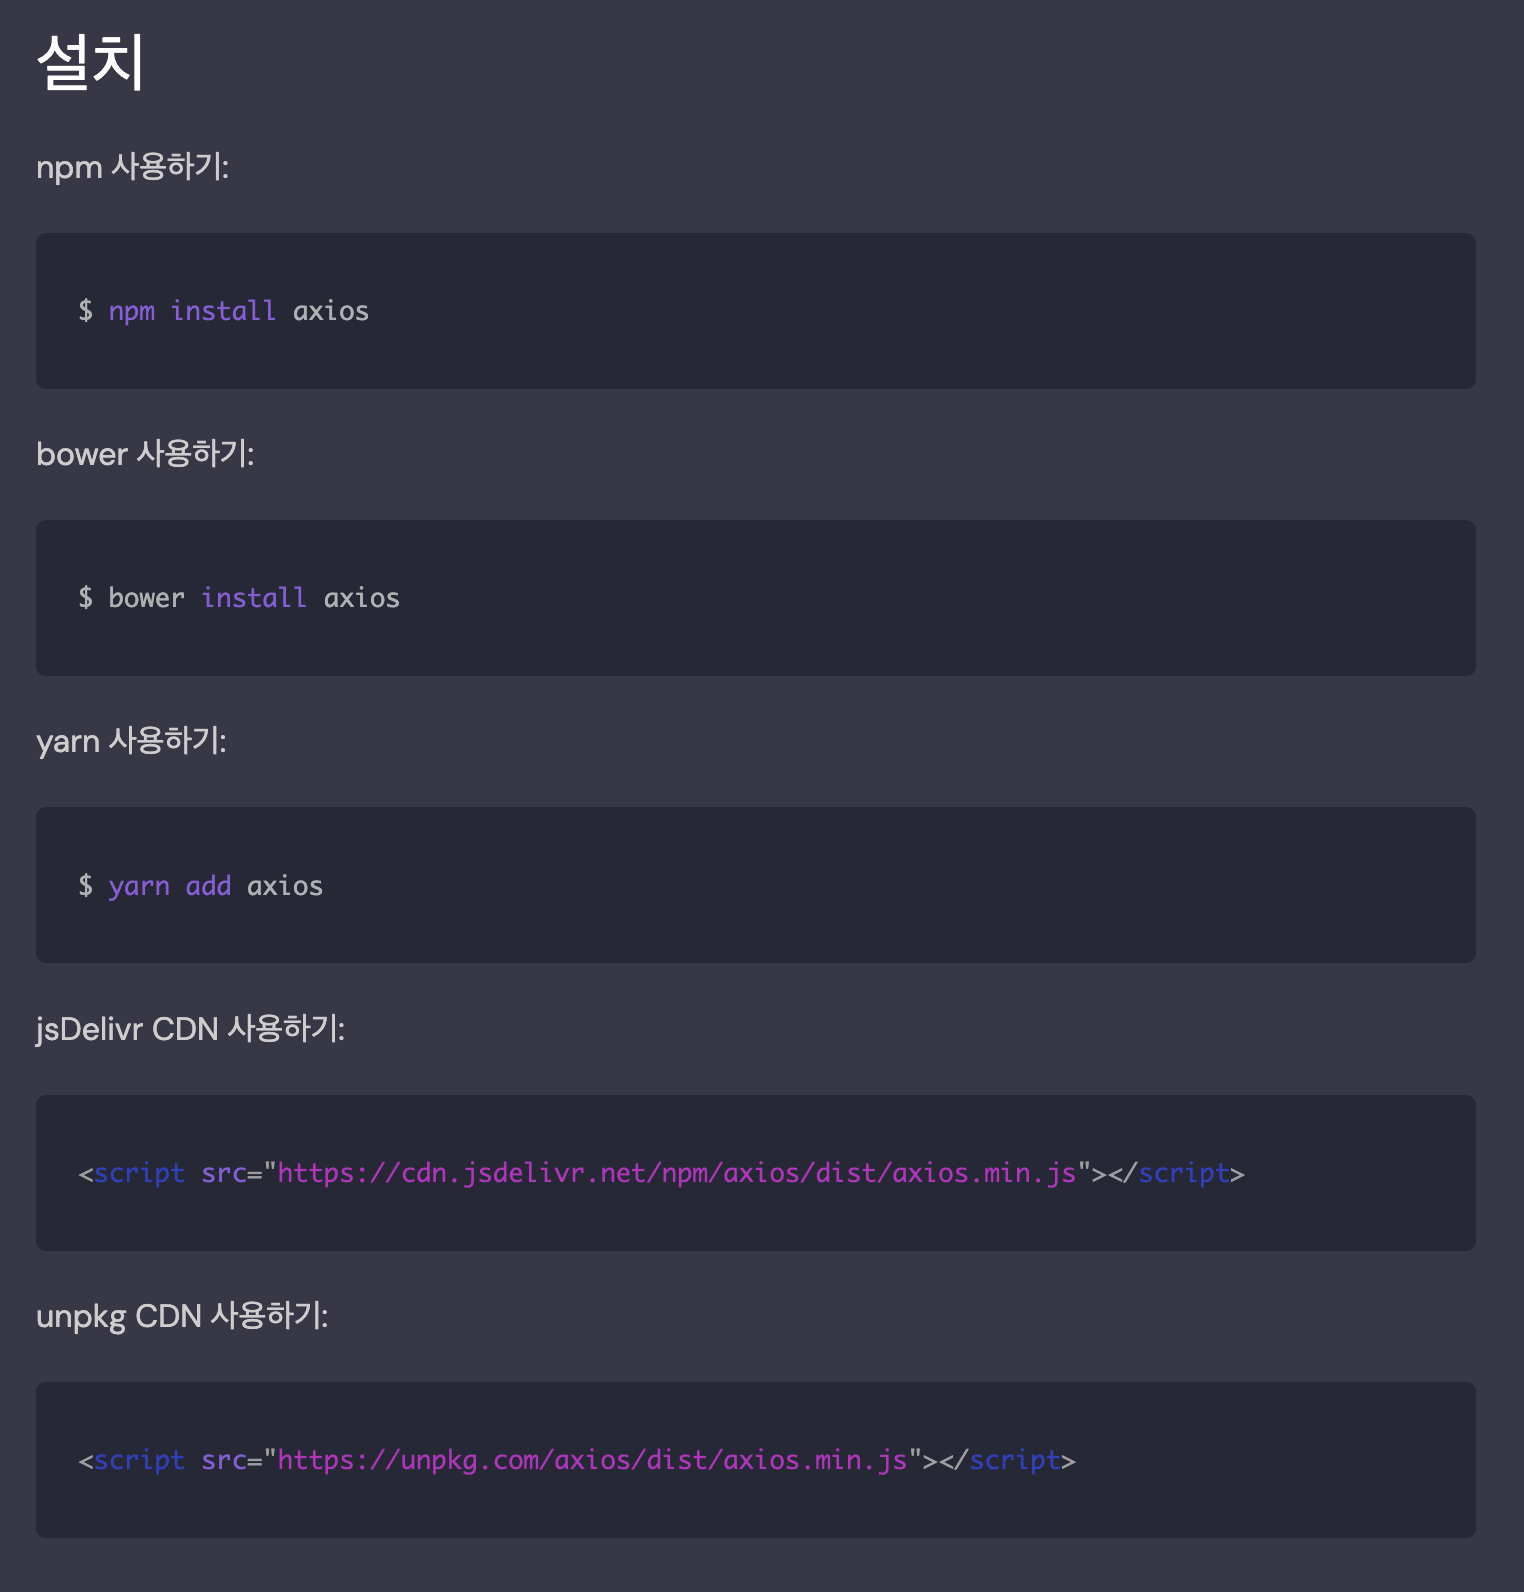
Axios를 CDN에서 로드 권장
<script src="https://cdn.jsdelivr.net/npm/axios/dist/axios.min.js"></script>3. 키워드 정리
1) .then()과 try...catch
a. .then() 방식 (Promise 체이닝)
- Promise 객체의 메서드
- 성공 시 .then(), 실패 시 .catch()
- 비동기 함수 내/외 어디서든 사용 가능
fetch("https://api.example.com/data")
  .then((response) => response.json())
  .then((data) => {
    console.log("데이터:", data);
  })
  .catch((error) => {
    console.error("에러 발생:", error);
  });
특징
- 함수형 스타일 체이닝
- 가독성이 좋지만 .then().then().catch()가 많아지면 복잡해짐
- try...catch보다 덜 직관적일 수 있음
b. try...catch 방식 (async/await)
- async 함수 안에서만 사용 가능
- await 키워드와 함께 사용
- 코드가 동기 코드처럼 보여 가독성이 좋음
async function fetchData() {
  try {
    const response = await fetch("https://api.example.com/data");
    const data = await response.json();
    console.log("데이터:", data);
  } catch (error) {
    console.error("에러 발생:", error);
  }
}
fetchData();
특징
- 동기식처럼 보여 가독성 좋음
try...catch블록으로 모든await에러 처리- 에러를 catch에서 한 번에 잡을 수 있어 깔끔
c. .then()과 try...catch` 차이
| 비교 항목 | .then().catch() | async/await + try...catch |
|---|---|---|
| 코드 스타일 | 함수형 체이닝 | 동기식처럼 작성 가능 |
| 사용 위치 | 어디서나 | async 함수 안에서만 |
| 가독성 | 짧은 경우 좋음, 길어지면 복잡 | 직관적이고 깔끔함 |
| 에러 처리 방식 | .catch() 메서드 사용 | try...catch 블록 사용 |
d. finally
- try에서 성공하든,
- catch에서 에러를 잡든,
- 무조건 마지막에 실행되는 블록
try {
  // 시도할 코드
  console.log("시작");
  throw new Error("문제 발생!");
} catch (error) {
  // 에러 처리
  console.error("에러:", error.message);
} finally {
  // 무조건 실행
  console.log("항상 실행됨");
}
사용
- 네트워크 요청 후 로딩 종료 처리
- 파일, 리소스 정리
- 모달 닫기, 버튼 비활성화 해제 등 마무리 작업
async/await에서도 사용 가능
async function fetchData() {
  try {
    const res = await fetch("https://api.example.com/data");
    const data = await res.json();
    console.log("데이터:", data);
  } catch (err) {
    console.error("에러 발생:", err);
  } finally {
    console.log("로딩 상태 종료 처리");
  }
}
2) async/await
Promise 기반의 비동기 코드를 더 간결하고 동기적인 코드 형태로 작성할 수 있게 해주는 최신 문법
a. async 키워드
-
함수 선언 앞에 붙인다. (async function myFunction() { ... })
-
이 함수는 항상 Promise를 반환. 함수 내부에서 Promise를 반환하든, 일반 값을 반환하든 상관없이 async 함수는 Promise로 결과를 감싸서 반환. (일반 값을 반환하면 해결된(resolved) Promise로, 에러를 throw하면 거부된(rejected) Promise로 감싸진다.)
-
async 함수 안에서만 await 키워드를 사용.
b. await 키워드
-
Promise 앞에 붙인다. (let result = await somePromise;)
-
await는 뒤에 오는 Promise가 해결될 때까지 (resolve 또는 reject) 해당 async 함수의 실행을 일시 중지.
-
Promise가 해결(resolve)되면, await는 해당 Promise의 결과 값을 반환.
-
Promise가 거부(reject)되면, await는 해당 Promise의 거부된 값(에러)을 throw합니다. 이는 동기 코드에서 에러가 발생하는 것과 유사하게 동작하며, try...catch 블록을 사용하여 처리할 수 있다.
-
중요: await는 해당 async 함수의 실행만 중지시킬 뿐, JavaScript 프로그램의 전체 실행(메인 스레드)을 멈추지는 않는다. 덕분에 UI가 멈추는 일 없이 비동기 작업을 기다릴 수 있다.
async/await의 장점 요약
-
가독성 향상: 비동기 코드가 동기 코드처럼 보이게 되어 흐름을 파악하기 쉽다.
-
작성 용이성: Promise 체인을 .then()으로 길게 연결하는 것보다 코드가 간결해진다.
-
에러 핸들링: try...catch 문을 사용하여 동기 코드에서처럼 자연스럽게 에러를 처리할 수 있다.
-
디버깅: 비동기 코드임에도 불구하고 동기 코드처럼 단계별로 디버깅하기가 수월해진다.
3) Promise
자바스크립트에서 비동기 작업의 성공 또는 실패를 나타내는 객체다.
"약속(Promise)"처럼 나중에 결과를 알려주는 장치.
| 상태 | 설명 |
|---|---|
pending | 대기 중 (아직 결과 없음) |
fulfilled | 성공적으로 완료됨 |
rejected | 실패함 (에러 발생) |
a. 왜 Promise를 쓸까?
⛔ 콜백 지옥 (Callback Hell)
setTimeout(() => {
  console.log("1초");
  setTimeout(() => {
    console.log("2초");
    setTimeout(() => {
      console.log("3초");
    }, 1000);
  }, 1000);
}, 1000);
✅ Promise로 깔끔하게
function delay(msg, time) {
  return new Promise((resolve) => {
    setTimeout(() => resolve(msg), time);
  });
}

delay("1초", 1000)
  .then((msg) => {
    console.log(msg);
    return delay("2초", 1000);
  })
  .then((msg) => {
    console.log(msg);
    return delay("3초", 1000);
  })
  .then(console.log);
✅ async/await과 함께 쓰면 더 깔끔
async function run() {
  console.log(await delay("1초", 1000));
  console.log(await delay("2초", 1000));
  console.log(await delay("3초", 1000));
}
run();
4) axios
axios는 브라우저와 Node.js에서 사용할 수 있는 Promise 기반 HTTP 클라이언트.
a. 설치방법
npm install axios
또는 CDN 사용 (브라우저만)
<script src="https://cdn.jsdelivr.net/npm/axios/dist/axios.min.js"></script>b. 기본 사용법
import axios from "axios";

axios.get("https://api.example.com/data")
  .then((response) => {
    console.log(response.data); // 서버에서 받은 데이터
  })
  .catch((error) => {
    console.error("에러 발생:", error);
  });
c. async/await로 쓰기
async function getData() {
  try {
    const res = await axios.get("https://api.example.com/data");
    console.log(res.data);
  } catch (err) {
    console.error("에러:", err);
  }
}
d. POST 요청
axios.post("https://api.example.com/users", {
  name: "철수",
  age: 25,
})
.then((res) => {
  console.log("응답:", res.data);
})
.catch((err) => {
  console.error("에러:", err);
});
e. axios의 장점
| 기능 | 설명 |
|---|---|
| 자동 JSON 변환 | res.data로 바로 데이터 사용 가능 |
| 요청/응답 인터셉터 | 요청 전/후 가로채기 가능 |
baseURL 설정 | 공통 URL 쉽게 설정 |
| 헤더 설정 쉬움 | axios.defaults.headers 또는 각 요청마다 지정 가능 |
timeout, cancel, withCredentials 등 다양한 옵션 지원 |
f. baseURL 설정 예시
const api = axios.create({
  baseURL: "https://api.example.com",
  timeout: 5000,
});

api.get("/data").then((res) => console.log(res.data));