Health Check
kubelet은 모든 노드의 pod을 관리, Health Check를 담당livenessProbe: 기본 상태는 SuccessreadinessProbe: 기본 상태는 SuccessstartupProbe: 설정되지 않으면 실행되지 않음
- 별도의 설정이 없을 경우, 프로세스가 실행 중이면 컨테이너가 정상이라고 간주 / 실행 중이지 않으면 재시작
- 무한 루프 상태, 애플리케이션 내부 오류, 외부 의존성 연결 실패 등이 있어도 정상으로 간주
⇒ Spring App에 대한 Probe 설정이 필요!
Probe
startupProbe
- 애플리케이션이 시작되는 동안 기다려주는 probe.
- 성공해야 이후
livenessProbe와readinessProbe가 실행됨.
cf. startupProbe가 필요한 이유에 대한 참고자료
readinessProbe
- 용도: 애플리케이션이 요청을 받을 준비가 됐는지 판단.
- 실패하면 Service가 트래픽을 보내지 않음.
- 응답이 실패하면 해당 pod를 준비되지 않은 상태로 취급해 로드밸런서에서 제외함.
livenessProbe
- 컨테이너가 살아있는지 판단.
- 실패하면 Kubernetes가 컨테이너를 자동으로 재시작함.
- 응답 실패가 지속되면 재시작 트리거됨.
Spring 앱에 Spring Actuator 추가
Spring Actuator란?
- Spring Boot 애플리케이션의 모니터링과 관리를 위한 프로덕션 준비 기능을 제공하는 모듈
- 애플리케이션 상태 모니터링: 애플리케이션의 건강 상태(health), 메트릭 수집, HTTP 추적 등의 정보를 실시간으로 확인
(1) 의존성 추가
build.gradle.kts
dependencies {
    ...
    implementation("org.springframework.boot:spring-boot-starter-actuator")
    ...
}
(2) 엔드포인트 설정
- 기본적으로
http://localhost:8080/actuator에서 사용 가능한 엔드포인트 목록을 확인 가능 /actuator/health엔드포인트를 통해 애플리케이션의 Health를 확인 가능- k8s의 Health Check를 위한 속성 설정 필요
application.yml
management.endpoint.health.probes.enabled = true로 k8s probe를 지원- 기본적으로
liveness,readiness를 지원하기 때문에 custom health group으로startup을 추가(liveness와 동일) - 그 외의 추가적인 보안 설정(읽기 전용, 엔드포인트와 세부정보 노출 방지)
...

management:
    endpoint:
        health:
            access: read_only     # 읽기 전용
            probes:
                enabled: true     # k8s Probe 지원 활성화(liveness. readiness)
            show-details: never   # 세부정보 노출 방지
            group:
                startup:
                    include:
                        - livenessState  # startup 엔드포인트를 추가(liveness와 동일)
    endpoints:
        web:
            exposure:
                include: health   # /actuator/health 엔드포인트만 노출
...
ArgoCD 저장소의 Deployment 설정
- Spring Boot 이미지 Deployment를 기반으로 생성되는 Pod의 Health Check를 위해
spring-deployment.yaml에 probe 설정값을 추가
spring-deployment.yaml
# deployment
apiVersion: apps/v1
kind: Deployment
metadata:
  name: {{ .Values.app.name }}
  namespace: {{ .Values.namespace }}
spec:
  replicas: {{ .Values.deployment.replicas }}
  revisionHistoryLimit: {{ .Values.deployment.revisionHistoryLimit }}
  selector:
    matchLabels:
      app: {{ .Values.app.name }}
  template:
    metadata:
      labels:
        app: {{ .Values.app.name }}
    spec:
      containers:
        - name: {{ .Values.app.name }}
          image: {{ .Values.image.repository }}:{{ .Values.image.tag }}
          ports:
            - containerPort: {{ .Values.service.targetPort }}
          resources:
            limits:
              cpu: {{ .Values.resources.limits.cpu }}
              memory: {{ .Values.resources.limits.memory }}
            requests:
              cpu: {{ .Values.resources.requests.cpu }}
              memory: {{ .Values.resources.requests.memory }}
          envFrom:
            - configMapRef:
                name: {{ .Values.config.name }}
            - secretRef:
                name: {{ .Values.secret.name }}
          # Probe 추가
          startupProbe:
            httpGet:
              path: /actuator/health/startup
              port: 8080
            initialDelaySeconds: 10
            failureThreshold: 20
          readinessProbe:
            httpGet:
              path: /actuator/health/readiness
              port: 8080
            initialDelaySeconds: 5
            periodSeconds: 10
          livenessProbe:
            httpGet:
              path: /actuator/health/liveness
              port: 8080
            initialDelaySeconds: 10
            periodSeconds: 20
---
# 이하 생략startup: 10초 후부터 최대 20번까지 실패를 허용 - 200초(20 × 기본 periodSeconds: 10초) 동안 실패해도 "아직 시작 중"으로 봐줌readiness: 5초 후부터 10초마다/actuator/health/readiness요청liveness: 10초 후부터 20초마다/actuator/health/liveness호출
cf. startupProbe를 설정하는 또 다른 방법
Spring Actuator는startupProbe용 엔드포인트를 제공하지 않기 때문에 Spring 앱에서 별도의 설정이 필요했음- Spring앱을 설정하는 방식 대신
startupProbe자체를livenessProbe와 동일한 엔드포인트로 사용하는 설정 가능startupProbe: httpGet: path: /actuator/health/liveness # startup 대신 liveness 사용 권장 port: 8080 initialDelaySeconds: 10 failureThreshold: 20
적용
values.yaml의service.type을LoadBalancer가 아닌NodePort로 변경- git 저장소에 push
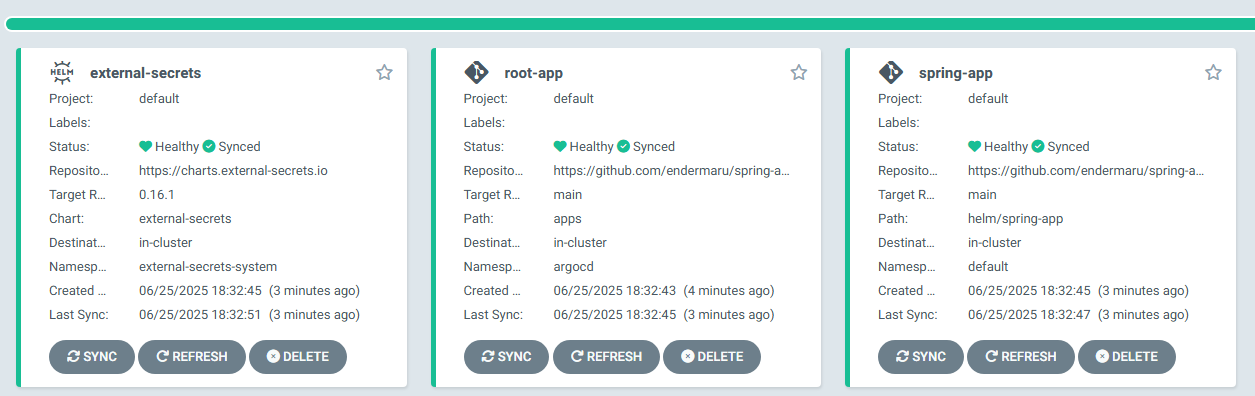
- 이전 글을 참고해서 ArgoCD 기반으로 배포
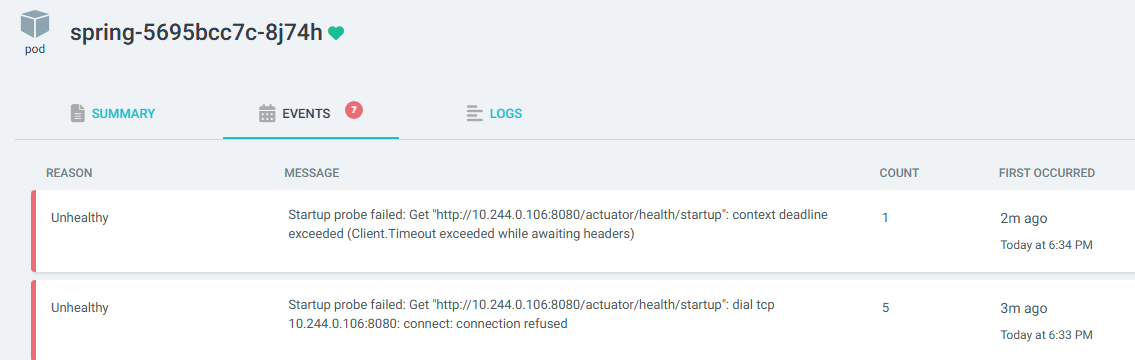
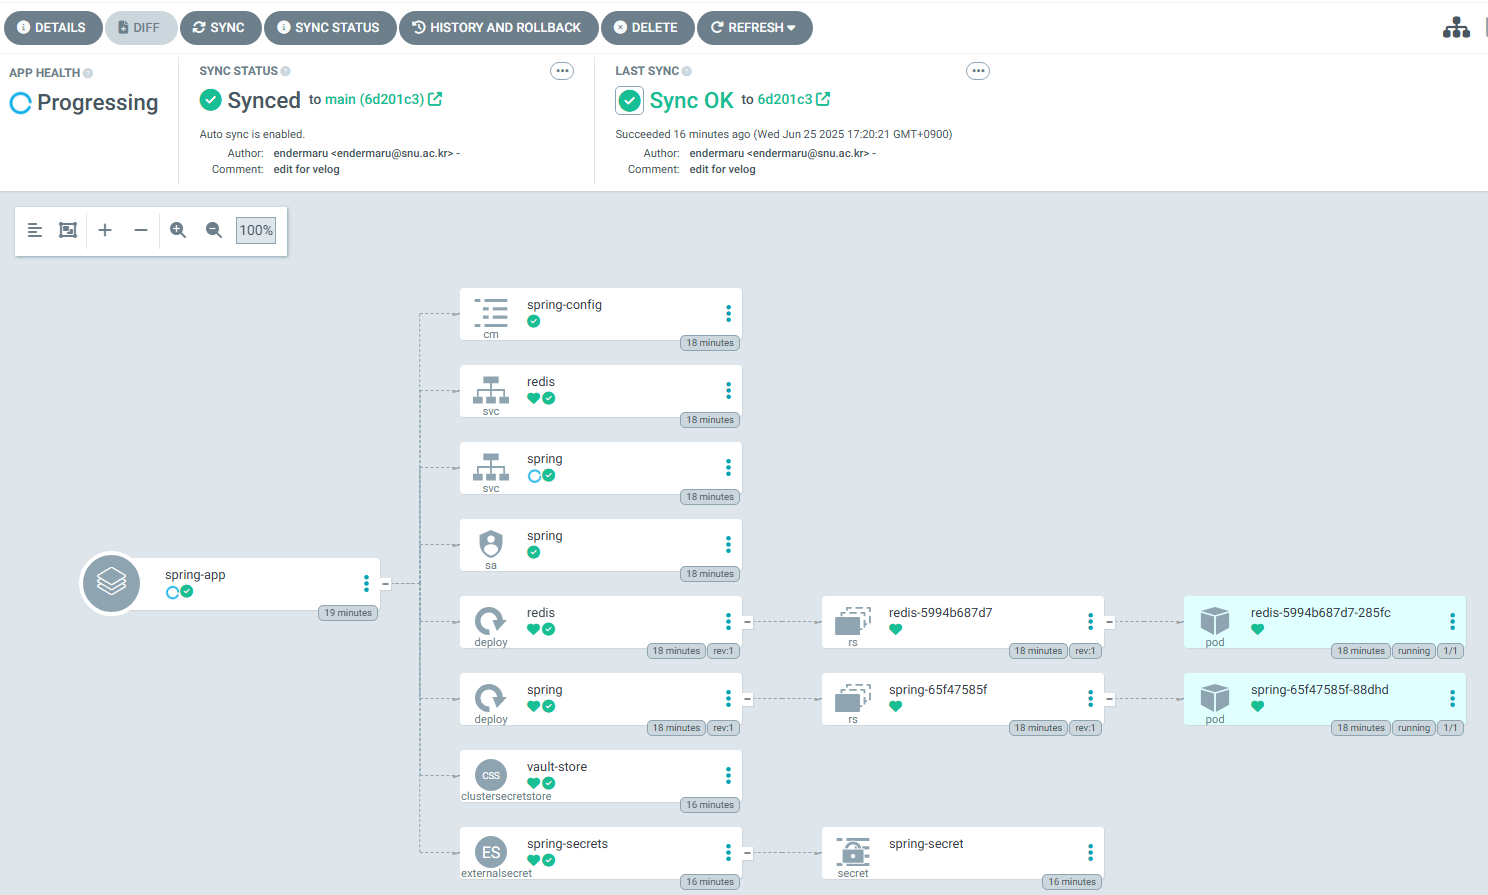
- WebUI로 접근 시 모든 앱이 Healthy 상태인 것으로 확인 가능
- spring app이 돌아가는 pod의 event log 확인 시 컨테이너 실행 초기에
startupProbe가 실패한 로그를 확인 가능(이후 모든 Probe를 통과해 Healthy로 체크됨)