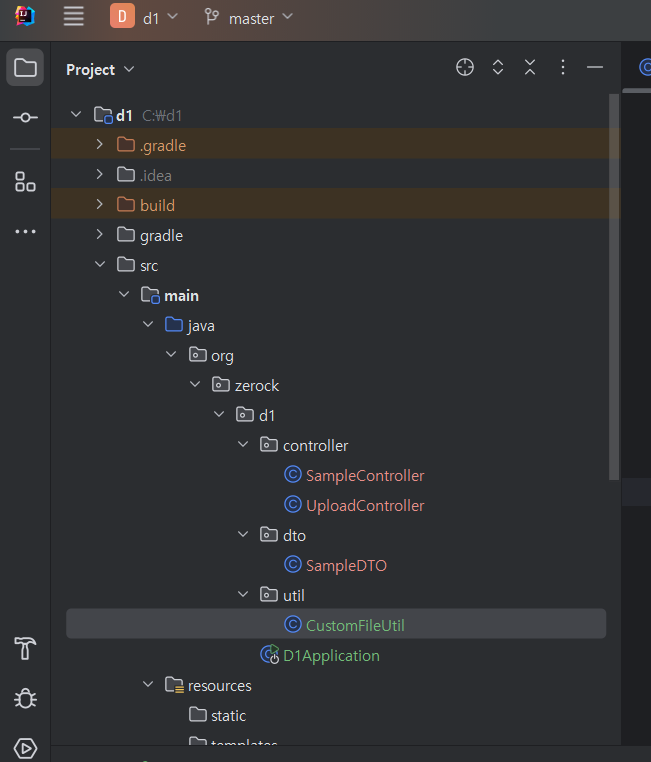
1. local file upload
- customUtil
package org.zerock.d1.util;

import java.io.File;
import java.io.IOException;
import java.nio.file.Files;
import java.nio.file.Path;
import java.nio.file.Paths;
import java.util.ArrayList;
import java.util.List;
import java.util.UUID;

import lombok.RequiredArgsConstructor;
import lombok.extern.log4j.Log4j2;
import net.coobird.thumbnailator.Thumbnails;

import org.springframework.beans.factory.annotation.Value;
import org.springframework.core.io.FileSystemResource;
import org.springframework.core.io.Resource;
import org.springframework.http.HttpHeaders;
import org.springframework.http.ResponseEntity;
import org.springframework.stereotype.Component;
import org.springframework.web.multipart.MultipartFile;

import jakarta.annotation.PostConstruct;

@Component
@Log4j2
@RequiredArgsConstructor
public class CustomFileUtil {

  @Value("${org.zerock.upload.path}")
  private String uploadPath;

  @PostConstruct
  public void init() {
    File tempFolder = new File(uploadPath);

    if(tempFolder.exists() == false) {
      tempFolder.mkdir();
    }

    uploadPath = tempFolder.getAbsolutePath();

    log.info("-------------------------------------");
    log.info(uploadPath);
  }

  public List<String> saveFiles(List<MultipartFile> files)throws RuntimeException{

    if(files == null || files.size() == 0){
      return null;
    }

    List<String> uploadNames = new ArrayList<>();

    for (MultipartFile multipartFile : files) {

      String savedName = UUID.randomUUID().toString() + "_" + multipartFile.getOriginalFilename();

      Path savePath = Paths.get(uploadPath, savedName);

      try {
        Files.copy(multipartFile.getInputStream(), savePath);

        String contentType = multipartFile.getContentType();

        if(contentType != null && contentType.startsWith("image")){ //이미지여부 확인

          Path thumbnailPath = Paths.get(uploadPath, "s_"+savedName);

          Thumbnails.of(savePath.toFile())
                  .size(400,400)
                  .toFile(thumbnailPath.toFile());
        }

        uploadNames.add(savedName);
      } catch (IOException e) {
        throw new RuntimeException(e.getMessage());
      }
    }//end for
    return uploadNames;
  }

  public ResponseEntity<Resource> getFile(String fileName) {

    Resource resource = new FileSystemResource(uploadPath+ File.separator + fileName);

    if(!resource.exists()) {

      resource = new FileSystemResource(uploadPath+ File.separator + "default.jpeg");

    }

    HttpHeaders headers = new HttpHeaders();

    try{
        headers.add("Content-Type", Files.probeContentType( resource.getFile().toPath() ));
    } catch(Exception e){
        return ResponseEntity.internalServerError().build();
    }
    return ResponseEntity.ok().headers(headers).body(resource);
  }


  public void deleteFiles(List<String> fileNames) {

    if(fileNames == null || fileNames.size() == 0){
      return;
    }

    fileNames.forEach(fileName -> {

      //썸네일이 있는지 확인하고 삭제
      String thumbnailFileName = "s_" + fileName;
      Path thumbnailPath = Paths.get(uploadPath, thumbnailFileName);
      Path filePath = Paths.get(uploadPath, fileName);

      try {
        Files.deleteIfExists(filePath);
        Files.deleteIfExists(thumbnailPath);
      } catch (IOException e) {
        throw new RuntimeException(e.getMessage());
      }
    });
  }


}
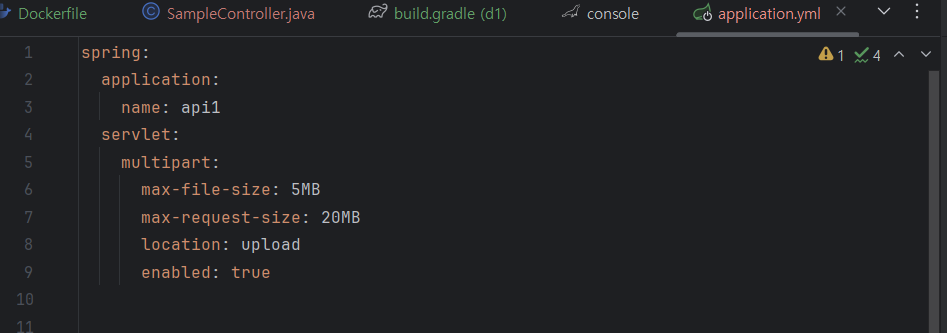
- yml 파일 내부 upload 추가
- maven 추가
implementation 'net.coobird:thumbnailator:0.4.19'- yml 내부에 servlet 추가

- DTO 구성
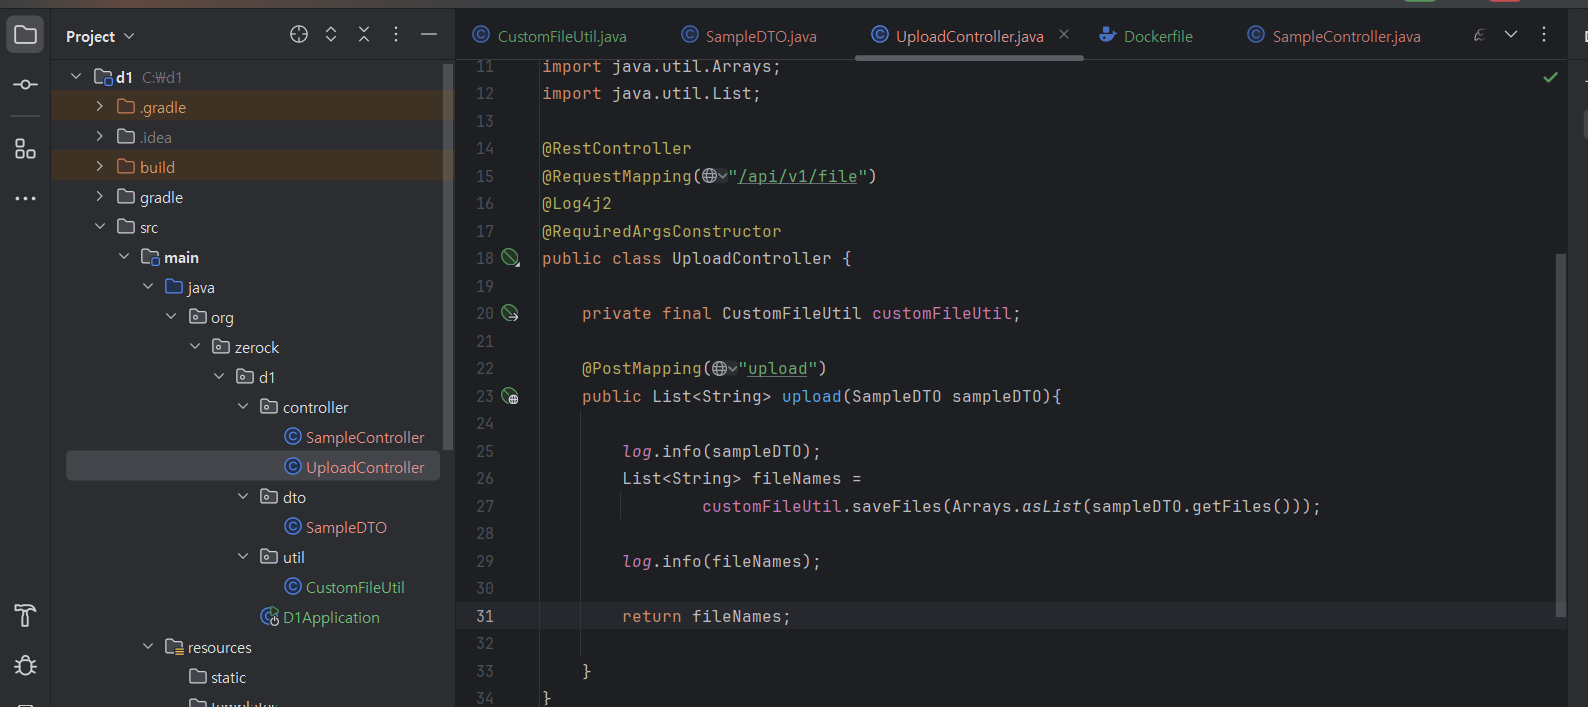
- uploadController
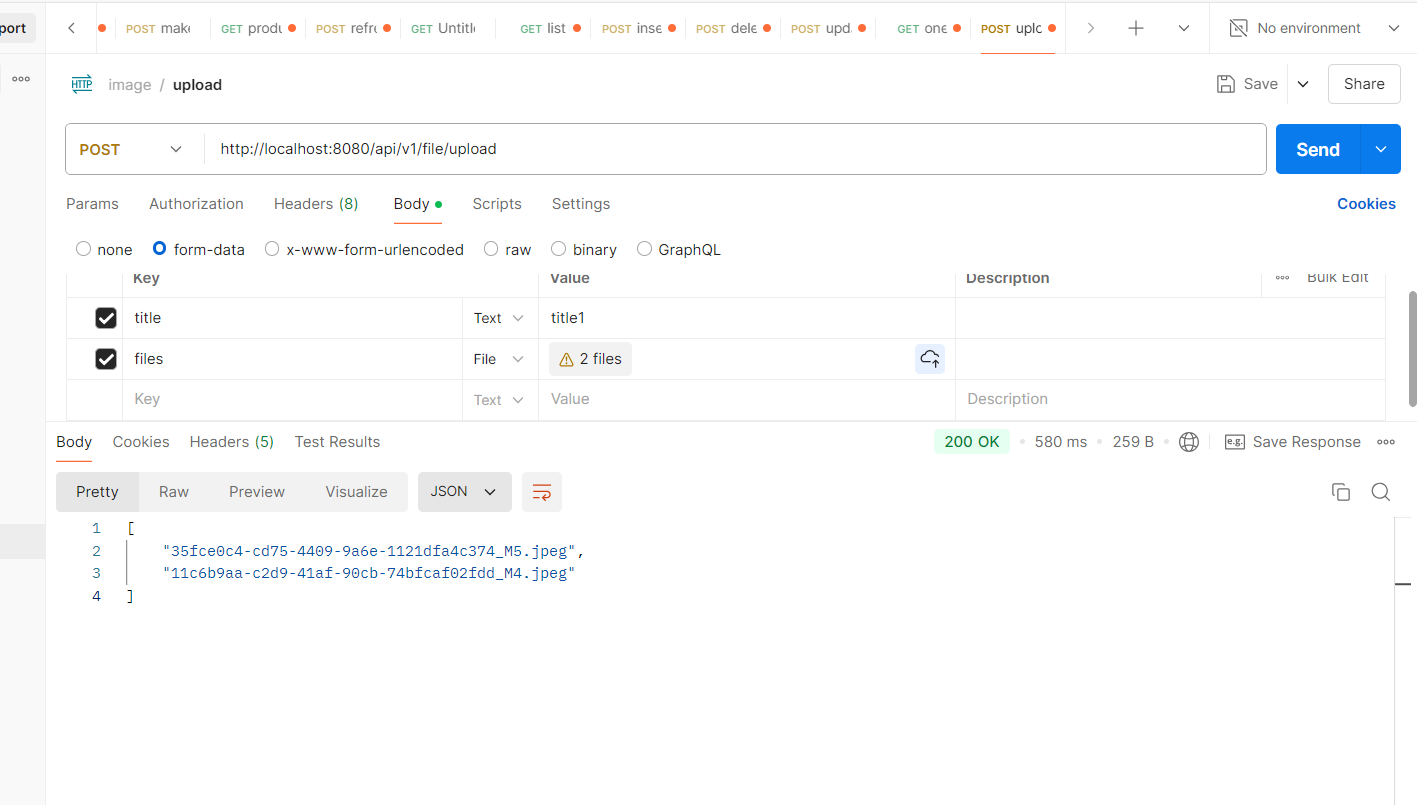
- postman 확인

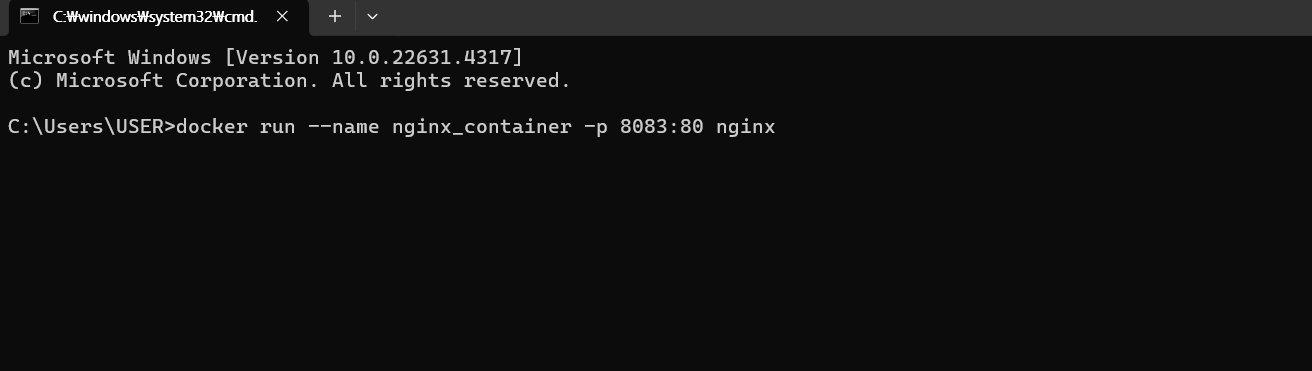
2. docker file upload
- docker desktop 실행 및 jar파일 생성
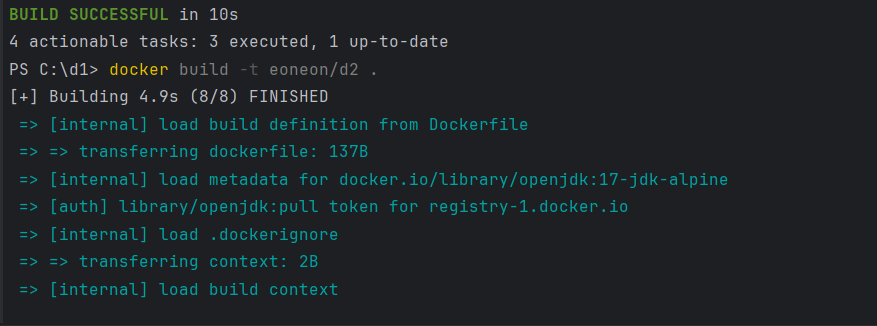
- docker build해서 image생성

- docker container 생성
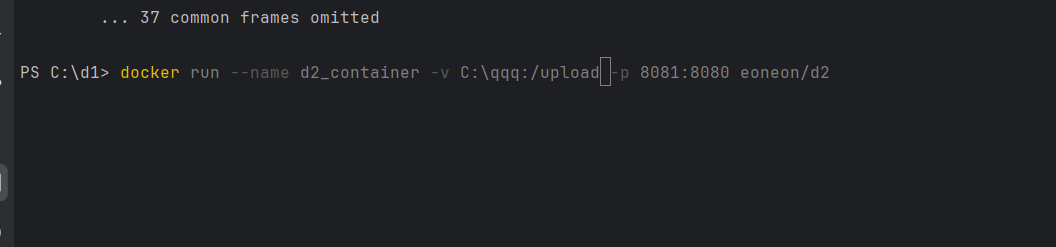
👉 외부포트를 8081로 생성하고, docker의 container에 들어가면 upload파일이 생성되어있는데, 이후에 postman에서 post를 http://localhost:8081/api/v1/file/upload 으로 보내면 docker내부의 upload파일에 사진이 전달된다. 해당 구조가 중요함.
- c드라이브 아래 qqq폴더에 저장되려면

👉 새로운 컨테이너를 생성할때 해당 경로를 설정해주면 c드라이브 아래 qqq를 해주면 됨.

👉 해당코드는 network를 이용했을때
3. nginx 이용

- nginx는 기본적으로 내부는 80포트를 사용함.
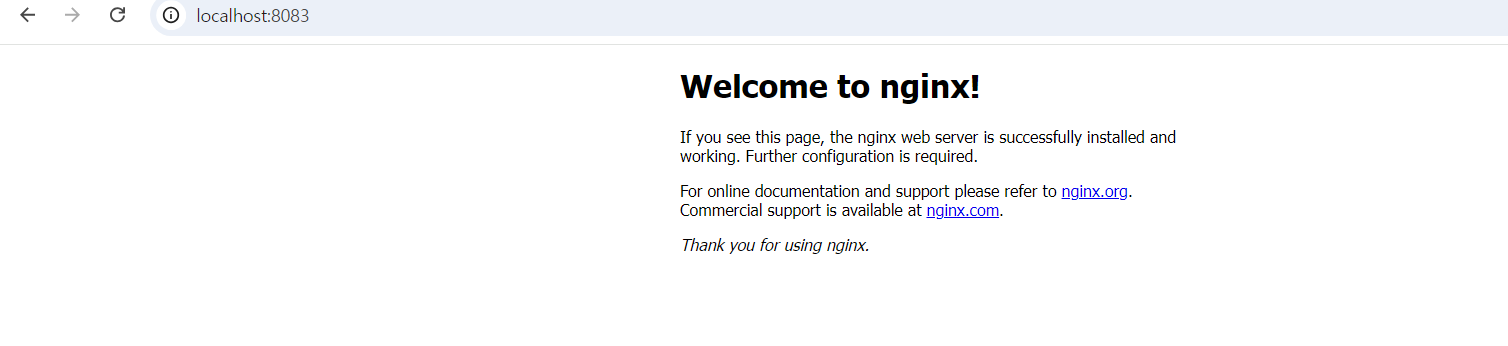
- nginx 확인가능

- nginx도커/usr/share/nginx/html 경로에 해당 2번의 파일들이 존재하므로, 내가 원하는 경로를 여기에 잡아준다면 nginx를 사용시에 내가 원하는 경로로 사용가능하다.

4. 이제 새로운 conatiner를 내가 원하는 경로로 nginx를 생성한다
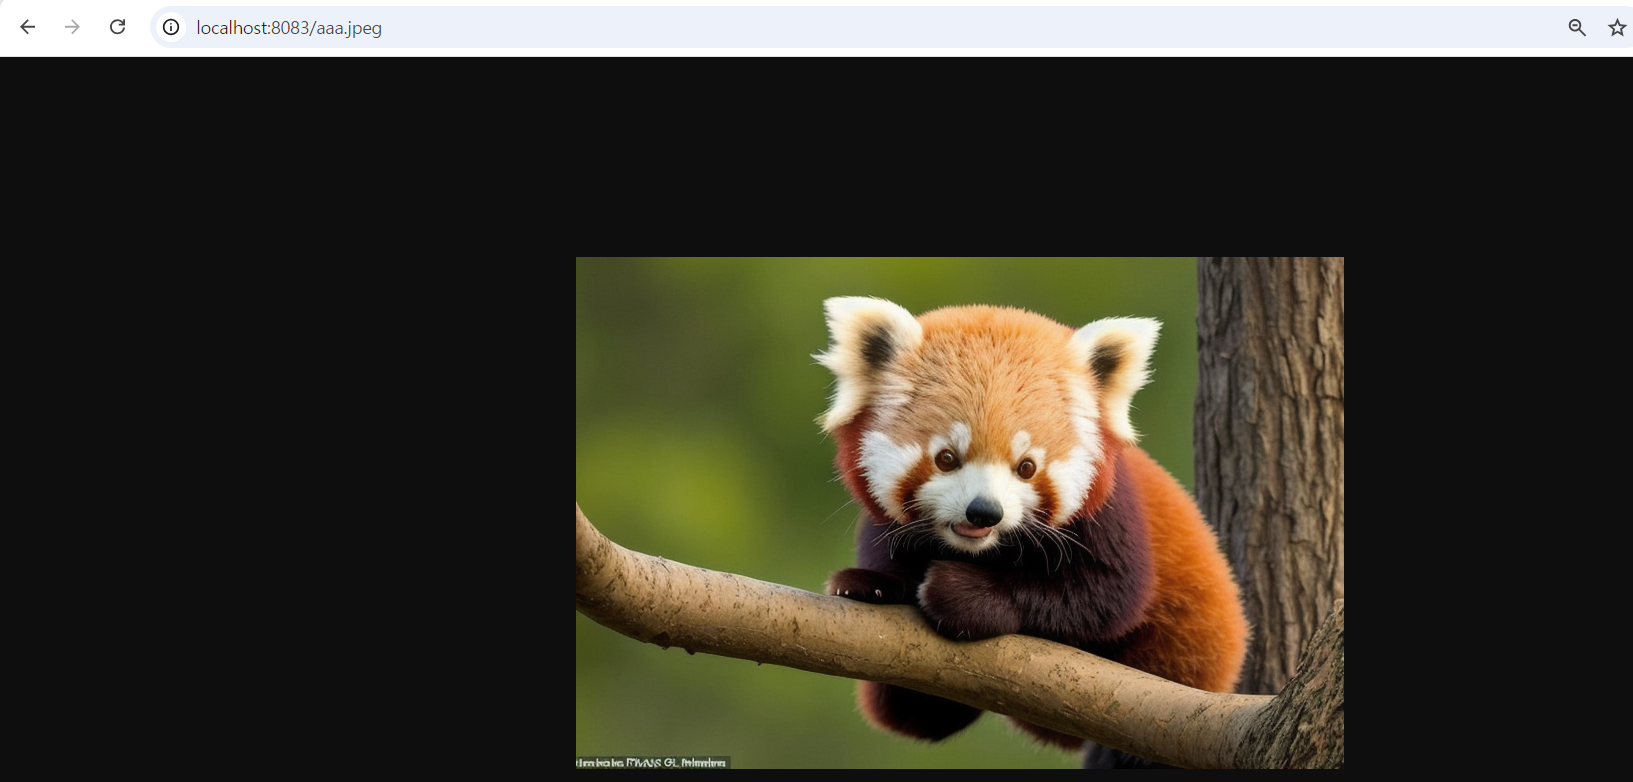
- 그렇게 되면 c드라이브 아래 qqq폴더의 원하는 사진이 출력된다.
4. GitAction
👉 도커의 jar, build 생성 등 귀찮은 코드작성이 자동으로 되어있는 단계
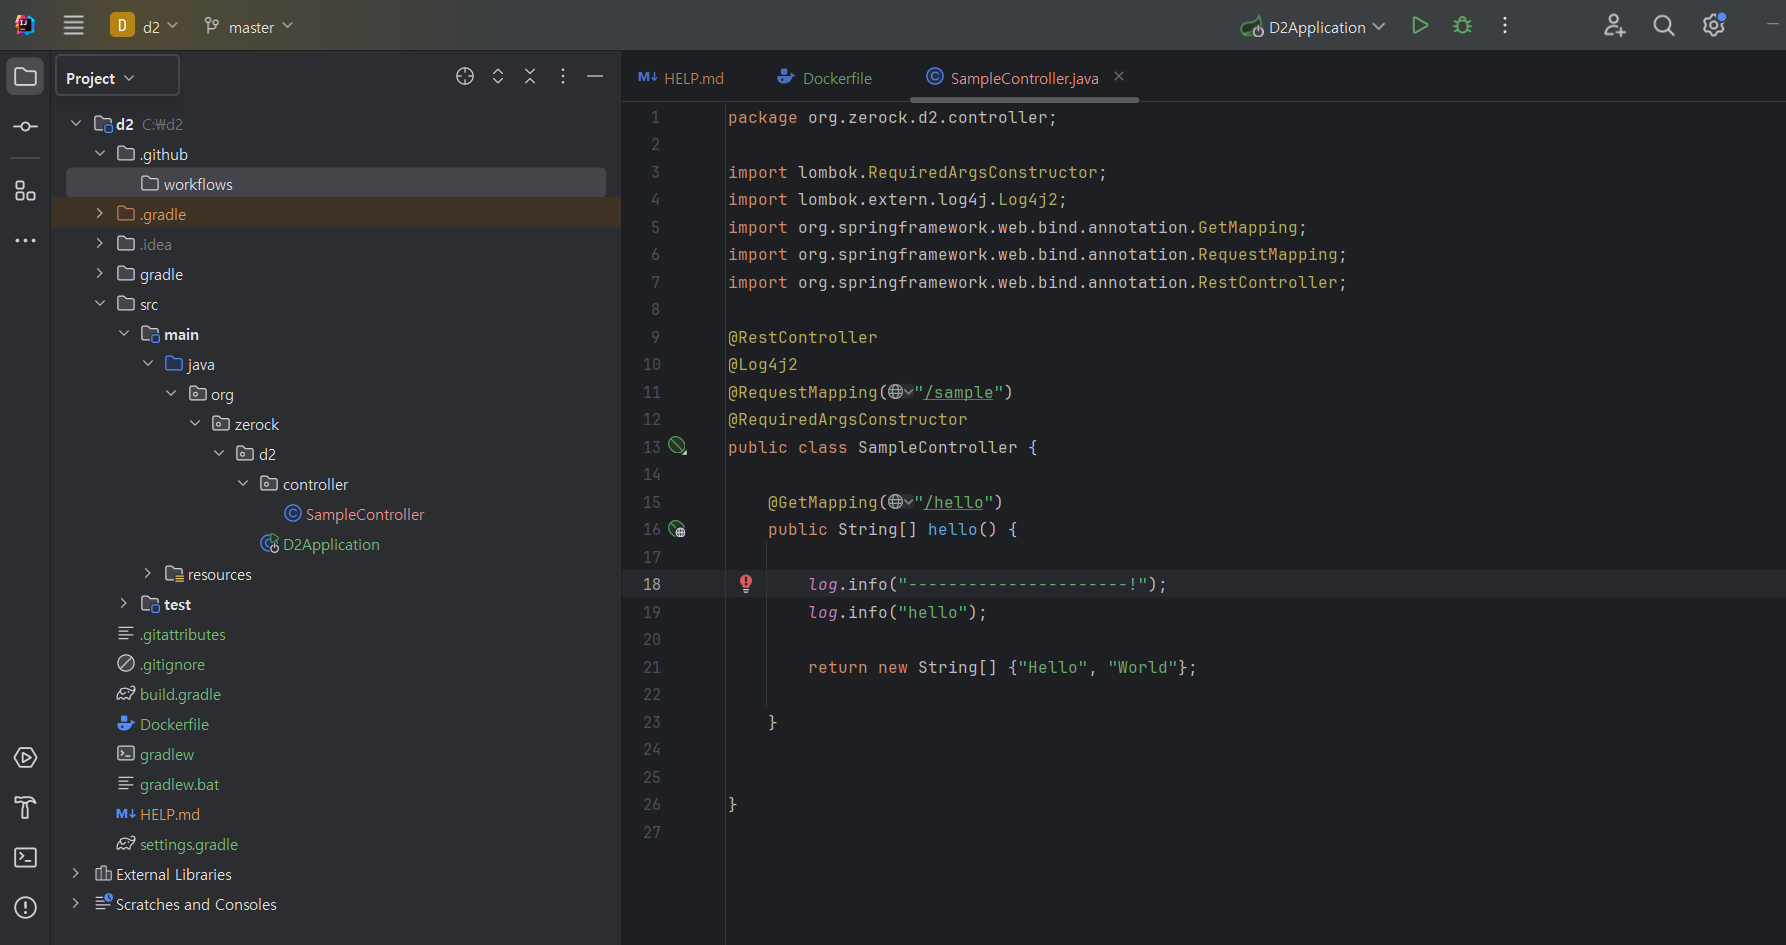
- controller 생성, dockerfile생성, .github - workflows 디렉토리 생성

- yml 파일 생성후 내부 내용은 github의 action의 Java with Gradle configration 내부 내용을 복사해서 가져온다.
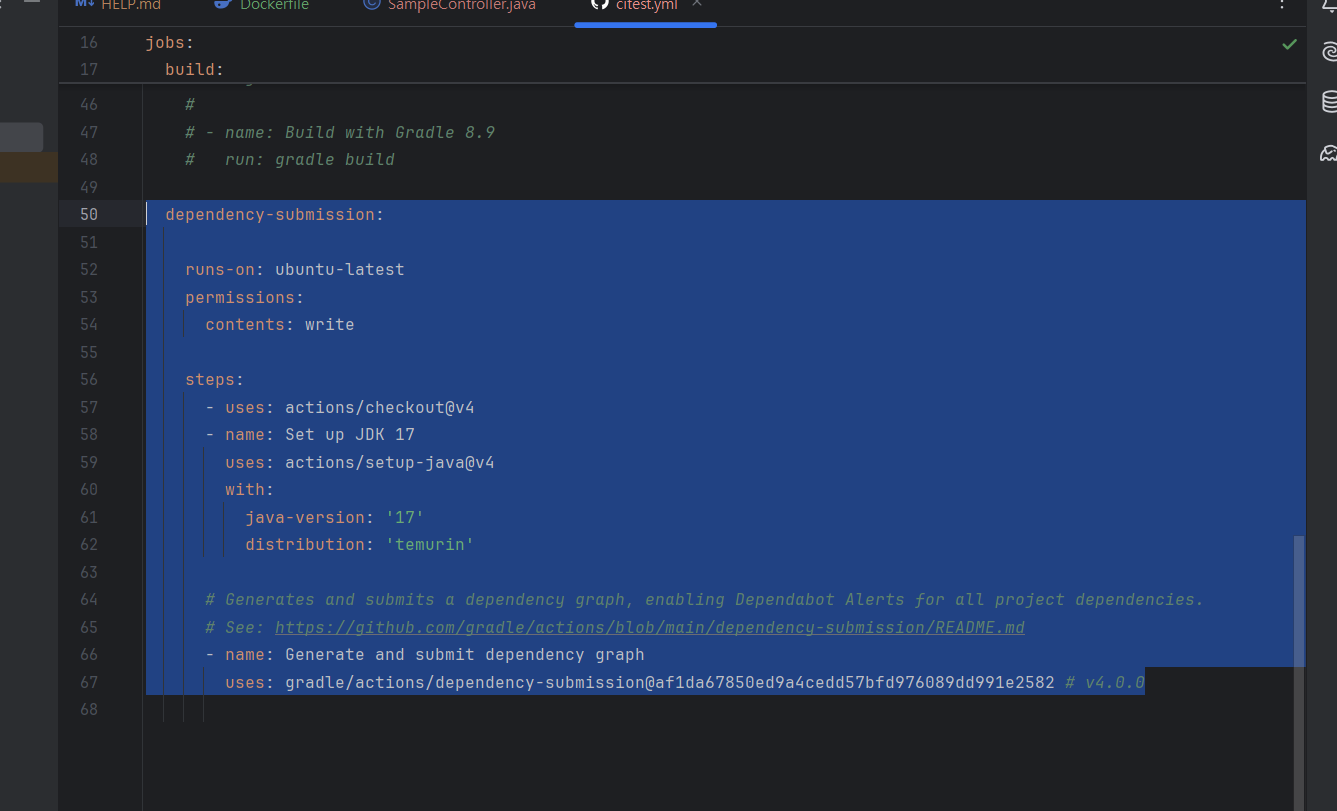
- 해당내용은 지워도됨
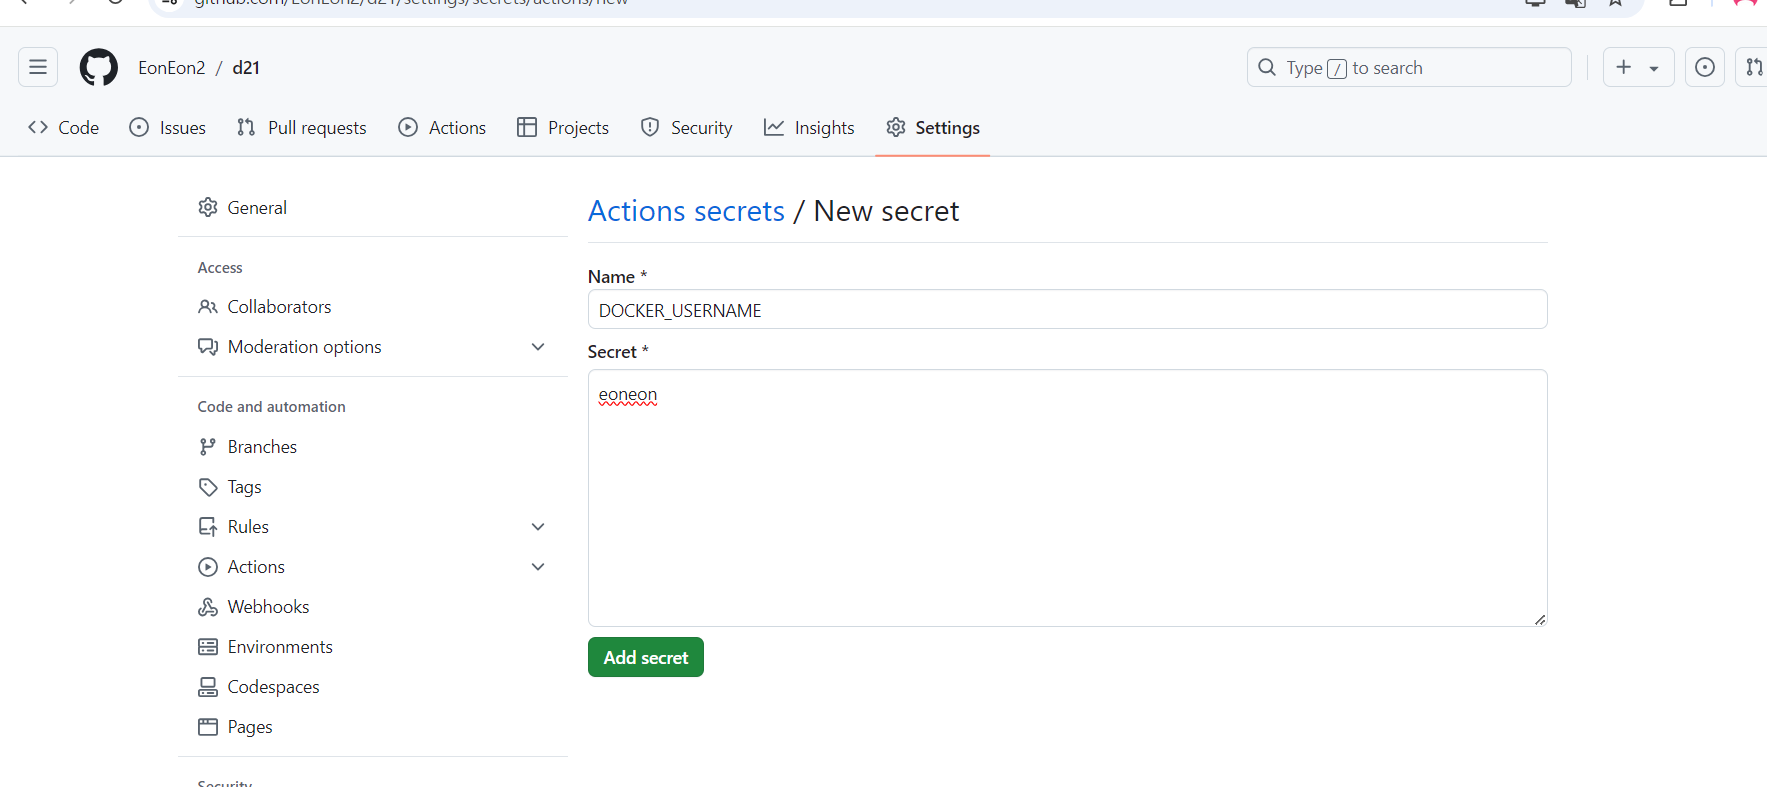
- docker hub의 account / Personal access tokens

👉 해당 값들을 저장해두기
- git hub의 token값 넣기
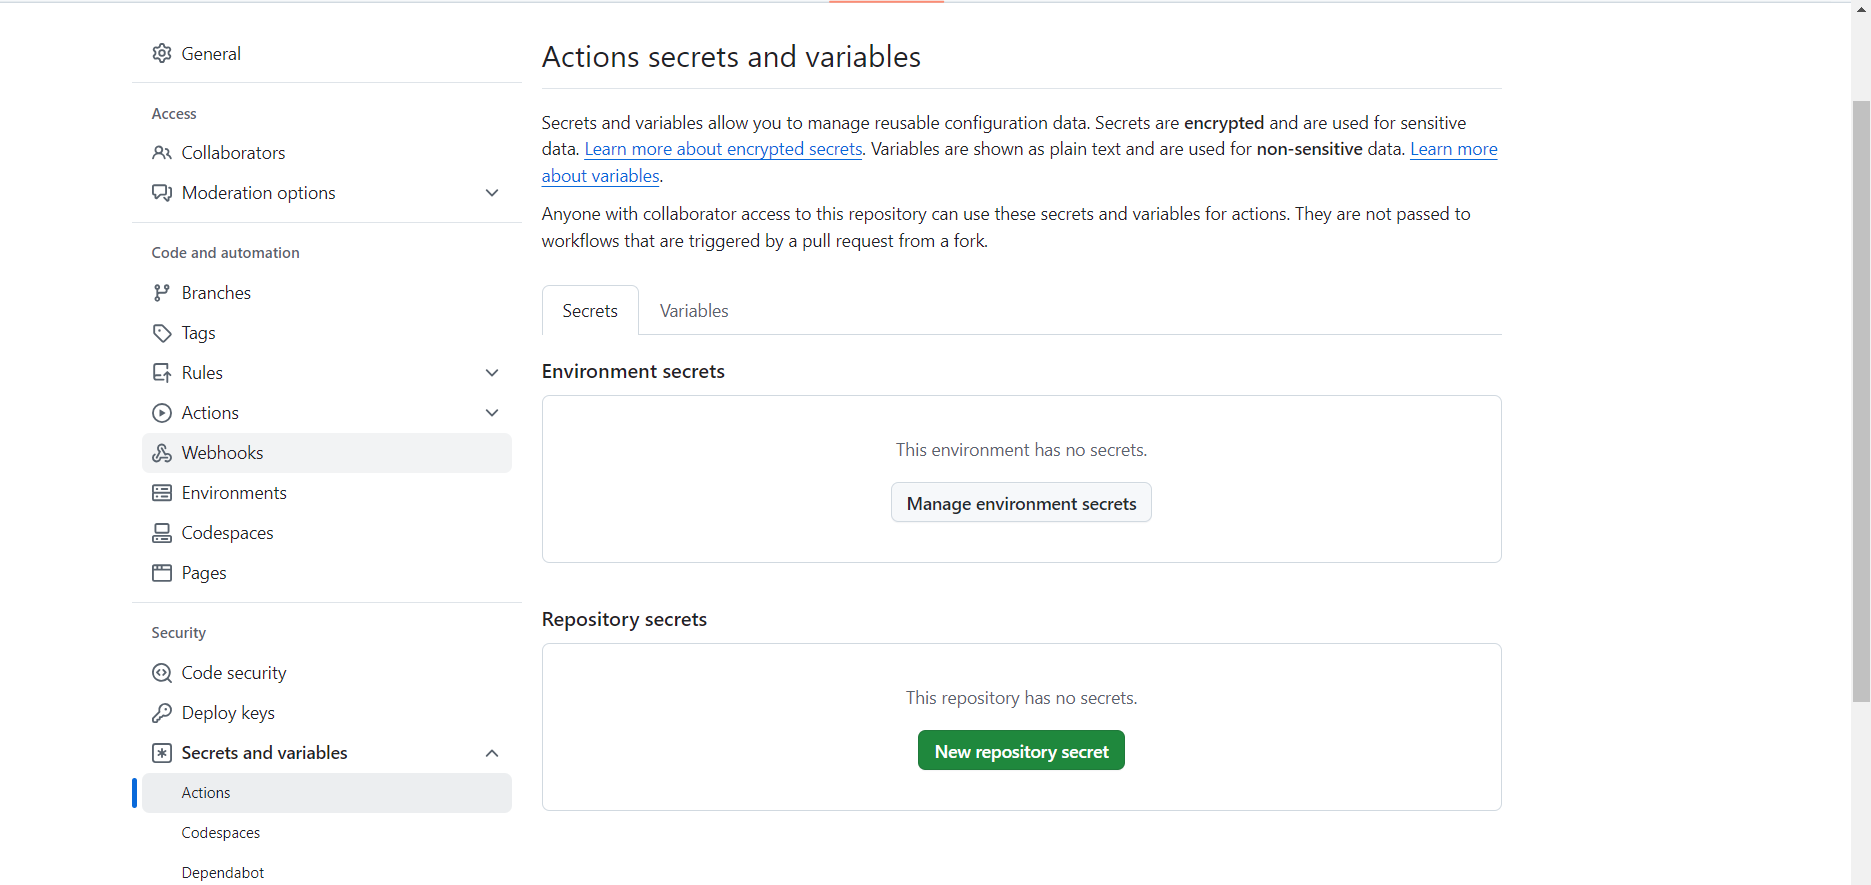
- USERNAME의 토큰생성
-
DOCKER의 토큰값도 똑같이 생성
-
yml 파일에 코드를 추가 후 커밋푸시
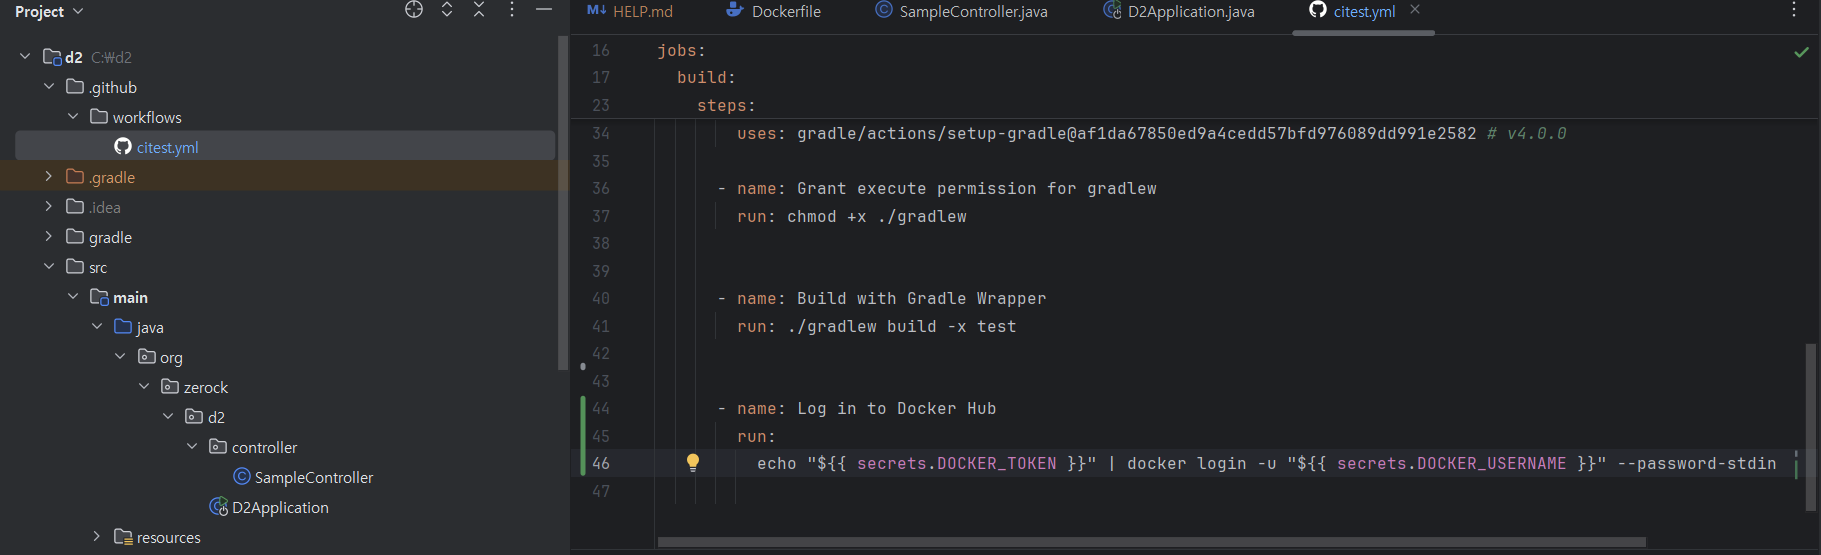
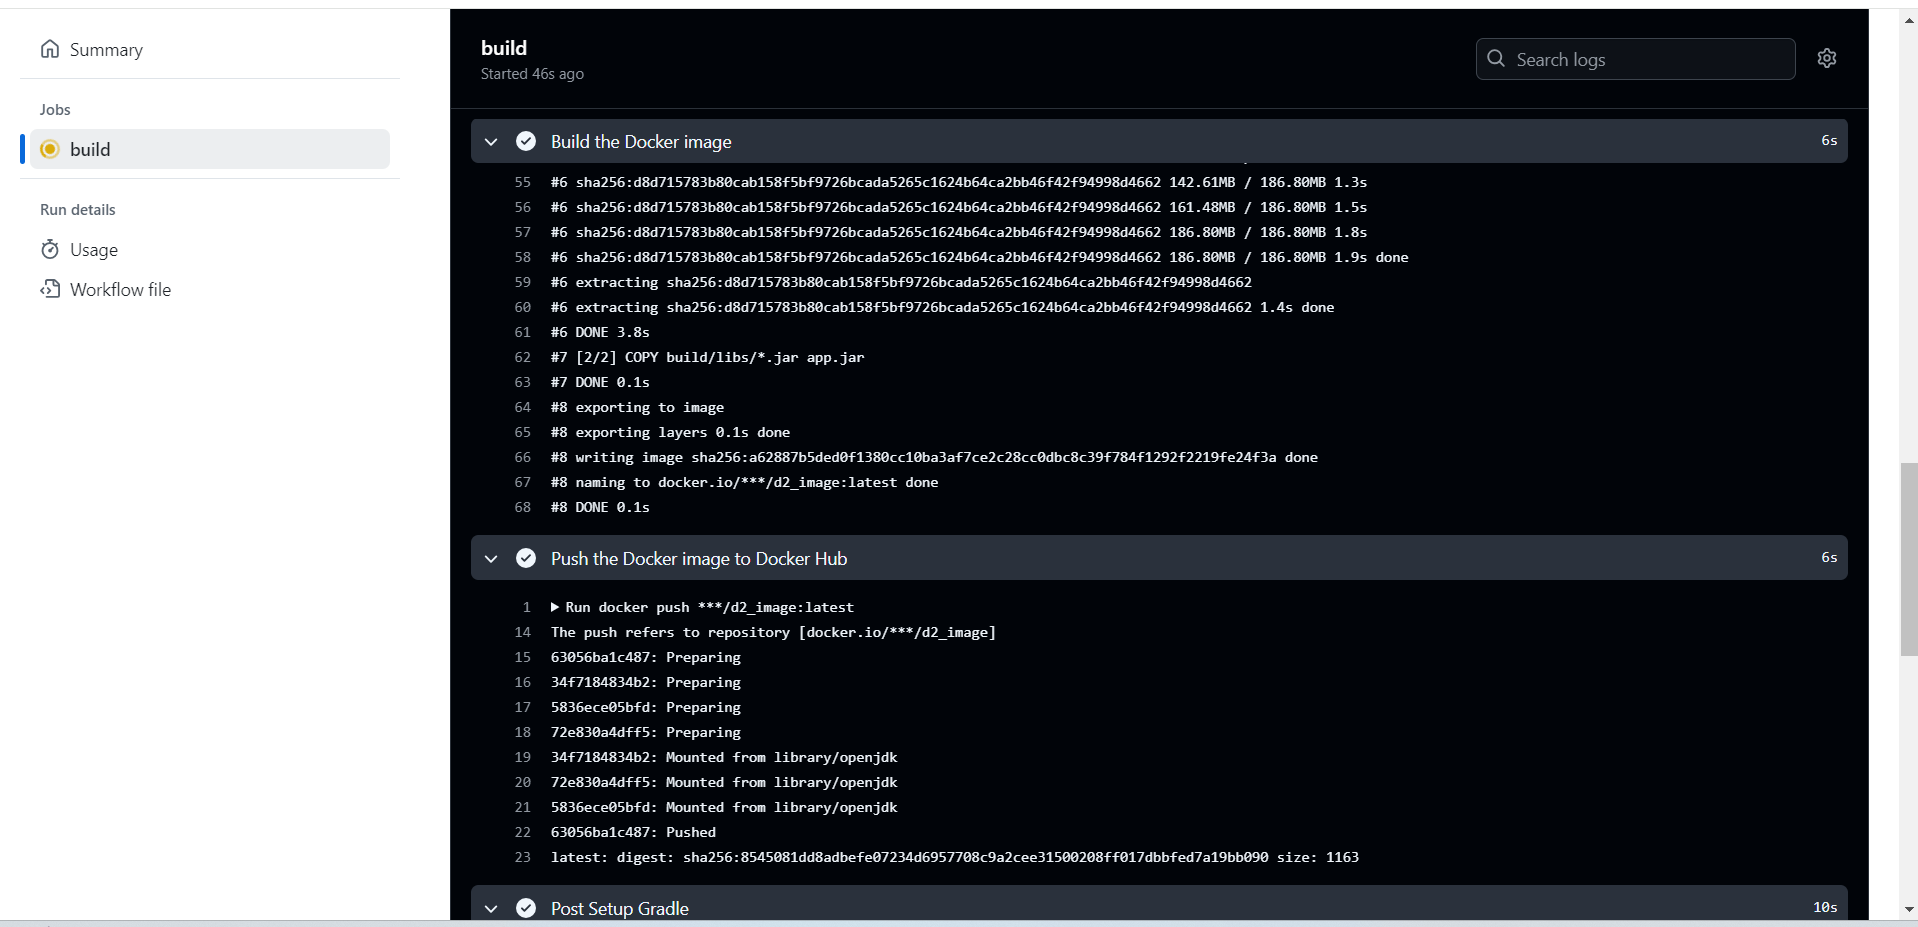
- git hub action 확인

- docker build 내용 yml에 추가 및 커밋푸시
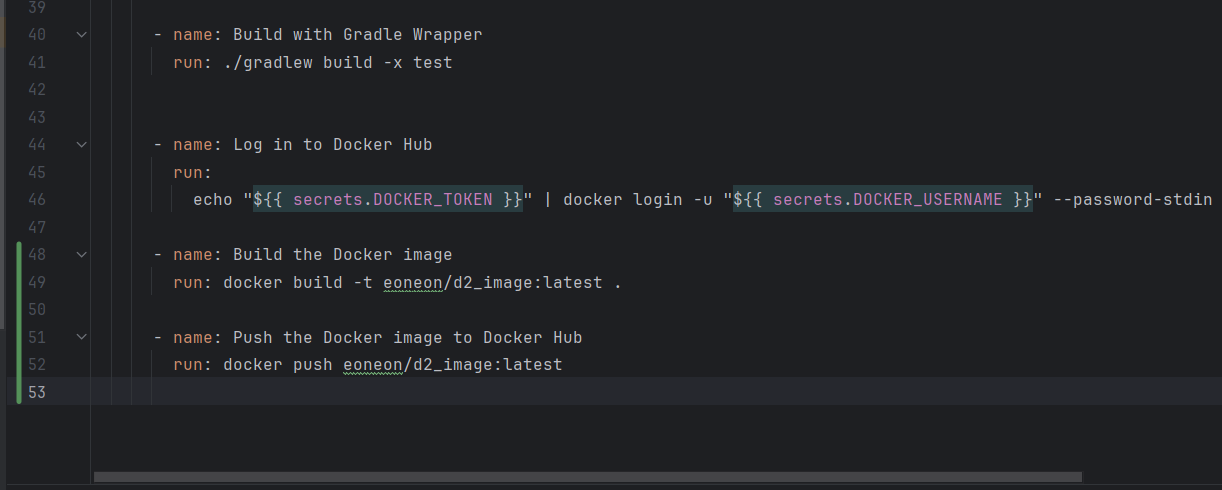
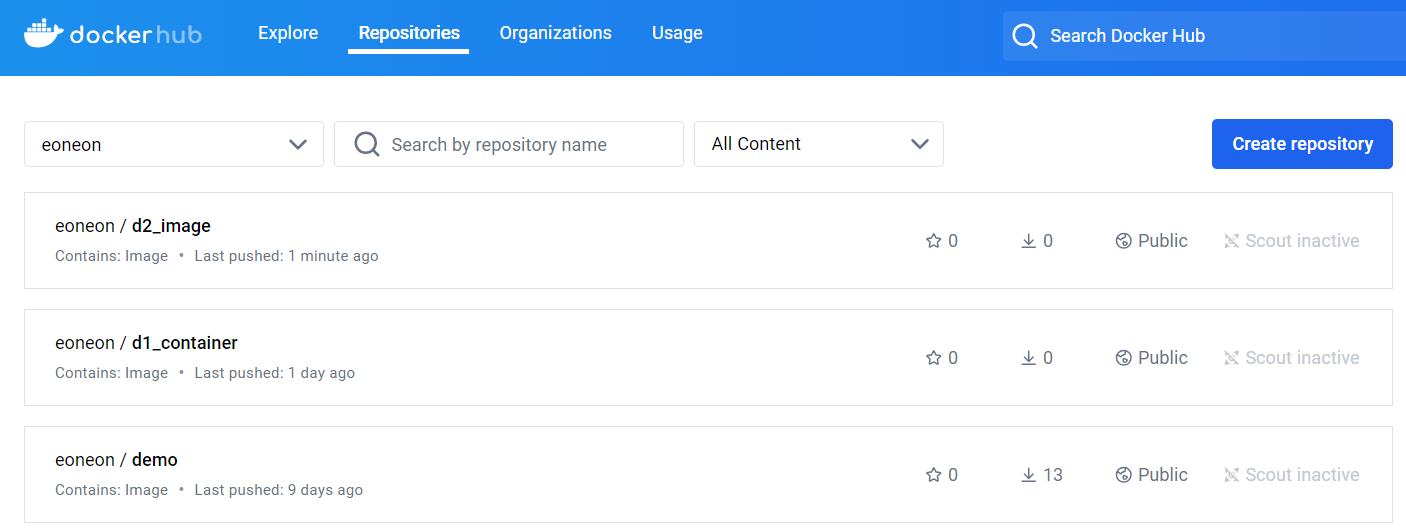
- docker hub에 올라가는것을 확인가능
👉 이제부턴 업데이트를 하기위해서 이미지, 컨테이너를 삭제하지 않아고 git push만 해줘도 도커의 업데이트까지 완료가 된다.
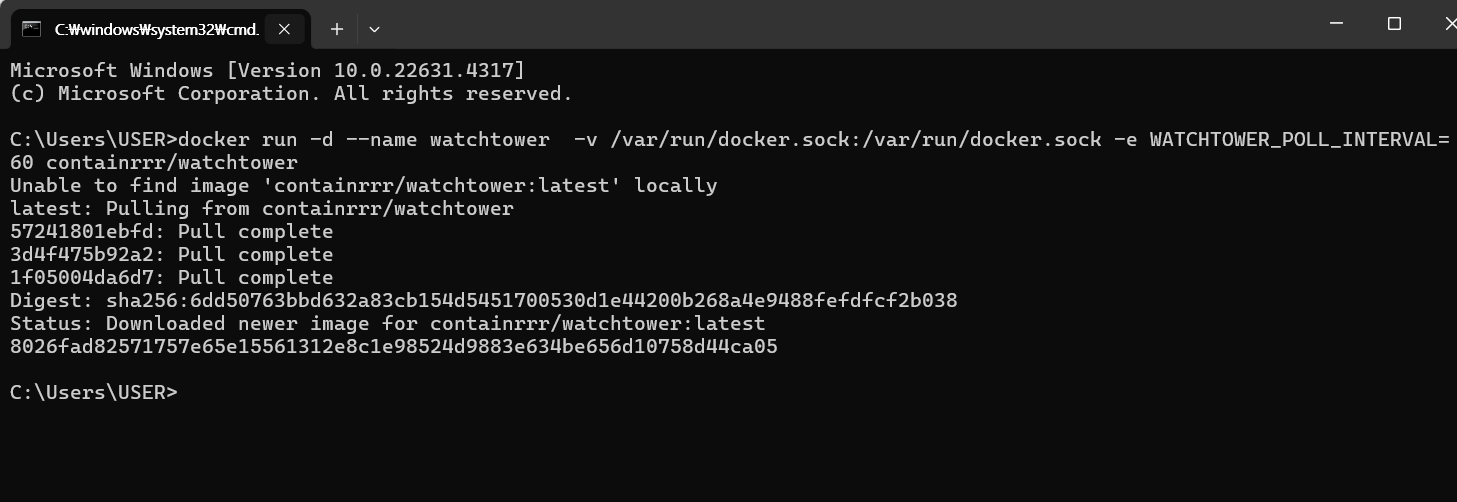
5. watch tower
👉 docker를 이용하여 협업할때 변경될때마다 자동으로 변경해주는 기능
docker run -d --name watchtower -v /var/run/docker.sock:/var/run/docker.sock -e WATCHTOWER_POLL_INTERVAL=60 containrrr/watchtower