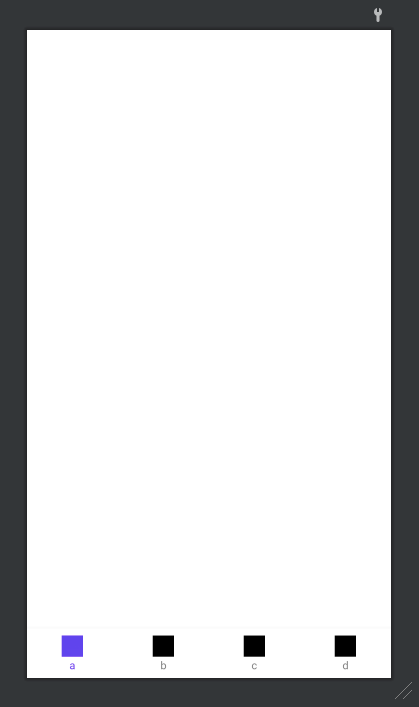
💡 Navigation 설정하기
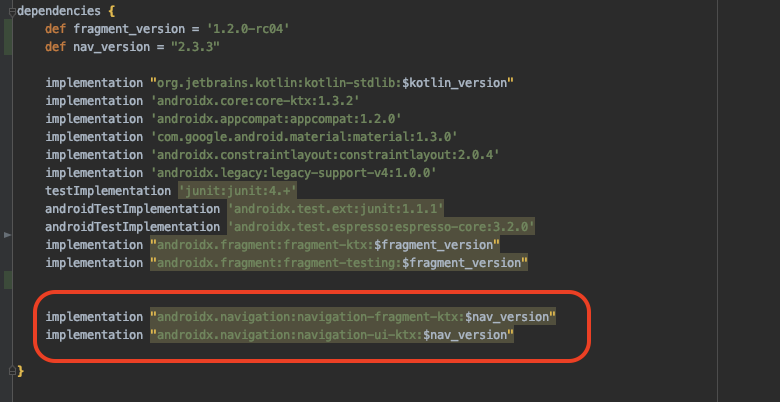
Navigation를 사용하려면 먼저 build.gradle 파일에 필요한 라이브러리를 추가한다.
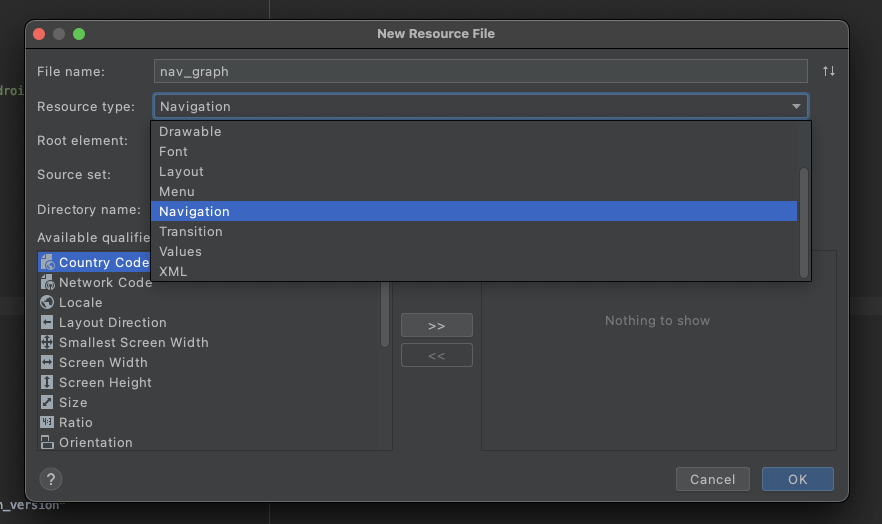
💡 Navigation graph 만들기
res에서 new -> Android Resource File -> resource type에서 Navigation를 선택하고 생성하면 res에 navigation 폴더안에 navigation graph가 생성된다.
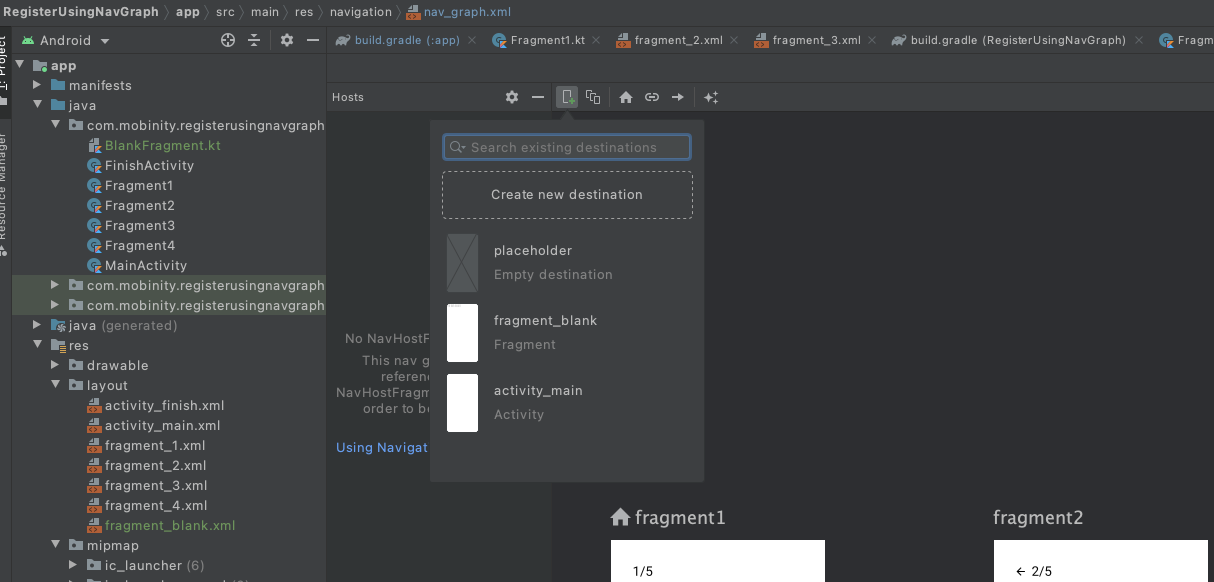
생성된 navigation graph xml에서 들어가면 화면을 구성할 수 있는 부분이 있다. 여기서 상단에 플러스 모양 아이콘을 클릭하면 navigation graph에 추가하고 싶은 화면들을 추가할 수 있다.
여기서 Bottom navigation에 원하는 화면들을 추가하면 다음그림과 같이 해당 화면들을 추가한다.
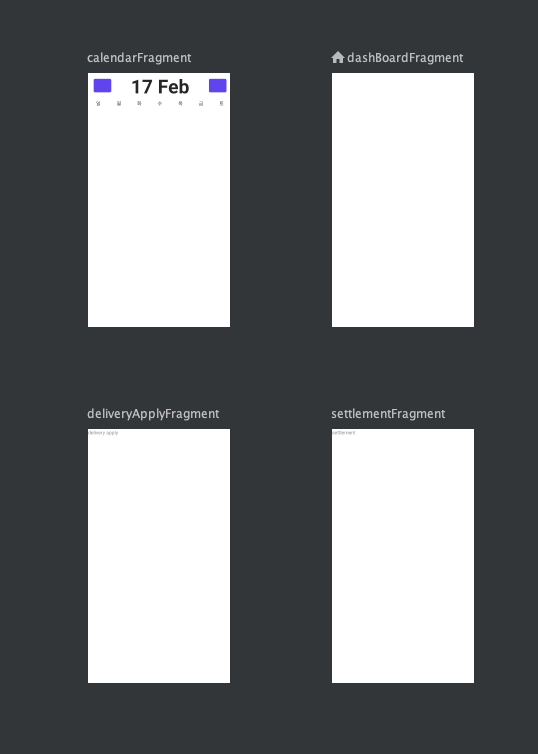
navigation xml 파일은 다음과 같다. startDestination은 Bottom Navigation의 첫 화면을 설정하는 것이다.
<?xml version="1.0" encoding="utf-8"?>
<navigation xmlns:android="http://schemas.android.com/apk/res/android"
    xmlns:app="http://schemas.android.com/apk/res-auto"
    xmlns:tools="http://schemas.android.com/tools"
    android:id="@+id/main_activity_navgraph"
    app:startDestination="@id/dashBoardFragment">

    <fragment
        android:id="@+id/calendarFragment"
        android:name="io.mobinity.wantact.adminapp.view.fragment.CalendarFragment"
        android:label="fragment_calendar"
        tools:layout="@layout/fragment_calendar" />
    <fragment
        android:id="@+id/dashBoardFragment"
        android:name="io.mobinity.wantact.adminapp.view.fragment.DashBoardFragment"
        android:label="fragment_dash_board"
        tools:layout="@layout/fragment_dash_board" />
    <fragment
        android:id="@+id/deliveryApplyFragment"
        android:name="io.mobinity.wantact.adminapp.view.fragment.DeliveryApplyFragment"
        android:label="fragment_delivery_apply"
        tools:layout="@layout/fragment_delivery_apply" />
    <fragment
        android:id="@+id/settlementFragment"
        android:name="io.mobinity.wantact.adminapp.view.fragment.SettlementFragment"
        android:label="fragment_settlement"
        tools:layout="@layout/fragment_settlement" />
</navigation>
다음으로 bottom navigation menu xml 파일을 설정하면된다. 각 item들의 id는 navigation xml 파일에서의 각각 fragment의 id와 동일해야지만 해당 메뉴와 fragment가 연결이 된다.
💡 Menu xml 설정하기
<?xml version="1.0" encoding="utf-8"?>
<menu xmlns:android="http://schemas.android.com/apk/res/android">

    <item
        android:id="@+id/dashBoardFragment"
        android:icon="@mipmap/ic_launcher"
        android:enabled="true"
        android:title="a"/>

    <item
        android:id="@+id/calendarFragment"
        android:icon="@mipmap/ic_launcher"
        android:enabled="true"
        android:title="b"/>

    <item
        android:id="@+id/deliveryApplyFragment"
        android:icon="@mipmap/ic_launcher"
        android:enabled="true"
        android:title="c"/>

    <item
        android:id="@+id/settlementFragment"
        android:icon="@mipmap/ic_launcher"
        android:enabled="true"
        android:title="d"/>

</menu>
💡 Bottom navigation을 보여줄 acitivty 설정하기
해당 fragment 뷰가 있는 activity에서 설정해주면 된다. MainActivity에 fragment 뷰가 있다고 가정해보자. 그럼 다음과 같이 navigationController를 설정해주면 된다. activity에서 navigationController를 만들고, 이를 활용해 navigate를 수행해주면 된다.
override fun onCreate(savedInstanceState: Bundle?) {
    	super.onCreate(savedInstanceState)
        _binding = ActivityMainBinding.inflate(layoutInflater)
        setContentView(binding.root)

        val navHostFragment = supportFragmentManager.findFragmentById(R.id.nav_host_fragment_container) as NavHostFragment
        navController = navHostFragment.findNavController()
        binding.bnMenu.setupWithNavController(navController)

    }
해당 activity의 xml 파일은 다음과 같다. BottomNavigationView에서 labelVisibilityMode는 클릭되어 있지 않은 메뉴에 label(이름)도 보여줄지 정하는 기능이다.
<?xml version="1.0" encoding="utf-8"?>
<androidx.constraintlayout.widget.ConstraintLayout xmlns:android="http://schemas.android.com/apk/res/android"
    xmlns:app="http://schemas.android.com/apk/res-auto"
    xmlns:tools="http://schemas.android.com/tools"
    android:layout_width="match_parent"
    android:layout_height="match_parent"
    tools:context=".view.activity.MainActivity">

    <androidx.fragment.app.FragmentContainerView
        android:id="@+id/nav_host_fragment_container"
        android:name="androidx.navigation.fragment.NavHostFragment"
        android:layout_width="0dp"
        android:layout_height="0dp"
        app:defaultNavHost="true"
        app:layout_constraintBottom_toTopOf="@id/bn_menu"
        app:layout_constraintEnd_toEndOf="parent"
        app:layout_constraintStart_toStartOf="parent"
        app:layout_constraintTop_toTopOf="parent"
        app:navGraph="@navigation/main_activity_nav_graph" />

    <com.google.android.material.bottomnavigation.BottomNavigationView
        android:id="@+id/bn_menu"
        android:layout_width="0dp"
        android:layout_height="wrap_content"
        app:layout_constraintBottom_toBottomOf="parent"
        app:layout_constraintEnd_toEndOf="parent"
        app:layout_constraintStart_toStartOf="parent"
        app:labelVisibilityMode="labeled"
        app:menu="@menu/bottom_nav_menu" />


</androidx.constraintlayout.widget.ConstraintLayout>