restdocs로 생성된 openapi를 2가지 방법을 통해 swaggerUI로 확인합니다.
springdoc-openapi-starter-webmvc-ui 사용
설정이 간단하지만, openapi3 경로를 설정하지 않을 경우 모든 api가 공개된다는 단점이 있습니다.
build.gradle
buildscript {
    ext {
    	...
        restdocsApiSpecVersion = '0.19.2'
    }
}

plugins {
	...
    id 'com.epages.restdocs-api-spec' version "${restdocsApiSpecVersion}"
}

dependencies {
	...
	implementation "org.springdoc:springdoc-openapi-starter-webmvc-ui:2.5.0"

    testImplementation "org.springframework.restdocs:spring-restdocs-mockmvc"
	testImplementation "com.epages:restdocs-api-spec-mockmvc:${restdocsApiSpecVersion}"
}

clean {
    ...
    delete file("src/main/resources/static/docs/")
}

openapi3 {
    server = "http//localhost:8080"
    title = "Neonadeuli API"
    description = "Neonadeuli API description"
    version = "0.1.0"
    format = "json"
    outputDirectory = layout.buildDirectory.dir("resources/main/static/docs/").get().toString()
}

tasks.register("copyOpenapi3") {
    doLast {
        copy {
            from(openapi3.outputDirectory)
            into("src/main/resources/static/docs/")
        }
    }
}

bootJar {
    ext.profile = (!project.hasProperty('profile') || !profile) ? 'none' : profile

    if ("${profile}" == 'dev') {
        dependsOn "openapi3"
        finalizedBy "copyOpenapi3"
    }
}
build 시 profile이 dev라면 build/resources/main/static/docs/openapi3.json을 만들고 이를 src/main/resources/static/docs/에 복사합니다.
복사하는 이유는 로컬 환경에서 테스트해보기 위함이며, dev가 아닌 내부 배포 환경(release 등)에서는 copyOpenapi3 task를 건너뛰어도 괜찮을 것 같습니다.
실제 배포 환경에서는 openapi의 생성을 애초에 막기 위해 코드를 위와 같이 작성해 두었습니다.
properties
application.properties
springdoc.api-docs.enabled=falseopenapi3의 생성과 더불어, 기본적으로는 swaggerui를 사용할 수 없도록 막아 두었습니다.
application-dev.properties
springdoc.api-docs.enabled=true
springdoc.swagger-ui.url=/docs/openapi3.json
springdoc.swagger-ui.path=/swagger
실제 사용할 profile에서는 enabled=true로 설정 후 url=openapi3 경로로 설정해주시면 되겠습니다.
path는 원하시는 경로로 작성해 주세요.
org.hidetake.swagger.generator 사용
swaggerui에 해당하는 파일을 만들어 사용하기 때문에, api가 모두 공개되는 등의 참사(?) 범위가 줄어듭니다.
build.gradle
buildscript {
    ext {
    	...
        restdocsApiSpecVersion = '0.19.2'
    }
}

plugins {
    ...
    id 'com.epages.restdocs-api-spec' version "${restdocsApiSpecVersion}"
    id 'org.hidetake.swagger.generator' version '2.19.2'
}

dependencies {
	...
    testImplementation "org.springframework.restdocs:spring-restdocs-mockmvc"
	testImplementation "com.epages:restdocs-api-spec-mockmvc:${restdocsApiSpecVersion}"

    swaggerUI 'org.webjars:swagger-ui:5.15.1'
}

clean {
    ...
    delete file("src/main/resources/static/docs/")
}

openapi3 {
    server = "http//localhost:8080"
    title = "Neonadeuli API"
    description = "Neonadeuli API description"
    version = "0.1.0"
    format = "json"
}

swaggerSources {
    sample {
        setInputFile(file("${openapi3.outputDirectory}/openapi3.json"))
    }
}

tasks.withType(GenerateSwaggerUI).configureEach {
    dependsOn "openapi3"
}

tasks.register("copySwaggerUISample") {
    doLast {
        copy {
            from("${generateSwaggerUISample.outputDir}")
            into("src/main/resources/static/docs/")
        }
    }
}

bootJar {
    ext.profile = (!project.hasProperty('profile') || !profile) ? 'none' : profile

    if ("${profile}" == 'dev') {
        dependsOn generateSwaggerUISample
        finalizedBy copySwaggerUISample
    }
}
이 역시 bootJar 내 if 로직을 건드려서 원하시는 profile에 대해 swaggerUI 생성 및 복사를 제어하시면 되겠습니다.
코드가 아주 약간 늘어난 대신, profile로 swaggerui의 생성을 제어하기 때문에 properties를 따로 설정하지 않아도 됩니다.
만약 헤더에 토큰이 들어가지 않는 문제가 발생한다면 해당 블로그 글을 참조해 보세요.
해당 방식을 선택하여 진행해보도록 하겠습니다.
테스트코드 예시
어디까지나 예시일 뿐, 작업하시는 프로젝트에 맞게 작성하시면 되겠습니다. 참고만 해주세요.
@WebMvcTest(value = {AccountController.class, SecurityConfig.class, UserDetailsService.class})
@AutoConfigureRestDocs
public abstract class ControllerTestSupport {

    @Autowired
    protected MockMvc mockMvc;

    @Autowired
    protected ObjectMapper objectMapper;

    @MockBean
    protected AccountService accountService;

    @MockBean
    protected AccountRepository accountRepository;

    protected <T> T getInstance(Class<T> clazz, Map<String, Object> params) throws Exception {
        Constructor<T> declaredConstructor = clazz.getDeclaredConstructor();
        declaredConstructor.setAccessible(true);
        T instance = declaredConstructor.newInstance();

        for (Entry<String, Object> entry : params.entrySet()) {
            ReflectionTestUtils.setField(instance, entry.getKey(), entry.getValue());
        }

        return instance;
    }
}
컨트롤러 테스트도 컨텍스트 생성 횟수를 최소화하기 위해 abstract 클래스를 만들었습니다.
getInstance() 메서드는 requestDTO의 NoArgsConstrucor를 모두 protected로 설정해뒀는데, 테스트코드에서 우회하여 사용하기 위해 만들어 두었습니다.
import static com.epages.restdocs.apispec.MockMvcRestDocumentationWrapper.document;
import static com.epages.restdocs.apispec.ResourceDocumentation.resource;
import static com.epages.restdocs.apispec.Schema.schema;
import static org.mockito.ArgumentMatchers.anyString;
import static org.mockito.BDDMockito.given;
import static org.springframework.restdocs.payload.JsonFieldType.NUMBER;
import static org.springframework.restdocs.payload.PayloadDocumentation.fieldWithPath;
import static org.springframework.test.web.servlet.result.MockMvcResultMatchers.status;

import back.neonadeuli.ControllerTestSupport;
import back.neonadeuli.account.model.dto.request.SignupRequestDto;
import back.neonadeuli.account.model.dto.response.SignupResponseDto;
import com.epages.restdocs.apispec.ResourceSnippetParameters;
import java.util.Map;
import org.junit.jupiter.api.DisplayName;
import org.junit.jupiter.api.Test;
import org.springframework.http.MediaType;
import org.springframework.restdocs.mockmvc.RestDocumentationRequestBuilders;

class AccountControllerTest extends ControllerTestSupport {

    @Test
    @DisplayName("회원 가입 API")
    void signup() throws Exception {

        // given
        SignupRequestDto signupRequestDto = getInstance(SignupRequestDto.class, Map.of(
                "name", "name",
                "nickname", "nickname",
                "loginId", "loginId",
                "password", "password",
                "email", "email@email.com"
        ));

        given(accountService.signup(anyString(), anyString(), anyString(), anyString(), anyString()))
                .willReturn(new SignupResponseDto(1L));

        // when
        // then
        mockMvc.perform(
                        RestDocumentationRequestBuilders.post("/accounts/signup")
                                .content(objectMapper.writeValueAsString(signupRequestDto))
                                .contentType(MediaType.APPLICATION_JSON)
                )
                .andExpect(status().isCreated())

                .andDo(document("signup",
                        resource(ResourceSnippetParameters.builder()
                                .summary("회원 가입")
                                .description("회원 가입을 진행합니다.")
                                .requestFields(
                                        fieldWithPath("name").description("사용자명"),
                                        fieldWithPath("nickname").description("사용자 별명"),
                                        fieldWithPath("loginId").description("로그인 아이디"),
                                        fieldWithPath("password").description("비밀번호"),
                                        fieldWithPath("email").description("이메일")
                                )
                                .responseFields(
                                        fieldWithPath("id").type(NUMBER).description("회원 번호")
                                )
                                .requestSchema(schema("signupRequestForm"))
                                .responseSchema(schema("signupResponse"))
                                .build())));
    }
}com.epages.restdocs.apispec.MockMvcRestDocumentationWrapper.document를 사용하셔야 정상적으로 문서가 작성됩니다.
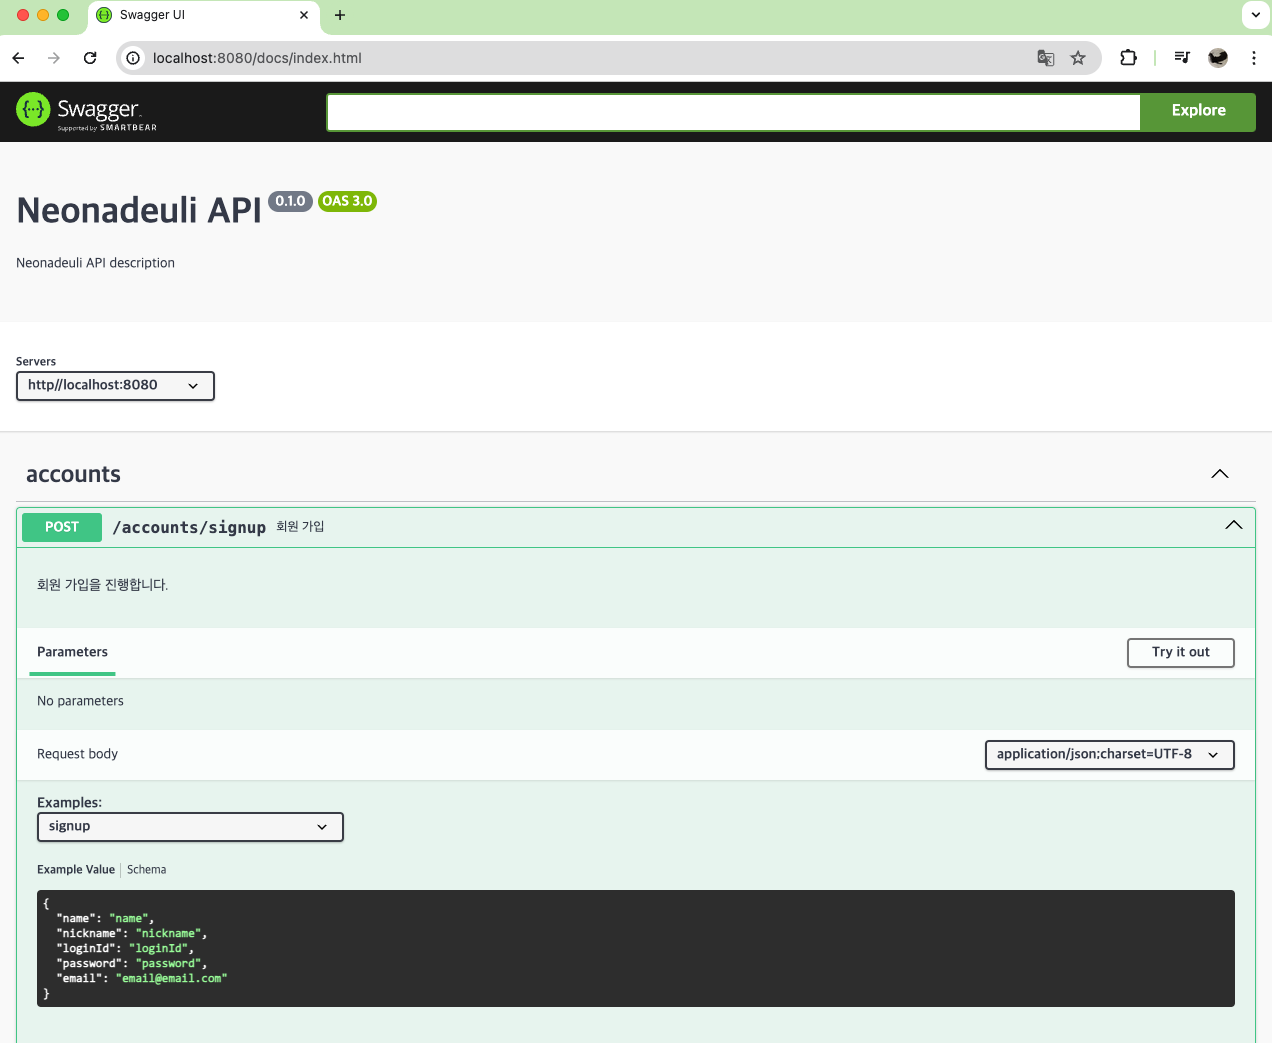
문서 생성
dev인 경우에만 생성되게 만들었기 때문에, build 시 profile을 부여하겠습니다.
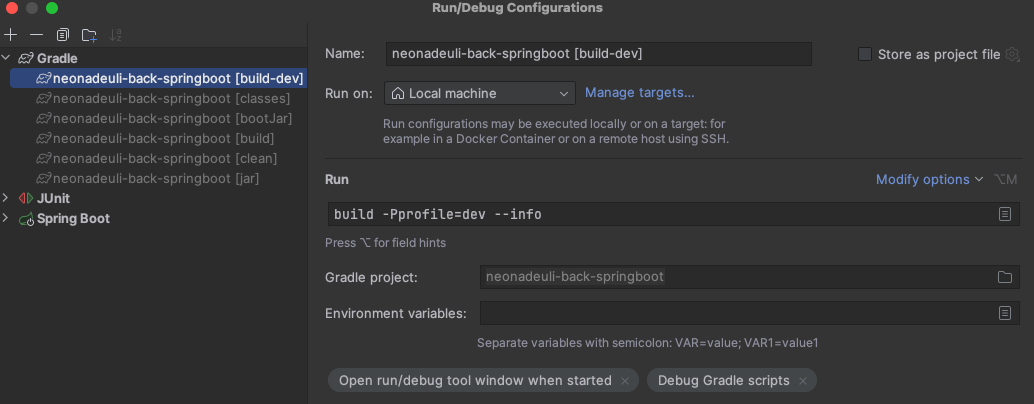
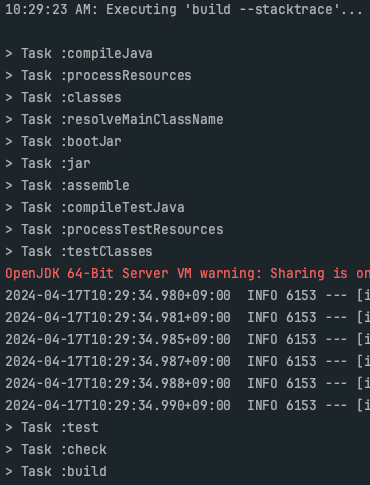
이제 build를 수행하면
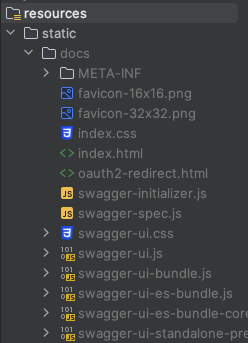
swaggerui에 해당하는 파일이 생성됩니다.

잘 생성되었군요.
만약 profile을 부여하지 않으면 어떻게 될까요?
swagger 관련 task가 동작되지 않으므로 아무것도 생성해내지 않습니다.
원하던 대로 동작되는 것을 확인할 수 있었습니다.
build 시 jar 파일에도 포함시키기
tasks.withType(JavaCompile).configureEach {
    options.getGeneratedSourceOutputDirectory().set(file(querydslSrcDir))
}

openapi3 {
    server = "http//localhost:8080"
    title = "Zelkova API"
    description = "Zelkova API description"
    version = "0.1.0"
    format = "json"
}

swaggerSources {
    sample {
        setInputFile(file("${openapi3.outputDirectory}/openapi3.json"))
    }
}

tasks.register("copySwaggerUISample") {
    doLast {
        def destinationDir

        if ("${profile}" == 'local') {
            destinationDir = "src/main/resources/static/docs/"
        } else if ("${profile}" == 'release') {
            destinationDir = "${layout.buildDirectory.dir("resources/main/static/docs/").get()}"
        }

        copy {
            from("${generateSwaggerUISample.outputDir}")
            into(destinationDir)
        }
    }
}

tasks.withType(GenerateSwaggerUI).configureEach {
    dependsOn "openapi3"
    finalizedBy copySwaggerUISample
}

bootJar {
    ext.profile = (!project.hasProperty('profile') || !profile) ? 'none' : profile

    if ("${profile}" == 'local' || "${profile}" == 'release') {
        dependsOn generateSwaggerUISample
    }
}
이후 properties 파일에
spring.mvc.static-path-pattern=/swagger-ui/**
spring.web.resources.static-locations=classpath:/static/docs/
로 작성해주시면 됩니다.
Reference
https://perfectacle.github.io/2017/09/23/Spring-boot-gradle-profile/
https://velog.io/@hwsa1004/Spring-restdocs-swagger-%EA%B0%99%EC%9D%B4-%EC%82%AC%EC%9A%A9%ED%95%98%EA%B8%B0
https://jwkim96.tistory.com/274