🎯 목표
NestJS의 모듈인 Guard (canActivate) 를 활용하여 기존 미들웨어인 authmiddleware를 대체
🛡 Guard ?
NestJS의 모듈인 Guard에 대해서 찬찬이 짚어보자.
Guard는 @Injectable() 데코레이터와 함께 CanActive라는 인터페이스를 상속받아 사용할 수 있다.
Express에서는 종종 middleware를 사용해서 인증을 진행했는데 이는 next()함수를 만나지 않으면 실행될 수 없다.
반면, Guard는 ExecutionContext라는 인스턴스에 접근해 그 다음 작업을 수행할 수 있다.
마치 필터, 파이프, 인터셉터와 같은 디자인으로 설계되었고 req,res사이클에 올바르게 접근할 수 있도록 로직이 실행되도록 해준다.
AuthGuard
Guard의 역할을 하는 CanActivate를 상속받은 AuthGuard를 사용하여 JWT 방식으로 인가하는 class를 설정해야 한다.
// auth.guard.ts 파일
import { ExecutionContext, Injectable } from '@nestjs/common';
import { AuthGuard as NestAuthGuard } from '@nestjs/passport';
import { Observable } from 'rxjs';

@Injectable()
export class AuthGuard extends NestAuthGuard('jwt') {
  canActivate(
    context: ExecutionContext,
  ): boolean | Promise<boolean> | Observable<boolean> {
    return super.canActivate(context);
  }
}
옵셔널 체이닝 (?.)
- auth.guard.ts를 작성했으니 이제 auth.service.ts를 통해 회원가입을 할 때 user의 정보를 검증하는 로직을 작성해야한다.
아래 코드는 NestJS에서 예시로 보여준 코드인데 userService에서 비밀번호를 확인할 때 자바스크립트 문법 중 옵셔널체이닝(?.)이라는 것을 사용한 예시를 보여준다.
import { Injectable, UnauthorizedException } from '@nestjs/common';
import { UsersService } from '../users/users.service';

@Injectable()
export class AuthService {
  constructor(private usersService: UsersService) {}

  async signIn(username: string, pass: string): Promise<any> {
    const user = await this.usersService.findOne(username);
    if (user?.password !== pass) {
      throw new UnauthorizedException();
    }
    return result;
  }
}
자바스크립트에서는 객체에 없는 정보에 접근하는 경우 에러를 발생시킨다.
let user = {};
alert(user.address)
// result
// VM353:2 Uncaught TypeError: Cannot read properties of undefined (reading 'street') at <anonymous>:2:20

let user = {};
alert(user && user.address)
// result
// alert undefined
위의 코드와 같이 &&(논리곱연산자)를 사용해야 undefined라는 결과를 도출해낼 수 있다.
이렇게 사용하게 되면 굳이 user까지 불러와서 코드가 길어진다는 단점이 있다.
이 것을 해결하기 위해 나온 것이 옵셔널 체이닝이다.
let user = null;
alert( user?.address )
// result
// alert undefined
let user = {};
alert( user?.address )
// result
// alert undefined
위와 같이 null값이나 undefined를 에러로 나오게 하지 않고 undefined를 리턴해주는 역할을 한다.
단, 이것을 남발해서는 안되고 값이 없어도 가능한 곳에서만 사용해야한다.
다시 코드로 돌아가서, 아래 코드를 해석해보면 다음과 같다.
user의 password프로퍼티가 있으면 매개변수로 받아온 pass와 평가를 시작하고 아니면 평가를 시작하지 않는다로 볼 수 있겠다.
	if (user?.password !== pass) {
      throw new UnauthorizedException();
    }
길게 주저리 썼지만 실제로는 password를 직접 비교하지 않고 hash된 패스워드와 비교하기 때문에 실제 코드는 저렇지 않다.
아래와 같이 bcrypt를 사용해 매개변수로 들어온 password와 실제 user에 hash된 패스워드를 비교하여 true나 false로 받을 수 있게된다.
간단하게 코드를 !matchedPass로 쓸 수도 있지만 변수에 할당되는 값이 true or false로 돌아올 수 있다는 것을 명시하기 위해 작성하였다.
async signIn(
    email: string,
    password: string,
  ): Promise<{ accessToken: string } | undefined> {
    const user = await this.usersService.findUser(email);
    const matchedPass = await bcrypt.compare(password, user.password);
    if (matchedPass == false) {
      throw new UnauthorizedException('비밀번호가 일치하지 않습니다.');
    }
    const payload: Payload = { id: user.id, nickname: user.nick_name };
    return {
      accessToken: await this.jwtService.signAsync(payload),
    };
  }
이렇게 userService에서 발급해줬던 token쪽을 auth.guard에 옮겨오는 작업을 완료해준다.
인증작업(JWT-Verify)
- passport.jwt.strategy.ts 파일 생성
- payload.interface.ts 파일 생성
이제 @UseGuard 데코레이터를 사용하여 AuthGuard로 인증작업을 해줄 수 있게된다.
passport.jwt.strategy.ts
import { Injectable, UnauthorizedException } from '@nestjs/common';
import { PassportStrategy } from '@nestjs/passport';
import { ExtractJwt, Strategy, VerifiedCallback } from 'passport-jwt';
import { AuthService } from './auth.service';
import { ConfigService } from '@nestjs/config';
import { Payload } from './security/payload.interface';

@Injectable()
export class JwtStrategy extends PassportStrategy(Strategy) {
  constructor(
    private authService: AuthService,
    private configService: ConfigService,
  ) {
    super({
      jwtFromRequest: ExtractJwt.fromAuthHeaderAsBearerToken(),
      ignoreExpiration: true,
      secretOrKey: configService.get('JWT_SECRET_KEY'),
    });
  }
  async validate(payload: Payload, done: VerifiedCallback): Promise<any> {
    const user = await this.authService.tokenValidateUser(payload);
    if (!user) {
      return done(
        new UnauthorizedException({ message: 'user does not exist' }),
      );
    }
    return done(null, user);
  }
}
payload.interface.ts
export interface Payload {
  id: number;
  nickname: string;
}
Payload의 객체타입을 설정해주기 위해 위와 같은 코드를 작성하였다.
만약 payload에 다른 설정값을 넣고 싶다면 그 외의 것을 넣어주면 된다.
실행 확인
guard가 제대로 실행되는지 확인하기 위해 간단한 유저 정보를 갖고오는 코드를 작성한다.
auth.controller.ts
@Controller('auth')
export class AuthController {
constructor(
private readonly authService: AuthService,
private readonly configService: ConfigService,
) {}
// auth guard 사용 로직
@HttpCode(HttpStatus.OK)
@Post('/auth-login')
async signIn(@Body() data, @Res() res: Response) {
const jwtToken = await this.authService.signIn(data.email, data.password);
res.setHeader('Authorization', 'Bearer ' + jwtToken.accessToken);
return res.json(jwtToken);
}
@Get('/user-info')
@UseGuards(AuthGuard)
getProfile(@Req() req: Request): any {
const user: any = req.user;
return user;
}
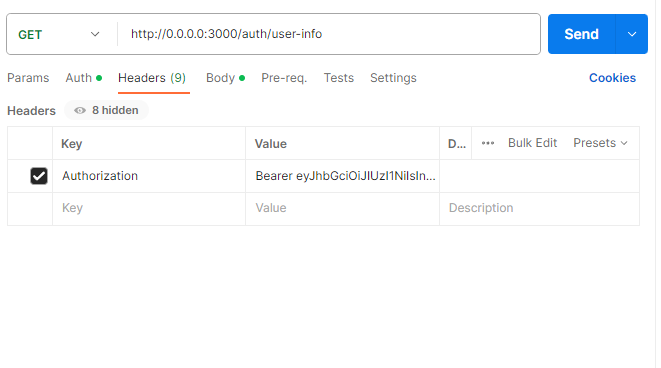
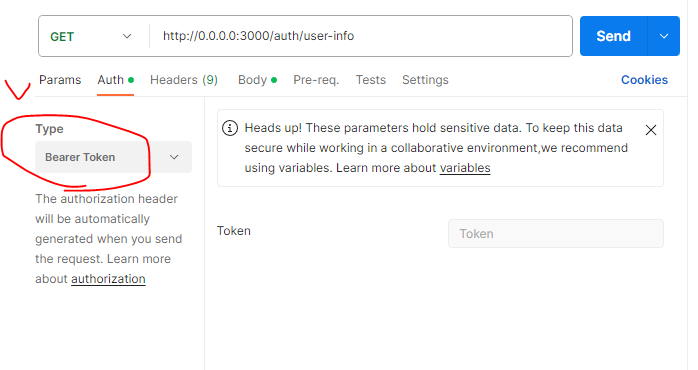
}테스트용으로 작성한 코드는 쿠키를 헤더에 저장했기때문에 헤더로부터 추출할 수 있다.
postman이나 thunder client로 Auth 설정에 Type은 Bearer Token으로 하고 Headers에 Key값으로 Authorization / Value값은 반환된 Bearer + token값을 넣어주면 된다.
테스트 결과
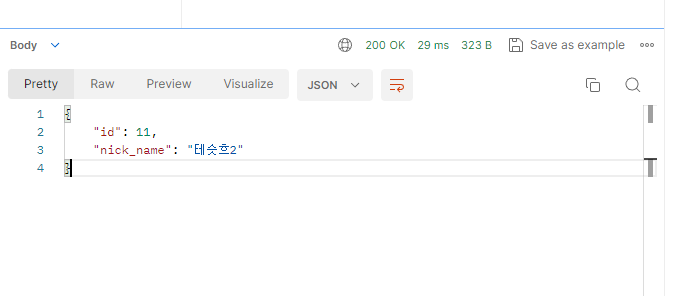
유저 값이 잘 return되는것을 확인할 수 있었다.
이제 guard를 이용해 회원기능이 필요한 부분들에 데코레이터를 삽입하여 변경해주고 refresh token도 추가 구현하면 될 것 같다.
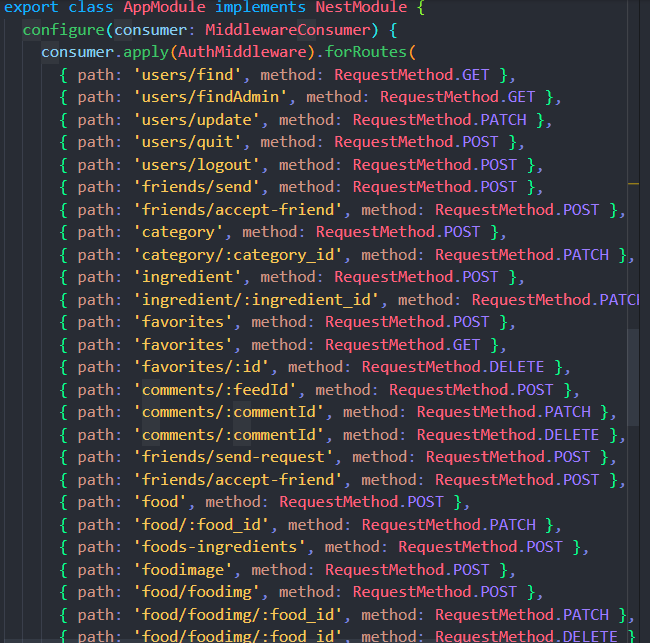
app.module의 현재 코드인데 회원 인증이 필요한 기능에 authmiddleware 모두 적용하다보니 하드 코딩이 되어버렸다.. 이 부분을 지워주고 데코레이터를 적용해주면 훨씬 더 깔끔해질 것 같다.

잘 봤습니다. 👍