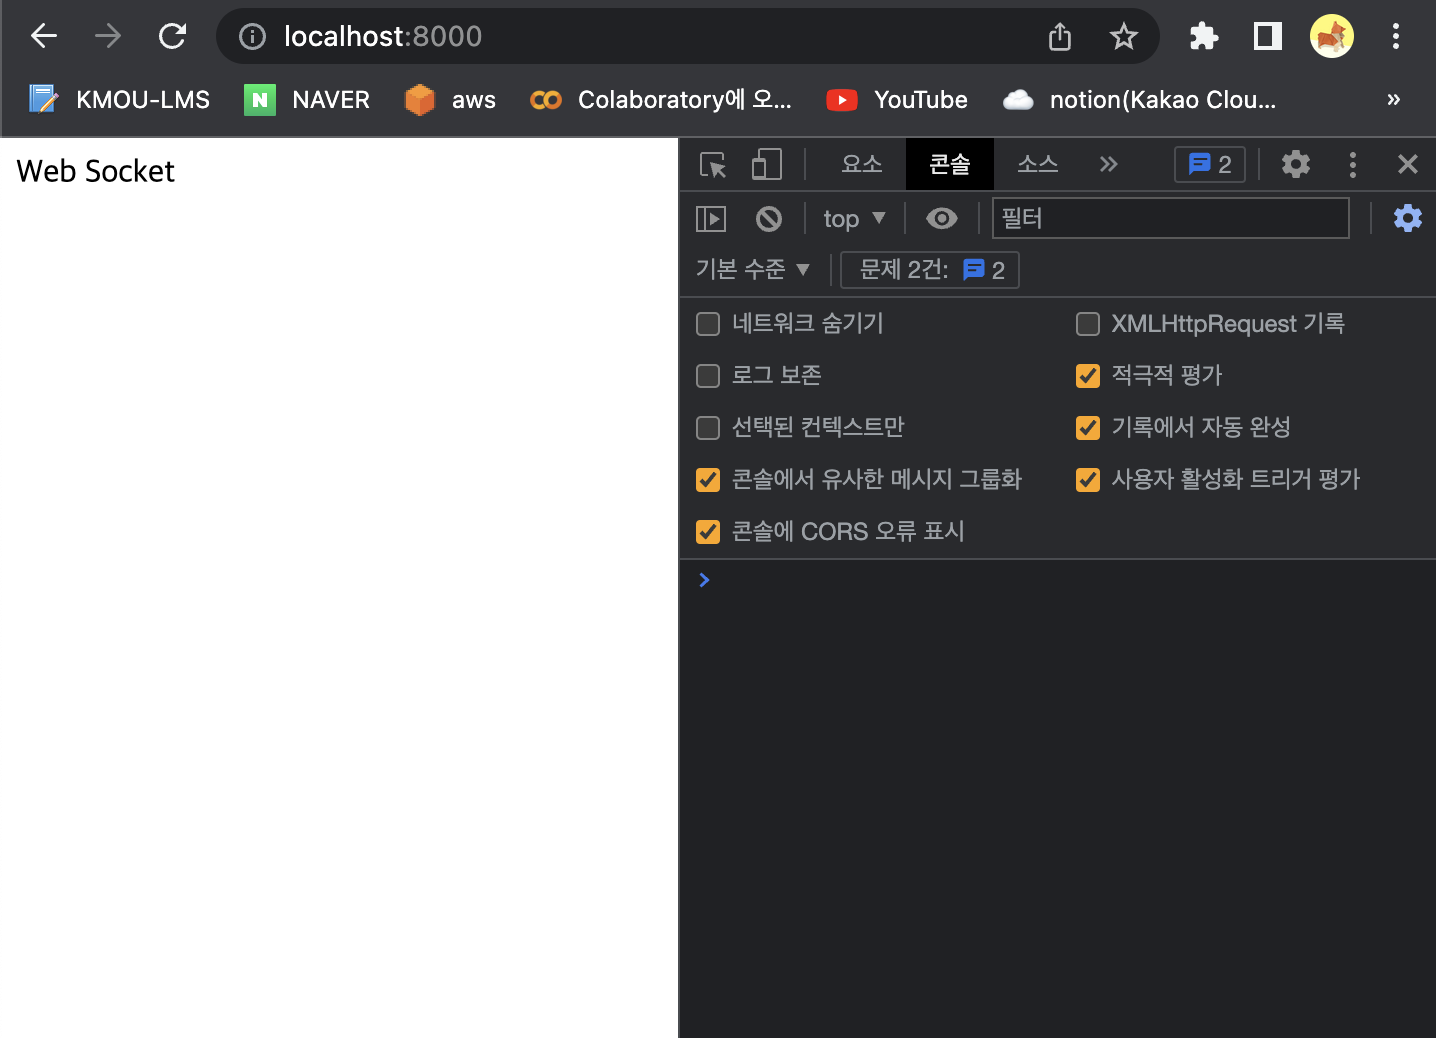
Web Socket
HTTP
-
HTTP 는 Client - Server 간의 접속을 유지하지 않음
-
HTTP 는 Client 와 상태 유지 문제 발생
-
Cookie 와 Session 을 이용해서 상태 유지
-
Cookie : 클라이언트 브라우저의 데이터를 저장한 후 서버에 요청을 보낼 때 마다 전송되는 객체
- 모든 요청을 전송할 때마다 서버에게 데이터를 전송하는 문제 때문에 최근에는 local Storage 나 Web SQL 또는 Indexed DB를 활용하는 경우가 많다
-
Session : 서버에 쿠키의 키와 사용자(브라우저)를 구분해서 데이터를 저장하는 기술
- 기본적으로 메모리에 저장을 하기 때문에 접속하고 클라이언트의 수가 늘어나거나 저장해야 하는 데이터 양이 많아지면 서버에 부담이 된다.
- 최근에는 세션을 데이터베이스에 저장한느 경우가 많다
- Server Application 과 Client Application 을 별도로 만들면 세션을 사용하기가 곤란해져 최근에는 JWT(Json Web Token) 방식으로 인증을 많이 처리한다
-
-
HTTP 의 성능 저하 문제
-
HTTP 는 기본적으로 Half Duplex 방식을 사용하기 때문에 Full Duplex 보다는 성능이 떨어진다.
- Half Duplex : 양쪽 모두 전송이 가능하지만 어느 한 순간에는 한쪽만 데이터를 전송하는 방식
- Full Duplex : 동시에 양쪽이 데이터를 전송할 수 있는 방식
-
HTTP 는 헤더와 본체를 같이 전송하는 방식이기 때문에 본체의 내용이 적다면 헤더로 인한 오버헤드가 많이 발생
-
HTTP 는 Client 의 request 가 없으면 Server 가 Response 할 수 없음
-
-
성능 저하 문제를 해결하기 위해 Web Socket 이 등장
-
Web 에서 TCP/IP 방식의 소켓 통신을 가능하게 한 API
-
네트워크 과부하를 줄일 수 있고 애플리케이션의 반응성도 높일 수 있음
-
HTTP 는 800byte 에서 수kbyte 의 헤더를 갖지만 Web Socket 은
수 byte 정도의 헤더만을 가진다 -
HTTP 가 적합하지 않은 트래픽이 많고 지연 시간이 낮아야 하는 환경에서 주로 사용
- Message 처리 (채팅이나 화면 공유 등)
- 빈번한 트랜잭션 처리 등
-
대표적인 예
- RMI(Remote Method Invocation) : 원격 프로시저 호출
- JMS(Java Messaging Service)
- XMPP
-
Web RTC 의 기반 기술
- ws 프로토콜 사용
- 별도의 서버가 있어야 한다 (리액트 불가능)
- node 의 web socket 모듈 혹은 Spring 의 Web Socket Library 등을 이용해서 구현이 가능
-
-
SSE (Server Sent Events) : Web Push
- 클라이언트의 요청 없이 서버가 클라이언트에게 데이터를 전송하는 기술
- 이전에는 ajax 를 이용한 풀링으로 구현
- EventSource 라는 객체를 통해서 구현 가능
- 클라이언트가 서버에게 데이터를 보낼 수는 없음
- 이와 유사한 통신 방식이 APNS(Apple Push Notification), FCM(Firebase Cloud Messaging) 이다
node 의 Web Socket 모듈
- Websocket 모듈
- ws 모듈
- Socket.IO 모듈
- IE 하위 버전에는 web socket 지원이 불가
- ajax polling 으로 IE 하위 버전에 web socket 을 사용하는 효과를 만들어 줌
웹 소켓 모듈 활용
- VS Code 에서 노드 프로젝트로 사용할 디렉토리를 생성
- 터미널에서 디렉토리로 프롬프트를 옮기고
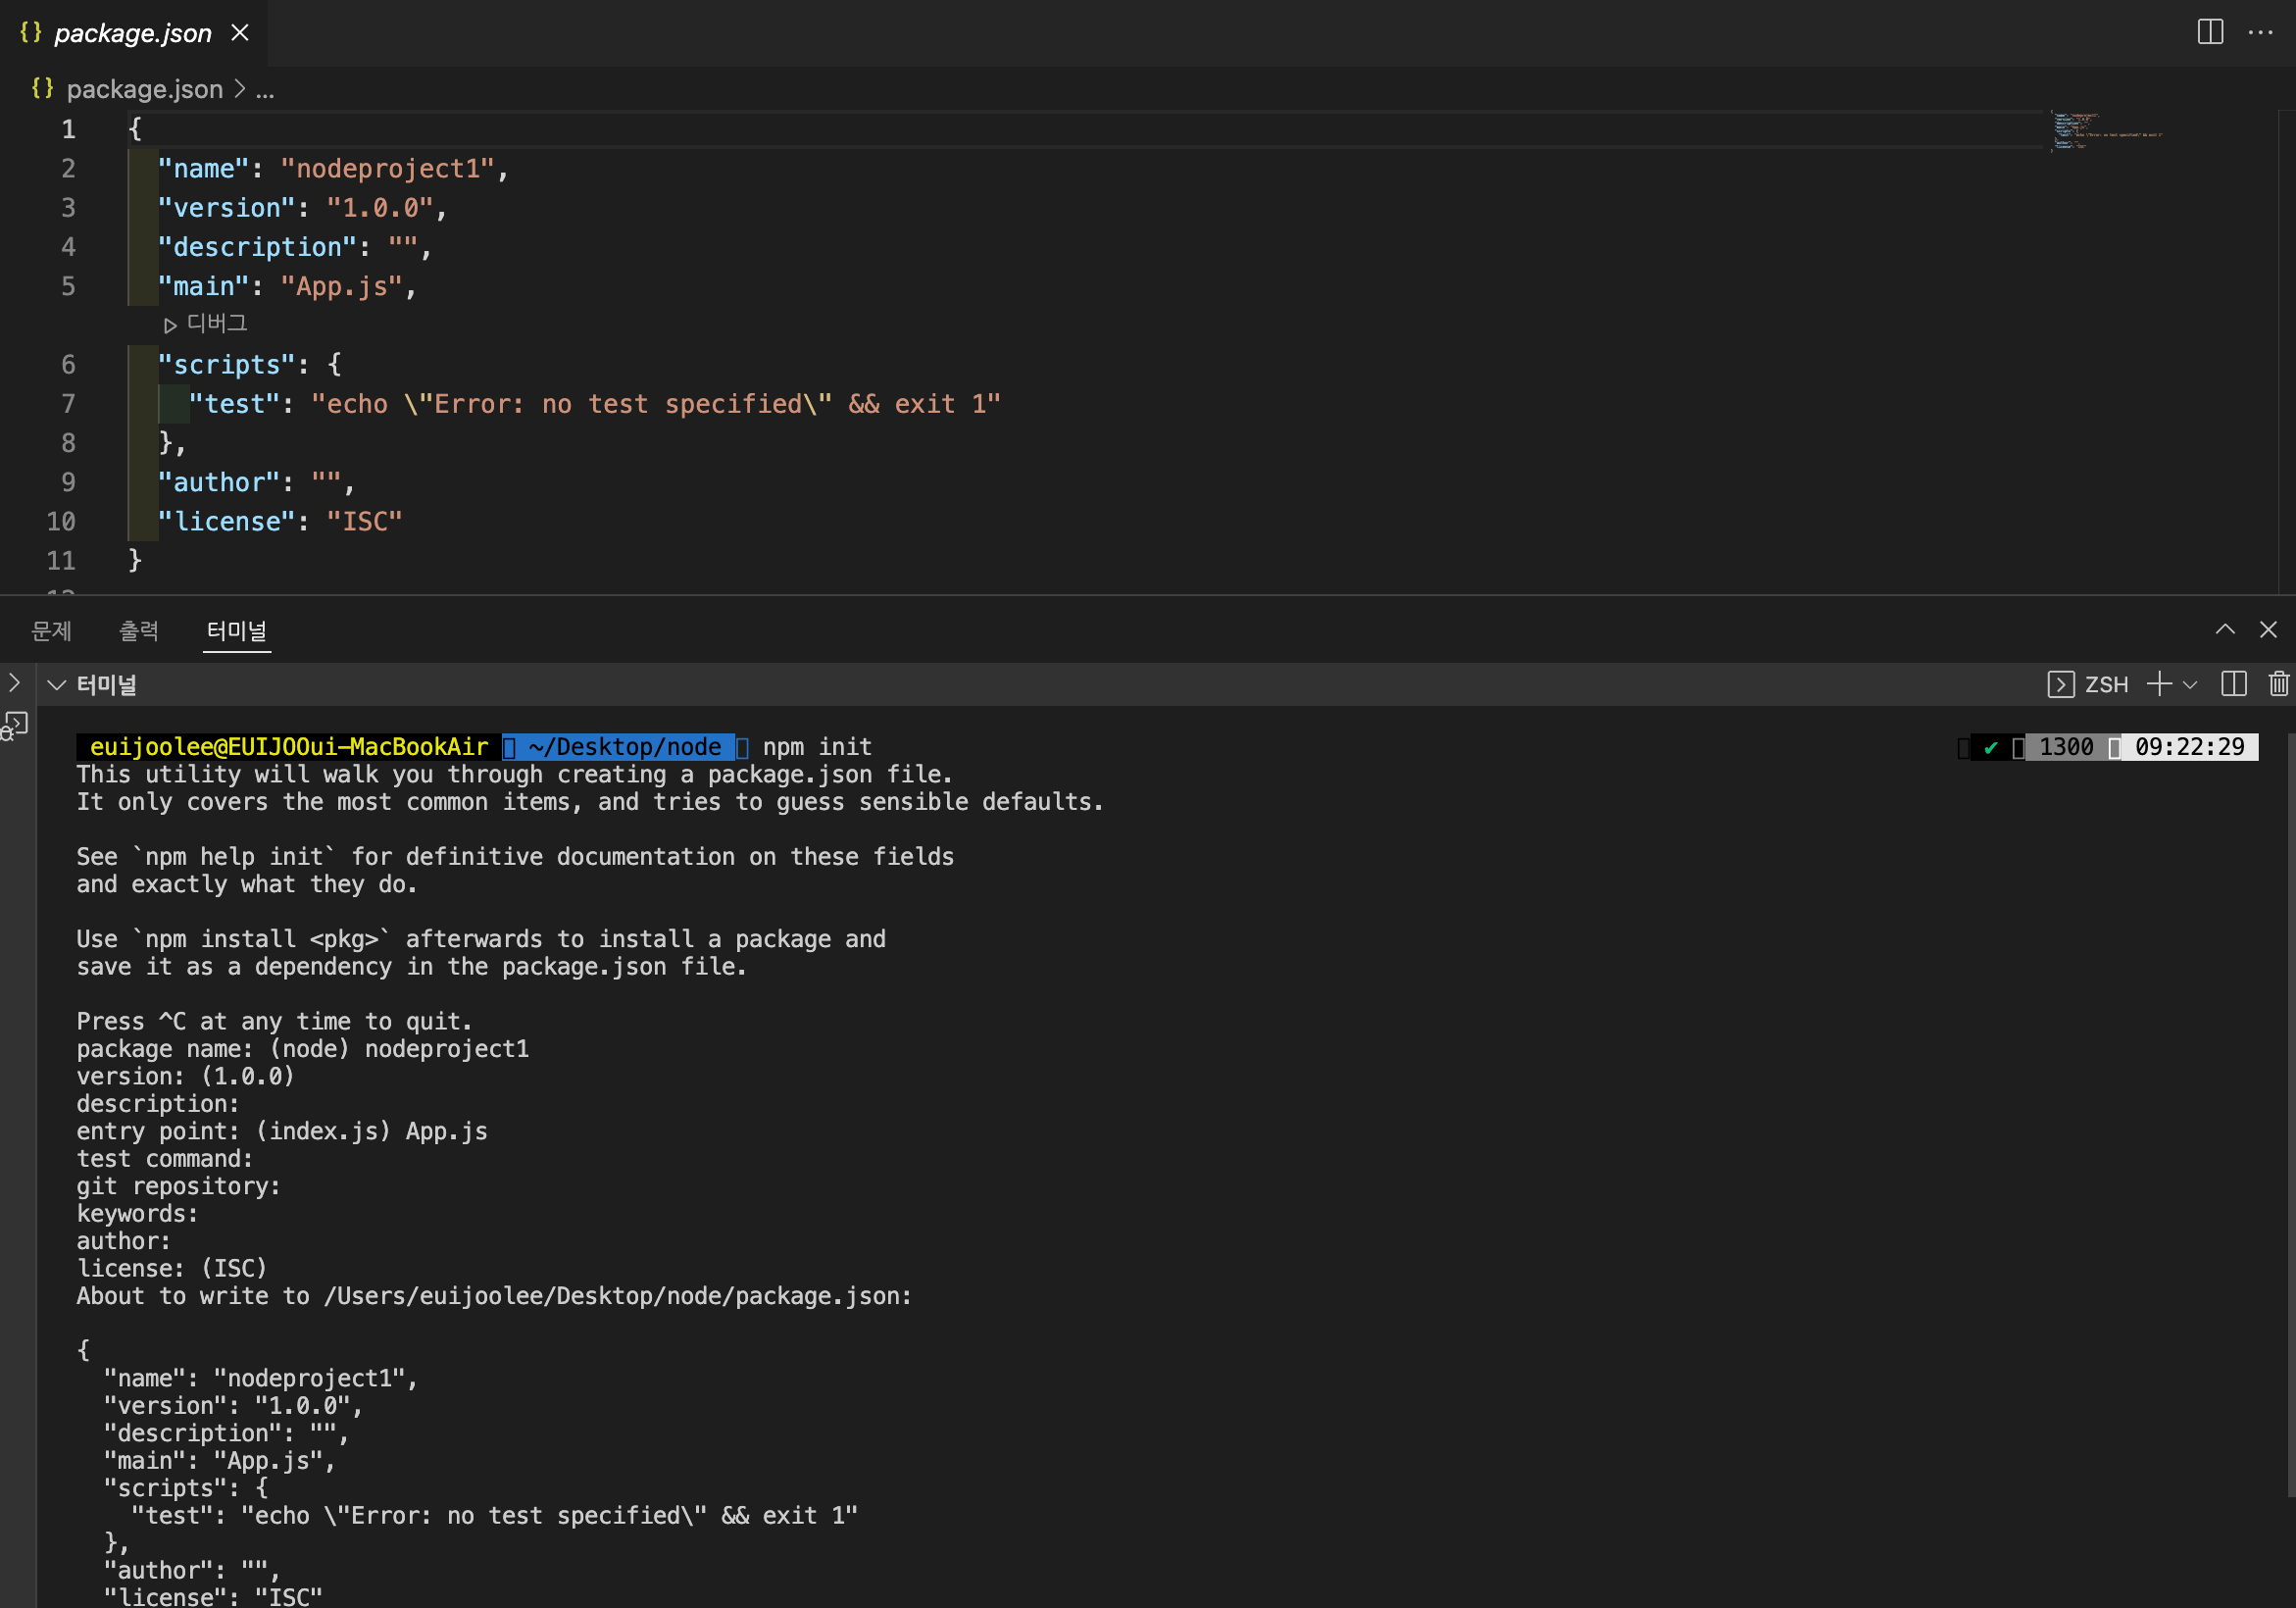
$ npm init명령어 실행하고 옵션을 설정
-
node runtime 프로젝트를 다른 곳으로 가져갈 때 node_module(의존성 라이브러리가 설치되는 디렉토리임)를 삭제하고 가져 간 후 디렉토리를 가져온 다음
npn install명령만 다시 수행하면 이전 프로젝트 와 동일한 환경이 만들어진다.- git 에 올릴 경우 ignore 파일에 node_module 을 넣어주면 된다.
-
패키지를 설치
$ npm install cookie-parser dotenv express express-session morgan nunjucks ws websocket
$ npm install --save-dev nodemon
-
--save-dev nodemon 패키지
-
서버 개발을 할 때 소스코드를 변경하면 바로 적용이 되도록 설정해두기 위한 패키지
- 개발을 할 때는 이렇게 사용하지만 운용을 할 때는 이 모드는 사용하지 않는다
-
{
  "name": "nodeproject1",
  "version": "1.0.0",
  "description": "",
  "main": "App.js",
  "scripts": {
    "test": "echo \"Error: no test specified\" && exit 1"
  },
  "author": "",
  "license": "ISC",
  "dependencies": {
    "cookie-parser": "^1.4.6",
    "dotenv": "^16.0.3",
    "express": "^4.18.2",
    "express-session": "^1.17.3",
    "morgan": "^1.10.0",
    "nunjucks": "^3.2.3",
    "websocket": "^1.0.34",
    "ws": "^8.12.1"
  },
  "devDependencies": {
    "nodemon": "^2.0.20"
  }
}
pakage알아둬야 할 것
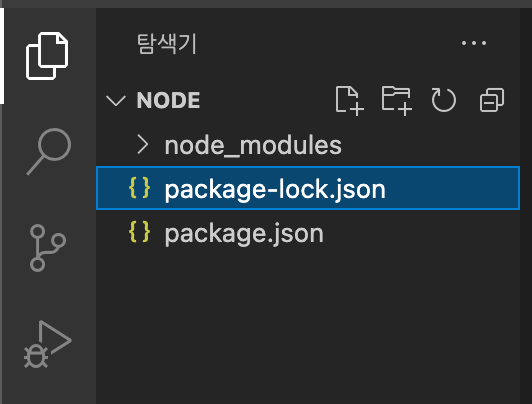
- package.json : node run-time 프로젝트의 설정 파일
- package-lock.json : 의존성 라이브러리 세부 목록까지 나오는 설정 파일
- 없어도 프로젝트 실행에는 문제가 되지 않음
- 프로젝트 실행 간편화를 위해 약간의 설정 수정 pakage.json
"scripts":{}안에"start":"nodemon app추가"main": "App.js"수정
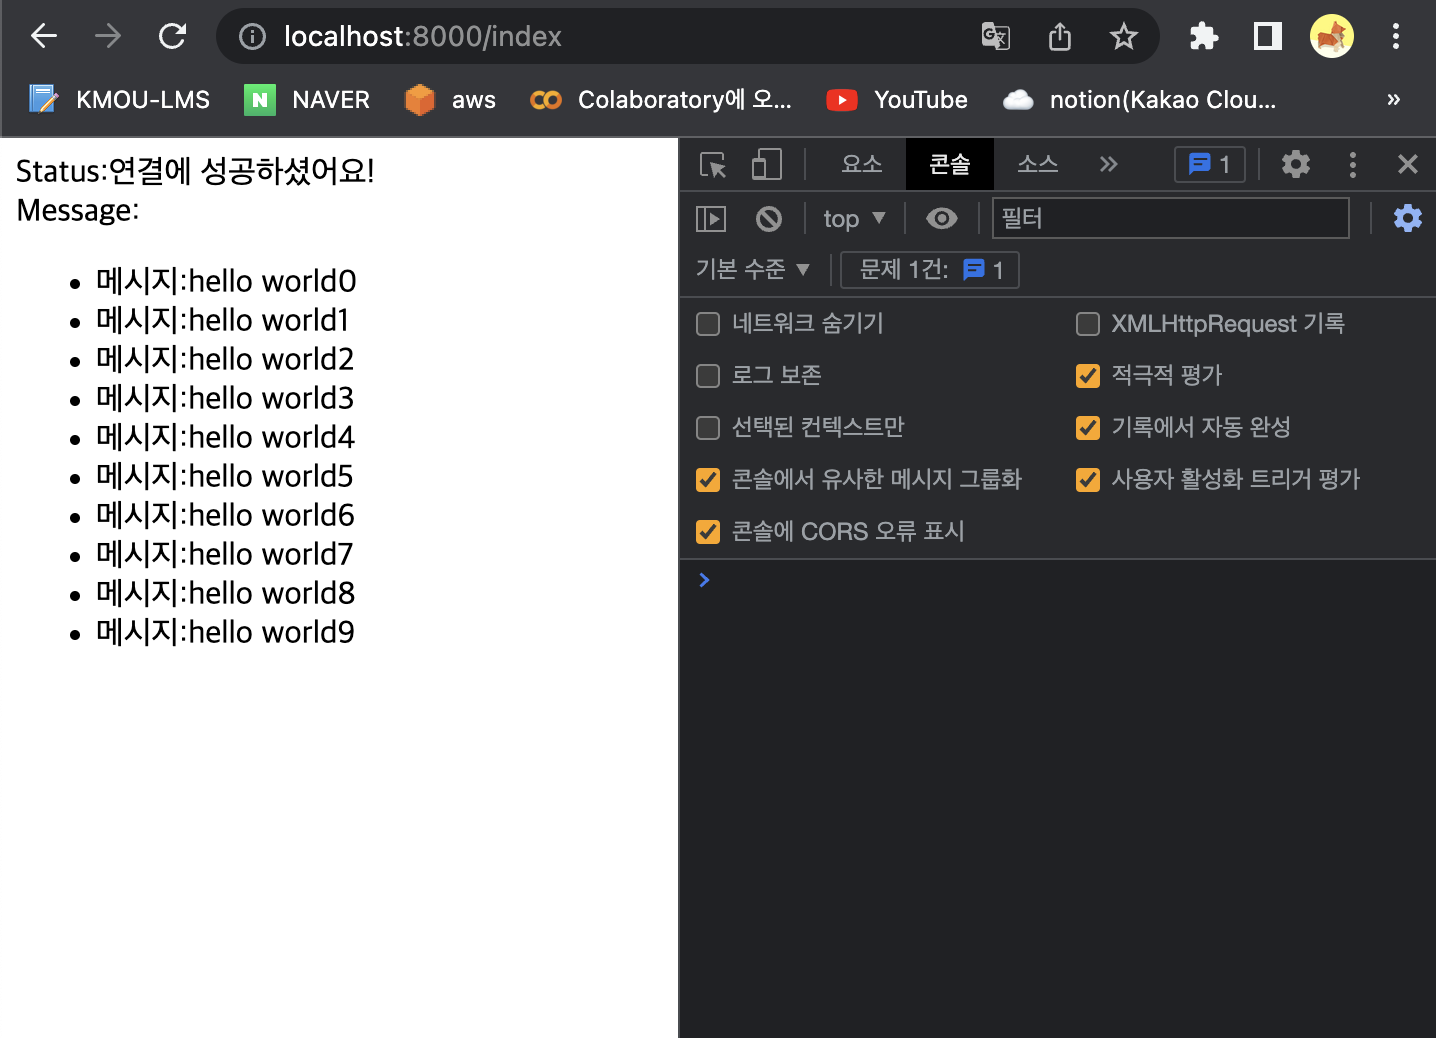
- 루트 디렉토리에 메인 화면이 될 index.html 파일 추가
<!DOCTYPE html>
<html lang="en">
<head>
    <meta charset="UTF-8">
    <meta http-equiv="X-UA-Compatible" content="IE=edge">
    <meta name="viewport" content="width=device-width, initial-scale=1.0">
    <title>Web Socket Example</title>
</head>
<body>
    Status:<span id = 'status'></span>
    <br/>
    Message:<ul id = 'messages'></ul>
</body>
<script>
    let status = document.getElementById('status');
    let messages = document.getElementById('messages');

    //웹 소켓 접속
    let ws = new WebSocket('ws://127.0.0.1:8000','example-echo');

    //웹 소켓에 접속 성공했을 때 처리
    ws.addEventListener('open', (e)=>{
        status.innerHTML = '연결에 성공하셨어요!';
        // 서버에게 메시지 전송
        for(let i=0; i<10; i=i+1){
            ws.send('hello world' + i);
        }
    })

    //웹 소켓 서버로부터 메시지가 온 경우
    ws.addEventListener('message', (e)=>{
        messages.innerHTML = messages.innerHTML + '<li>메시지:' + e.data + '</li>'
    });

    //웹 소켓 연결해제
    ws.addEventListener('close',(e)=>{
        status.innerHTML = '접속해제 완료';
        //직접 연결 해제 - ws.close();
    })
</script>
</html>
❗️네트워크 프로그래밍을 할 때 접속 해제는 매우 중요❗️
소켓 프로그래밍이나 세션을 사용하는 경우 연결 관리는 중요
-
backlog를 이용해서 서버에 접속할 수 있는 클라이언트의 숫자를 설정하는데 토큰을 주고 받는 방식으로 동작
-
backlog를 10으로 설정하면 클라이언트에게 접속할 수 있는 토큰 10을 발급하는 것과 유사한데 클라이언트가 접속을 해제한다고 알려주지 않으면 토큰의 개수는 복원되지 않는다
-
클라이언트 프로그램을 만들 때 예상치 않는 상황으로 종료되는 경우 세션을 파기하거나 연결을 해제하는 코드를 만들어 주는 것이 좋다
- Entry Point 로 사용할 App.js 파일 생성
//웹 소켓 서버를 위한 모듈
let WebSocketServer = require('websocket').server;
//http 웹 서버를 위한 모듈
let http = require('http');
//파일을 읽고 쓰기 위한 모듈
let fs = require('fs');
//서버 설정
let server = http.createServer(function(req, res){
if(req.url === '/'){
res.writeHead(200,{'Content-Type': 'text/html'});
res.end('Web Socket');
}else if(req.url === '/index'){
fs.readFile('index.html', function(error, data){
res.writeHead(200, {'Content-Type':'text/html; charset=utf-8'});
res.end(data);
})
}
});
//서버 구동
server.listen(8000, function(){
console.log('Server is Listen on Port 8000');
})
//소켓 서버 생성
let wsServer = new WebSocketServer({
httpServer:server,
autoAcceptConnections:false
});
wsServer.on('request', function(request){
//서버이름과 동일한 요청만 연결
let connection = request.accept('example-echo',request.origin);
//연결된 소켓과 이벤트 처리
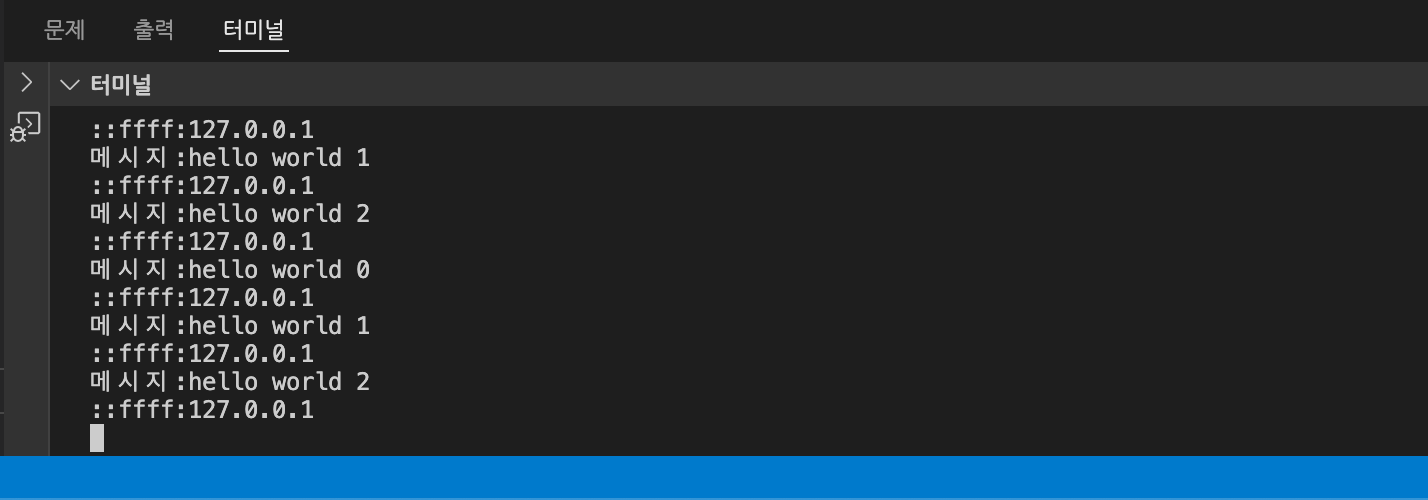
connection.on('message', function(message){
if(message.type ==='utf8'){
console.log('메시지:' + message.utf8Data);
//echo : 클라이언트가 보낸 메시지를 그대로 다시 전송
connection.sendUTF(message.utf8Data);
//전송된 클라언트 IP 확인
console.log(connection.remoteAddress);
}else if(message.type === 'binary'){
connection.sendBytes(message.binaryData);
}
})
})-
실행 :
$ npm start -
브라우저에서 localhost:8000 으로 접속
- localhost:8000/index 페이지
express & ws 모듈을 이용한 웹 소켓 생성
🔎 Web Server Programming 에서의 Routing
-
클라이언트가 요청한 URL 에 따라 다른 처리를 수행하도록 하는 것
-
Routing 하는 부분을 Python 의 django 에서는 urls 와 views를 이용해서 처리하는데 그 이외의 프레임워크에서는 Controller 라고 하는 경우가 많다
node 런타임에서 index.js 의 역할
-
node 런타임에서는 디렉토리를 Import 하면 디렉토리 안의 index.js를 import 하는 것이다.
-
node 런타임에서 배포를 할 때는 배포하고자 하는 라이브러리나 컴포넌트를 하나의 디렉토리에 저장하고 index.js를 만들어서 배포
-
import React from 'react';리액트 디렉토리에 index.js 파일이 export default 한 내용을 React라는 이름으로 받아서 사용하겠다는 의미
- routes 디렉토리를 생성
- routes 디렉토리에 index.js 파일을 생성하고 작성
//웹 서버를 만들기 위한 node 의 모듈
const express = require('express');
const router = express.Router();

//기본 요청이 왔을 때 websocket.html 을 출력
router.get('/',(req,res)=>{
    res.render('websocket');
});

module.exports = router;- websocket을 위한 socket.js 파일을 생성하고 작성
const WebSocket = require('ws');
module.exports = (server) => {
//웹 소켓 서버 생성
const wss = new WebSocket.Server({
server
});
//이벤트 처리
wss.on('connection', (ws, req) => {
//클라이언트 IP 확인
const ip = req.headers['x-forwarded-for'] || req.socket.remoteAddress;
console.log('접속한 클라이언트:', ip);
//클라이언트가 서버에게 메시지를 전송한 경우
ws.on('message', (message) => {
console.log(message);
});
ws.on('close', ()=>{
console.log('클라이언트 접속 해제');
//타이머 해제
clearInterval(ws.interval);
});
//타이머를 이용해서 클라이언트에게 주기적으로 메시지 전송
ws.interval = setInterval(()=>{
if(ws.readyState === ws.OPEN){
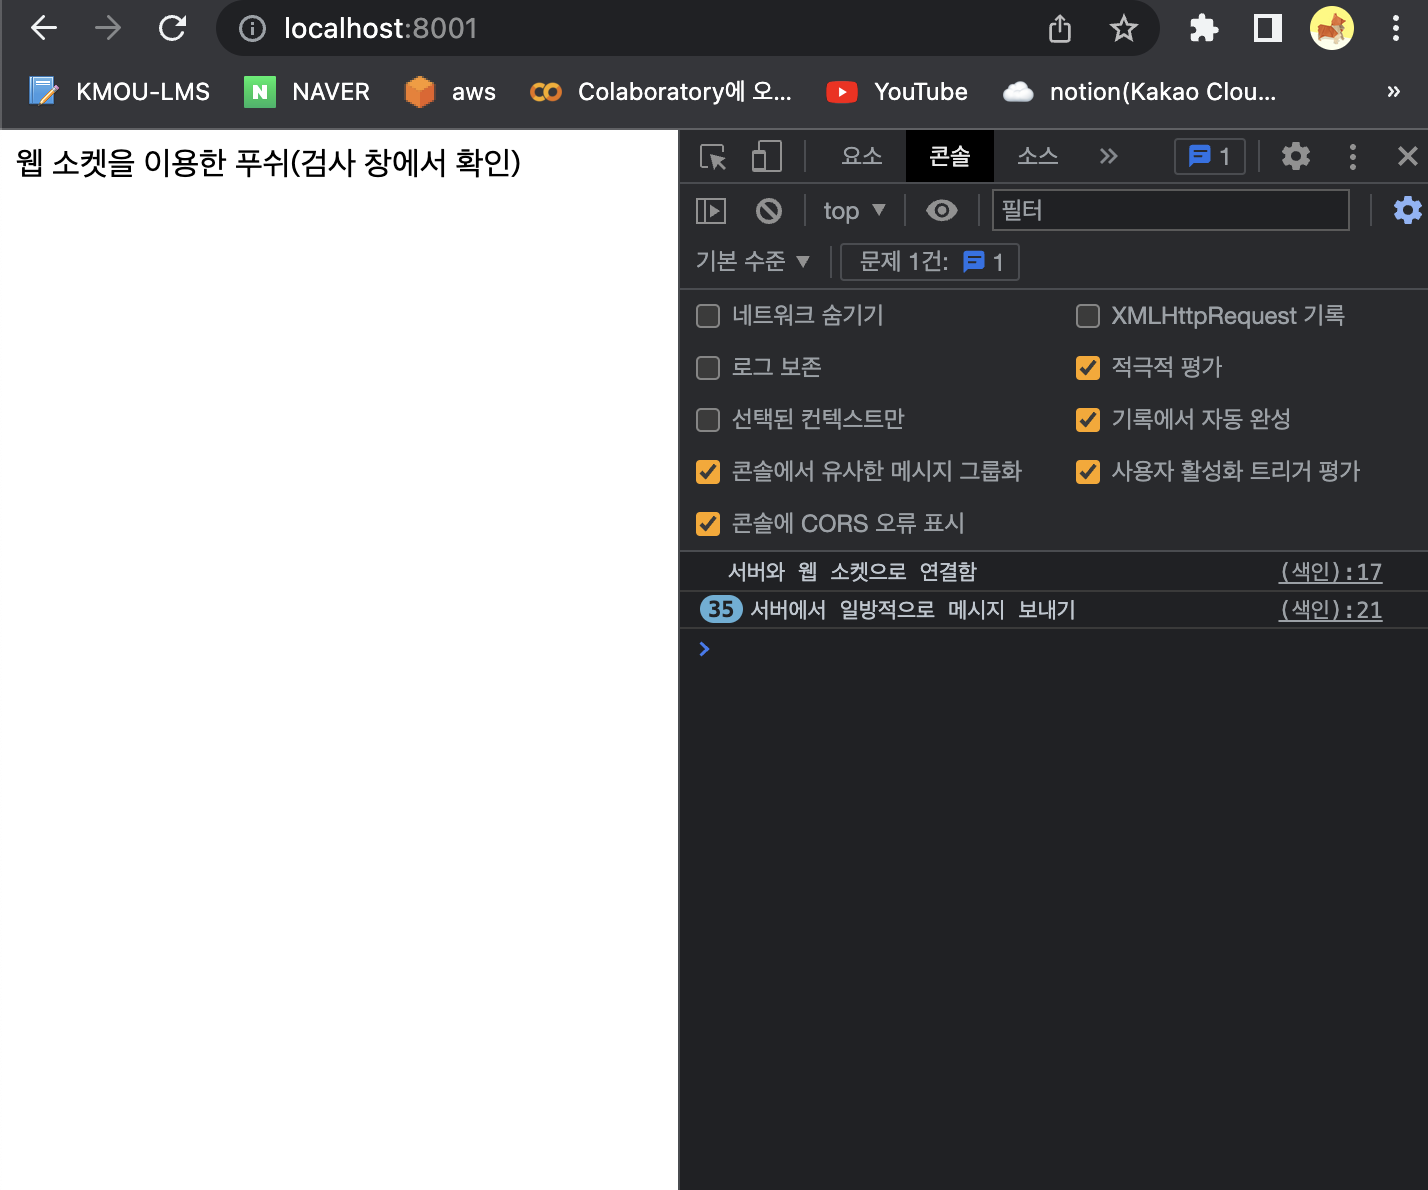
ws.send('서버에서 일방적으로 메시지 보내기');
}
}, 3000);
})
}- .env 파일을 만들고 작성 - node는 .env 파일을 자주 이용함
COOKIE_SECRET = websocket🔎 애플리케이션 소스 코드의 이해
-
애플리케이션이 실행되는 과정
- 소스코드 작성 : compile -> Build -> Run
-
개발에 필요한 내용을 만들다 보면 변하지 않는 고정된 문자열이 있는 경우가 있는데 이러한 문자열 가운데는 개발 모드에서 운용모드로 변경될 때 수정하는 경우가 있다.
- 데이터베이스 접속 정보나 키 값 등이 대표적으로 운용 모드로 이전할 때 수정해야하는 데이터이다.
-
소스 코드가 변경이 되면 Compile 을 다시해야하고 Build 역시 다시 해야하지만, 소스 코드 이외의 변경은 ReRun 만 하면 되는 경우가 많다
-
Compile 이나 Build를 다시하게 되면 얘기치 않은 오류가 발생할 수 있다
- App.js 수정
//웹서버 프레임 워크 추출
const express = require('express');

//경로 사용하기 위한 노드의 기본 모듈
const path = require('path');

//로그 기록을 위한 모듈
const morgan = require('morgan');

//서버에서 클라이언트 출력을 만들 때 상태 유지를 위한 모듈
const cookieparser = require('cookie-parser');
const session = require('express-session');

//노드의 템플릿 엔진(서버에서 만든 데이터를 HTML 에 출력하기 위한 엔진
//- 서버사이드 렌더링에 필요) 중 하나
const nunjucks = require('nunjucks');

//.env 파일의 설정 내용을 읽어내기 위한 모듈
const dotenv = require('dotenv');

dotenv.config();
const webSocket = require('./socket');
const indexRouter = require('./routes');

//웹서버 생성
const app = express();
app.set('port', process.env.PORT || 8001);

//템플릿 엔진 설정
app.set('view engine','html');
nunjucks.configure('views',{
    express:app,
    watch:true
})

//미들웨어 설정
app.use(morgan('dev'));
app.use(express.static(path.join(__dirname,'public')));
app.use(express.json);
app.use(express.urlencoded({extended:false}));
app.use(cookieparser(process.env.COOKIE_SECRET));
🔎 웹 프로그래밍에서의 middleware
-
클라이언트의 요청을 Controller 가 처리하기 전이나 처리한 후에 동작을 수행하는 것
-
middleware가 없어도 Controller 에서 모든 처리를 할 수 있다.
-
가장 많이 사용되는 미들웨어는 로그 기록 하는 부분과 인증
-
데이터 유효성 검사도 미들웨어의 대상이 된다.
-
AoP(Aspect of Programming - 관점 지향 프로그래밍)
-
프로그래밍 구성을 Common Concern(공통 관심 사항)과 Bussiness Logic(업무 관련 로직) 으로 분리를 하고 별도로 작성하는 프로그래밍 기법
-
공통 관심 사항은 도메인 지식이 없어도 작성이 가능한 부분이고 Bussiness Logic 은 도메인 지식이 없으면 작성이 불가능한 부분
-
-
CQRS
- 데이터 저장소에 대한 읽기 및 업데이트 작업을 구분하는 패턴
- 명령 과 쿼리의 분리
- select 구문 과 그 이외의 구문에서 동일한 데이터 모델을 사용해 발생하는 문제를 해결하기 위한 패턴
-
데이터를 구분
- Mutable(변경 가능) 과 Immutable(변경 불가능) 그리고 Scala 와 Vector
-
- 프로젝트에 views 디렉토리를 추가하고 websocket.html 파일을 생성
<!DOCTYPE html>
<html lang="en">
<head>
    <meta charset="UTF-8">
    <meta http-equiv="X-UA-Compatible" content="IE=edge">
    <meta name="viewport" content="width=device-width, initial-scale=1.0">
    <title>Document</title>
</head>
<body>
    웹 소켓을 이용한 푸쉬(검사 창에서 확인)
</body>
<script>
    //웹 소켓 연결
    const webSocket = new WebSocket('ws://localhost:8001');
    //연결된 경우 이벤트 처리
    webSocket.addEventListener('open', ()=>{
        console.log('서버와 웹 소켓으로 연결함');
    });
    //서버로부터 메시지가 도착한 경우
    webSocket.addEventListener('message', (event) =>{
        console.log(event.data);
    })
</script>
</html>- 8001 번으로 접속 - 3초(3000ms)마다 메시지가 찍힘
Socket.IO 패키지
- Express Server 와 연동 가능한 웹 소켓 모듈
- 이벤트를 직접 만들어서 전송하는 것이 가능
- emit 메서드를 이용해서 이벤트 이름 과 메시지를 별도로 전송 가능
⚡️ 순서
- 이전 프로젝트를 수정
-
socket.io 설치
$ npm install socket.io -
socket.js 를 수정
const SocketIO = require('socket.io');

module.exports = (server) => {
    const io = SocketIO(server, {path:'./socket.io'});
    io.on('connection', (socket)=> {
        const req = socket.request;
        const ip = req.headers['x-fowarded-for'] || req.connection.remoteAddress;
        console.log('접속한 클라이언트의 IP:' + ip);

        socket.on('disconnect', ()=>{
            clearInterval(socket.interval);
        });
        //클라이언트에서 응답이 왔을 때
        socket.toString('reply', (data)=>{
            console.log(data);
        });

        let ar = ['일','이','삼','사','오'];
        let i =0;
        socket.interval = setInterval(()=>{
            i = i +1;
            socket.emit('news', ar[i % ar.length]);
        }, 3000)
    })
}- websocket.html 파일을 수정 - news로 바뀜
<!DOCTYPE html>
<html lang="en">
<head>
    <meta charset="UTF-8">
    <meta http-equiv="X-UA-Compatible" content="IE=edge">
    <meta name="viewport" content="width=device-width, initial-scale=1.0">
    <title>push using websocket</title>
    <div id="content"></div>
</head>
<body>
    웹 소켓을 이용한 푸쉬(검사 창에서 확인)
</body>
<script src = '/socket.io/socket.io.js'></script>
<script>
    //웹 소켓 연결
    const socket = io.connect('http://localhost:8001',{
        path:'/socket.io',
        transports:['websocket'],
    });

    socket.on('news', function(data){
        document.getElementById('content').innerHTML = data;
        console.log(data);
    })
</script>
</html>- 채팅 구현
- 한명의 클라이언트가 전송한 데이터를 모든 클라이언트에게 동일한 메시지를 전송
- UI는 jquery mobile(SPA 형태로 동작하는 라이브러리 - 컴포넌트 기반이 아님)을 이용해서 구현
- socket.js 파일에 message 이벤트 처리 코드를 추가
socket.on('message', function(data){
            io.sockets.emit('message', data);
})- websocket.html 파일을 수정
<!DOCTYPE html>
<html lang="en">
<head>
<meta charset="UTF-8">
<meta http-equiv="X-UA-Compatible" content="IE=edge">
<meta name="viewport" content="width=device-width, initial-scale=1.0">
<title>web Chatting</title>
<link rel = "stylesheet" href="http://code.jquery.com/mobile/1.2.0/jquery.mobile-1.2.0.min.css"/>
<script src="http://code.jquery.com/jquery-1.8.2.min.js"></script>
<script src="http://code.jquery.com/mobile/1.2.0/jquery.mobile-1.2.0.min.js">
</script>
<script src = '/socket.io/socket.io.js'></script>
<div id="content"></div>
</head>
<body>
<div data-role = "page">
<div data-role = "header">
<h1>Web Socket Chatting</h1>
</div>
<div data-role="content">
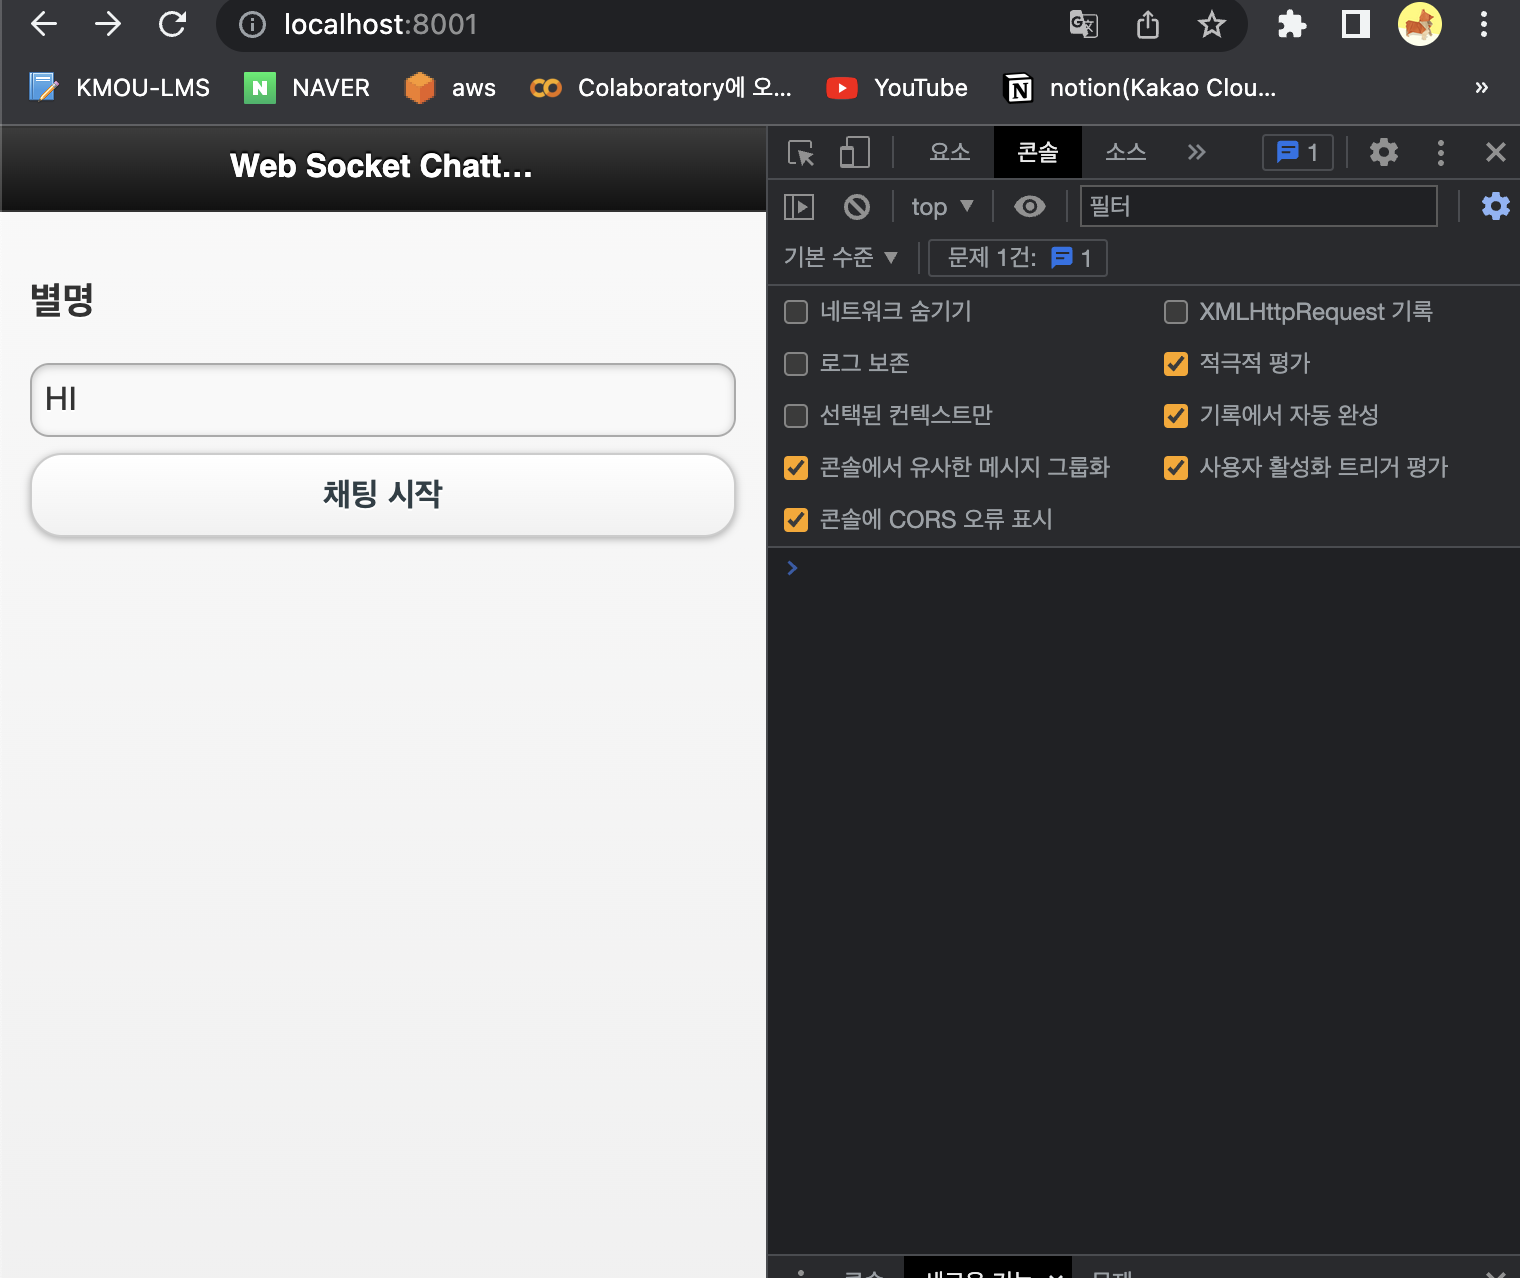
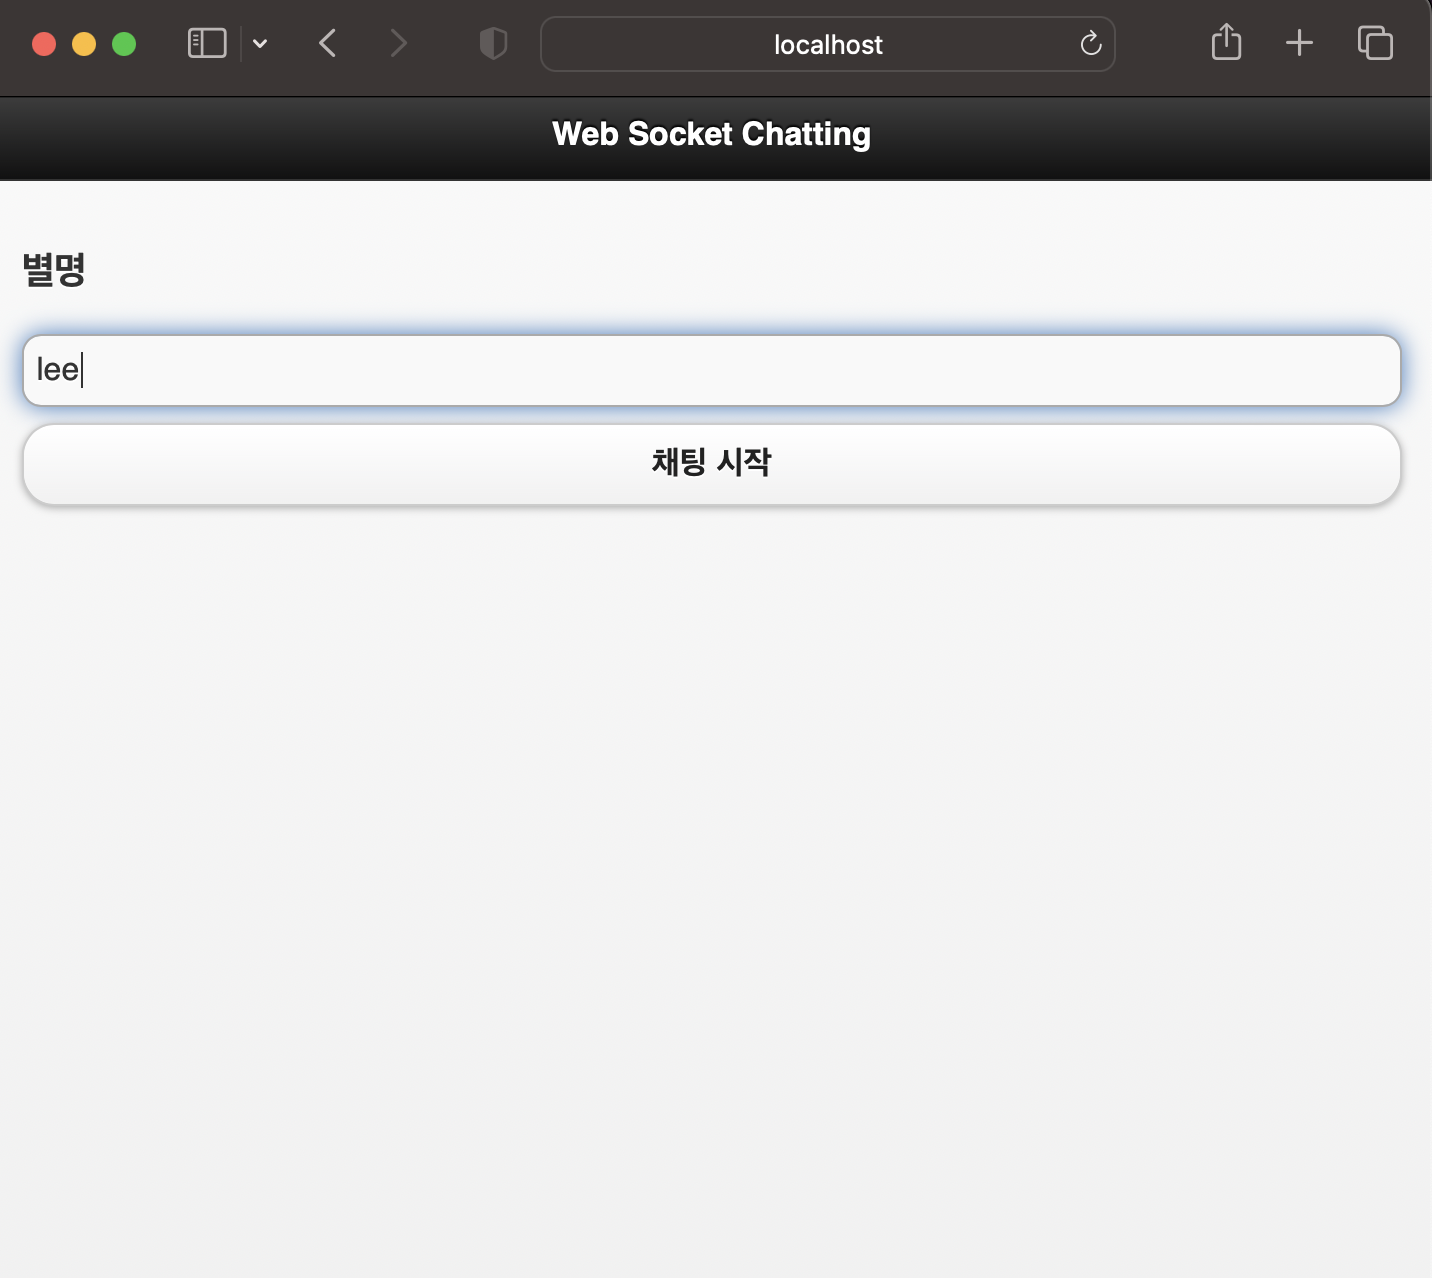
<h3>별명</h3>
<input id = "name"/>
<a data-role="button" href="#chatpage">
채팅 시작
</a>
</div>
</div>
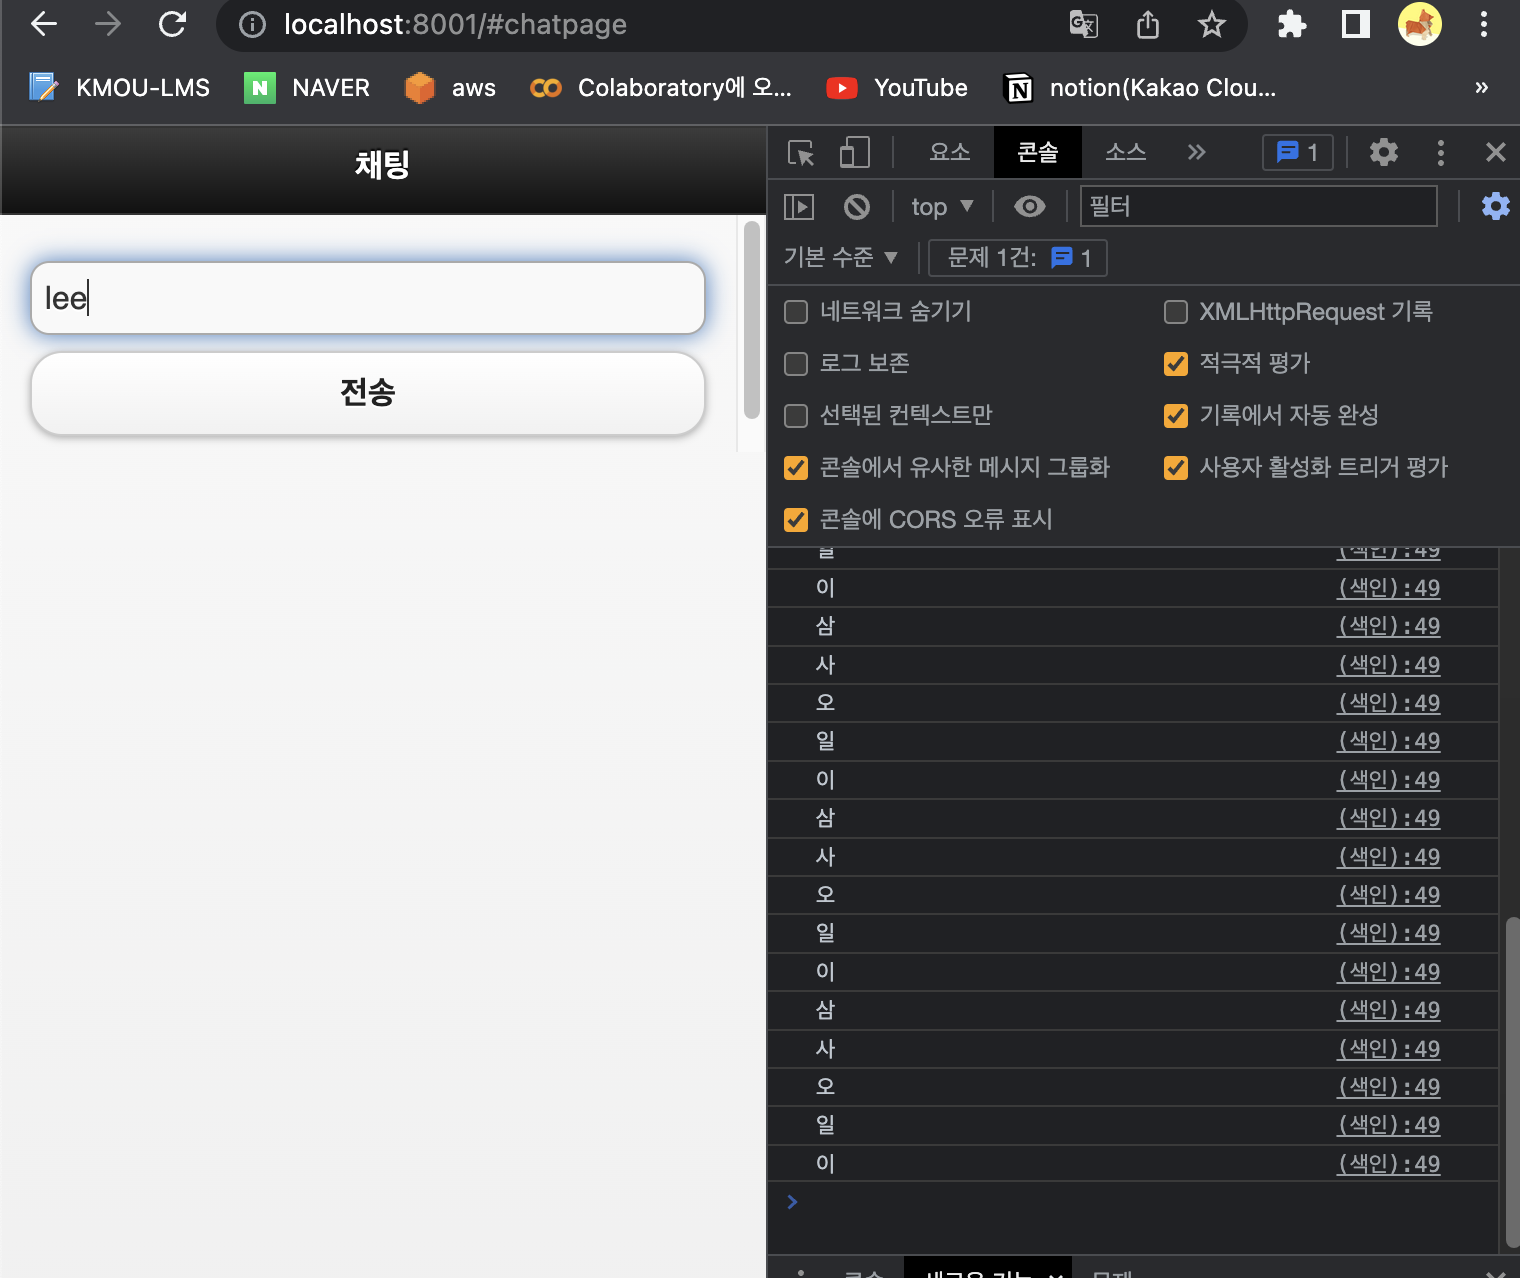
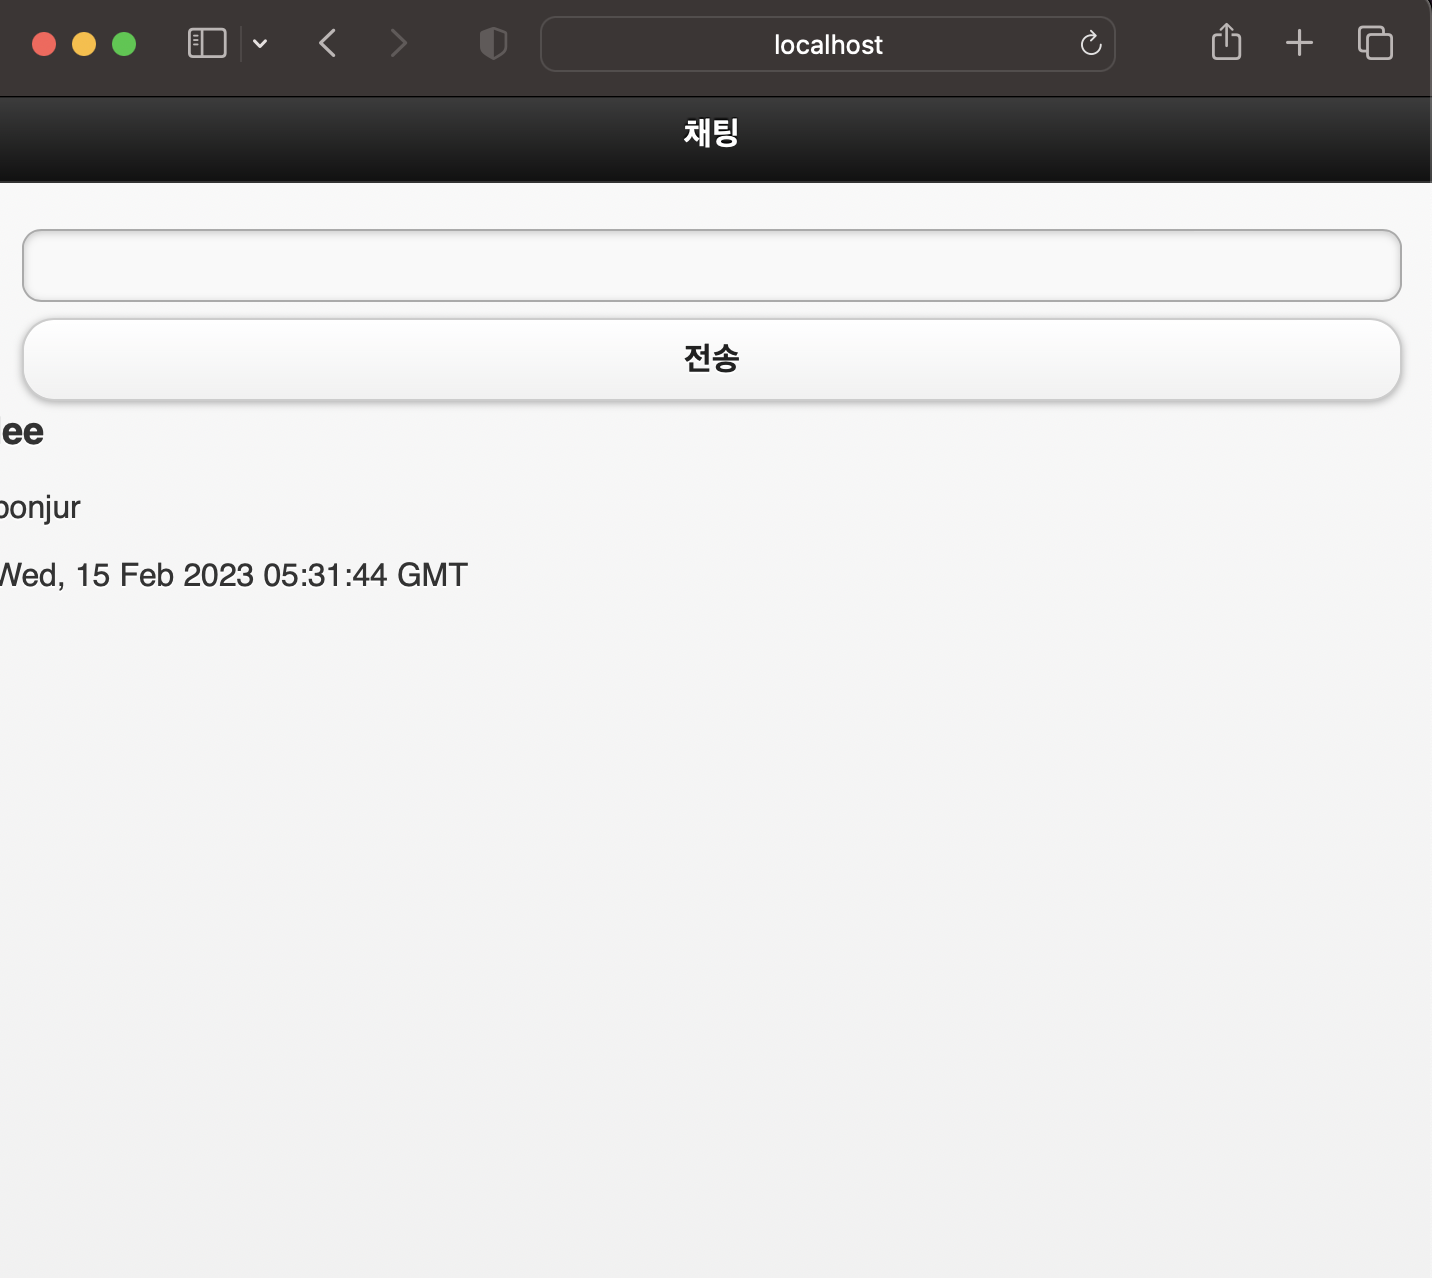
<div data-role="page" id = "chatpage">
<div data-role="header">
<h1>채팅</h1>
</div>
<div data-role="content">
<input id = "message"/>
<button>전송</button>
<ul id = "content" data-role="listview" data-insert="true"></ul>
</div>
</div>
</body>
<script>
//웹 소켓 연결
const socket = io.connect('http://localhost:8001',{
path:'/socket.io',
transports:['websocket'],
});
socket.on('news', function(data){
document.getElementById('content').innerHTML = data;
console.log(data);
})
</script>
</html>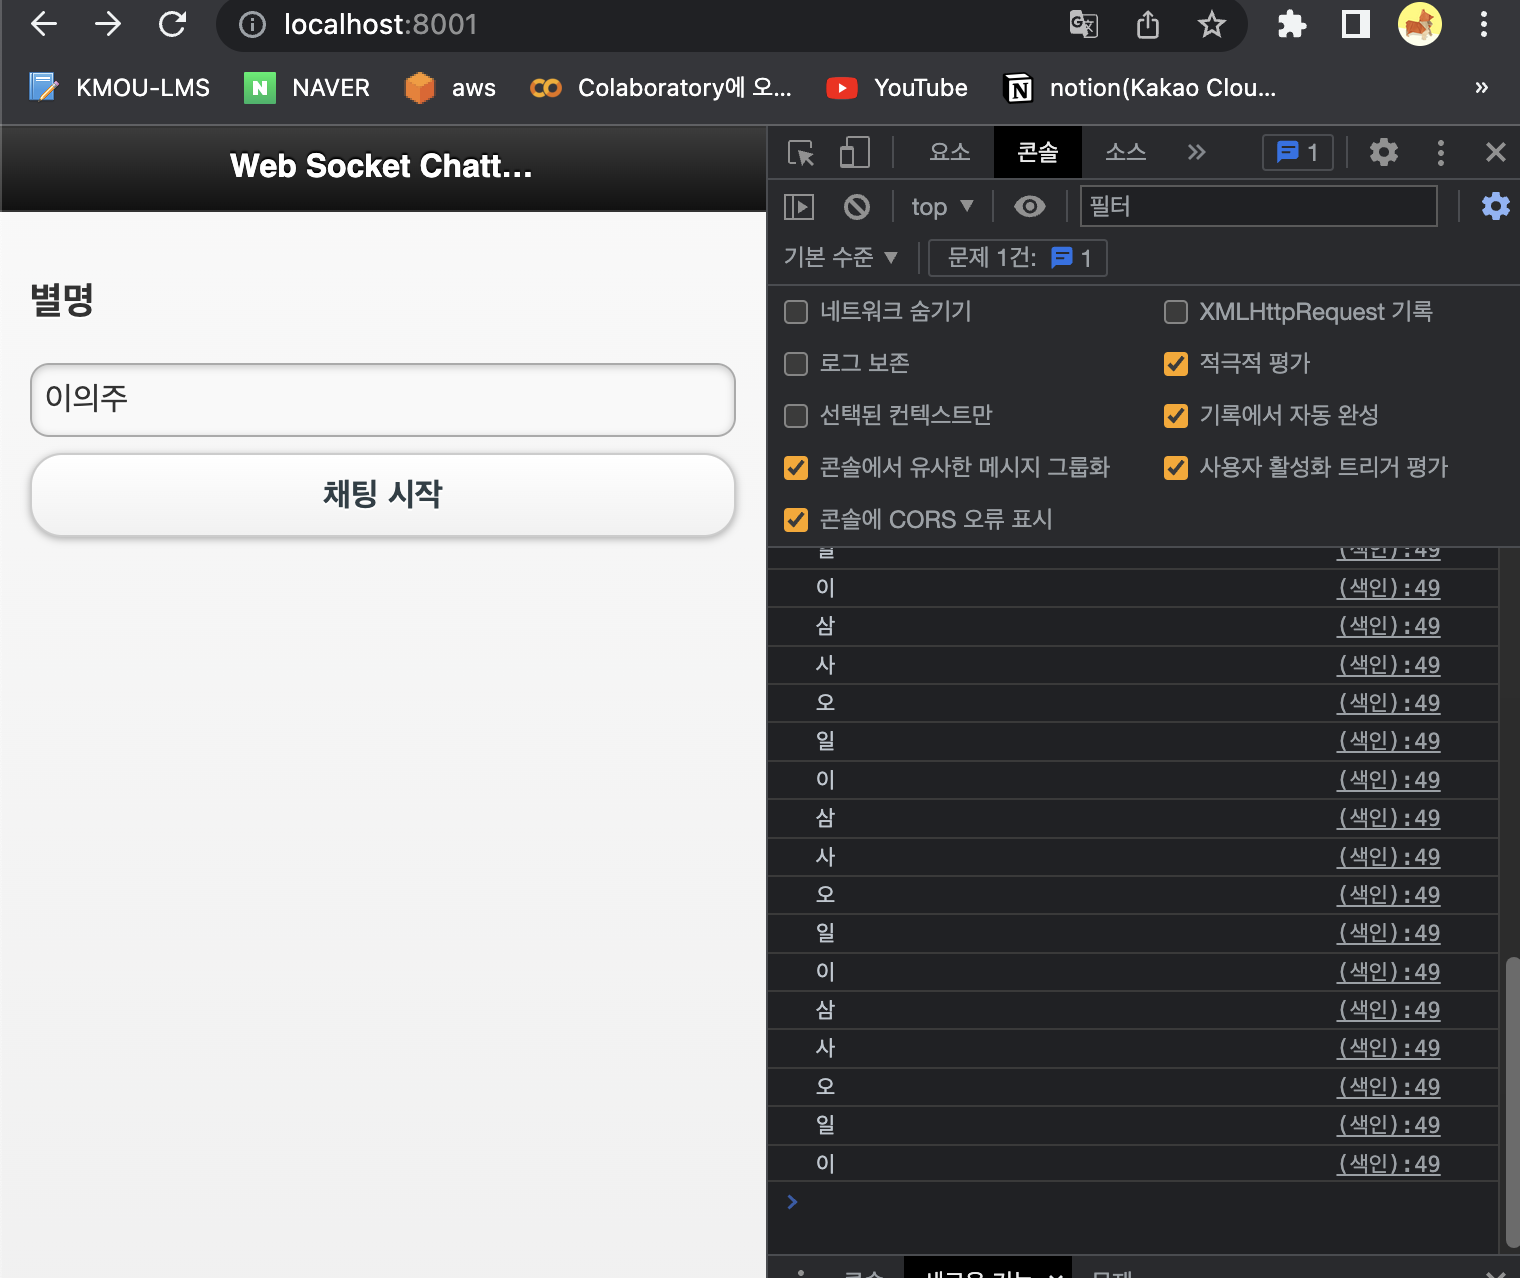
- websocket.html 파일 다시 수정
<!DOCTYPE html>
<html lang="en">
<head>
    <meta charset="UTF-8">
    <meta http-equiv="X-UA-Compatible" content="IE=edge">
    <meta name="viewport" content="width=device-width, initial-scale=1.0">
    <title>web Chatting</title>
    <link rel = "stylesheet" href="http://code.jquery.com/mobile/1.2.0/jquery.mobile-1.2.0.min.css"/>
    <script src="http://code.jquery.com/jquery-1.8.2.min.js"></script>
    <script src="http://code.jquery.com/mobile/1.2.0/jquery.mobile-1.2.0.min.js">
    </script>
    <script src = '/socket.io/socket.io.js'></script>

</head>
<body>
    <div data-role = "page">
        <div data-role = "header">
            <h1>Web Socket Chatting</h1>
        </div>
        <div data-role="content">
            <h3>별명</h3>
            <input id = "name"/>
            <a data-role="button" href="#chatpage">
                채팅 시작
            </a>
        </div>
    </div>
    <div data-role="page" id = "chatpage">
        <div data-role="header">
            <h1>채팅</h1>
        </div>
        <div data-role="content">
            <input id = "message"/>
            <button>전송</button>
            <ul id = "content" data-role="listview" data-insert="true"></ul>
        </div>
    </div>
</body>

<script>
    window.addEventListener('load', () =>{
        let socket = io.connect('http://localhost:8001');
        //소켓에 message 이벤트가 발생했을 때
        socket.on('message', function(data){
            //출력 내용 만들기
            let output = '';
            output = output + '<li>';
            output = output + '<h3>' + data.name + '</h3>';
            output = output + '<p>' + data.message + '</p>';
            output = output + '<p>' + data.date + '</p>';
            output = output + '</li>';

            let content = document.getElementById('content');
            content.innerHTML = output + content.innerHTML;


        });
        //버튼을 누를 때 입력한 내용을 전송
        $('button').click(function(){
            socket.emit('message', {
                name:$('#name').val(),
                message:$('#message').val(),
                date: new Date().toUTCString()
            });
            $('#message').val('');
        })
    })
</script>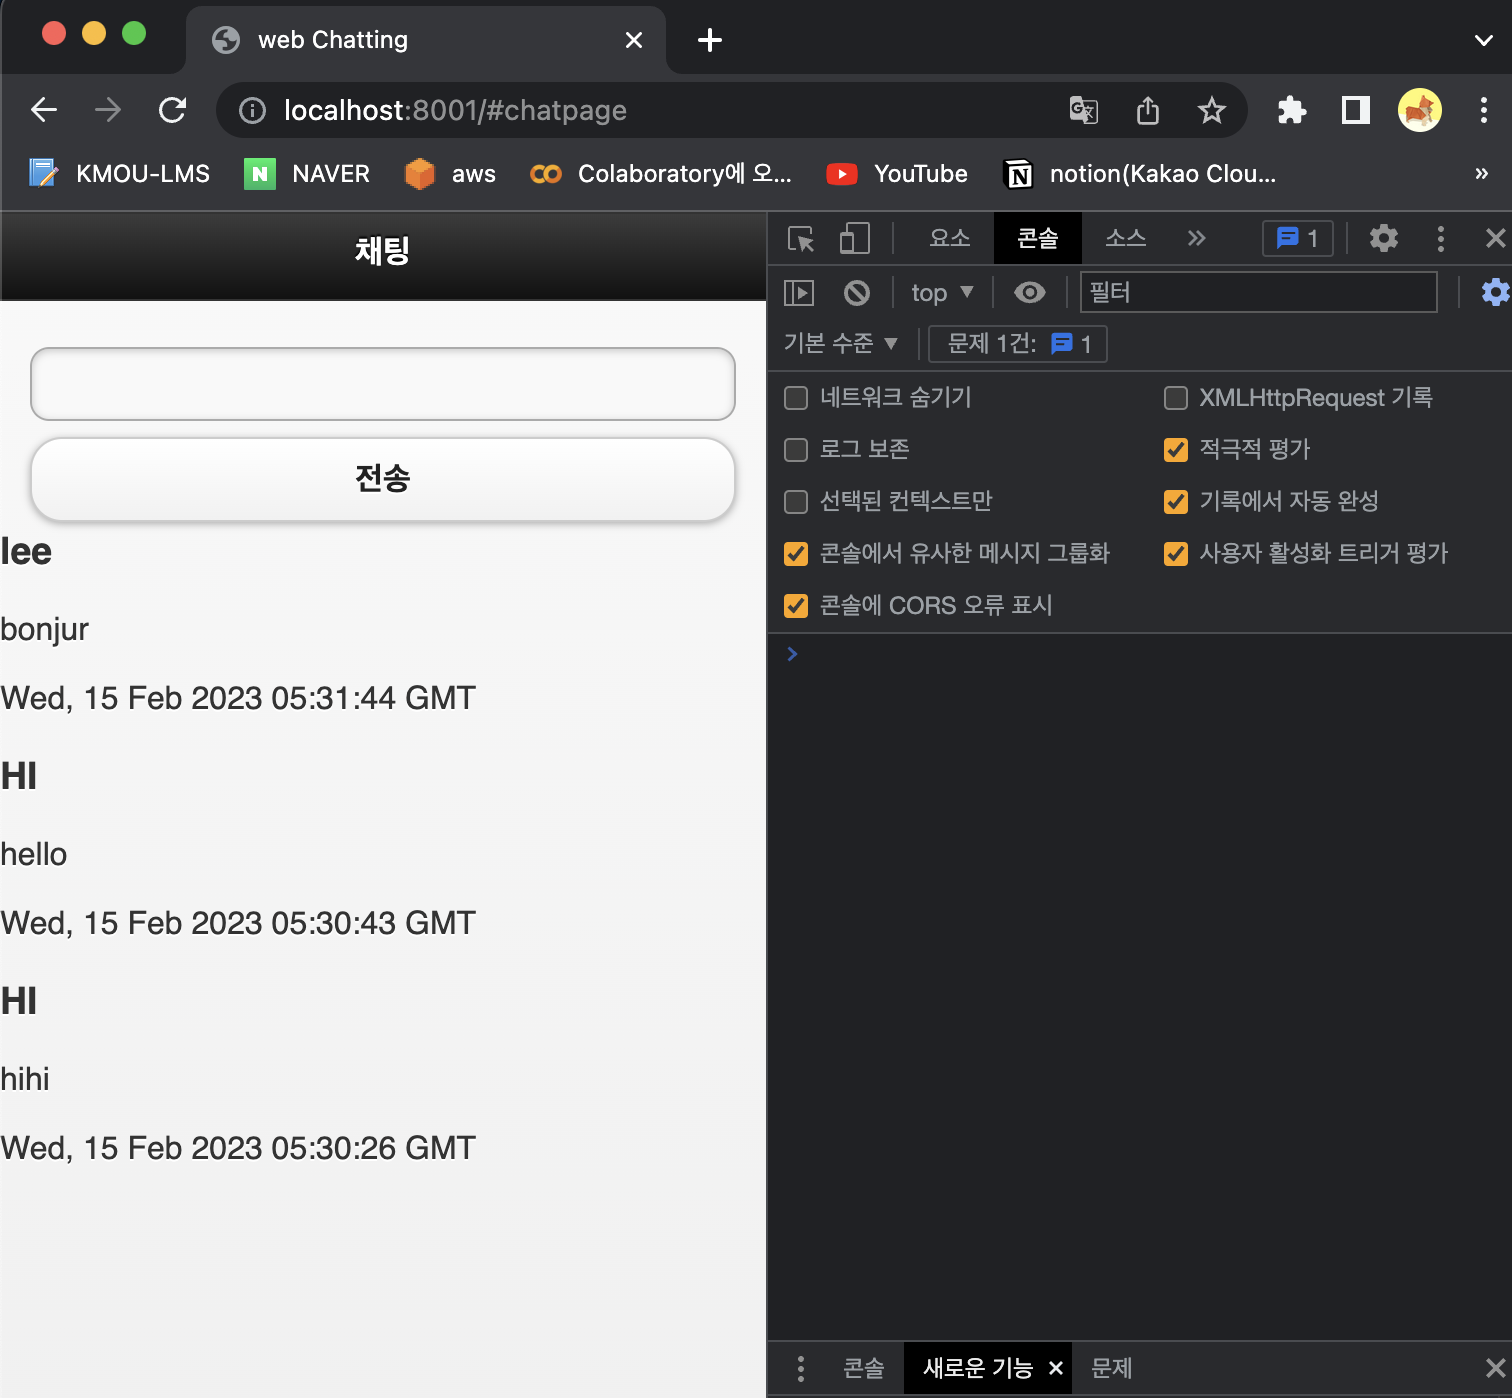
</html>- 접속창으로 채팅 확인
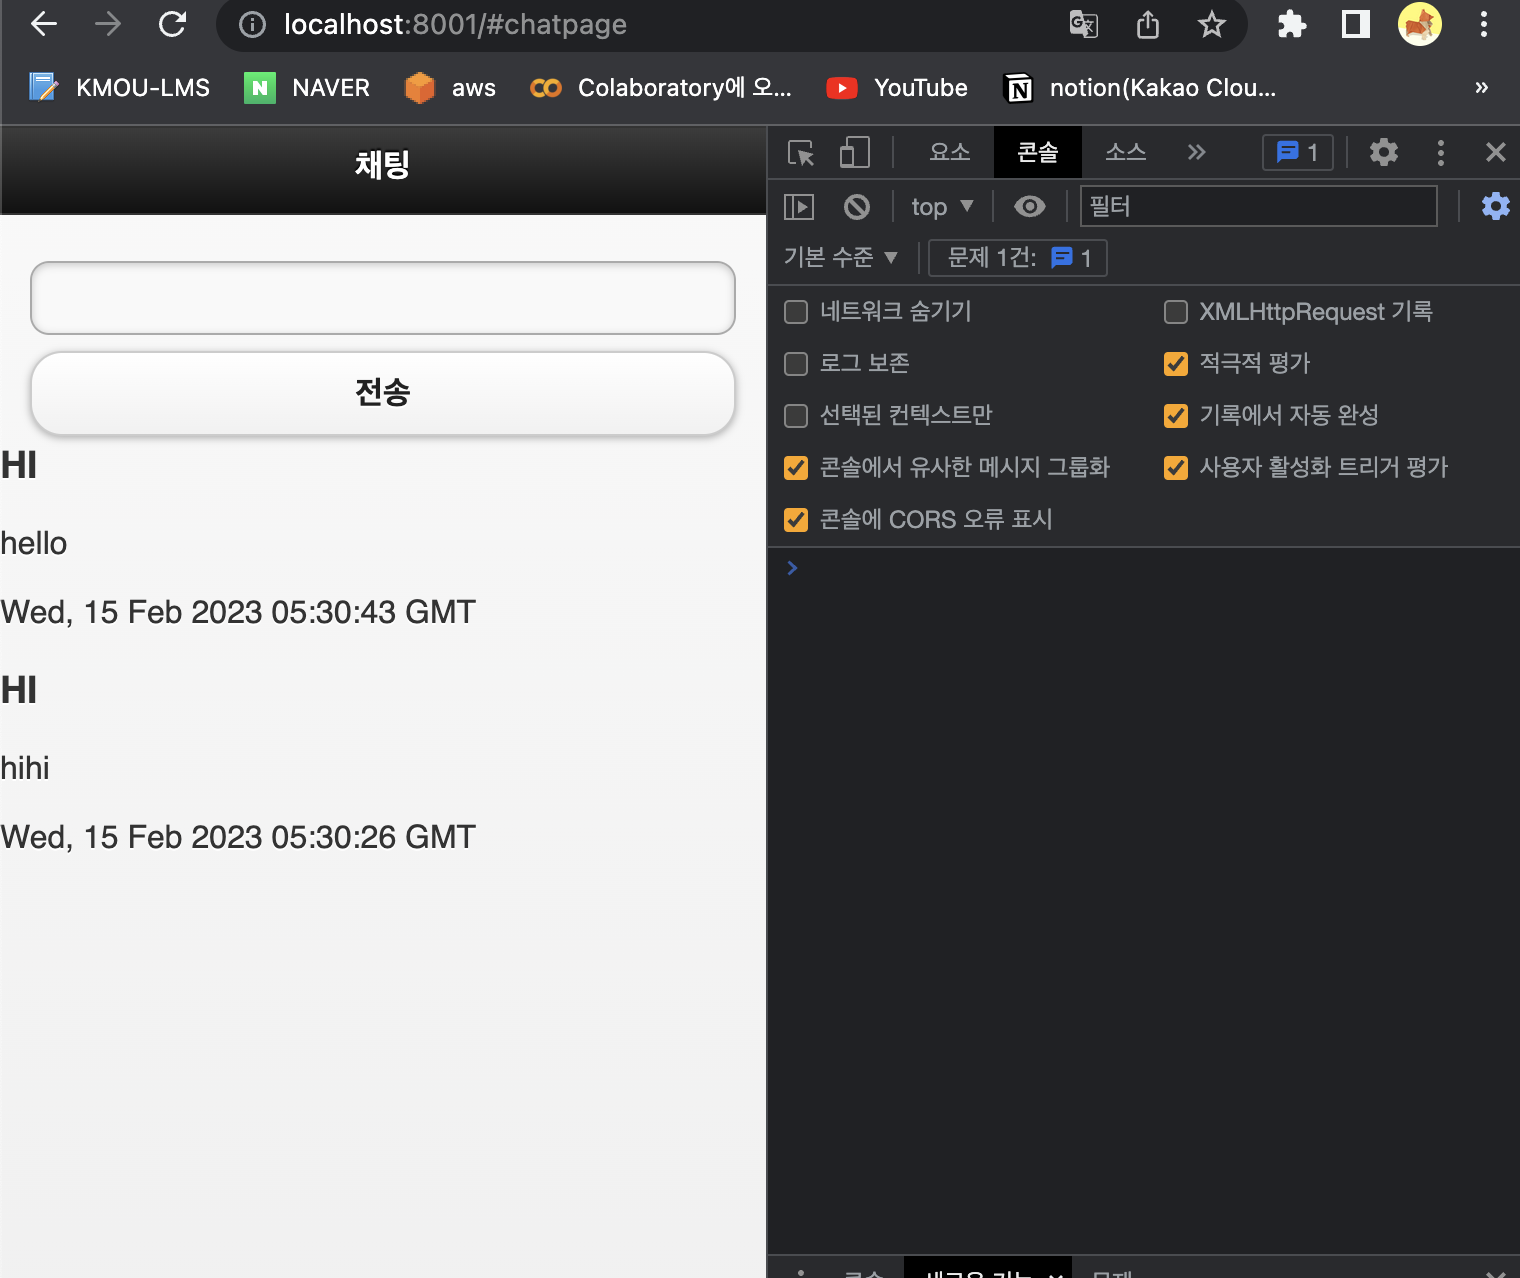
- Safari 접속창으로 테스트
- 별명과 채팅 입력
- 크롬 접속창으로 확인
- 캔버스를 이용한 화면 공유
-
canvas api : HTML5 의 API로 HTML 화면에 그림을 그리거나 이미지를 출력하고 동영상 이미지 등을 캡처 할 수 있는 API
-
websocket.html 파일을 수정
<!DOCTYPE html>
<html lang="en">
<head>
<meta charset="UTF-8">
<meta http-equiv="X-UA-Compatible" content="IE=edge">
<meta name="viewport" content="width=device-width, initial-scale=1.0">
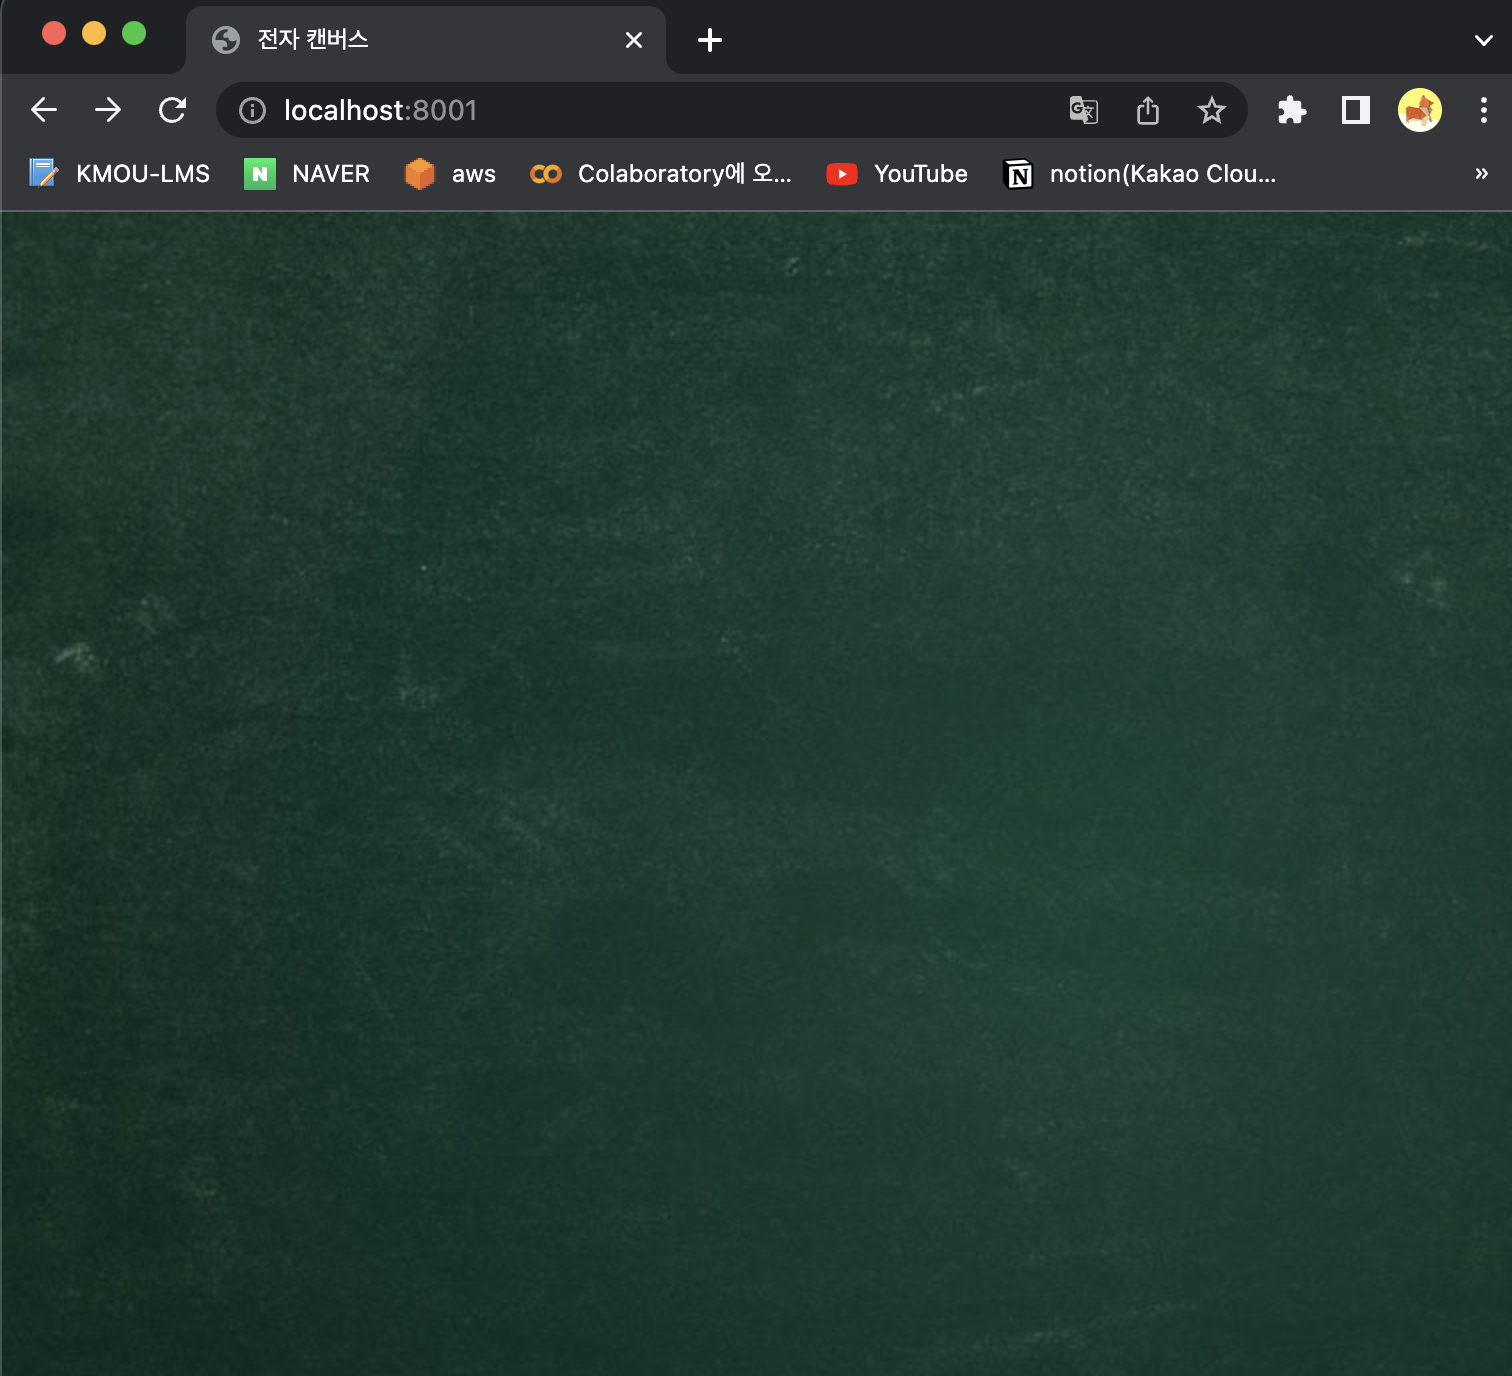
<title>전자 캔버스</title>
<script src = "js/board.js"></script>
<link rel = "stylesheet" href="stylesheet/style.css"/>
</head>
<body>
<canvas id="cv" width="860px" height="645px"></canvas>
</body>
</html>- 프로젝트에 public 디렉토리를 생성
- public 디렉토리 안에 images 디렉토리를 생성하고 칠판 배경으로 사용할 blackboard.jpg 파일을 복사
- public 디렉토리 안에 stylesheet 디렉토리를 생성하고 style.css 파일을 생성하여 작성
body{
    margin:0px;
}

#cv{
    width: 860px;
    height: 645px;
    background-image: url('../images/blackboard.jpg');
}- 브라우저에 접속하여 배경이미지 확인
- public 디렉토리에 js 디렉토리를 생성하고 board.js 파일을 만들고 작성
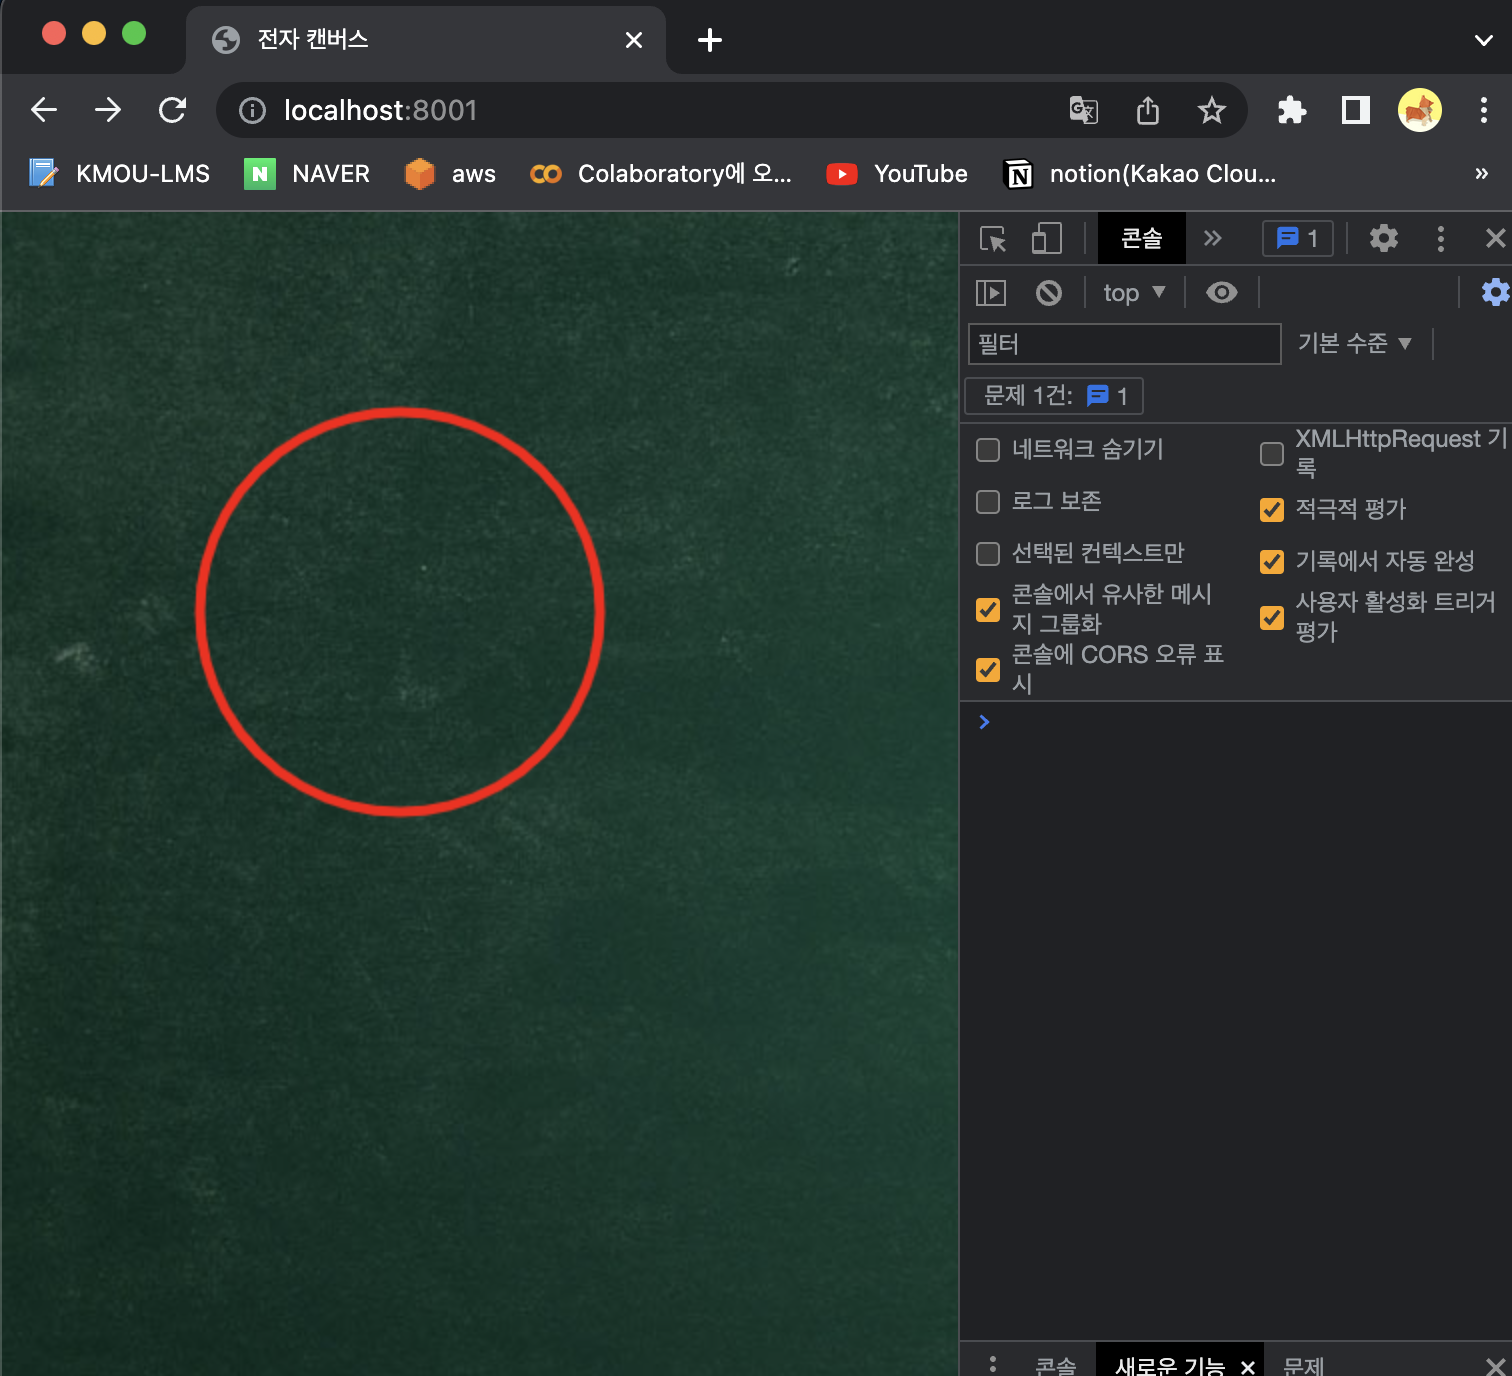
- 원 그리기
window.addEventListener('load',(e)=>{
    // canvas 태그를 찾아오기
    let canvas = document.getElementById('cv');
    // Canvas 의 Context(그리기 위한 기본 정보를 저장한 객체)를 찾아 오기
    let ctx = canvas.getContext('2d');
    //ctx.fillStyle="#FF0000";
    //ctx.fillRect="0,0,200,200";
    ctx.strokeStyle="#FF0000";
    ctx.lineWidth=5;
    ctx.beginPath();
    ctx.arc(200,200,100,0,2*Math.PI);
    ctx.stroke();
})
- 선그리기
window.addEventListener('load',(e)=>{
    // canvas 태그를 찾아오기
    let canvas = document.getElementById('cv');
    // Canvas 의 Context(그리기 위한 기본 정보를 저장한 객체)를 찾아 오기
    let ctx = canvas.getContext('2d');
    //ctx.fillStyle="#FF0000";
    //ctx.fillRect="0,0,200,200";
    /*ctx.strokeStyle="#FF0000";
    ctx.lineWidth=5;
    ctx.beginPath();
    ctx.arc(200,200,100,0,2*Math.PI);
    ctx.stroke();
    */
   //선그리기
    ctx.strokeStyle="#FF0000";
    ctx.lineWidth=5;
    ctx.beginPath();
    ctx.moveTo(100,100);
    ctx.lineTo(200,200);
    ctx.stroke();

})
- 마우스가 이동할 때 선 그리기 구현
window.addEventListener('load',(e)=>{
    // canvas 태그를 찾아오기
    let canvas = document.getElementById('cv');
    // Canvas 의 Context(그리기 위한 기본 정보를 저장한 객체)를 찾아 오기
    let ctx = canvas.getContext('2d');
    //ctx.fillStyle="#FF0000";
    //ctx.fillRect="0,0,200,200";
    /*ctx.strokeStyle="#FF0000";
    ctx.lineWidth=5;
    ctx.beginPath();
    ctx.arc(200,200,100,0,2*Math.PI);
    ctx.stroke();
    */
   //마우스 이벤트와 결합한 선 그리기
    ctx.strokeStyle="#FF0000";
    ctx.lineWidth=5;
    ctx.beginPath();

    //그리기 모드 변수
    let drawing = false;
    //마우스를 눌렀을 때
    canvas.addEventListener('mousedown',(e)=>{
        drawing = true;
        //현재 마우스 좌표로 move
        ctx.moveTo(e.pageX,e.pageY);
    });
    // 마우스를 이동할 때 선그리기
    canvas.addEventListener('mousemove', (e)=>{
        if(drawing){
            ctx.lineTo(e.pageX,e.pageY);
            ctx.stroke();
        }
    });
    // 마우스에서 손을 땔 때 그리기 모드를 해제
    canvas.addEventListener('mouseup',(e)=>{
        drawing=false;
    })

})
- 이제 서로 그림 그린 것을 공유할 것임!!
- board.js 수정
- 브라우저에서 마우스를 움직여 그려지는지 확인
//Context 객체를 저장할 변수
//여러 곳에서 사용하기 위해서 외부에 선언
let ctx;

window.addEventListener('load',(e)=>{
    let canvas = document.getElementById('cv')

    ctx = canvas.getContext('2d');

    ctx.strokeStyle = 'white';
    ctx.lineWidth = 5;
    ctx.beginPath();
    let drawing = false;

    canvas.addEventListener('mousedown',draw.start);
    canvas.addEventListener('mousemove',draw.move);
    canvas.addEventListener('mouseup',draw.end);

    shape.setShape();
})

//옵션 설정하는 객체
let shape = {
    color:'white',
    width:3,
    setShape:function(color,width){
        if(color != null){
            this.color = color;
        }
        if(width != null){
            this.width = width;
        }
        ctx.strokeStyle=this.color;
        ctx.lineWidth=this.width;
    }

}

//선을 그려주는 함수를 소유한 객체
let draw = {
    drawing:null,
    start:function(e){
        ctx.beginPath();
        ctx.moveTo(e.pageX, e.pageY);
        this.drawing = true;
    },
    move:function(e){
        if(this.drawing){
            ctx.lineTo(e.pageX,e.pageY);
            ctx.stroke();
        }

    },
    end:function(e){
        this.drawing = false;

    },

}
- 버튼을 누르면 칠판에 그려진 그림을 한번에 삭제 구현
- wbsocket.html 파일에 버튼을 하나 추가
<div class="menu">
        <button id="clear">전체 삭제</button>
</div>- 삭제버튼의 모양을 변경하기 위해서 style.css 수정
body{
    margin:0px;
}

#cv{
    width: 860px;
    height: 645px;
    background-image: url('../images/blackboard.jpg');
    float: left;
}
.menu{
    float: left;
    width: 100px;
}
button,select{
    width: 100px;
    height: 50px;
    float: left;
}- 삭제 버튼의 기능을 만들어주기 위해서 board.js 파일의 내용을 수정
//Context 객체를 저장할 변수
//여러 곳에서 사용하기 위해서 외부에 선언
let ctx;

window.addEventListener('load',(e)=>{
    let canvas = document.getElementById('cv')

    ctx = canvas.getContext('2d');

    ctx.strokeStyle = 'white';
    ctx.lineWidth = 5;
    ctx.beginPath();
    let drawing = false;

    canvas.addEventListener('mousedown',draw.start);
    canvas.addEventListener('mousemove',draw.move);
    canvas.addEventListener('mouseup',draw.end);

    //삭제 버튼 이벤트 연결
    let clear = document.getElementById('clear');
    clear.addEventListener('click', draw.clear);

    shape.setShape();
})

//옵션 설정하는 객체
let shape = {
    color:'white',
    width:3,
    setShape:function(color,width){
        if(color != null){
            this.color = color;
        }
        if(width != null){
            this.width = width;
        }
        ctx.strokeStyle=this.color;
        ctx.lineWidth=this.width;
    }

}

//선을 그려주는 함수를 소유한 객체
let draw = {
    drawing:null,
    start:function(e){
        ctx.beginPath();
        ctx.moveTo(e.pageX, e.pageY);
        this.drawing = true;
    },
    move:function(e){
        if(this.drawing){
            ctx.lineTo(e.pageX,e.pageY);
            ctx.stroke();
        }

    },
    end:function(e){
        this.drawing = false;

    },
    clear:(e)=>{
        //캔버스의 영역에 해당하는 부분의 그림을 삭제
        ctx.clearRect(0,0,860,645);
    }

}- 브라우저에서 낙서를 하다가 삭제버튼을 누르면 낙서가 모두 삭제됨
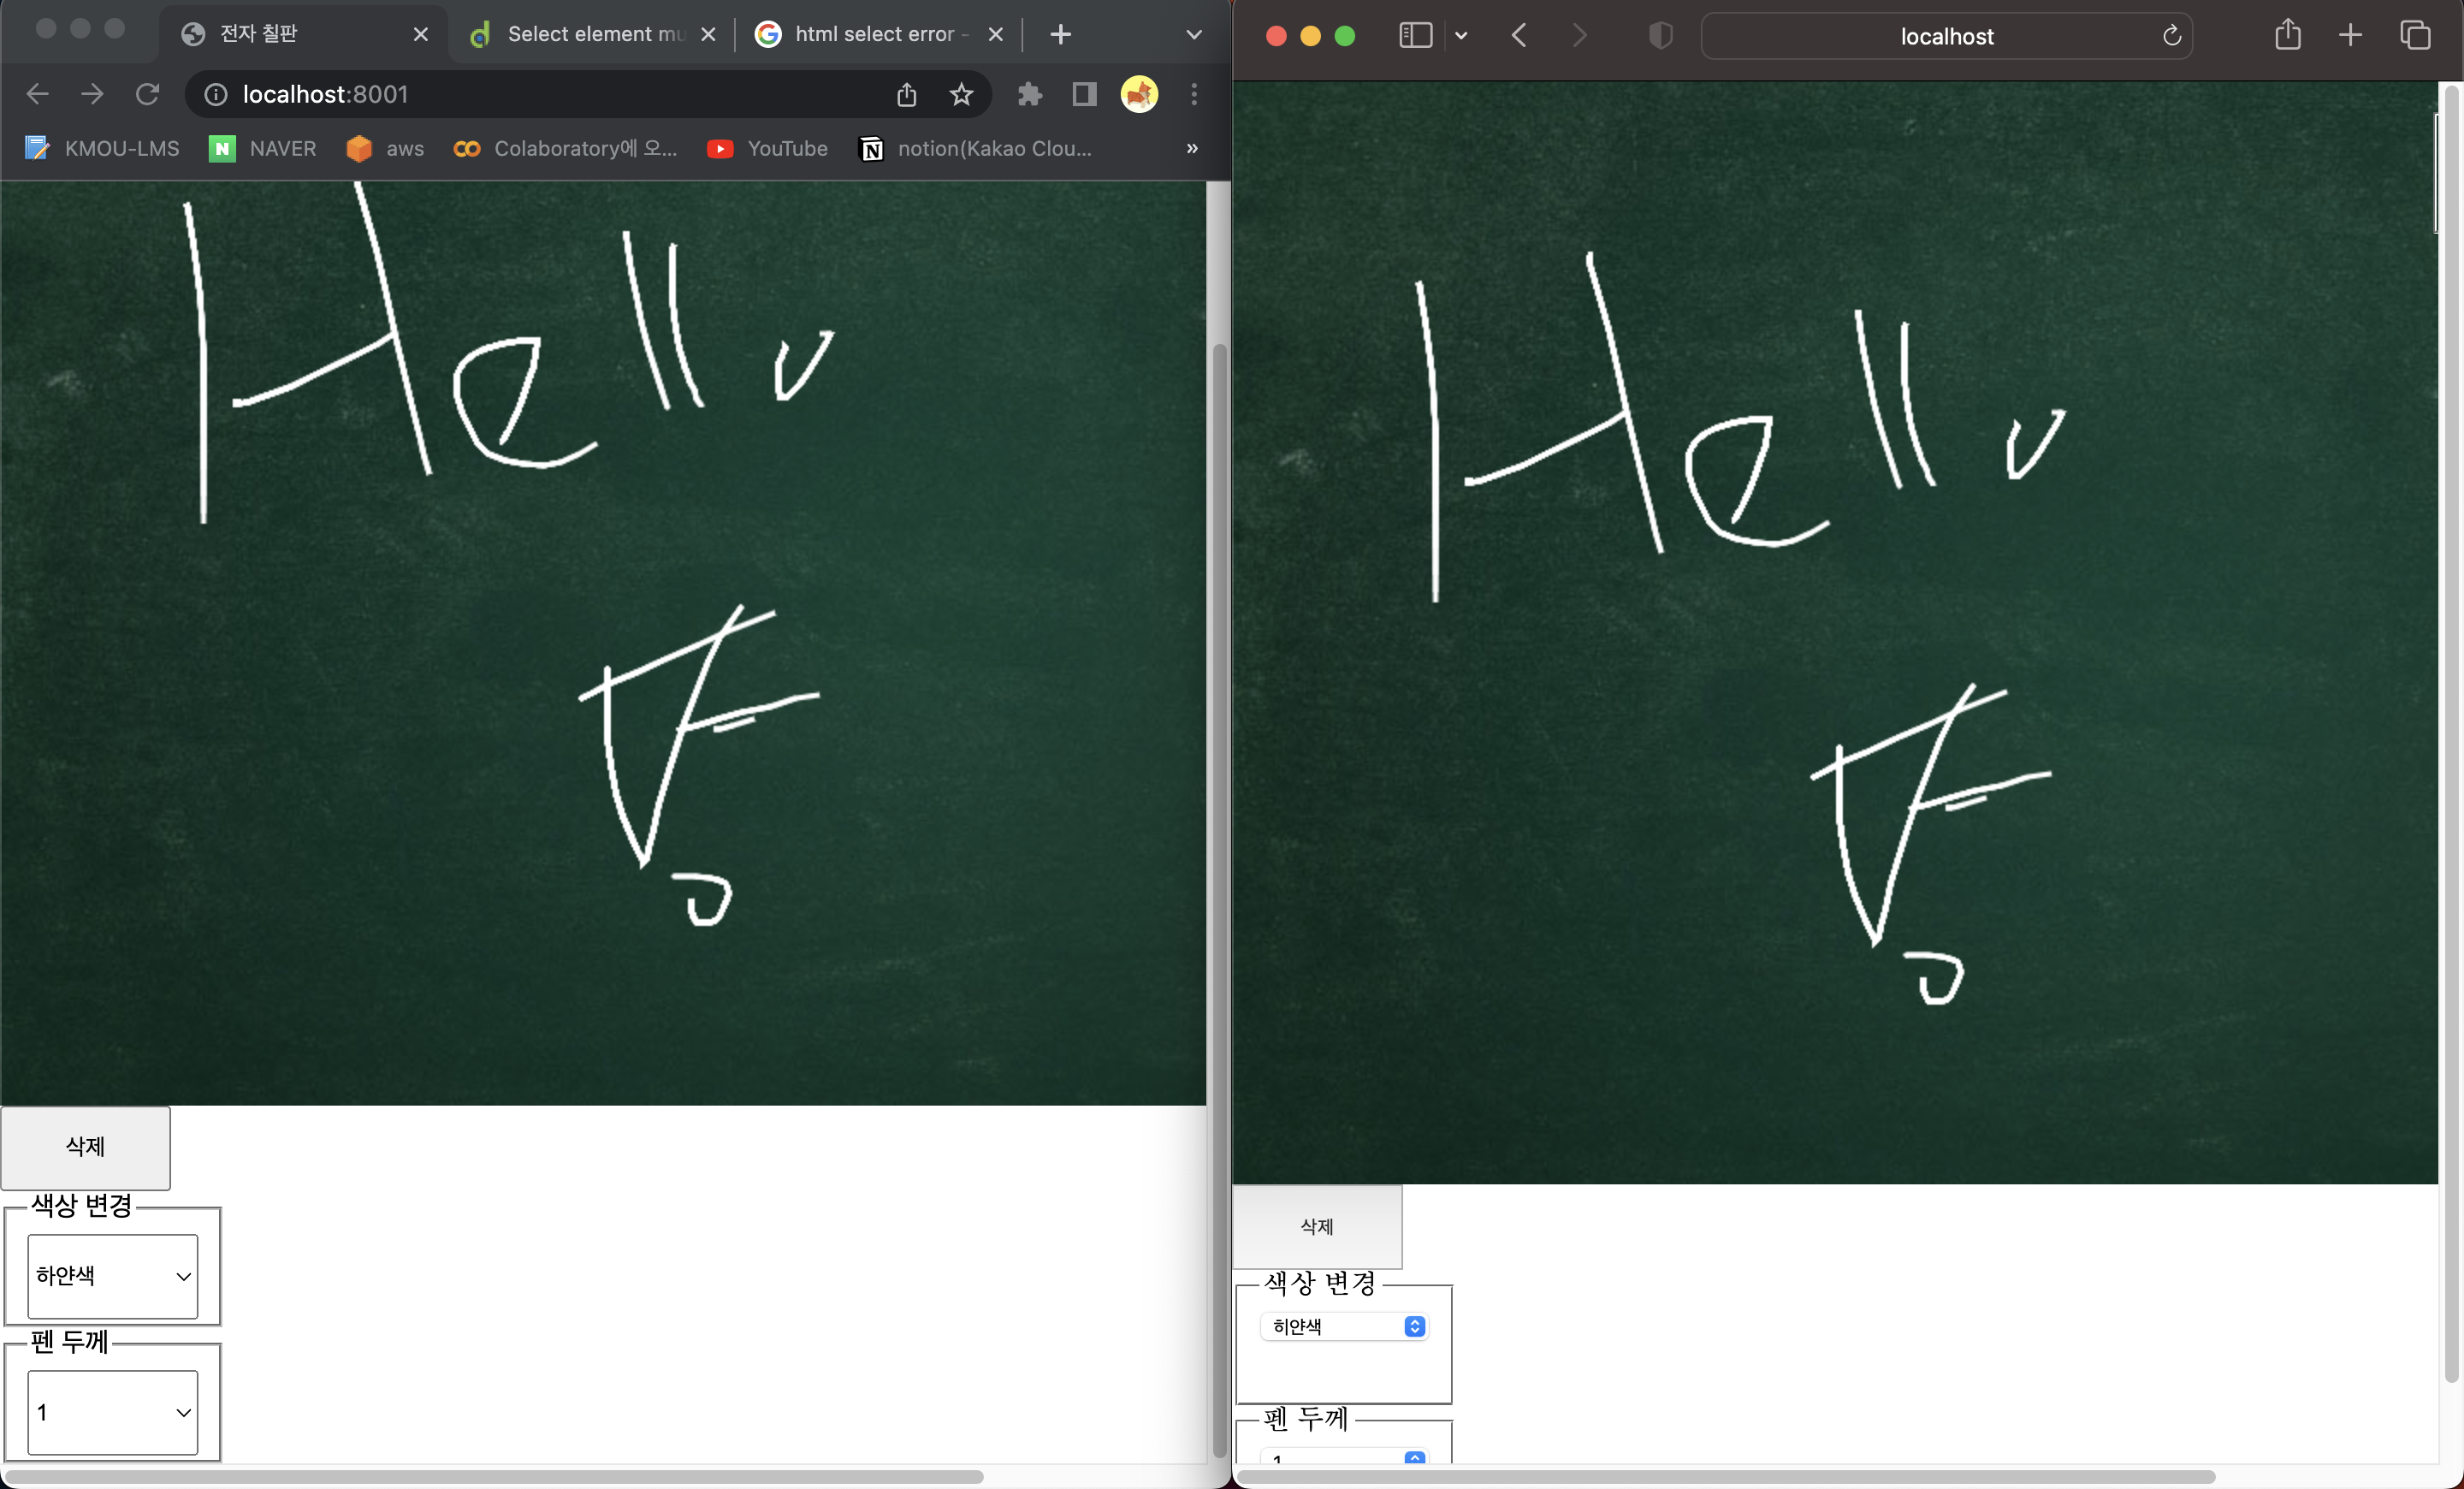
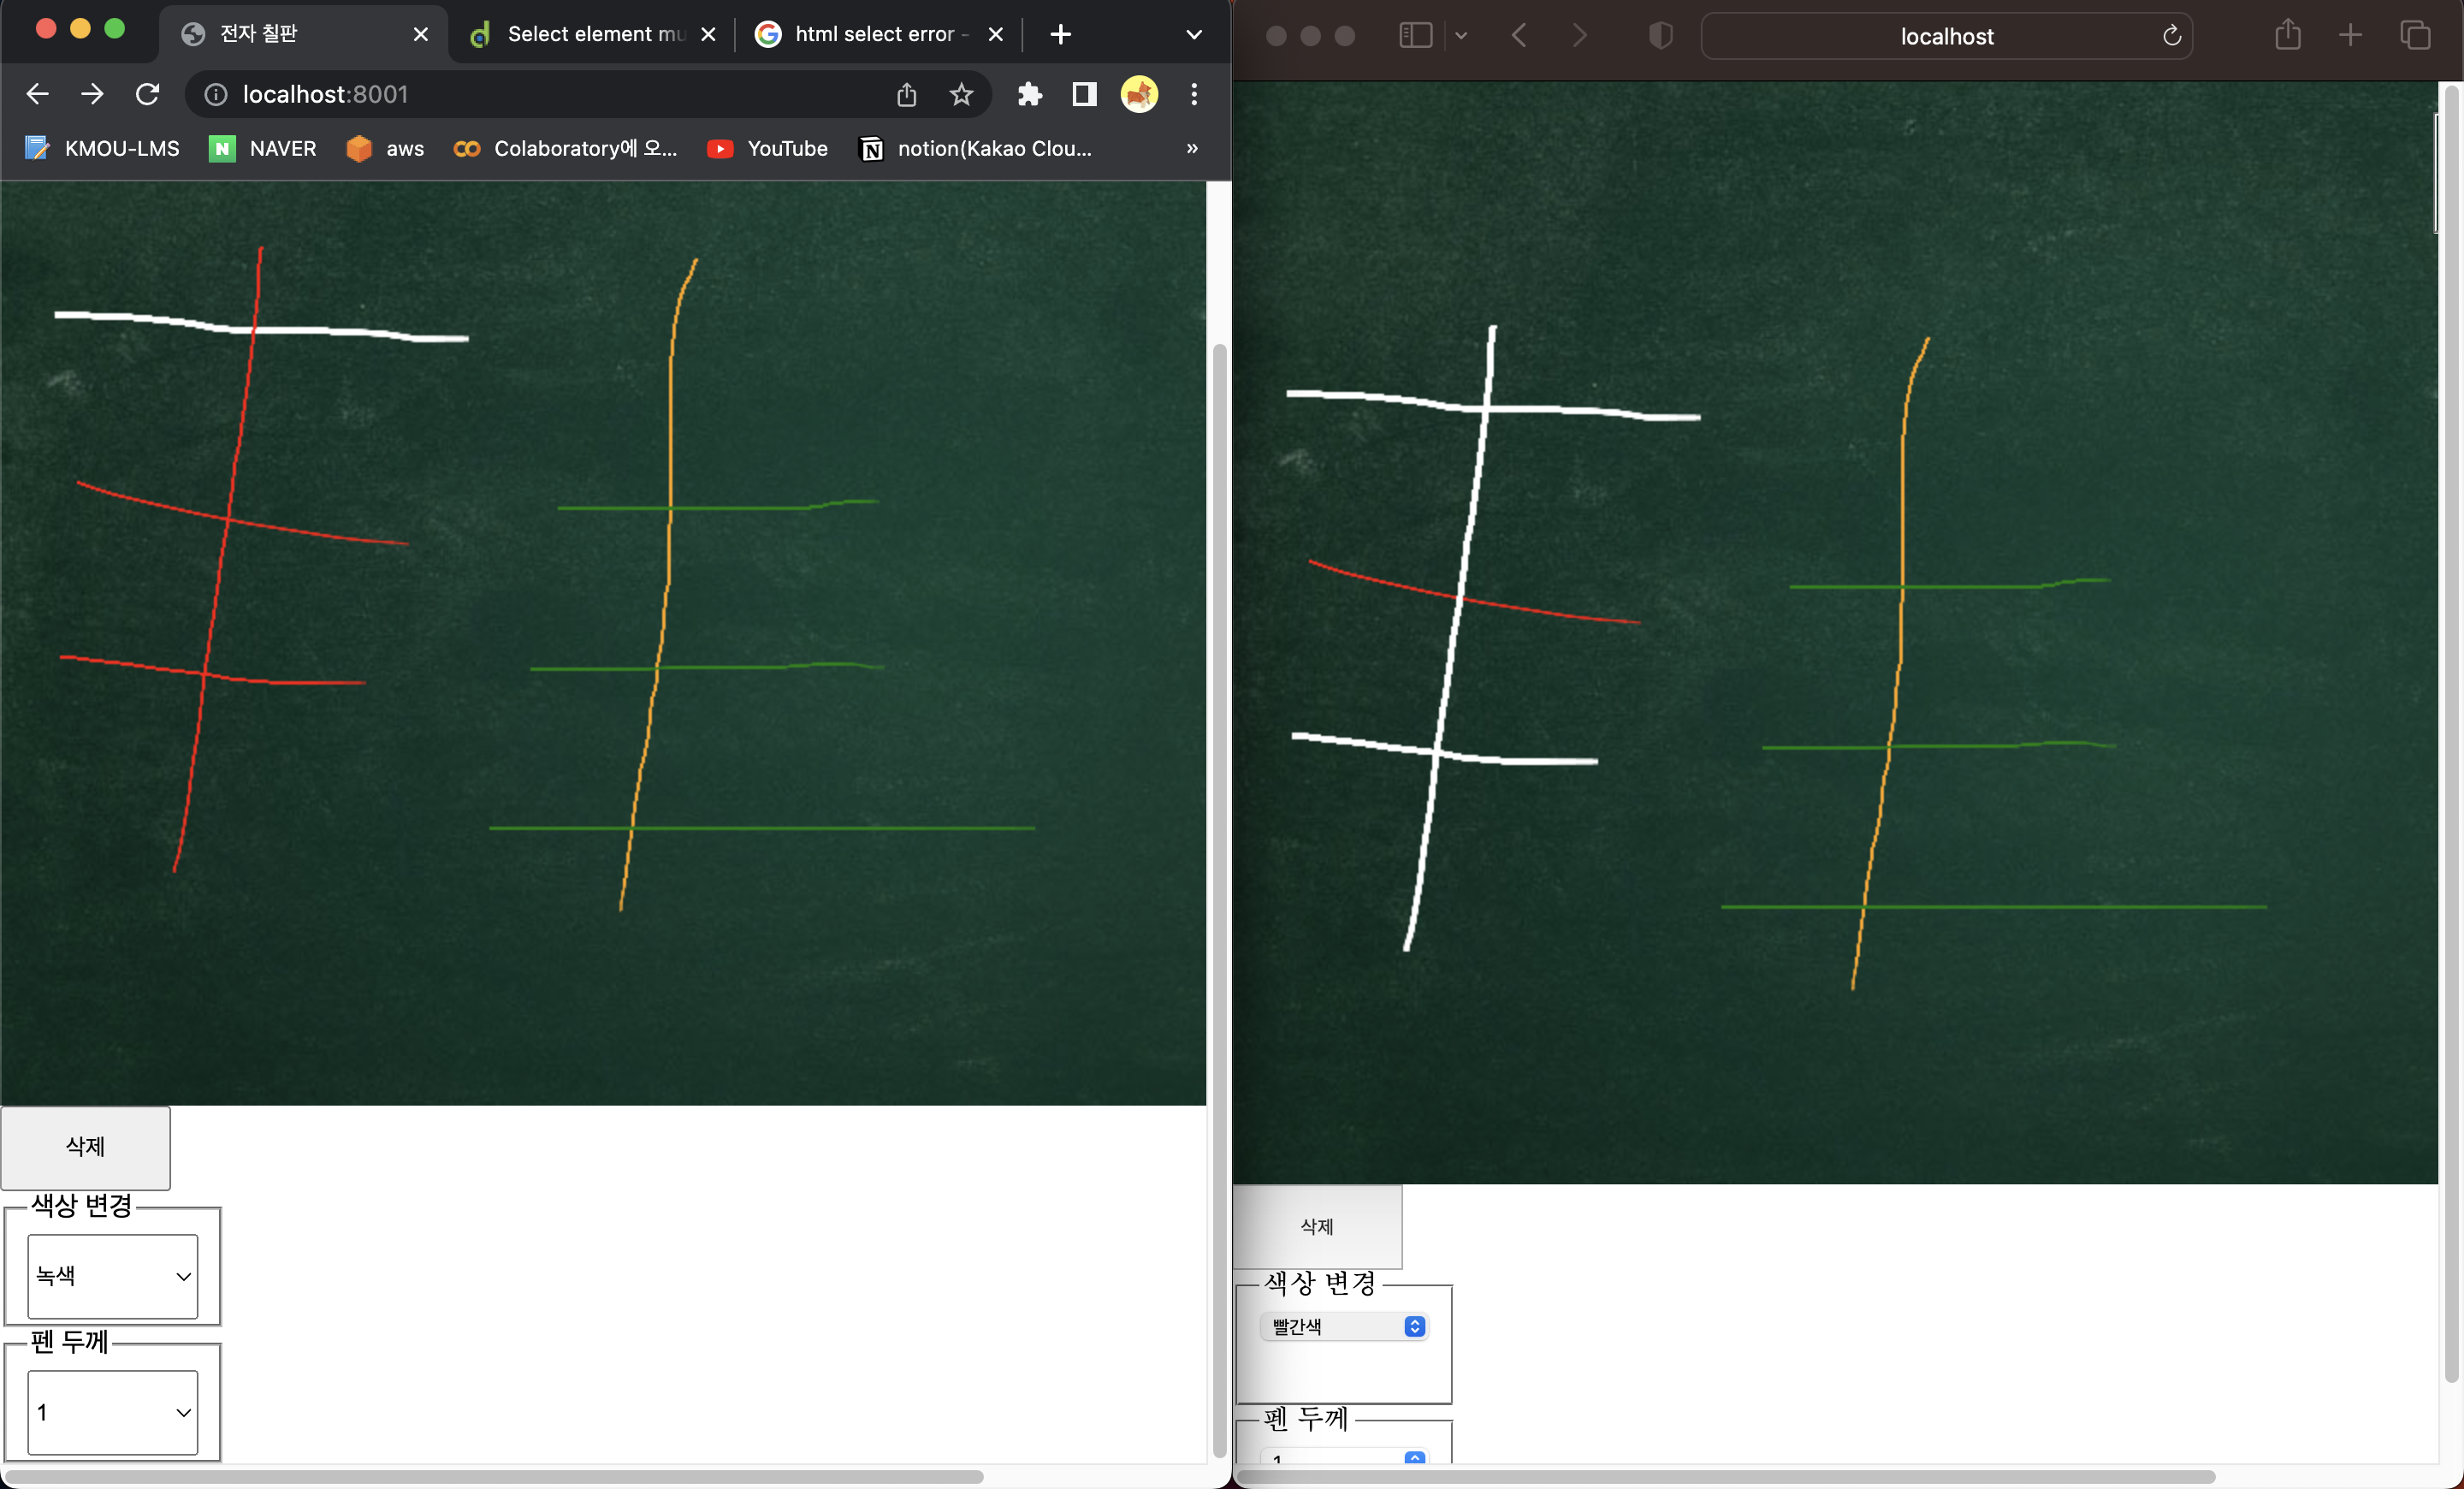
- 그리는 색상과 선의 두께를 변경하기 위한 메뉴를 websocket.html 파일에 추가
<!DOCTYPE html>
<html lang="en">
<head>
    <meta charset="UTF-8">
    <meta http-equiv="X-UA-Compatible" content="IE=edge">
    <meta name="viewport" content="width=device-width, initial-scale=1.0">
    <title>전자 칠판</title>

    <script src="/socket.io/socket.io.js"></script>

    <script src="js/board.js"></script>
    <link rel="stylesheet" href="stylesheet/style.css" />
</head>
<body>
    <canvas id="cv" width="860px" height="645px"></canvas>
    <div class="menu">
        <button id="clear">삭제</button>
        <fieldset>
            <legend>색상 변경</legend>
            <select id="pen_color"></select>
        </fieldset>
        <fieldset>
            <legend>펜 두께</legend>
            <select id="pen_width"></select>
        </fieldset>
        <fieldset id="pen_shape">
            <legend>펜 모양</legend>
        </fieldset>
    </div>
</body>
</html>
- style.css 파일에서 새로 추가한 영역의 스타일을 추가
body{
    margin:0px;
}

#cv{
    width: 860px;
    height: 645px;
    background-image: url('../images/blackboard.jpg');
    float: left;
}
.menu{
    float: left;
    width: 100px;
}
button,select{
    width: 100px;
    height: 50px;
    float: left;
}
fieldset{
    width: 100px;
    height: 60px;
    float: left;
}
#pen_shape{
    position:absolute;
    top: 10px;
    left: 700px;
    color: white;
}- board.js 파일에 색상배열을 추가
//Context 객체를 저장할 변수
//여러 곳에서 사용하기 위해서 외부에 선언
let ctx;

window.addEventListener('load',(e)=>{
    let canvas = document.getElementById('cv')

    ctx = canvas.getContext('2d');

    ctx.strokeStyle = 'white';
    ctx.lineWidth = 5;
    ctx.beginPath();
    let drawing = false;

    canvas.addEventListener('mousedown',draw.start);
    canvas.addEventListener('mousemove',draw.move);
    canvas.addEventListener('mouseup',draw.end);

    //삭제 버튼 이벤트 연결
    let clear = document.getElementById('clear');
    clear.addEventListener('click', draw.clear);

    shape.setShape();
    //색상 배열
    let color_map = [
        {'value':'white','name':'히얀색'},
        {'value':'white','name':'빨간색'},
        {'value':'white','name':'주황색'},
        {'value':'white','name':'노란색'},
        {'value':'white','name':'파란색'},
        {'value':'white','name':'녹색'},
        {'value':'white','name':'검정색'},
    ]
    let pen_color = document.getElementById('pen_color');
    let pen_width = document.getElementById('pen_width');
    let pen_shape = document.getElementById('pen_shape');

    //색상 추가
    for(let key in color_map){
        let newOption = new Option(color_map[key].name, color_map[key].value);
        pen_color.append(newOption);
    }
    //두께 추가
    for(let i=1;i<=15; i = i+1){
        let newOption = new Option(i,1);
        pen_width.append(newOption);
    }
    pen_color.addEventListener('change', shape.change);
    pen_width.addEventListener('change',shape.change);
    pen_shape.addEventListener('change',shape.change);


})

//옵션 설정하는 객체
let shape = {
    color:'white',
    width:3,
    change:function(){
        // select 의 선택된 값을 찾아오기
        let color = pen_color.options[pen_color.selectedIndex].value;
        let width = pen_width.options[pen_width.selectedIndex].value;
        shape.setShape(color,width);
    },
    setShape:function(color,width){
        if(color != null){
            this.color = color;
        }
        if(width != null){
            this.width = width;
        }
        ctx.strokeStyle=this.color;
        ctx.lineWidth=this.width;

        //선택한 선 모양을 출력
        ctx.clearRect(703,0,860,90);
        ctx.beginPath();
        ctx.moveTo(710,55);
        ctx.lineTo(820,55);
        ctx.stroke();
    }

}

//선을 그려주는 함수를 소유한 객체
let draw = {
    drawing:null,
    start:function(e){
        ctx.beginPath();
        ctx.moveTo(e.pageX, e.pageY);
        this.drawing = true;
    },
    move:function(e){
        if(this.drawing){
            ctx.lineTo(e.pageX,e.pageY);
            ctx.stroke();
        }

    },
    end:function(e){
        this.drawing = false;

    },
    clear:(e)=>{
        //캔버스의 영역에 해당하는 부분의 그림을 삭제
        ctx.clearRect(0,0,860,645);
    }

}- websocket.html 파일에 Web Socket 사용을 위한 스크립트 링크를 추가
<!DOCTYPE html>
<html lang="en">
<head>
    <meta charset="UTF-8">
    <meta http-equiv="X-UA-Compatible" content="IE=edge">
    <meta name="viewport" content="width=device-width, initial-scale=1.0">
    <title>전자 칠판</title>

    <script src="/socket.io/socket.io.js"></script>

    <script src="js/board.js"></script>
    <link rel="stylesheet" href="stylesheet/style.css" />
</head>
<body>
    <canvas id="cv" width="860px" height="645px"></canvas>
    <div class="menu">
        <button id="clear">삭제</button>
        <fieldset>
            <legend>색상 변경</legend>
            <select id="pen_color"></select>
        </fieldset>
        <fieldset>
            <legend>펜 두께</legend>
            <select id="pen_width"></select>
        </fieldset>
        <fieldset id="pen_shape">
            <legend>펜 모양</legend>
        </fieldset>
    </div>
</body>
</html>- socket.js 파일에 클라이언트로부터 linesend 이벤트가 전송되었을 때 처리하는 코드를 추가
//Context 객체를 저장할 변수
//여러 곳에서 사용하기 위해서 외부에 선언
let ctx;

//웹 소켓을 저장하기 위한 변수
let socket;

window.addEventListener('load', (e) => {
    //웹 소켓 연결 - 여기서는 로컬을 설정
    //실제 프로젝트에서는 서버의 IP와 포트번호로 설정
    socket = io.connect('http://'+ window.location.host);
    //서버로부터 전송되어온 메시지를 처리
    socket.on('linesend_toclient', (data) => {
        //넘어온 데이터를 가지고 그림을 그려주는 메서드를 호출
        draw.drawFromServer(data);
    })

    //캔버스 DOM 찾아오기
    let canvas = document.getElementById('cv');

    ctx = canvas.getContext('2d');

    //초기 설정
    ctx.strokeStyle = 'white';
    ctx.lineWidth = 5;
    ctx.beginPath();
    let drawing = false;

    //이벤트 처리
    canvas.addEventListener('mousedown', draw.start);
    canvas.addEventListener('mousemove', draw.move);
    canvas.addEventListener('mouseup', draw.end);

    //삭제 버튼 이벤트 연결
    let clear = document.getElementById('clear');
    clear.addEventListener('click', draw.clear);

    shape.setShape();

    //색상 배열
    let color_map = [
        {'value':'white', 'name':'하얀색'},
        {'value':'red', 'name':'빨간색'},
        {'value':'orange', 'name':'주황색'},
        {'value':'yellow', 'name':'노란색'},
        {'value':'blue', 'name':'파란색'},
        {'value':'green', 'name':'녹색'},
        {'value':'black', 'name':'검정색'},
    ]

    let pen_color = document.getElementById("pen_color");
    let pen_width = document.getElementById("pen_width");
    let pen_shape = document.getElementById("pen_shape");

    //색상 추가
    for(let key in color_map){
        let newOption = new Option(color_map[key].name, color_map[key].value);
        pen_color.append(newOption);
    }
    //두께 추가
    for(let i=1; i<=15; i=i+1){
        let newOption = new Option(i,i);
        pen_width.append(newOption);
    }

    pen_color.addEventListener('change', shape.change);
    pen_width.addEventListener('change', shape.change);
    pen_shape.addEventListener('change', shape.change);
})

//옵션 설정하는 객체
let shape = {
    color:'white',
    width:3,
    change:function(){
        //select의 선택된 값을  찾아오기
        let color = pen_color.options[pen_color.selectedIndex].value;
        let width = pen_width.options[pen_width.selectedIndex].value;
        shape.setShape(color, width);
    },
    setShape:function(color, width){
        if(color != null){
            this.color = color;
        }
        if(width != null){
            this.width=width;
        }
        ctx.strokeStyle=this.color;
        ctx.lineWidth=this.width;

        //선택한 선 모양을 출력
        ctx.clearRect(703, 0, 860, 90);
        ctx.beginPath();
        ctx.moveTo(710, 55);
        ctx.lineTo(820, 55);
        ctx.stroke();
    }
}

//선을 그려주는 함수를 소유한 객체
let draw = {
    drawing:null,
    start:function(e){
        ctx.beginPath();
        ctx.moveTo(e.pageX, e.pageY);
        this.drawing = true;
        msg.line.send('start', e.pageX, e.pageY);
    },
    move:function(e){
        if(this.drawing){
            ctx.lineTo(e.pageX, e.pageY);
            ctx.stroke();
            msg.line.send('move', e.pageX, e.pageY);
        }
    },
    end:function(e){
        this.drawing = false;
        msg.line.send('end');
    },
    clear:(e) => {
        //캔버스의 영역에 해당하는 부분의 그림 삭제
        ctx.clearRect(0,0,860,645);
        msg.line.send('clear');
    },
    drawFromServer:(data)=>{
        if(data.type === 'start'){
            ctx.beginPath();
            ctx.moveTo(data.x, data.y);
            ctx.strokeStyle = data.color;
            ctx.lineWidth = data.width;
        }else if(data.type === 'move'){
            ctx.lineTo(data.x, data.y);
            ctx.stroke();
        }else if(data.type === 'end'){

        }else if(data.type === 'clear'){
            ctx.clearRect(0, 0, cv.width, cv.height);
            shape.setShape();
        }
    }
}

//웹 소켓 통신을 위한 객체
let msg = {
    line:{
        send:function(type, x, y){
            console.log(type, x, y);
            socket.emit('linesend', {
                'type':type,
                'x':x,
                'y':y,
                'color':shape.color,
                'width':shape.width
            })
        }
    }
}