Redux
전역 상태(Global state) 관리 라이브러리
"중앙 데이터 관리소"를 사용할 수 있게 도와주는 패키지(라이브러리)
컴포넌트에서 생성한 state를 props로 넘겨줄 때는 부모 컴포넌트에서 자식 컴포넌트 방향으로만 props를 넘겨줄 수 있다.
이런 특성 때문에 자식 컴포넌트에서 부모 컴포넌트로는 값을 넘겨줄 수 없었고, 값을 넘겨주기 위해 prop drilling이 발생할 수 있다는 문제점이 생길 수 있었다.
위와 같은 문제점을 해결하기 위해 Redux를 사용한다.
Redux는 컴포넌트가 간 state를 공유할 때 부모 컴포넌트에서 자식 컴포넌트의 관계가 아니어도 되고, 의미 없이 값만 넘겨 주기 위해 중간 컴포넌트를 거치지 않아도 된다는 장점을 가지고 있다.
Local State와 Global State
Local state (지역상태)
- 컴포넌트에서 useState를 이용해서 생성한 state
Global state (전역상태)
- 컴포넌트에서 생성되지 않고 중앙화 된 특별한 곳에서 생성한 state
- "중앙 state 관리소"
Redux는 Global state(전역상태)를 관리하는 라이브러리이다.
Redux 개발 환경 구축
(1) Redux 설치
yarn add redux react-redux
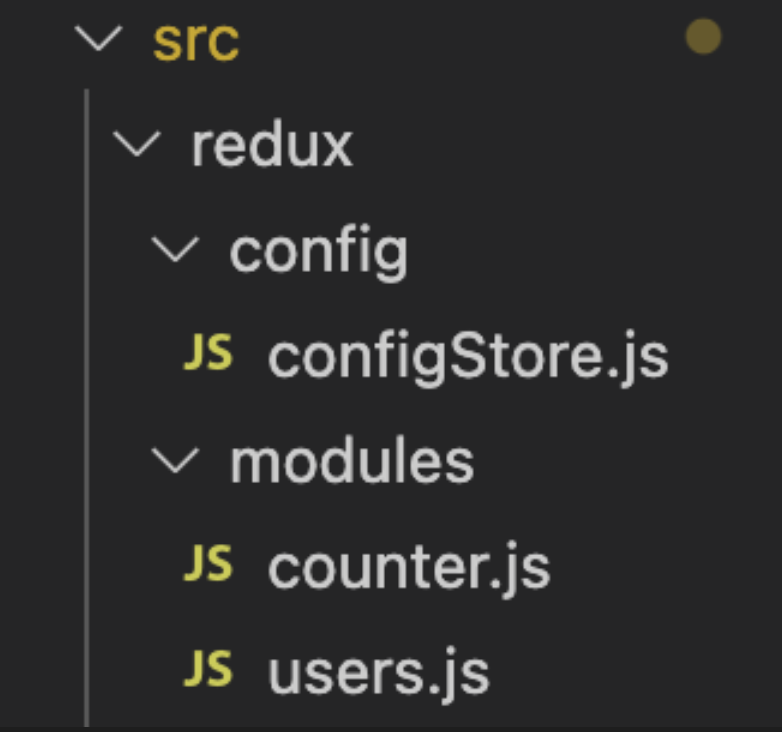
(2) 파일 구성
- redux
- config : 리덕스 설정과 관련된 파일들을 모아놓을 폴더
- configStore.js : 중앙 state 관리소인 state를 만드는 설정 코드들이 있는 파일
- modules : 생성할 state들의 그룹을 모아놓을 폴더
Redux의 흐름
- View에서 액션이 일어난다.
- dispatch에서 action이 일어난다.
- action에 의한 reducer 함수가 실행되기 전에 middleware가 작동한다.
- middleware에서 명령내린 일을 수행하고 난 뒤, reducer 함수를 실행한다.
- reducer의 실행결과 store에 새로운 값을 지정한다.
- store의 state에 subscribe를 하고 있던 UI에 변경된 값을 준다.
`View -> dispatch(action) -> middleware -> reducer -> store -> View
좀 더 단순하게 생각하면
(1) dispatch가 action을 store로 던져준다.
(2) store는 action 객체 type에 따라 state를 변경한다.
- action
- type
- payload
Payload
action 객체는 action type을 payload 만큼 처리한다.
리듀서로 보내는 액션 객체에 어떤 정보를 같이 담아보내고자 한다면 payload를 이용한다.
- 리듀서에서 payload를 사용하고자 할 때는 action.payload로 사용할 수 있다
Ducks 패턴
리덕스의 구성요소를 패턴화한 것
1) Reducer 함수를 export default 한다.
2) Action creator 함수들을 export 한다.
3) Action type은 app/reduce/ACTION_TYPE 형태로 작성한다.
Redux를 사용한 counter 실습
- createStore() : store을 만드는 메서드(함수)
- createReducers() : 여러 개의 독립적인 reducer의 반환값을 하나의 상태 객체로 만들어준다.
- 모듈을 스토어에 연결한다.
// configStore.js
// 중앙 데이터 관리소(store)를 설정

import { createStore } from "redux";
import { combineReducers } from "redux";
import counter from "../modules/counter";

const rootReducer = combineReducers({
  counter,
});
const store = createStore(rootReducer); // 스토어와 모듈 연결

export default store;
- Provider로 App을 감싸주고, store 값을 넘겨준다.
//index.jsx
import { Provider } from "react-redux";
import store from "./redux/config/configStore";

const root = ReactDOM.createRoot(document.getElementById("root"));
root.render(
  <Provider store={store}>
    <App />
  </Provider>
);- 초기 상태값 설정
- reducer : state에 변화를 일으키는 함수
- action의 type에 따라 state를 변경한다.
- action은 type과 value를 가진다.
// modules/counter.js

// 초기 상태값(state)
const initialState = {
  number: 0,
};

// reducer : 'state에 변화를 일으키는' 함수
// (1) state를 action의 type에 따라 변경하는 함수
// input : state와 action(type과 value를 가짐)
const counter = (state = initialState, action) => {
  switch (action.type) {
    default:
      return state; // state로 리턴
  }
};

export default counter;
//modules/users.js

const initialState = {
  userId: 123,
};

const users = (state = initialState, action) => {
  switch (action.type) {
    default:
      return state;
  }
};

export default users;
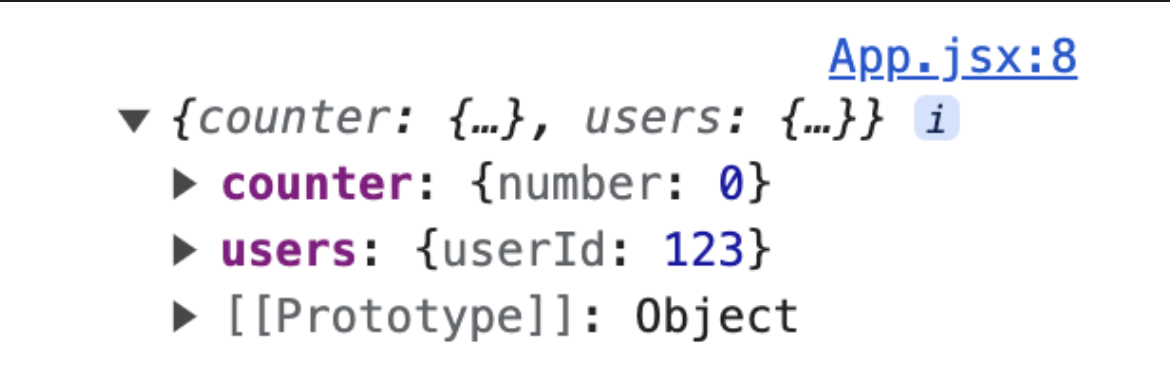
- useSelector를 사용하여 스토어를 조회한다.
- useSelector로 프로젝트에서 구성한 모든 리덕스 모듈의 state를 받아온다.
import { useSelector } from "react-redux";

function App() {
  const data = useSelector((state) => {
    return state;
  });

  console.log(data);
...- 모듈에 구성한 모든 state를 받아온 것을 알 수 있다.
action creators (액션 객체를 만드는 함수)
- reducer에게 보낼 명령인 액션 객체 만들기
- 사용할 string 값을 변수에 저장해서 오타를 방지하고 유지보수를 수월하게 할 수 있도록 한다.
const PLUS_N = "counter/PLUS_N";
const MINUS_N = "counter/MINUS_N";- 액션 객체는 반드시 type이라는 key를 가져야 한다.
- (리듀서는 객체 안에서 type이라는 key를 보기 때문이다.)
// 초기 상태값(state)
const initialState = {
  number: 0,
};

// reducer : 'state에 변화를 일으키는' 함수
// (1) state를 action의 type에 따라 변경하는 함수
// input : state와 action(type과 value를 가짐)
const counter = (state = initialState, action) => {
  switch (action.type) {
    case PLUS_N:
      return {
        number: state.number + action.payload,
      };
    case MINUS_N:
      return { number: state.number - action.payload };
    default:
      return state;
  }
};- action의 type과 payload를 반환하는 함수를 export 한다.
export const plusN = (payload) => {
  return {
    type: PLUS_N,
    payload,
  };
};

export const minusN = (payload) => {
  return {
    type: MINUS_N,
    payload,
  };
};- 액션 객체 보내기
-
useDispatch를 사용하여 액션 객체를 reducer로 보내줄 수 있다.
-
dispatch 변수를 생성한다.
-
dispatch() 안에 액션 객체를 넣어준다.
// App.js
import { useDispatch, useSelector } from "react-redux";
import { plusN, minusN } from "./redux/modules/counter";
import { useState } from "react";


function App() {

  const [number, setNumber] = useState(0);

  const counter = useSelector((state) => {
    return state.counter;
  });

  const dispatch = useDispatch(); // dispatch 변수 생성

   return (
    <>
      <div>현재 카운트 : {counter.number}</div>
      <div>
        <input
          type="number"
          value={number}
          onChange={(e) => {
            setNumber(e.target.value);
          }}
        />
      </div>
      <button
        onClick={() => {
          dispatch(plusN(Number(number)));
        }}
      >
        +
      </button>
      <button
        onClick={() => {
          dispatch(minusN(number));
        }}
      >
        -
      </button>
    </>
  );
  }
...
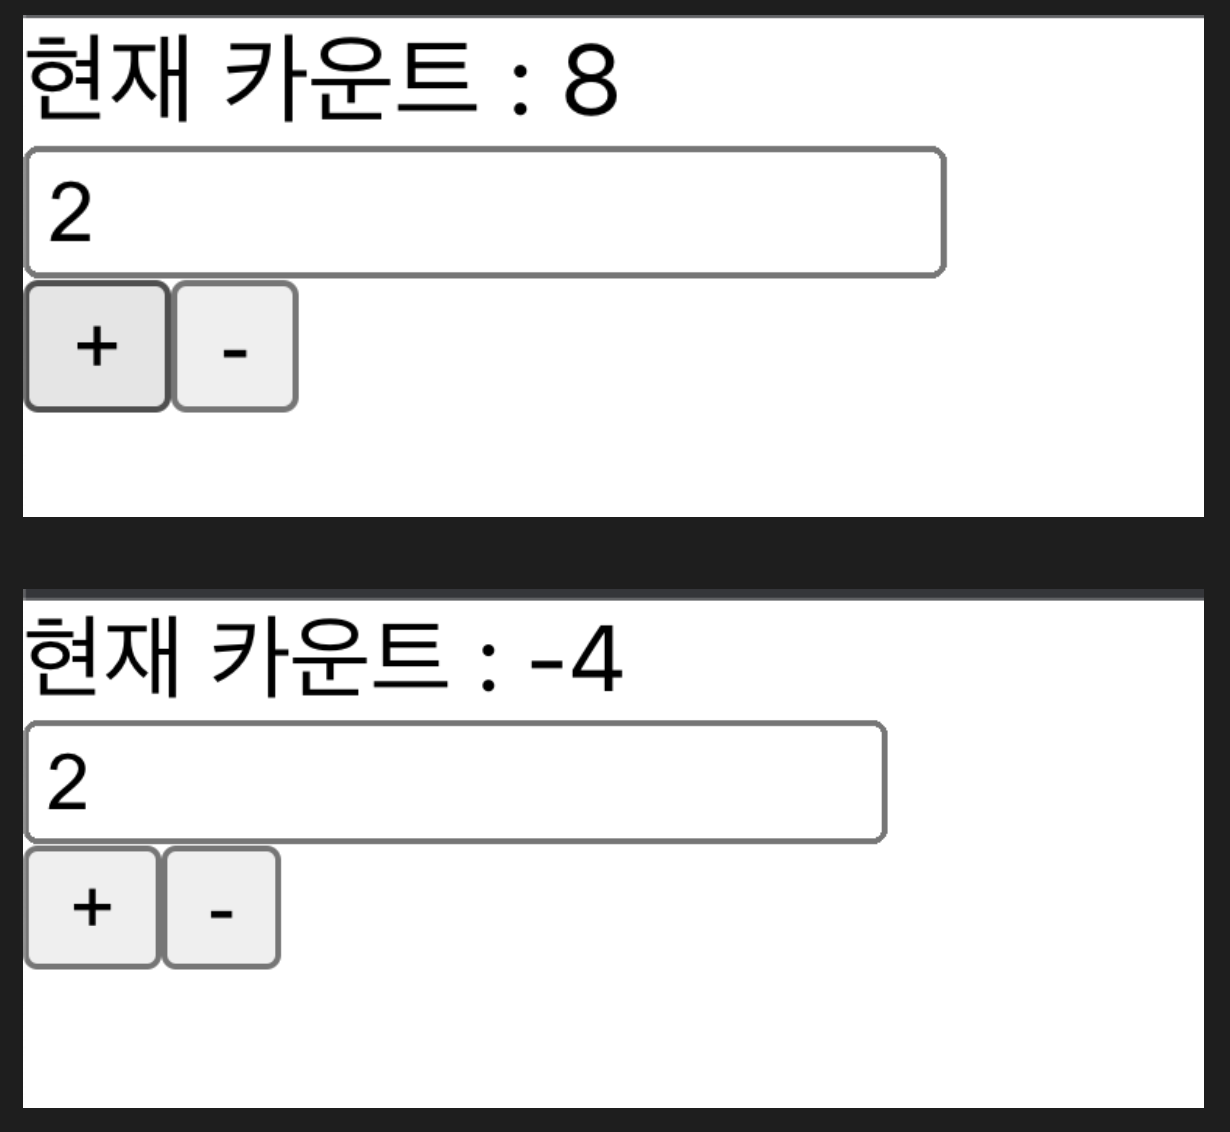
이렇게 구성한 코드의 로직을 단순화하면 아래와 같다.
1) input으로 받아온 e.target.value 값을 number에 반영한다.
2) plus 버튼 클릭 시dispatch(plusN((number)))와 같이 action의 payload에 number 값을 넘겨준다.
3)action.type으로 지정된 PLUS_N의 반환값인{ number: state.number + action.payload }객체가 반환된다.
4) 반환값을Reducer에 보낸 후 Reducer 함수의 실행 결과를store에 저장한다.
5)useSelector()를 사용하여 store를 조회하고, 저장된 state에서 사용할 state.counter 값을 counter의 변수로 지정한다.
6) counter에 저장된 number 값을 가져와 화면에 반영한다.
위와 같은 로직을 거쳐 아래와 같이 입력값에 따른 더하기, 빼기 프로그램을 구현할 수 있었다.