😊 본 게시글은 인프런 강의인 스프링 입문 을 참고해 공부한 내용입니다.
Java -> java11
IDE -> eclipse 3.18
* 정적 컨텐츠
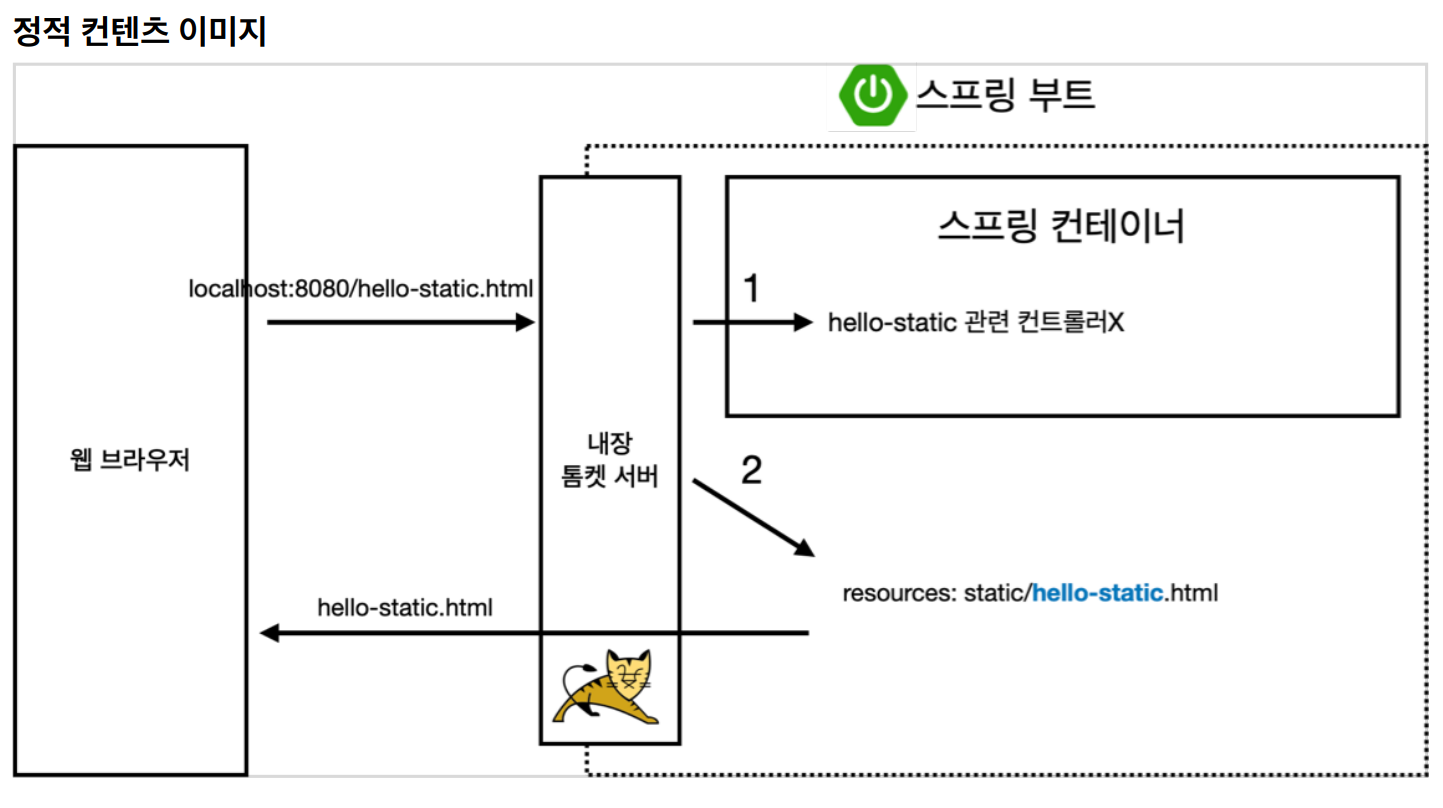
html 파일을 있는 그대로 보여준다.
src > main > java > resources > static 에 hello-static.html 생성
<!DOCTYPE HTML>
<html>
<head>
 <title>Hello=static</title>
 <meta http-equiv="Content-Type" content="text/html; charset=UTF-8" />
</head>
<body>
정적 컨텐츠
</body>
</html>
http://localhost:8080/hello-static.html 실행시키면 입력한 html 그대로 출력됨
정적 컨텐츠 파일이 실행되는 과정

* MVC와 템플릿 엔진
controller
@GetMapping("hello-mvc")
    public String helloMvc(@RequestParam("name") String name,Model model) {
        model.addAttribute("name", name);
        return "hello-template";
    }
@RequestParam 는 request 값이 필요함
따라서 http://localhost:8080/hello-mvc 뒤에 ?name=spring 를 붙여 name의 값을 요청해주어야 함
templates > hello-template.html
<!DOCTYPE HTML>
<html xmlns:th="http://www.thymeleaf.org">
<head>
 <title>Hello</title>
 <meta http-equiv="Content-Type" content="text/html; charset=UTF-8" />
</head>
<body>
<p th:text="'hello ' + ${name}" >hello! empty</p>
</body>
</html>
${name}의 $는 모델에서 값을 꺼내는 것 모델의 key값이 name인 value를 가져옴
p태그의 hello! empty는 서버가 렌더링을 할 때 알아서 'hello ' + ${name} 으로 치환해줌
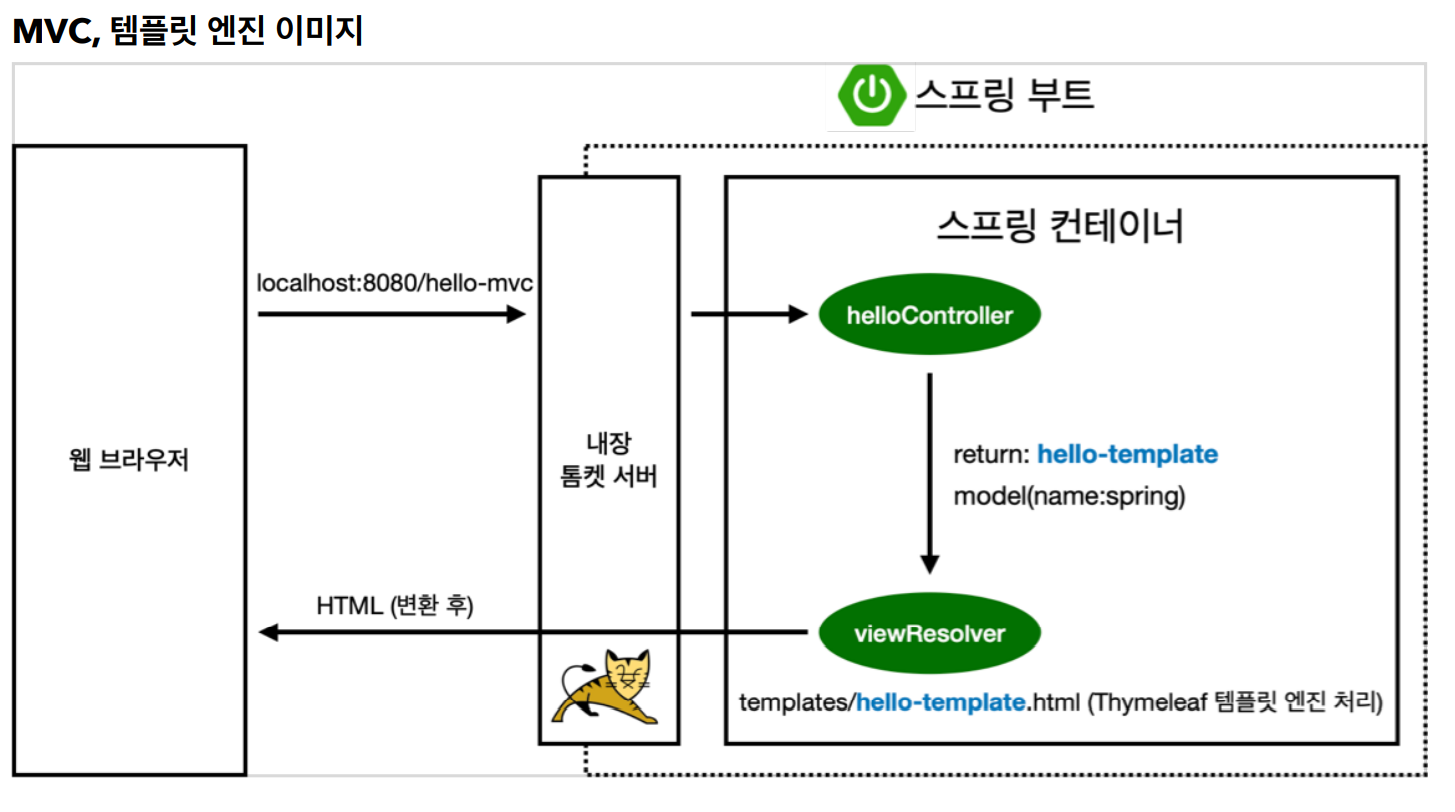
동작 방식
 viewResolver는 view를 찾아주고, 템플릿 엔진을 연결시켜주는 역할
* API
문자열 넘기기
controller
    @GetMapping("hello-string")
    @ResponseBody
    public String helloString(@RequestParam("name") String name,Model model) {
        return "hello"+name;
    }
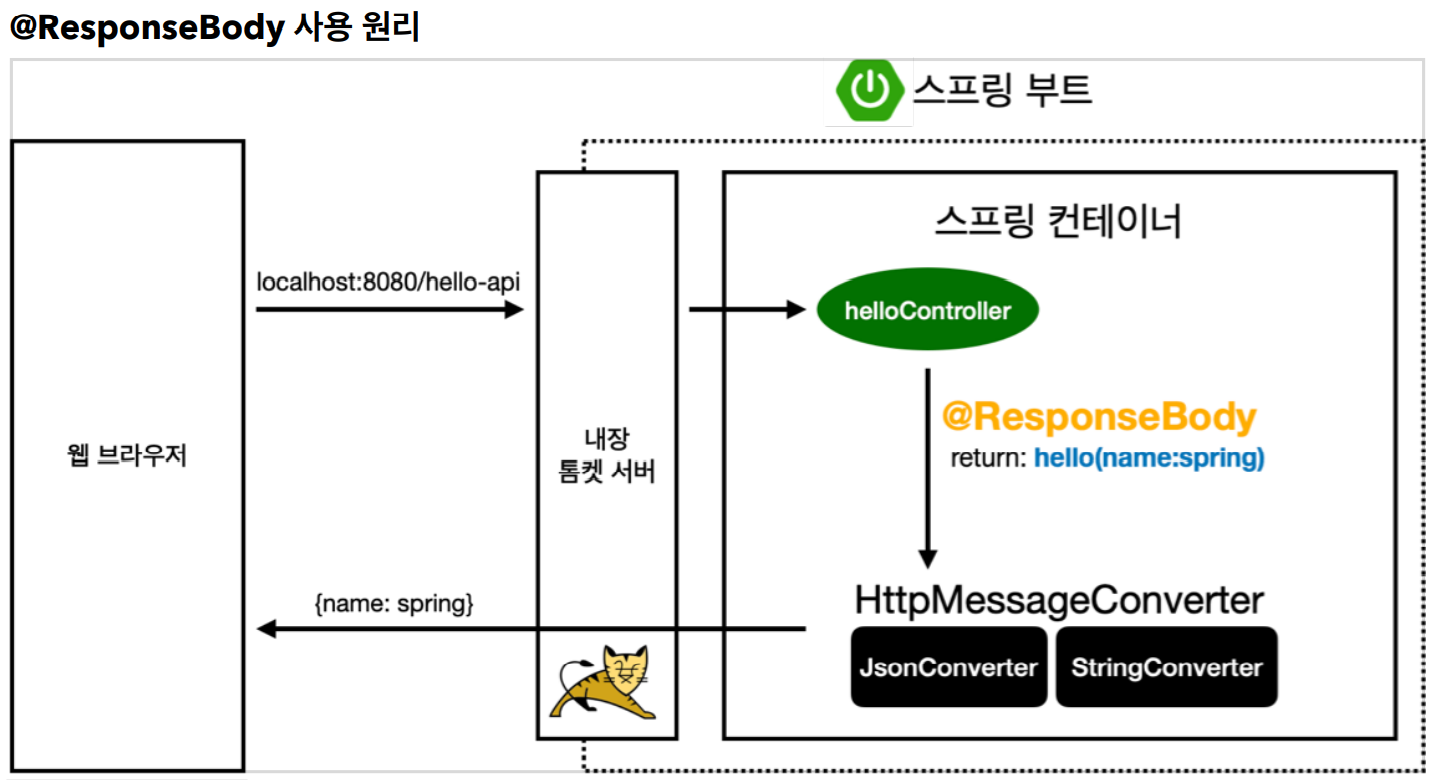
@ResponseBody => http 응답 바디부에 이 데이터를 내가 직접 넣어주겠다 라는 뜻
return "hello"+name 문자열 데이터가 그대로 출력됨
따라서 view가 필요없다!
이때, 데이터는 json으로 반환됨(default)
객체 넘기기
    @GetMapping("hello-api")
    @ResponseBody
    public Hello helloApi(@RequestParam("name") String name) {
    	Hello hello=new Hello();
    	hello.setName(name);
    	return hello;
    }

    static class Hello{
    	private String name;

		public String getName() {
			return name;
		}

		public void setName(String name) {
			this.name = name;
		}

    }
이클립스 getter, setter 단축키 (프로퍼티 방식)
shift+alt+s -> R
동작 방식

- view가 필요없기 때문에 viewResolver 대신에HttpMessageConverter가 동작함
- 기본 객체 처리는 MappingKackson2HttpMessageConverter 이용
- 객체 ⇒ json 바꿔주는 라이브러리 jackson, GSON 등이 있음
