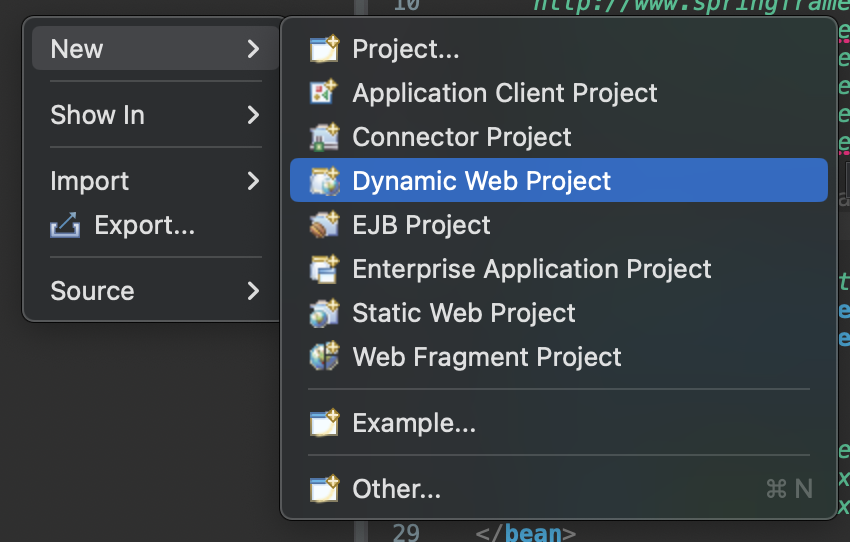
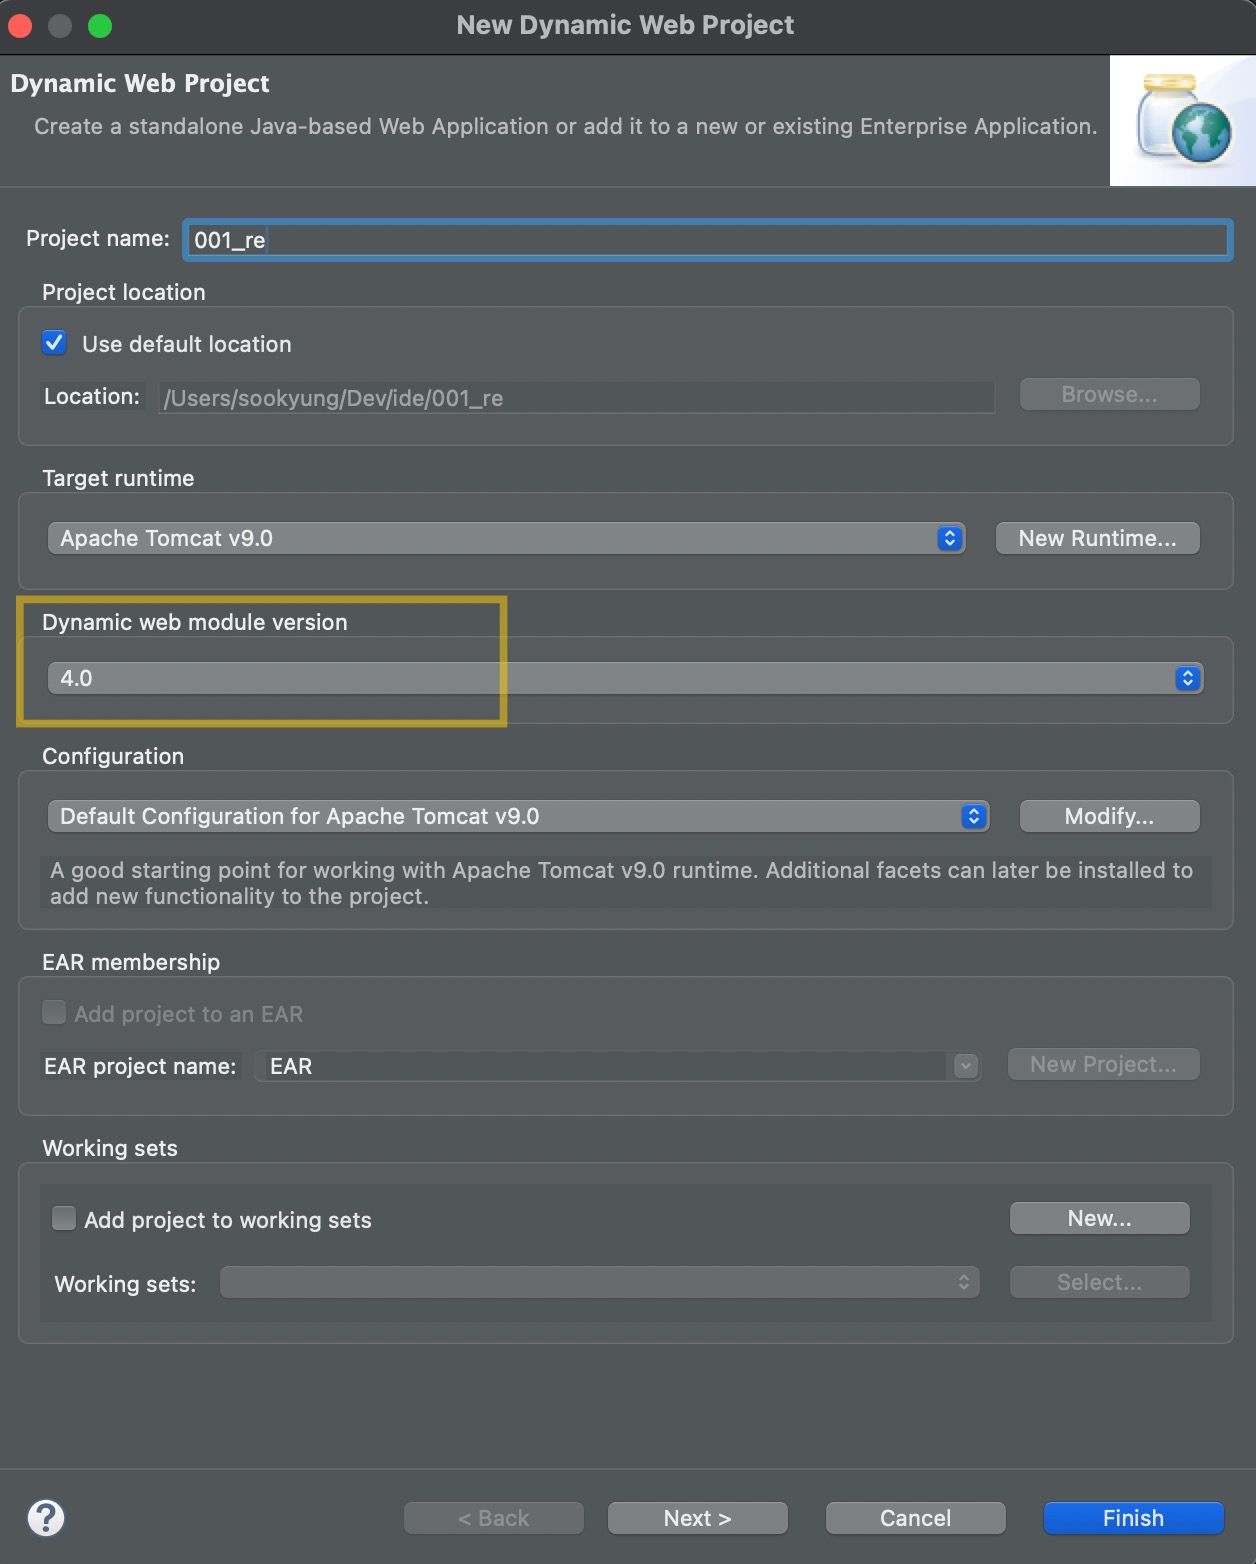
1. Web Project 생성하기
 1-1. web module version을 4.0으로 맞춘다.
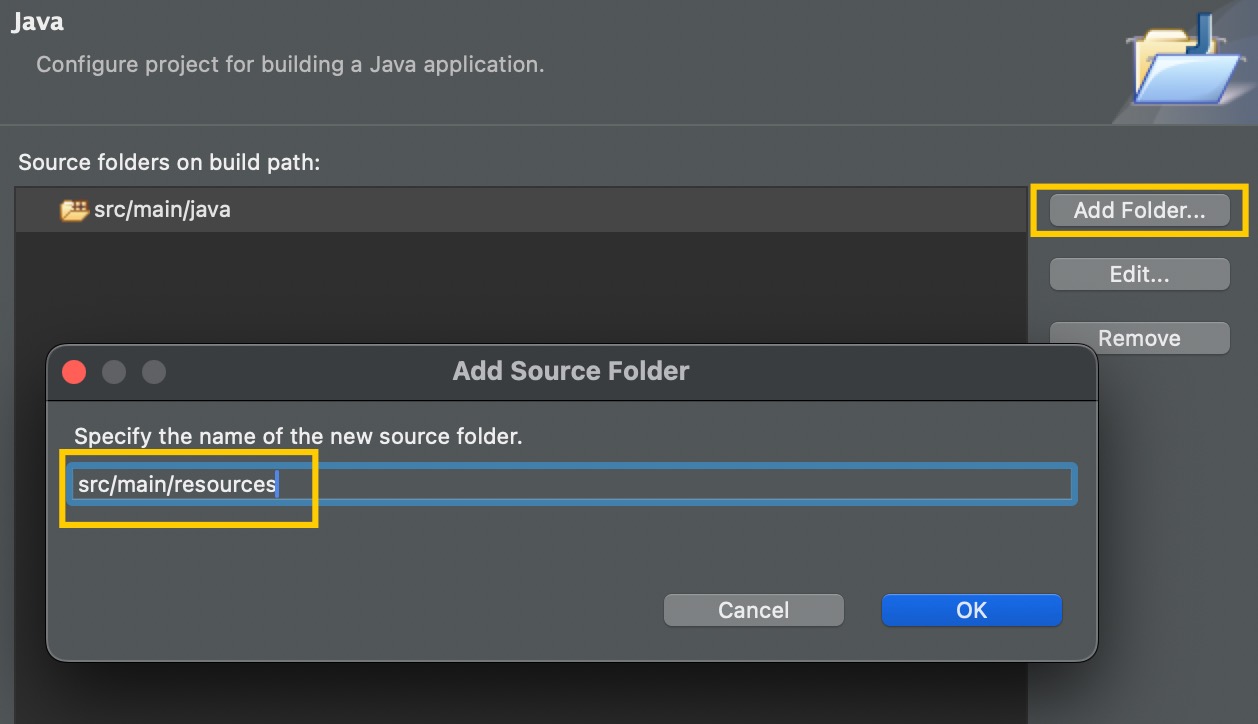
 1-2. src/main/resources를 추가해야 한다.
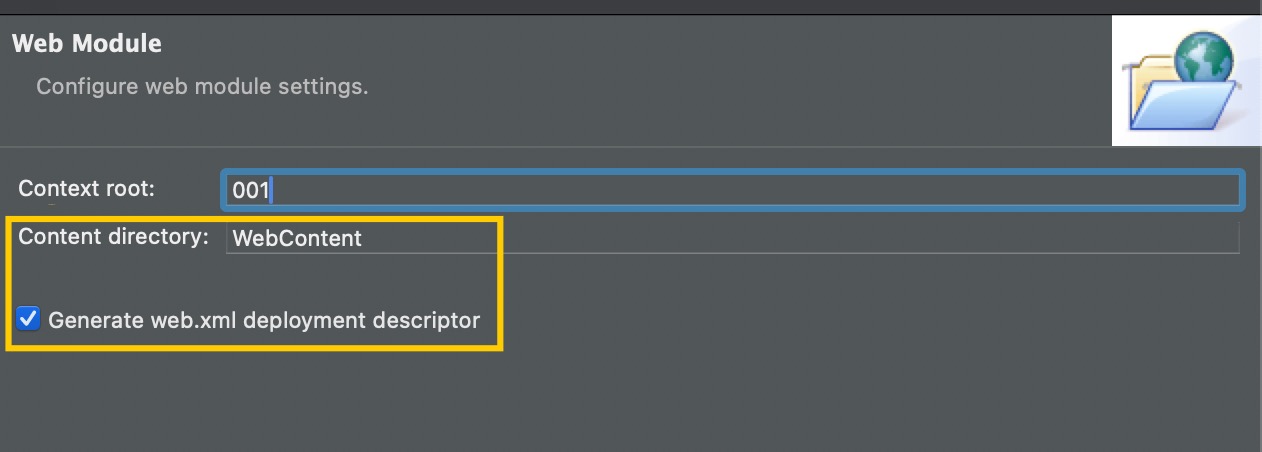
1-3. 편의상 Content directory를 'WebContent'로 맞춘다.
1-4. Generate web.xml deployment descriptor에 체크한다.
Context root는 Properties > Web Project Settings에서도 변경 가능.
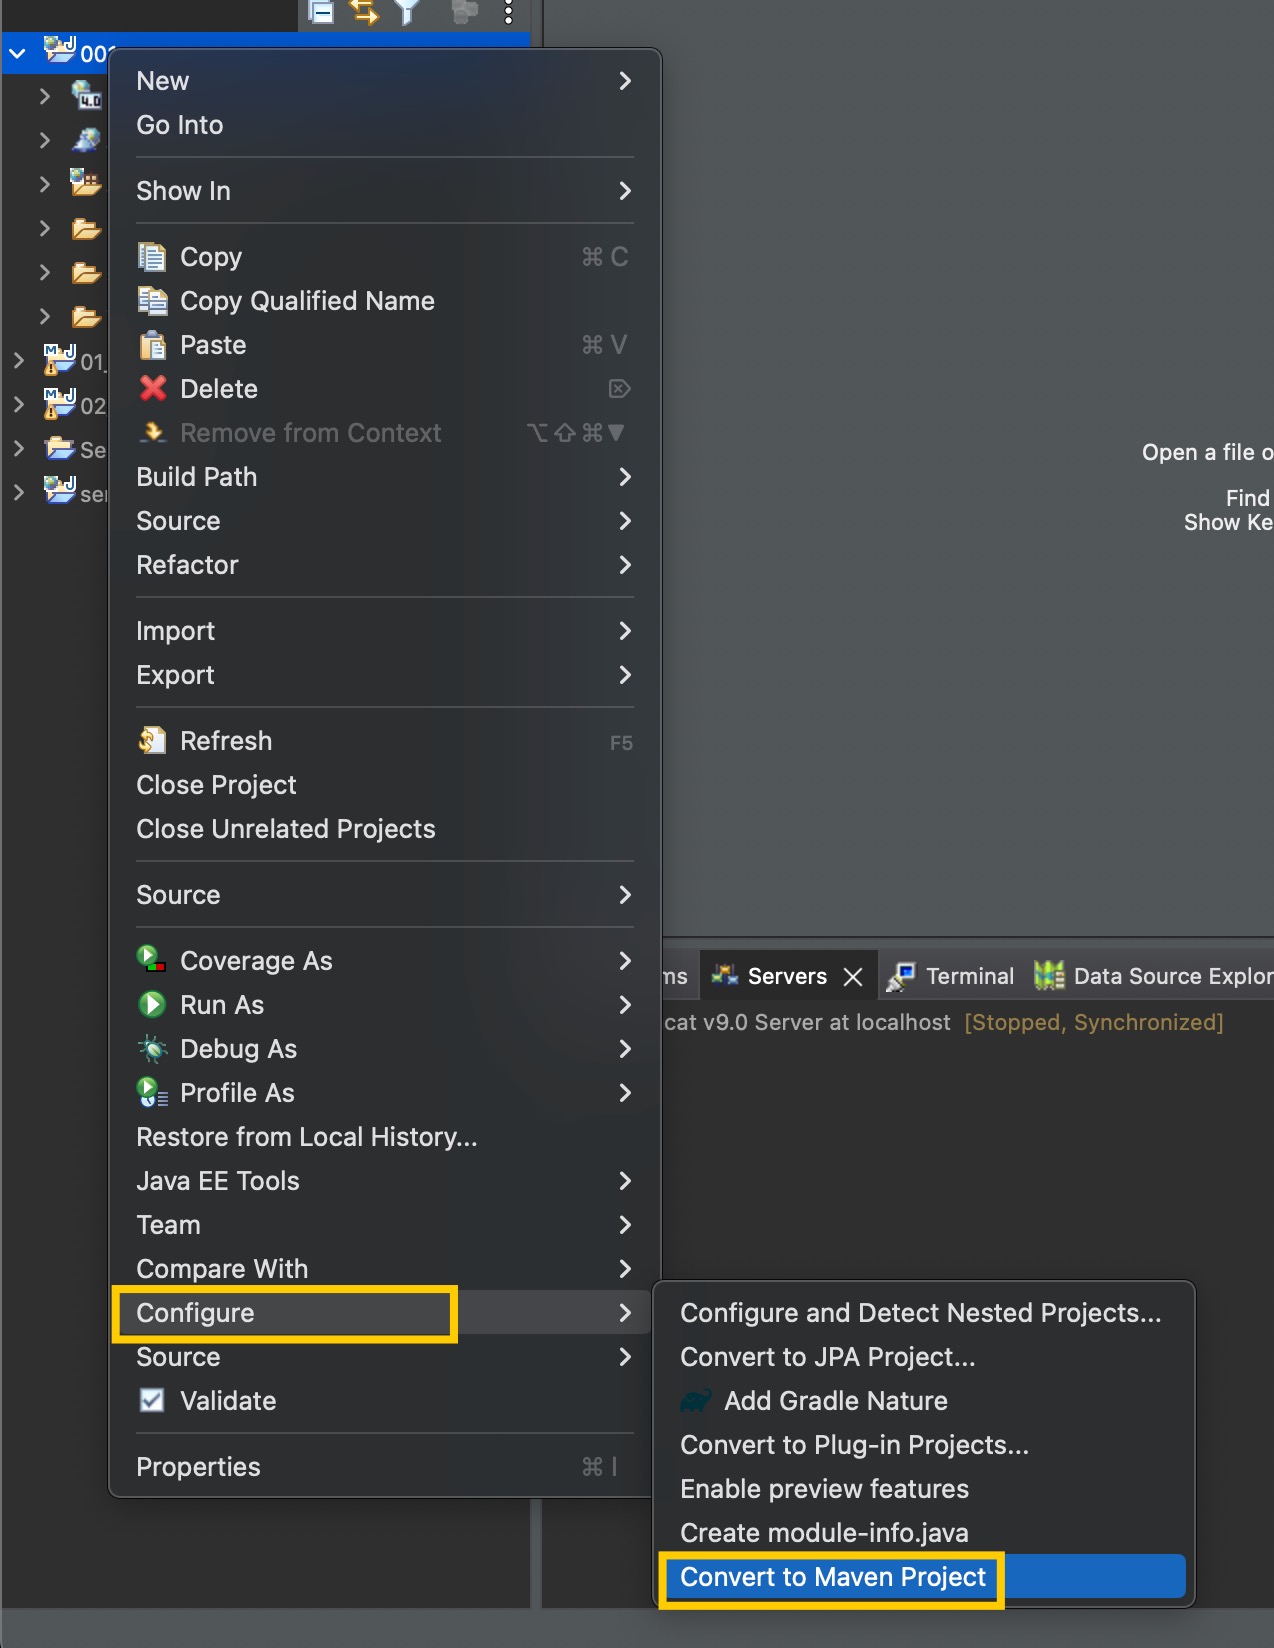
2. configure -> Convert to Maven Project
maven project로 변환한다. -> pom.xml이 생김
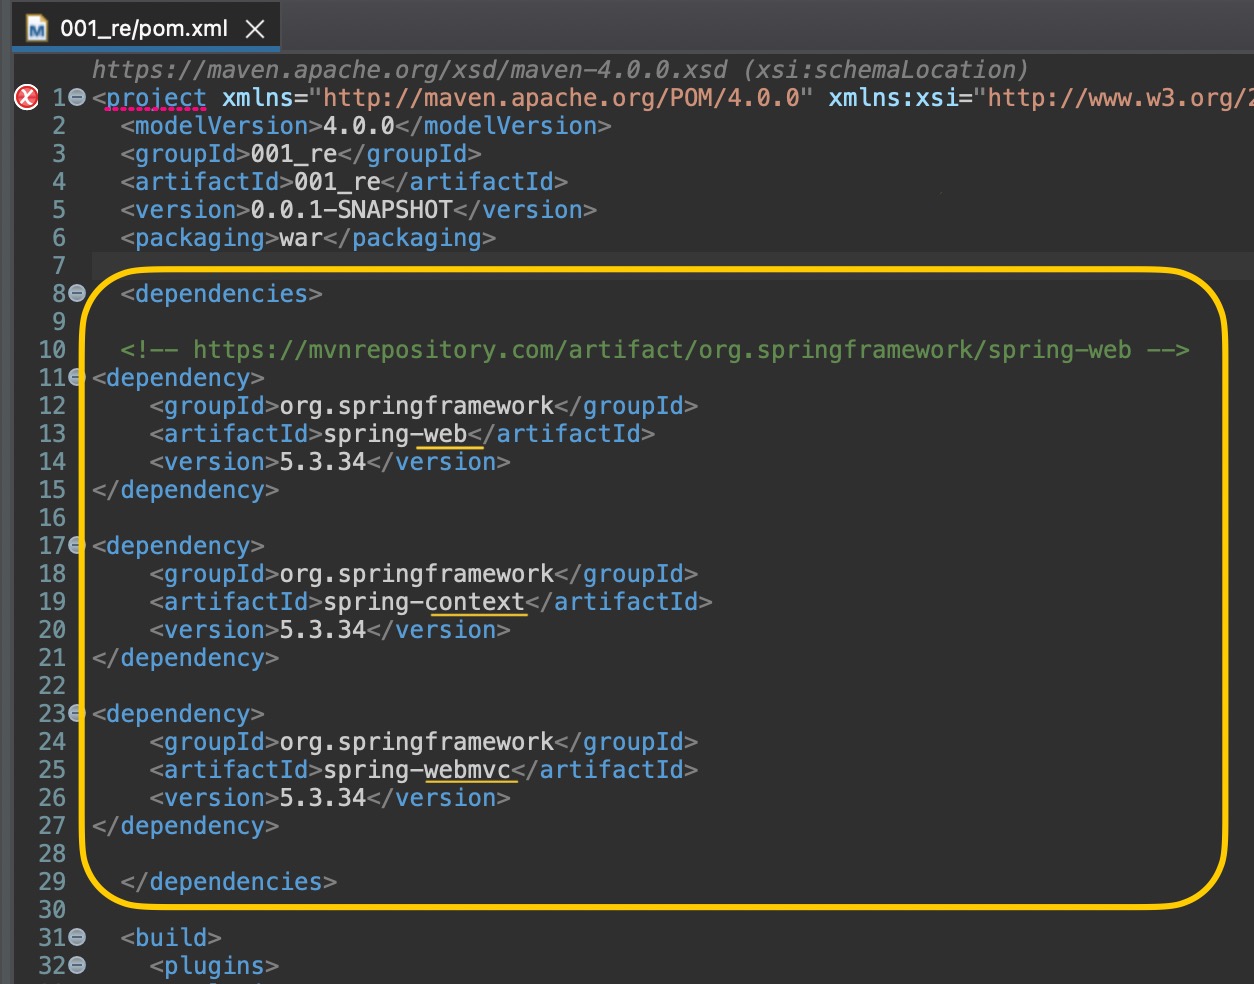
3. pom.xml 설정
3-1. pom.xml에 spring 라이브러리 추가(web, context, webmvc)
https://mvnrepository.com/ 에서 'spring-web'검색
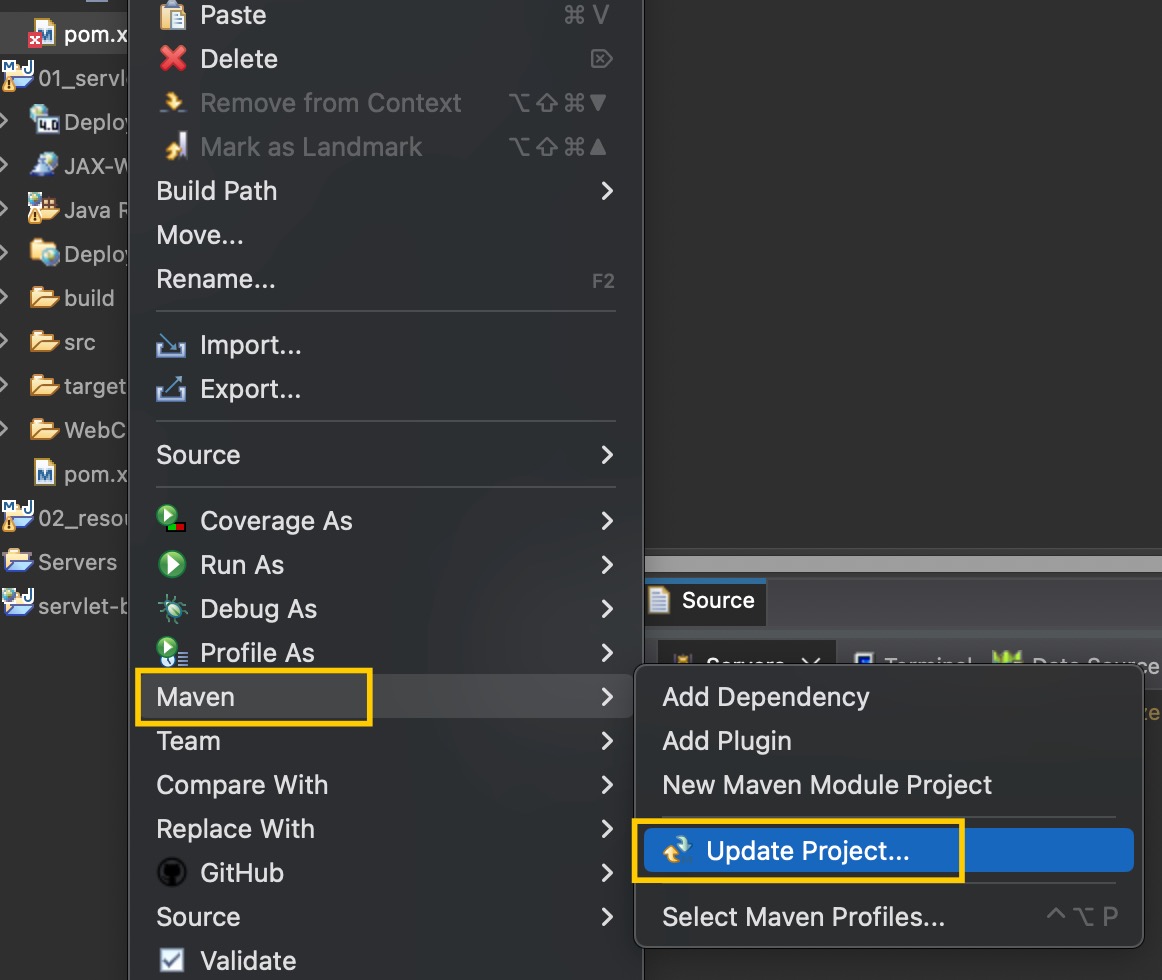
3-2. maven update
pom.xml에 추가하면 maven update를 해줘야한다.
4. web.xml에 Servlet 정의
WebContent>WEB-INF>web.xml
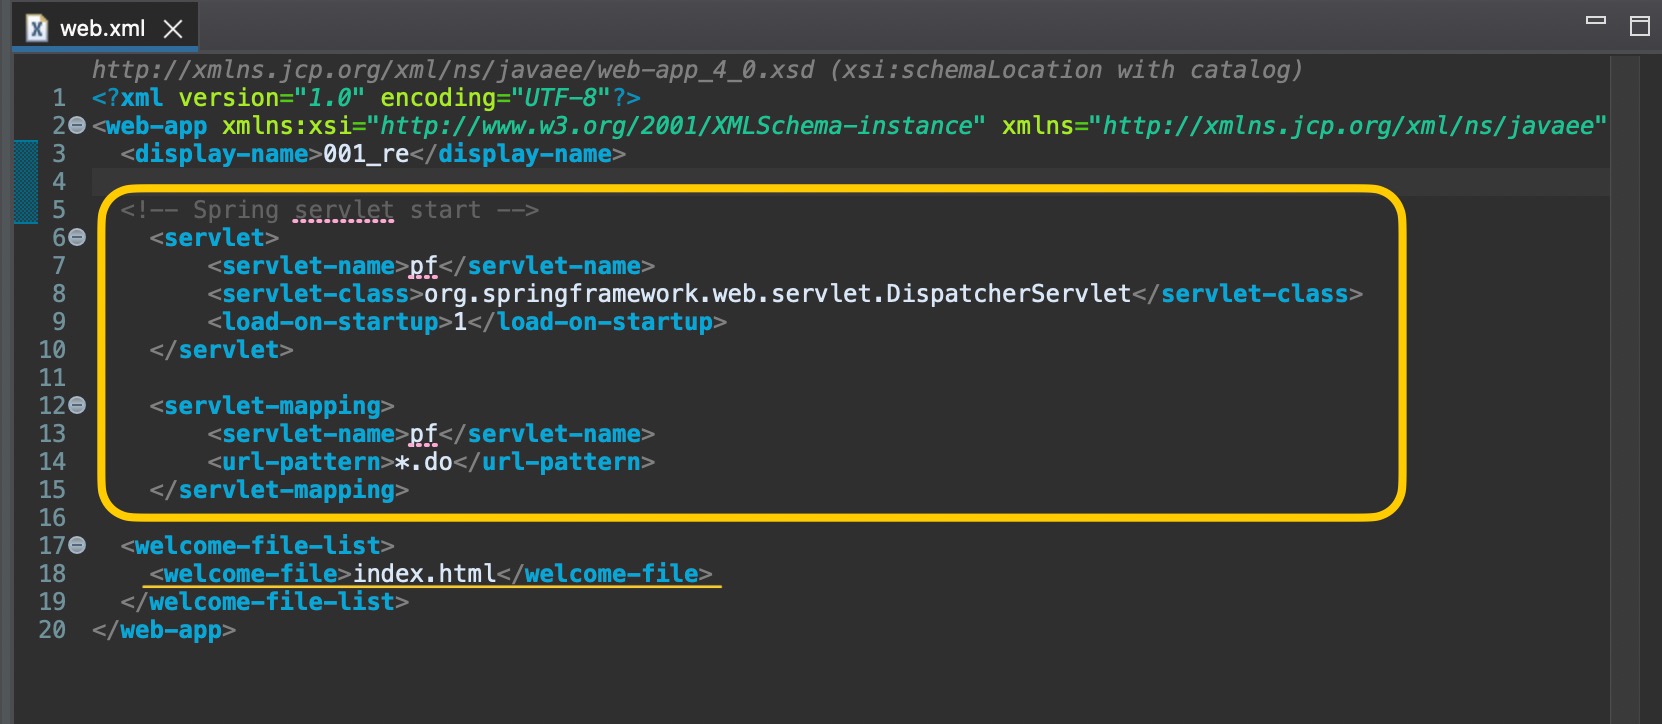
<!-- Spring servlet start -->
	<servlet>
		<servlet-name>pf</servlet-name>
		<servlet-class>org.springframework.web.servlet.DispatcherServlet</servlet-class>
		<load-on-startup>1</load-on-startup>
	</servlet>

	<servlet-mapping>
		<servlet-name>pf</servlet-name>
		<url-pattern>*.do</url-pattern>
	</servlet-mapping>
-
프로젝트 실행되거나 톰캣에 올라가면 web.xml에서 시작된다.
web.xml은 프로그램이 무엇으로 구성되어있는지 간략하게 알려준다.
(여기에 스프링이 있다. 서블릿이 있다. 설정파일은 저기에 있다.)
== 건축물대장(지하 1층에 기계실, 전기실 등이 있다) -
< welcome-file >로 감싸져 있는 index.html은 가장 처음에 띄워주는 페이지
5. Servlet 설정파일 생성
WebContent>WEB-INF>pf-servlet.xml 파일 생성
코드 붙여넣기
<?xml version="1.0" encoding="UTF-8"?>
<beans xmlns="http://www.springframework.org/schema/beans"
	xmlns:context="http://www.springframework.org/schema/context"
	xmlns:xsi="http://www.w3.org/2001/XMLSchema-instance"
	xmlns:tx="http://www.springframework.org/schema/tx"
	xmlns:mvc="http://www.springframework.org/schema/mvc"
	xsi:schemaLocation="
        http://www.springframework.org/schema/beans
        http://www.springframework.org/schema/beans/spring-beans-4.1.xsd
        http://www.springframework.org/schema/mvc
        http://www.springframework.org/schema/mvc/spring-mvc-4.1.xsd
        http://www.springframework.org/schema/tx
        http://www.springframework.org/schema/tx/spring-tx-4.1.xsd
        http://www.springframework.org/schema/context
        http://www.springframework.org/schema/context/spring-context-4.1.xsd">

	<!-- The controllers are auto-detected POJOs labeled with the @Controller
		annotation. -->
	<context:component-scan
		base-package="com.portfolio.www" use-default-filters="false">
		<context:include-filter type="annotation" expression="org.springframework.stereotype.Controller" />
		<context:include-filter type="annotation" expression="org.springframework.stereotype.Component" />
	</context:component-scan>

	<bean
		class="org.springframework.web.servlet.view.InternalResourceViewResolver">
		<property name="prefix" value="/WEB-INF/views/" />
		<property name="suffix" value=".jsp" />
	</bean>

	<mvc:resources mapping="/resources/**" location="/resources/" />

	<mvc:annotation-driven />

</beans>
6. index.html 파일 생성
WebContent아래 index.html파일 생성
- 코드 넣기 (context root 주의!)
<script>
window.onload = function(){
	location.href="/001/index.do";
}
</script>
7. jsp 파일이 들어갈 views 폴더 생성, index.jsp 파일 만들기
WebContent > WEB-INF > views 폴더 생성
views에 jsp파일들이 들어갈거다.
index.jsp 파일 만들기
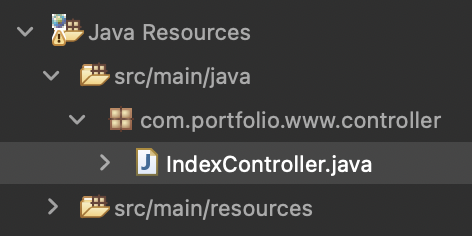
8. index.do 서블릿 클래스 작성
Java Resources > src/main/java > com.portfolio.www.controller패키지 생성
패키지 밑에 IndexController.java 클래스 생성
package com.portfolio.www.controller;

import org.springframework.stereotype.Controller;
import org.springframework.web.bind.annotation.RequestMapping;

@Controller
public class IndexController {
	public IndexController() {
		System.out.println("============================생성됨============================");
	}

	@RequestMapping("/index.do")
	public String indexPage() {
		return "index";
	}
}
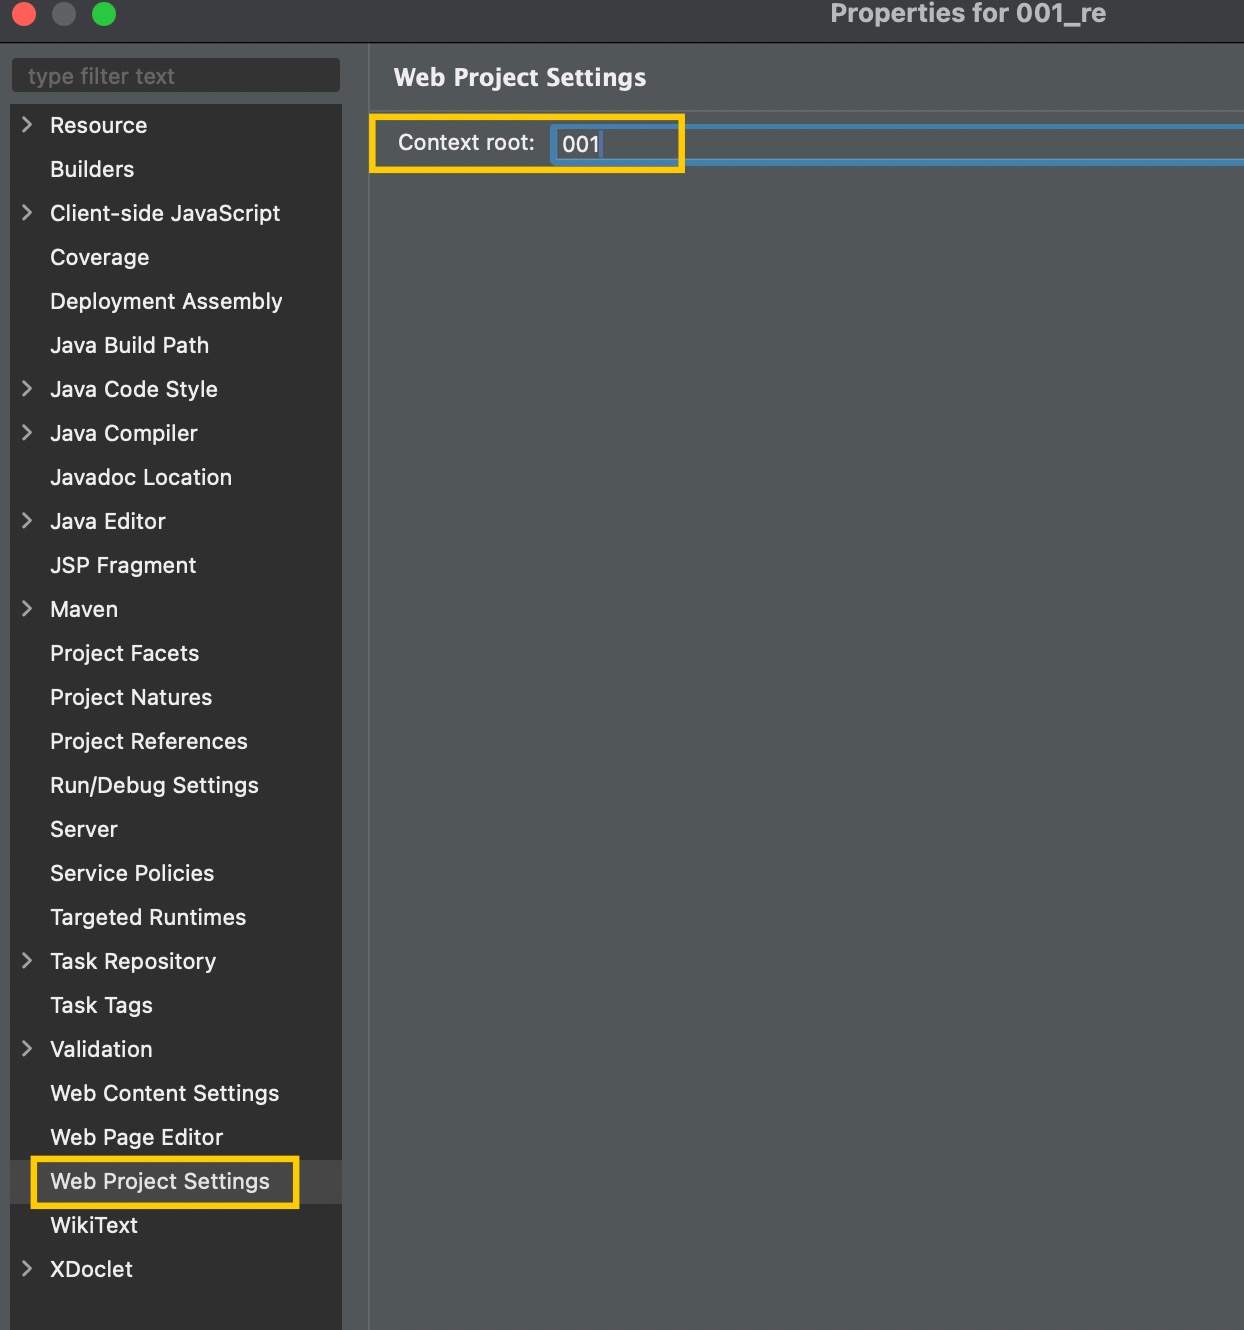
9. context root 변경하기
Properties > Web Project Settings에서 변경 가능
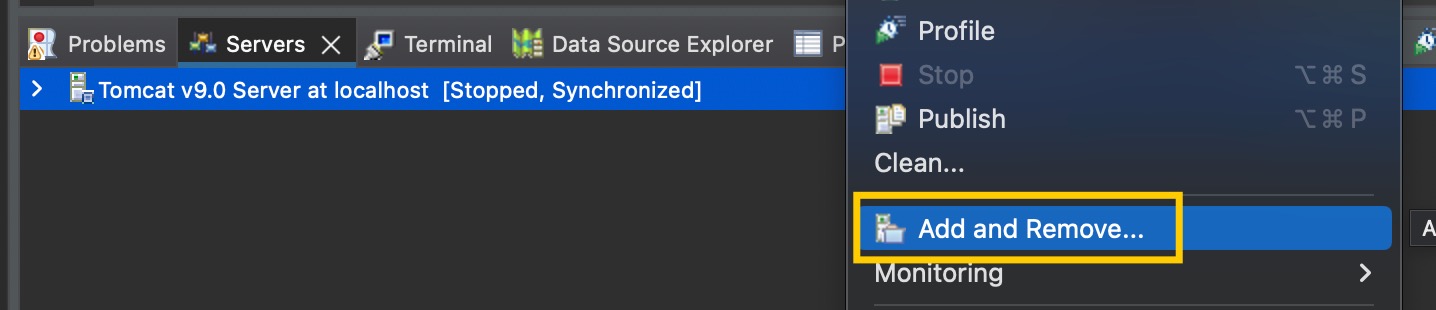
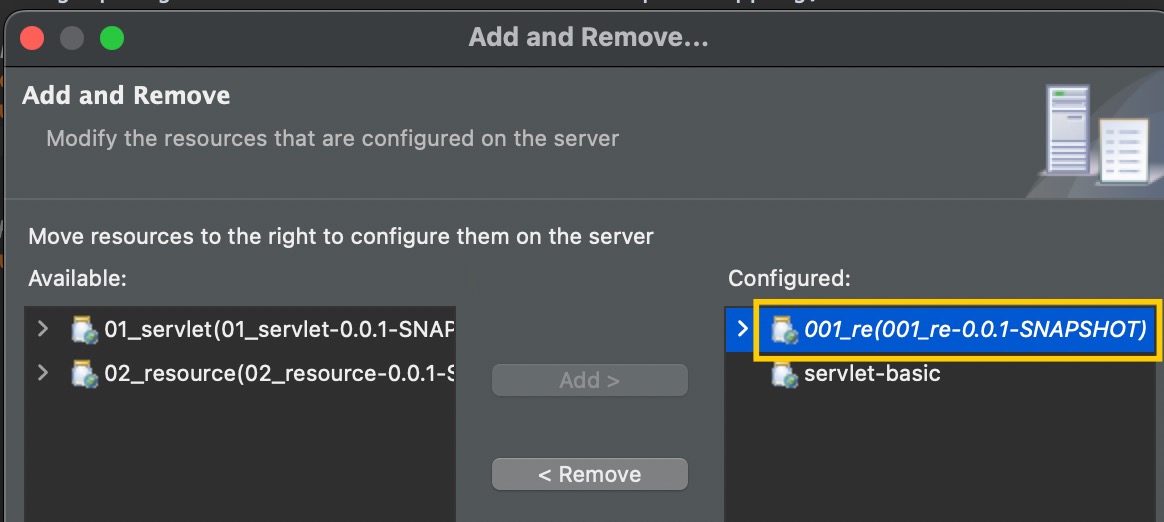
10. tomcat 연결하기
Servers Tomcat에서 우클릭 > Add and Remove > 해당프로젝트 Add