Mac M1 이상에서 Redis를 실행하는 방법과 Spring Boot에서 사용하는 방법을 정리하고자 한다. 처음에는 Embedded Redis를 사용하려 하였으나, 실행 오류가 발생하여 로컬 Redis 서버를 사용하도록 변경했다.
부제:
Invocation of init method failed; nested exception is java.lang.RuntimeException: Can't start redis server오류와 싸우는 모든 초보 개발자들을 위하여org.springframework.beans.factory.BeanCreationException: Error creating bean with name 'localRedisConfig': Invocation of init method failed; nested exception is java.lang.RuntimeException: Can't start redis server. Check logs for details. Redis process log:
Embedded Redis 시도 및 실패
처음에는 Embedded Redis를 사용하려 했지만, Mac M3 환경에서 실행되지 않는 문제가 있었다. 이유를 모르고 허비한 3시간.. 이는 embedded-redis 라이브러리가 ARM 아키텍처를 지원하지 않기 때문이었다.
로컬 Redis 서버 설치
Mac M1 이상에서는 homebrew를 이용해 Redis를 설치할 수 있다.
brew install redis설치가 완료되면 Redis 서버를 실행한다.
brew services start redis정상적으로 실행되었는지 확인하려면 다음 명령어를 실행해 본다.
redis-cli pingPONG 응답이 나오면 Redis가 정상적으로 실행되고 있는 것이다.
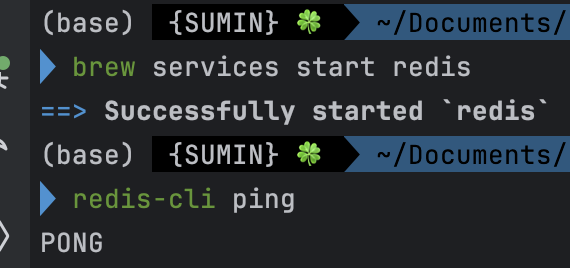
PONG 너무 귀여운 거 아니냐고.. 😙
Spring Boot에서 Redis 설정
Spring Boot 프로젝트에서 Redis를 사용하려면 spring-boot-starter-data-redis 라이브러리를 추가해야 한다.
build.gradle 설정
implementation 'org.springframework.boot:spring-boot-starter-data-redis'application.yml 설정
spring:
  data:
    redis:
      host: localhost
      port: 6379
Redis 설정 클래스 (LocalRedisConfig.java)
package com.example.account.config;

import org.springframework.beans.factory.annotation.Value;
import org.springframework.context.annotation.Bean;
import org.springframework.context.annotation.Configuration;
import org.springframework.data.redis.connection.RedisConnectionFactory;
import org.springframework.data.redis.connection.lettuce.LettuceConnectionFactory;
import org.springframework.data.redis.core.RedisTemplate;
import org.springframework.data.redis.serializer.StringRedisSerializer;

@Configuration
public class LocalRedisConfig {
    @Value("${spring.data.redis.host}")
    private String redisHost;

    @Value("${spring.data.redis.port}")
    private int redisPort;

    @Bean
    public RedisConnectionFactory redisConnectionFactory() {
        return new LettuceConnectionFactory(redisHost, redisPort);
    }

    @Bean
    public RedisTemplate<String, Object> redisTemplate() {
        RedisTemplate<String, Object> template = new RedisTemplate<>();
        template.setConnectionFactory(redisConnectionFactory());
        template.setKeySerializer(new StringRedisSerializer());
        template.setValueSerializer(new StringRedisSerializer());
        return template;
    }
}
이제 Redis를 실행한 상태에서 애플리케이션을 구동하면 정상적으로 Redis와 연결된다.
Redis 테스트
Redis가 정상적으로 동작하는지 확인하기 위해, 간단한 테스트 코드를 작성해 보자.
@Autowired
private RedisTemplate<String, String> redisTemplate;

@Test
void testRedistConnection() {
	redis.Template.opsForValue().set("testKey", "Hello, Redis!");
    String value = redisTemplate.opsForValue().get("testKey");
    System.out.println("Redis Value: " + value);
애플리케이션을 실행한 후 Redis Value: Hello, Redis!가 출력되면 성공적으로 Redis가 작동하는 것이다.
정리
Mac M1 이상에서 Redis를 실행하는 방법과 Spring Boot에서 설정하는 과정을 정리했다. 처음에는 Embedded Redis를 사용하려 했지만 ARM 아키텍처 문제로 실패했고, Homebrew로 Redis를 설치해 해결했다. 이후 Spring Boot에서 LettuceConnectionFactory를 사용하여 Redis와의 연결을 설정했다.
에러와 싸우는 우리 모두 파이팅...