📲 이미지 리사이징 함수, 추가한 이유
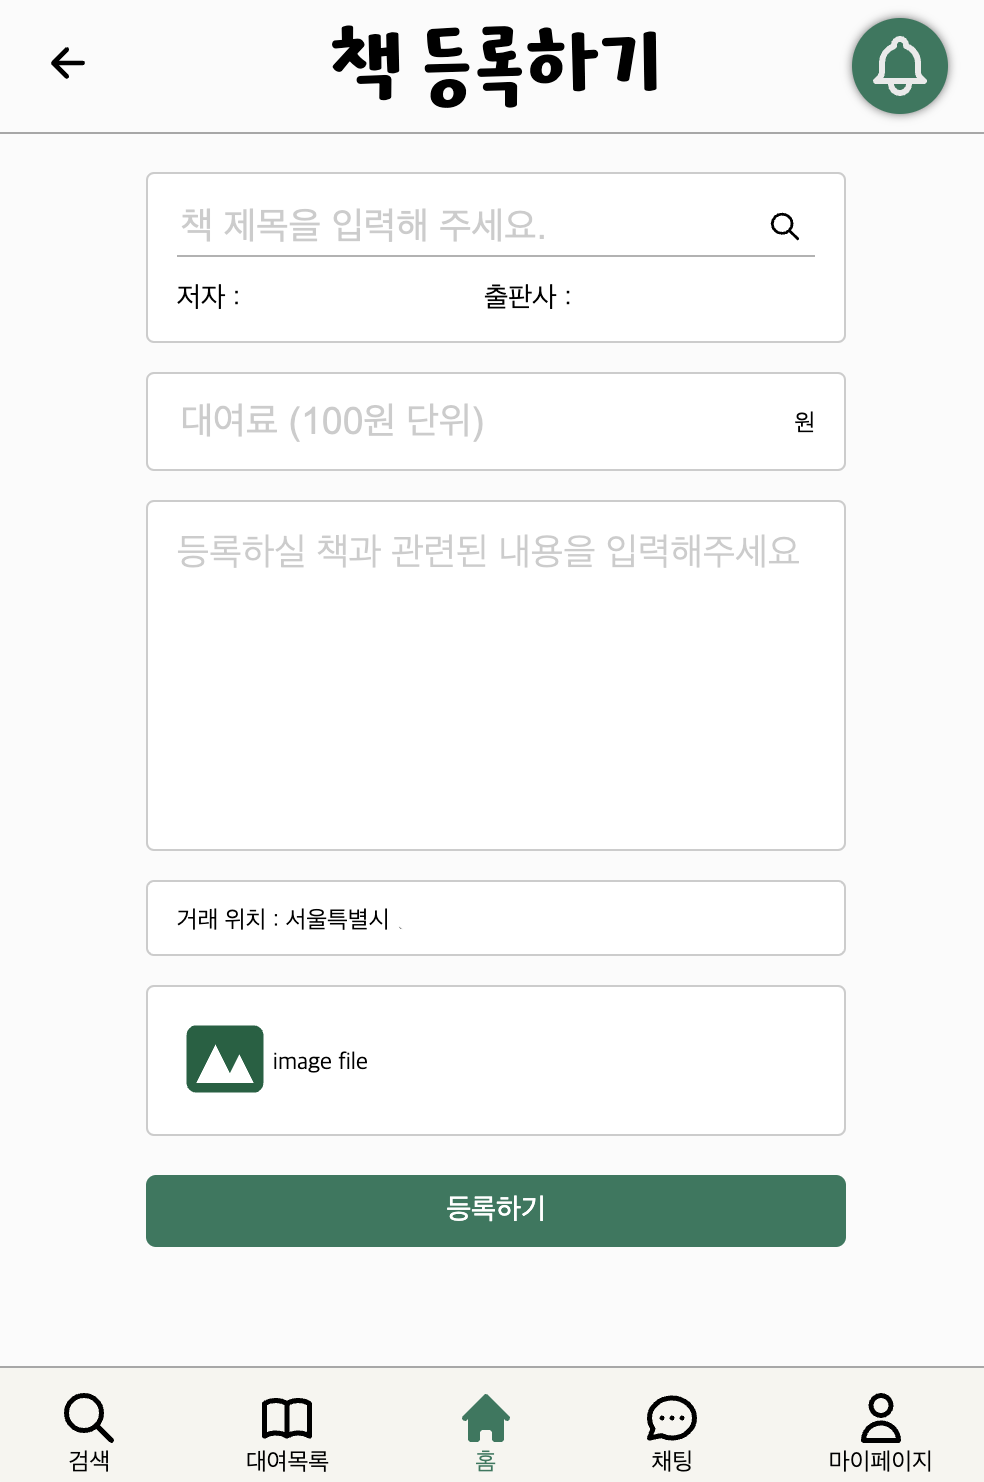
→ 우리 동네북 프로젝트에서는 유저가 이미지를 등록하는 기능이 총 2번 들어간다. 거래를 하기 위해 책을 등록할 때 책 이미지 등록하기, 그리고 마이페이지에서 프로필 이미지 등록하기.
처음에는 스프린트에 맞게 진행하기 위해 이미지 등록하는 기능만 구현하기 바빴는데,(사실 이 부분에서도 하루 종일 붙잡고 있을 정도로 문제가 많았기에 포스팅하여 다시는 같은 문제를 해결하는데 들어가는 시간을 줄일 예정이다) 기능 구현 후 생각해보니 유저에 따라서 등록하는 이미지의 용량이 천차만별일 것이고, 이 부분을 클라이언트 측에서 효과적으로 관리할 필요가 있겠다는 생각이 들었다.
그래서 빠른 렌더링과 리소스 관리를 위해 첨부된 이미지를 리사이징하는 함수를 추가하게 되었다.
🛠 이미지 리사이징 함수 만들기

→
utils에 이미지 리사이징 함수를 만들었는데, max size(width, heigth)는 400으로 두었으며, Context는 2d로 제한을 두었다.
const dataUriFromFormFile = (file: File) => {
	return new Promise(resolve => {
		const reader = new FileReader();

		reader.onload = () => {
			resolve(reader.result);
		};
		reader.readAsDataURL(file);
	});
};

const resizeImage = (imgEl: HTMLImageElement) => {
	const MAX_SIZE = 400;
	const canvas = document.createElement('canvas');
	let width = imgEl.width;
	let height = imgEl.height;
	if (width > height) {
		if (width > MAX_SIZE) {
			height *= MAX_SIZE / width;
			width = MAX_SIZE;
		}
	} else {
		if (height > MAX_SIZE) {
			width *= MAX_SIZE / height;
			height = MAX_SIZE;
		}
	}
	canvas.width = width;
	canvas.height = height;
	canvas.getContext('2d')?.drawImage(imgEl, 0, 0, width, height);
	return canvas.toDataURL('image/jpeg');
};

const dataURItoBlob = (dataURI: string) => {
	let byteString;
	if (dataURI.split(',')[0].indexOf('base64') >= 0)
		byteString = atob(dataURI.split(',')[1]);
	else byteString = unescape(dataURI.split(',')[1]);
	const mimeString = dataURI.split(',')[0].split(':')[1].split(';')[0];
	let ia = new Uint8Array(byteString.length);

	for (var i = 0; i < byteString.length; i++) {
		ia[i] = byteString.charCodeAt(i);
	}

	return new Blob([ia], { type: mimeString });
};

const resizeImageToBlob: (file: File) => Promise<Blob> = file => {
	return new Promise(async resolve => {
		const result = await dataUriFromFormFile(file);
		const imgEl = document.createElement('img');
		imgEl.onload = () => {
			if (imgEl.width <= 400 && imgEl.height <= 400) {
				resolve(file);
			} else {
				const resizedDataUri = resizeImage(imgEl);
				resolve(dataURItoBlob(resizedDataUri));
			}
		};
		imgEl.src = result as string;
	});
};

export default resizeImageToBlob;
🔎 이미지 리사이징 함수 적용하기
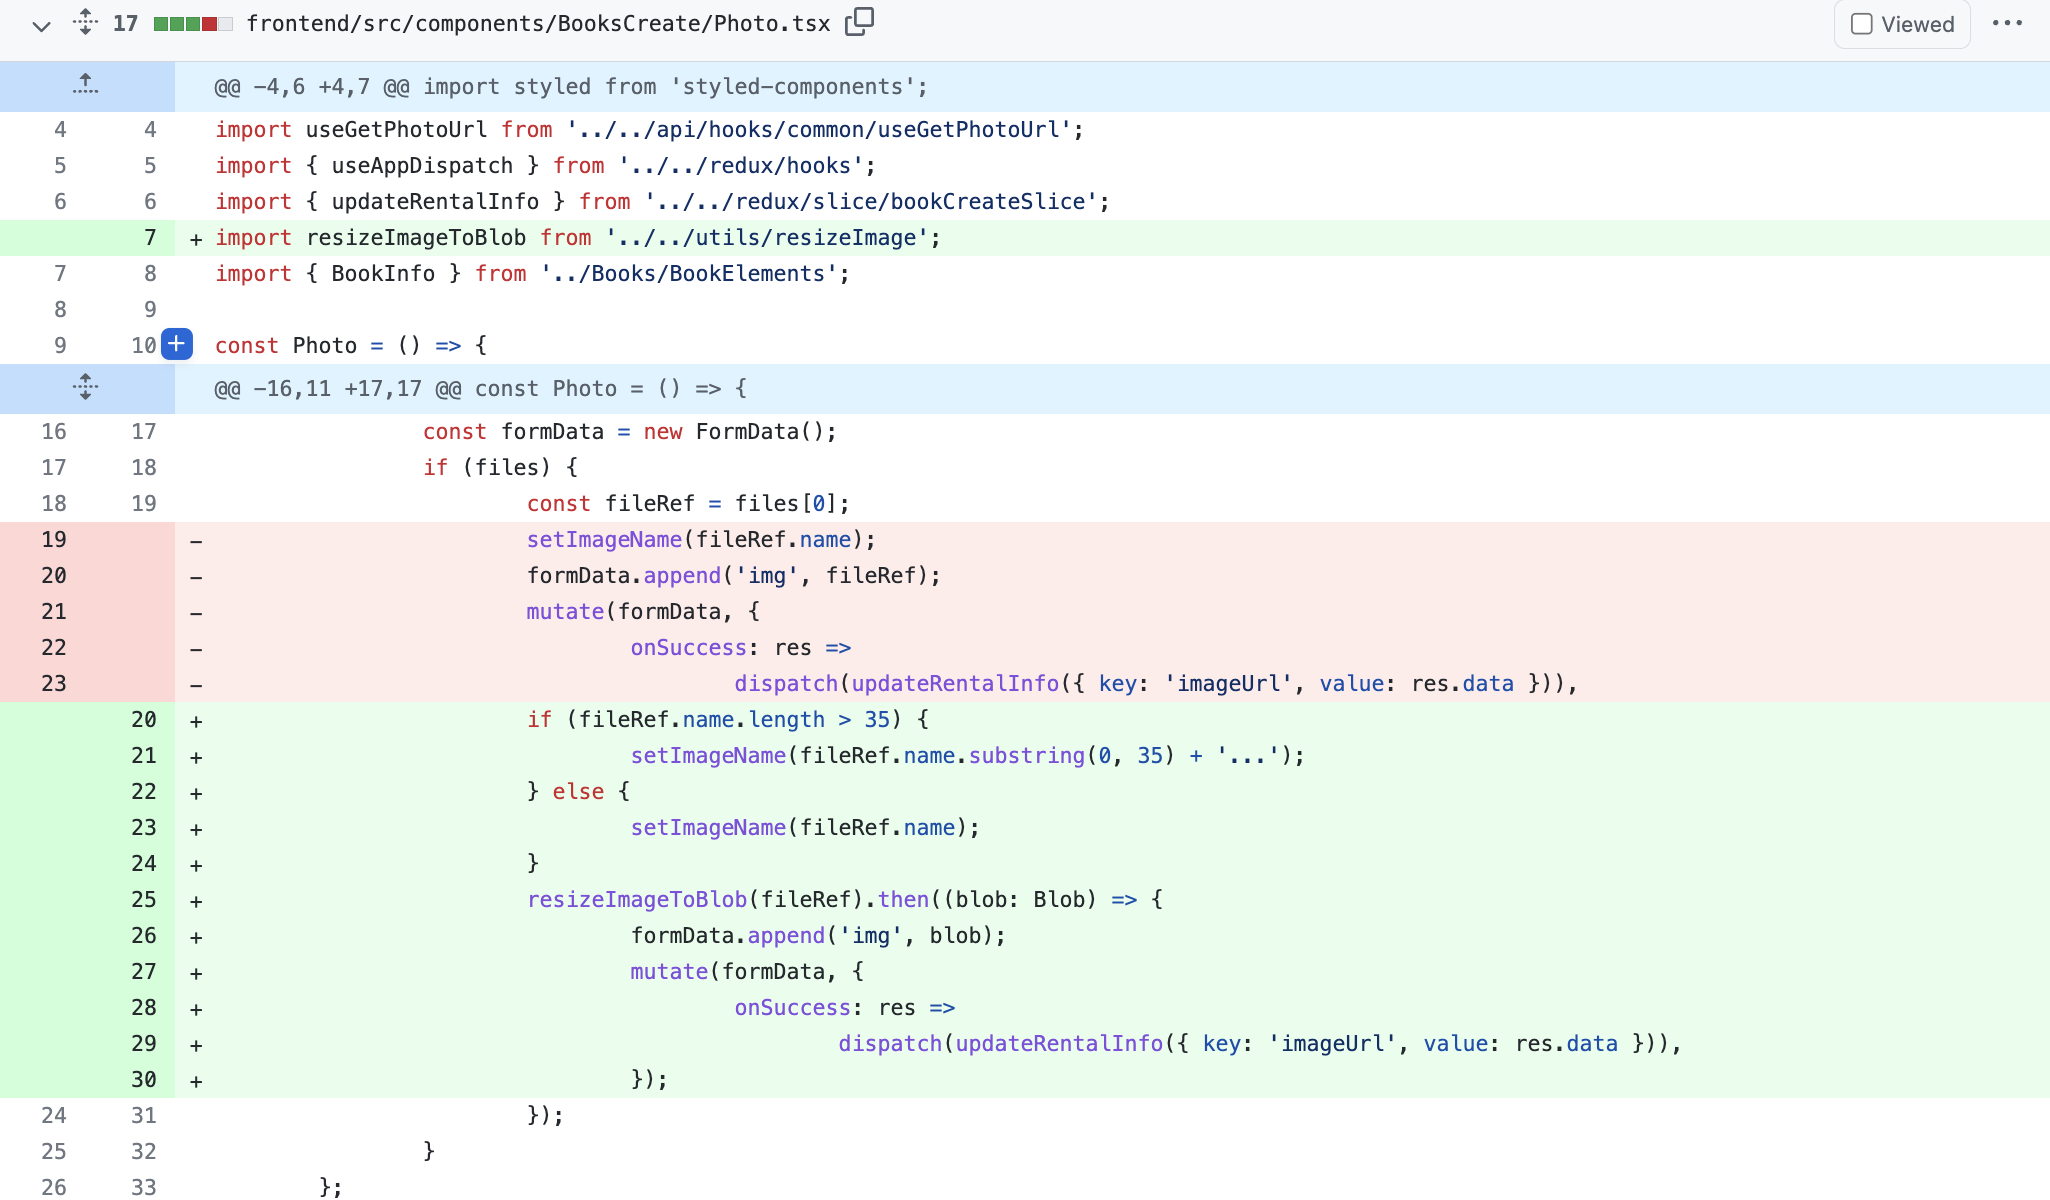
→ 이미지 파일을 페이지 전환 없이 폼 데이터를 비동기로 제출 하고 싶고, 자바스크립트로 비교적 타이트하게 폼 데이터를 관리하기 위해
formData 객체를 이용하였다.
이전에는 formData에 대한 개념 조차 몰랐기에 이 부분에 대해서 학습하는데 시간이 걸렸다. 추후에 포스팅하겠지만fetch로 폼데이터 전송하는 부분에서도 어려움을 겪었다.
import { useState } from 'react';
import { HiPhotograph } from 'react-icons/hi';
import styled from 'styled-components';
import useGetPhotoUrl from '../../api/hooks/common/useGetPhotoUrl';
import [
](https://inpa.tistory.com/entry/JS-%F0%9F%93%9A-FormData-%EC%A0%95%EB%A6%AC-fetch-api){ useAppDispatch } from '../../redux/hooks';
import { updateRentalInfo } from '../../redux/slice/bookCreateSlice';
import { StyledBookInfo } from '../../pages/BooksCreatePage';
import resizeImageToBlob from '../../utils/resizeImage';

const Photo = () => {
	const [imageName, setImageName] = useState('');
	const { mutate } = useGetPhotoUrl();
	const dispatch = useAppDispatch();

	const handleChange = (e: React.ChangeEvent<HTMLInputElement>) => {
		const { files } = e.target;
		const formData = new FormData();
		if (files) {
			const fileRef = files[0];
			if (fileRef.name.length > 35) {
				setImageName(fileRef.name.substring(0, 35) + '...');
			} else {
				setImageName(fileRef.name);
			}
			resizeImageToBlob(fileRef).then((blob: Blob) => {
				formData.append('img', blob);
				mutate(formData, {
					onSuccess: res =>
						dispatch(updateRentalInfo({ key: 'imageUrl', value: res.data })),
				});
			});
		}
	};

	return (
		<StyledBookInfo>
			<div className="book--info__photo">
				<label htmlFor="photo">
					<Photicon />
				</label>
				<div>{imageName || 'image file'}</div>
				<input
					id="photo"
					type="file"
					accept=".png,.jpg,.jpeg"
					multiple={false}
					onChange={handleChange}
				/>
			</div>
		</StyledBookInfo>
	);
};

const Photicon = styled(HiPhotograph)`
	color: ${props => props.theme.colors.logoGreen};
	width: 4rem;
	height: 4rem;
	cursor: pointer;
`;

export default Photo;

신규 서비스의 기획부터 개발, 운영까지 전 과정을 경험한 주니어 📱