Spring Boot AWS RDS 연결 및 사용
Spring Boot AWS EC2 연결 및 사용
지난 글들에서 RDS와 EC2로 DB와 가상서버를 연동해 배포를 진행했었다.
그리고 오늘은 이미지 및 파일들을 업로드 할 때 쓸 쑤 있는 S3를 연동 가즈아...!
(사실 이미지 업로드 생각 안하다가 급하게 생각나서 하는 중 ㅎ)
S3란?
S3(Simple Storage Service)는 클라우드 기반의 객체 스토리지 서비스로, 웹 서비스 인터페이스를 통해 어디서나 데이터를 저장하고 검색 가능
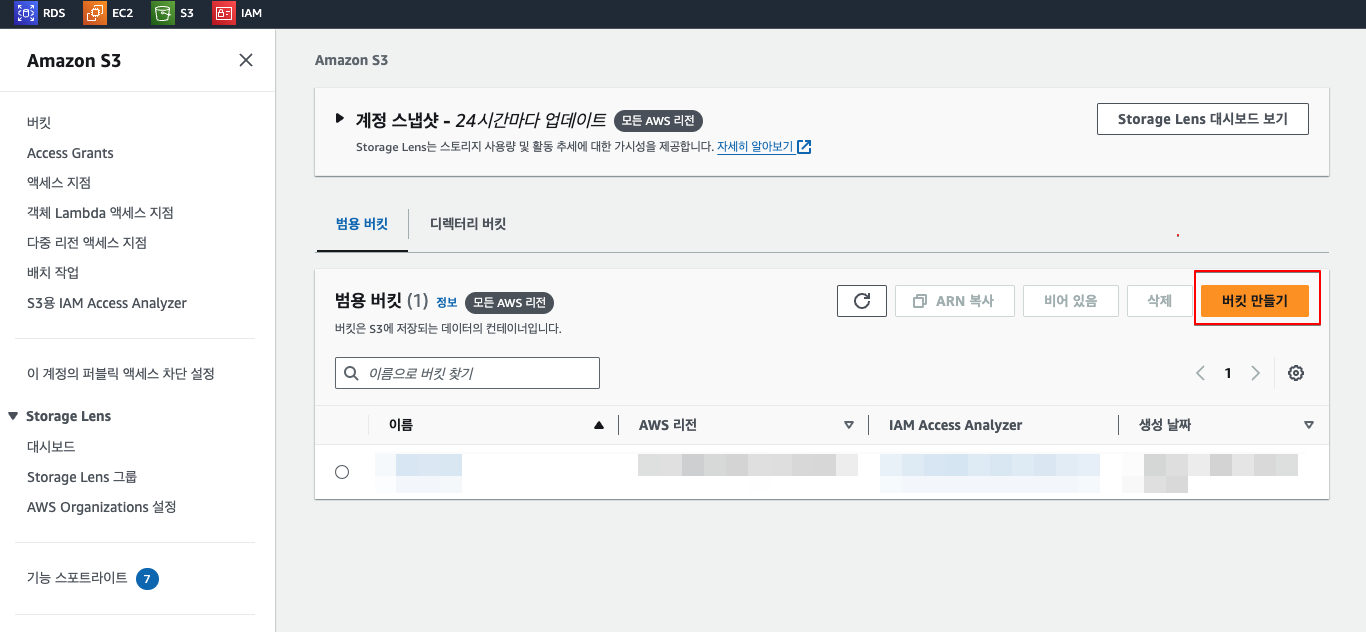
🛠️ AWS S3 Bucket 생성
-
s3 > 버킷 만들기
-
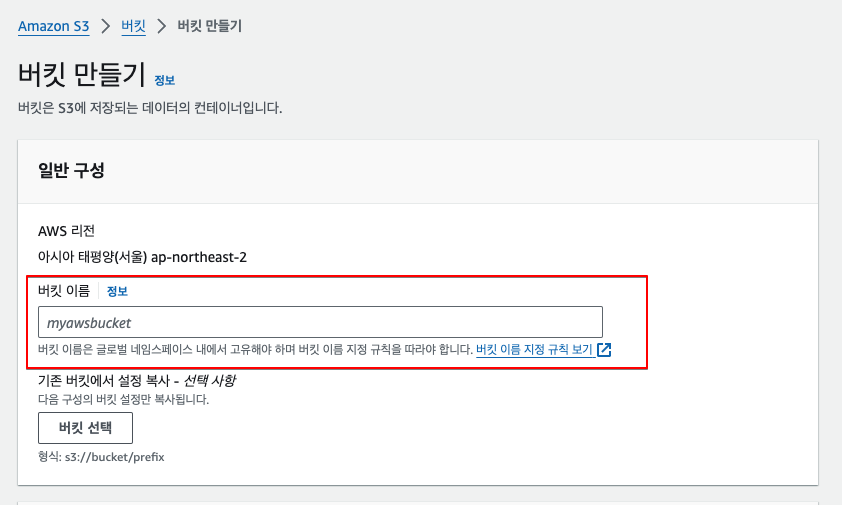
규칙에 맞춰서 야무지게 버킷 이름을 생성해주자
-
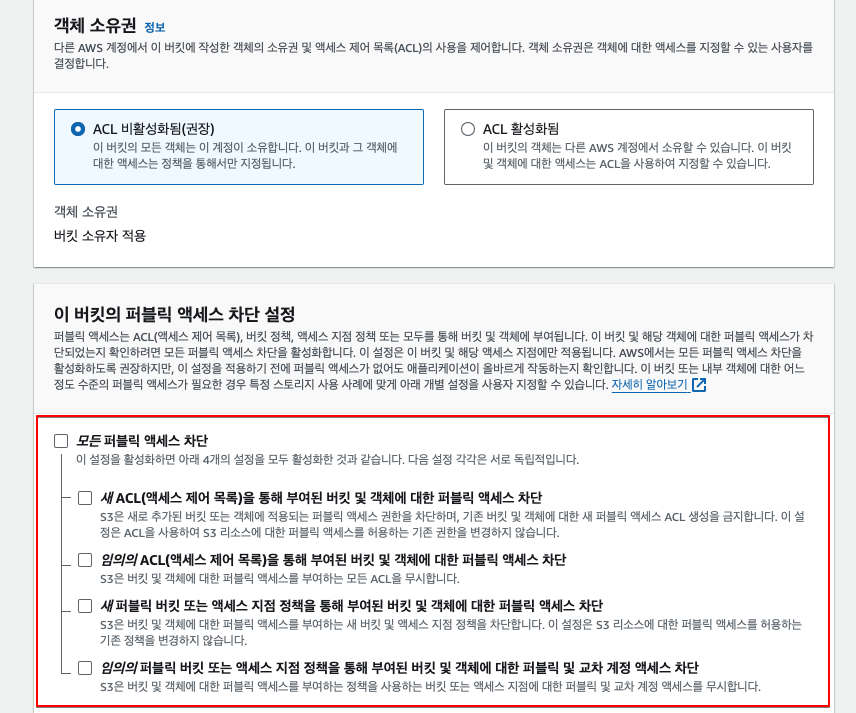
퍼블릭 액세스 설정 해제
(객체 소유권 같은 경우엔 추후에도 설정이 가능하다. 이건 나중에 공유가 필요할 때 야무지게 해보자.) -
그 외 나머지는 디폴트 값으로 두고 렛츠고~
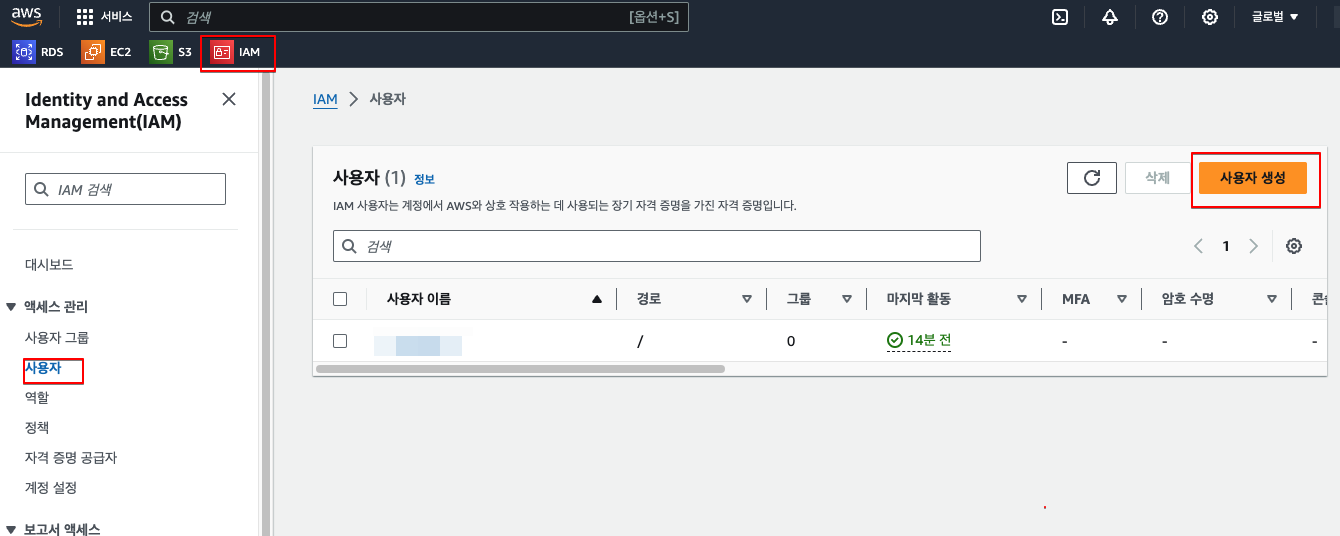
⚙️ IAM 사용자 권한 추가
-
S3에 접근하기 위해선 사용자에게 S3 접근 권한이 필요하다.
-
또한 접근 권한은 액세스키와 시크릿키로 설정하기 위함
-
IAM > 사용자 > 사용자 생성
-
사융자 세부 정보 입력
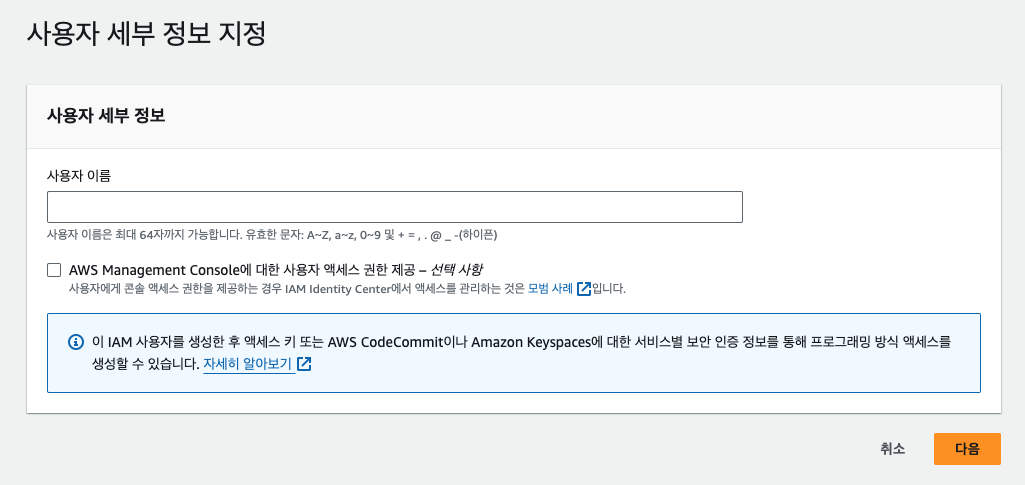
-
권한 설정 > 직접 정책 연결 > AmazonS3FullAccess 선택
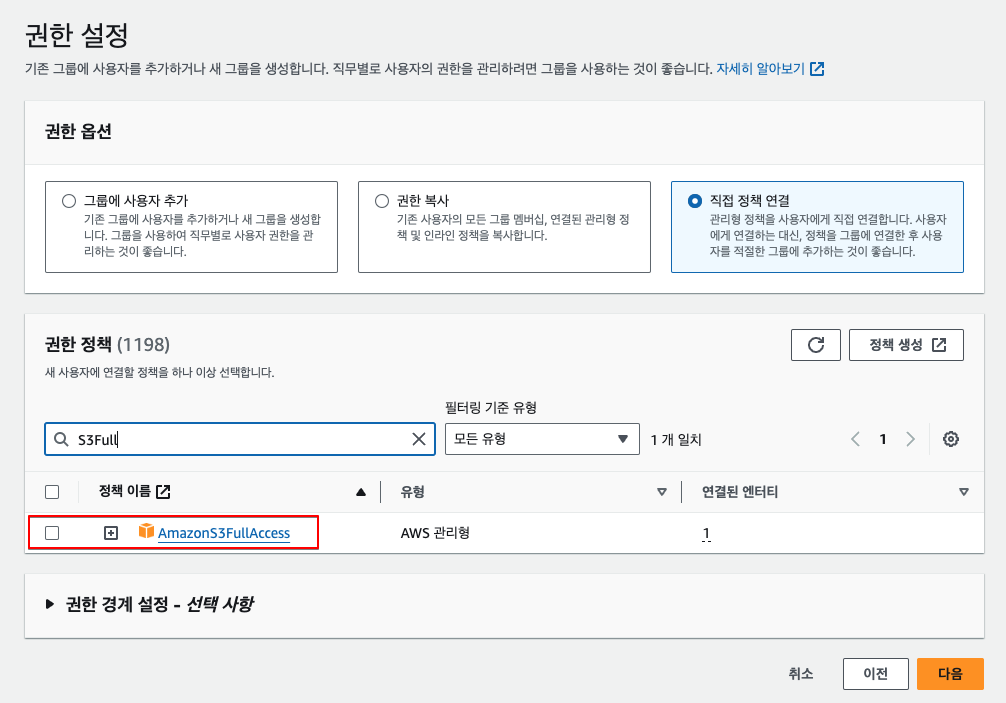
-
아래 이미지처럼 S3 엑세스 권한 되면 생성 클릭
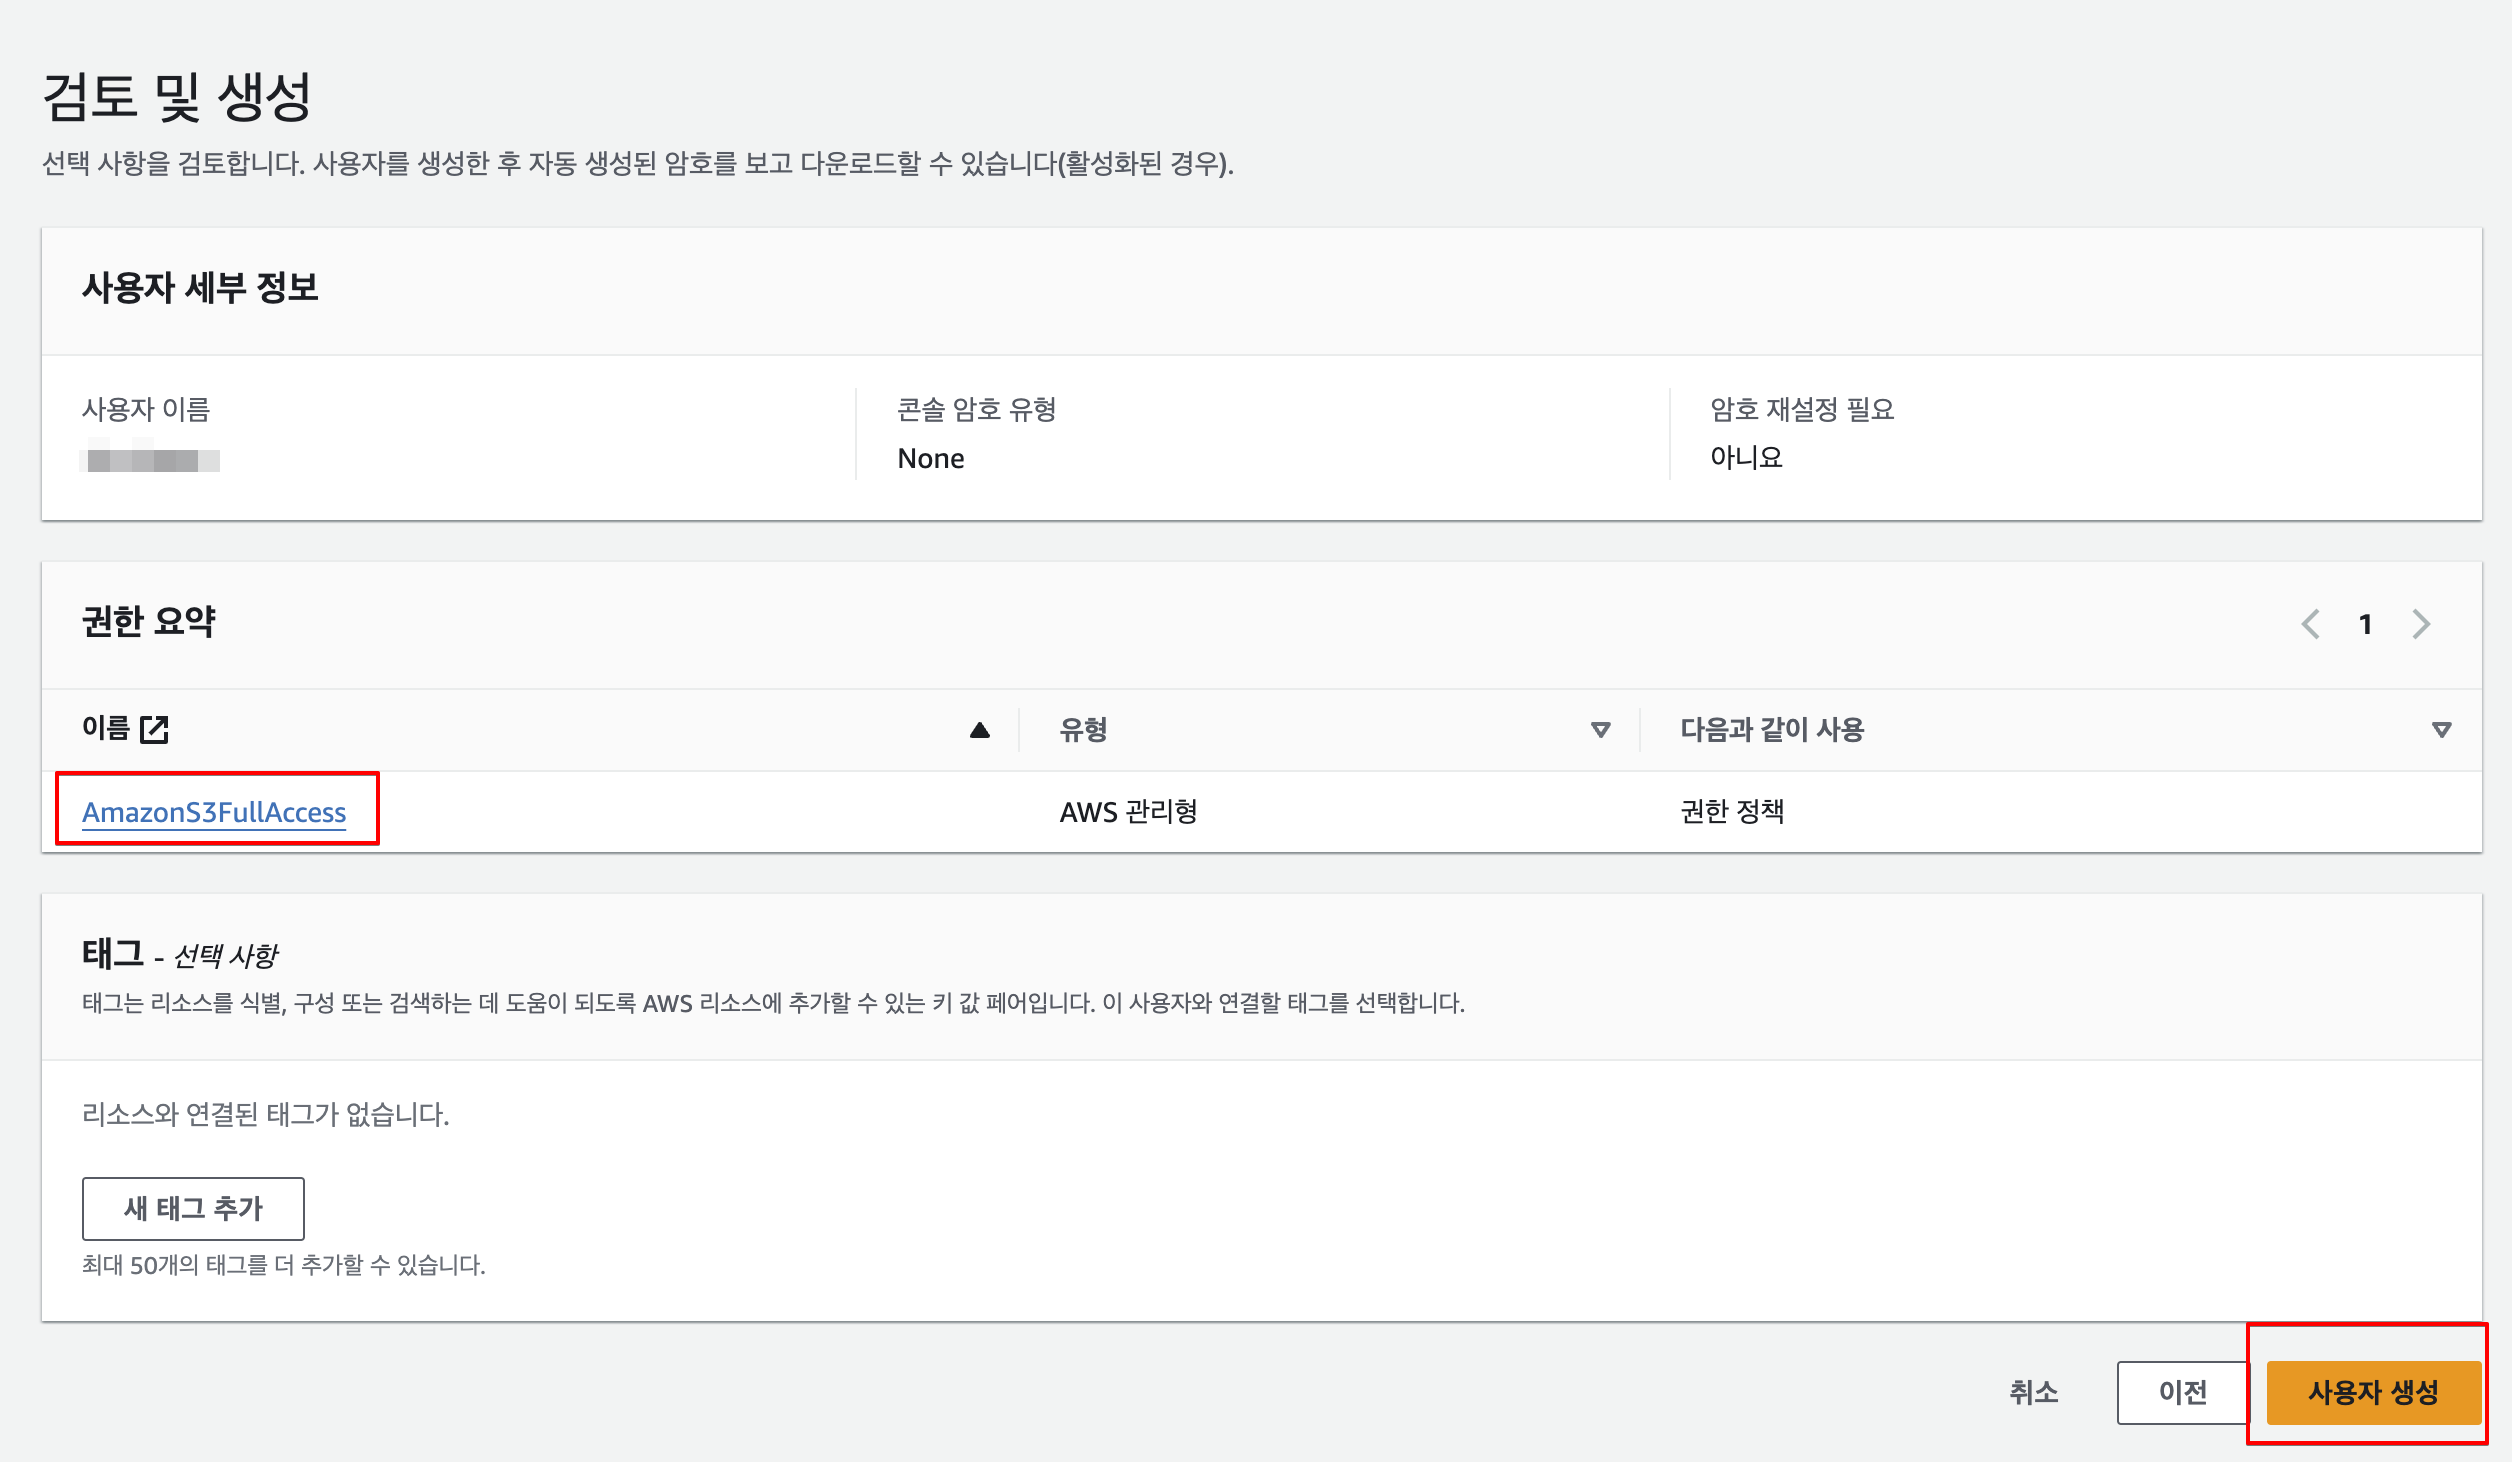
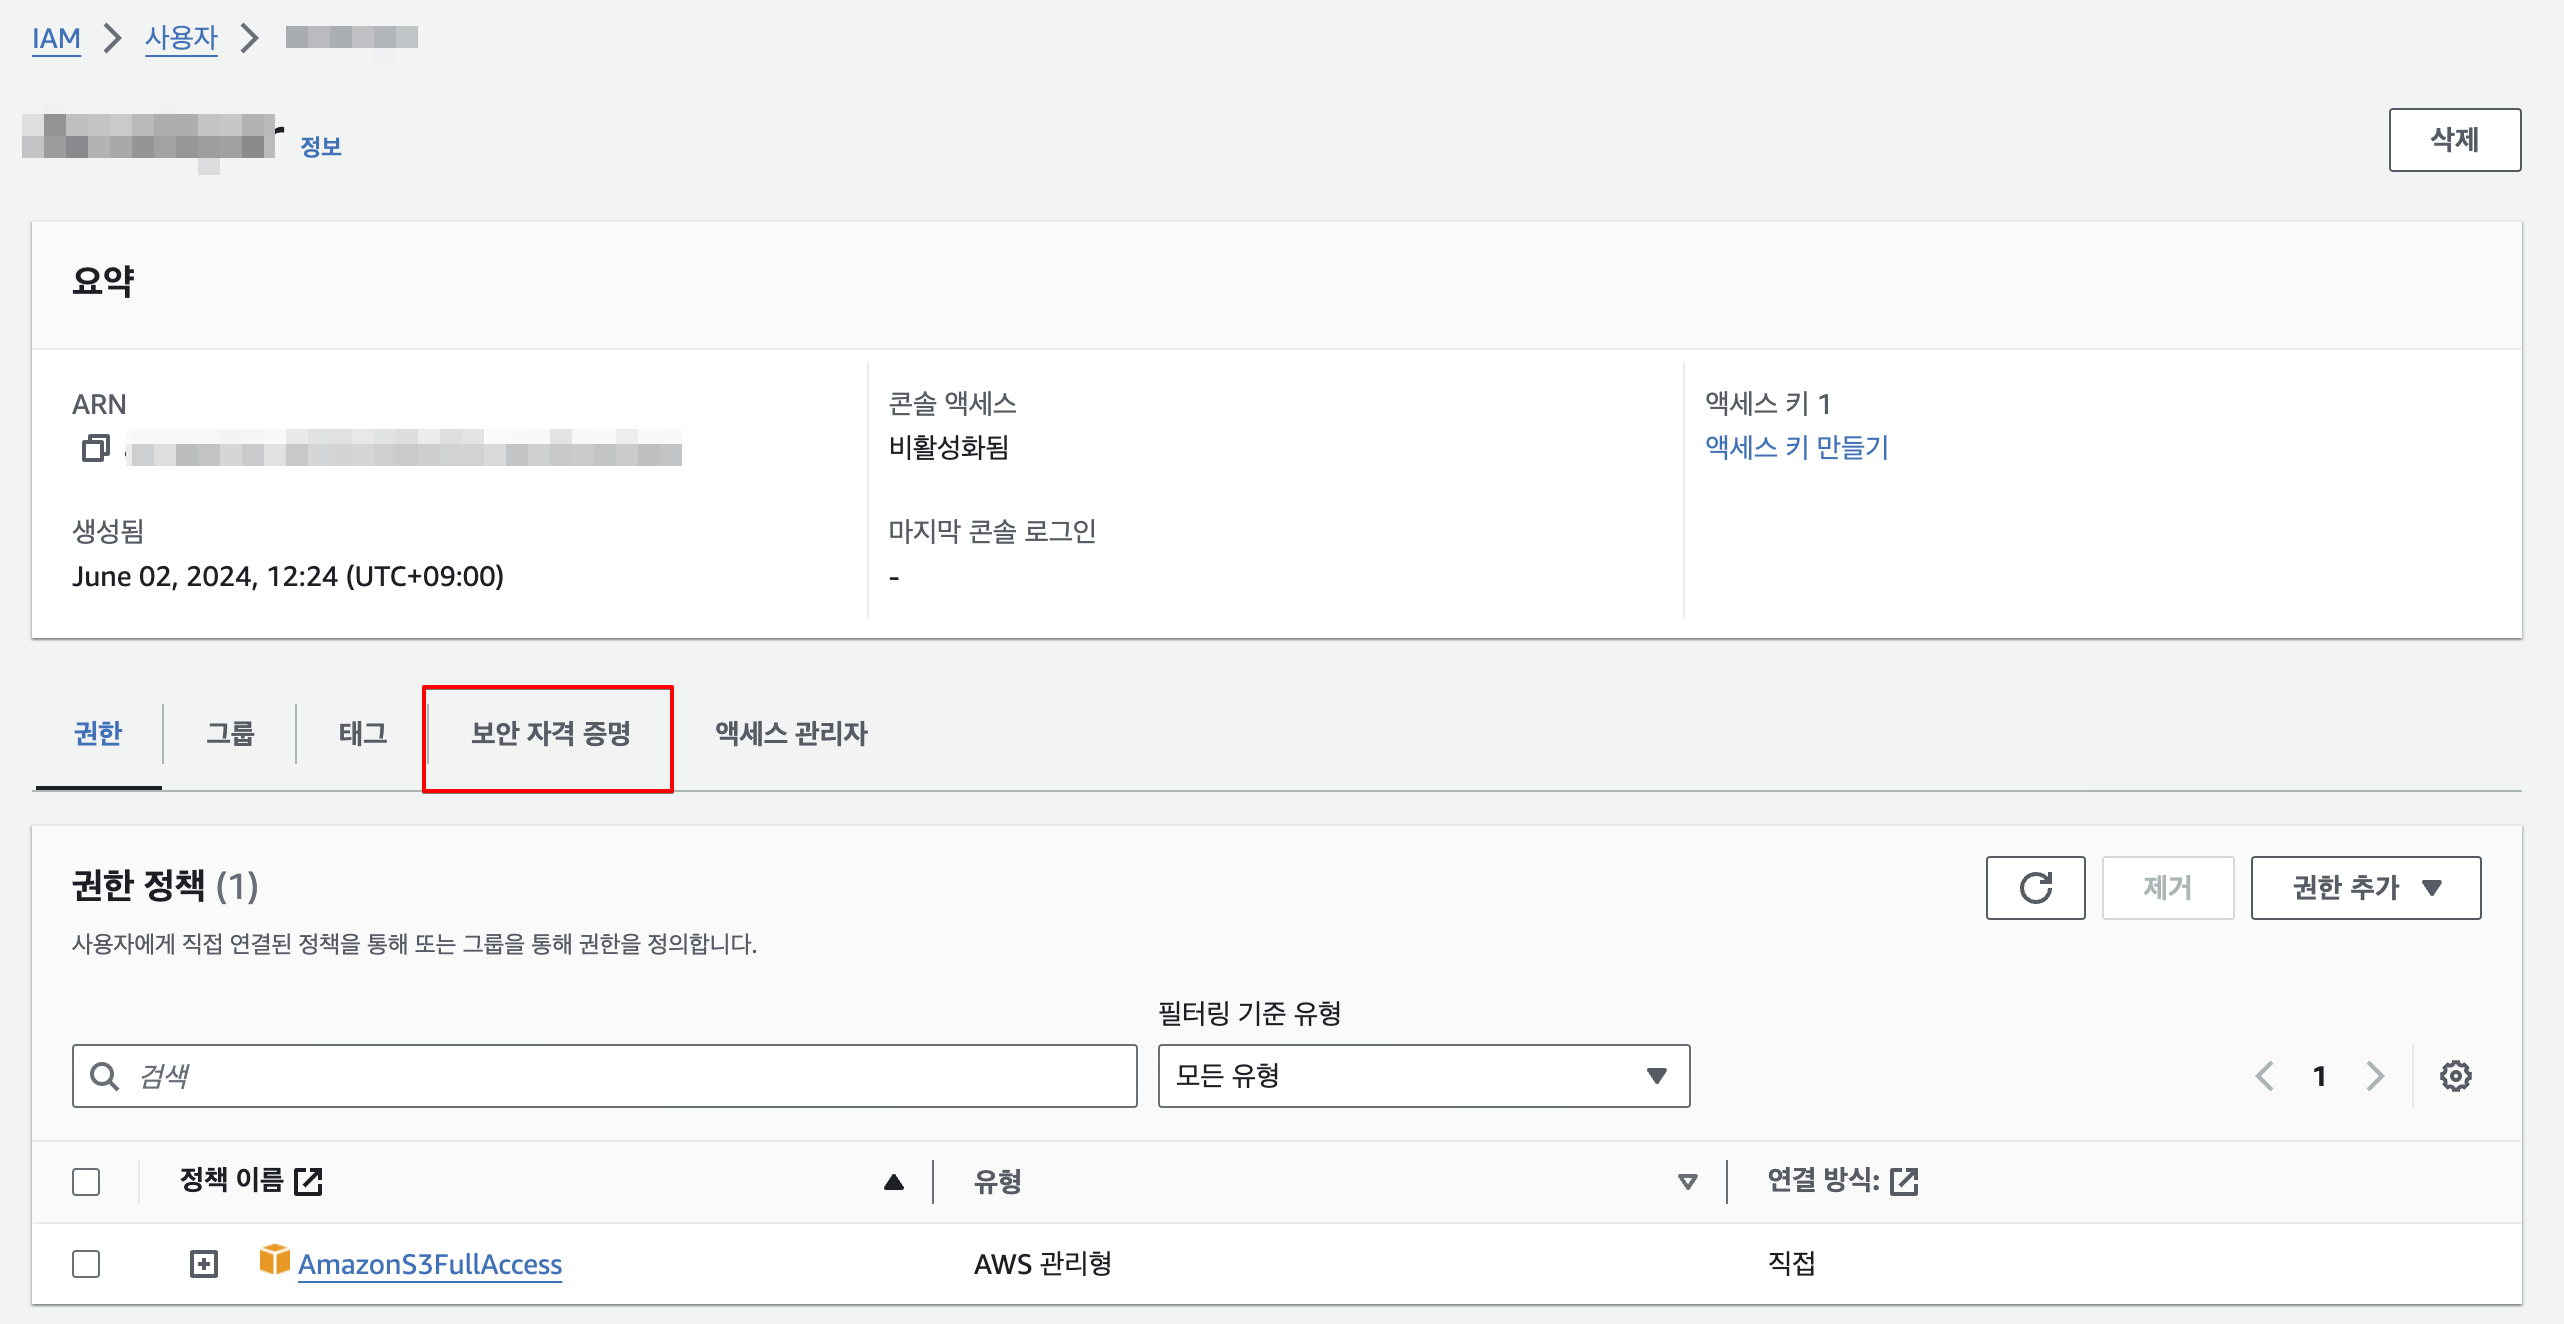
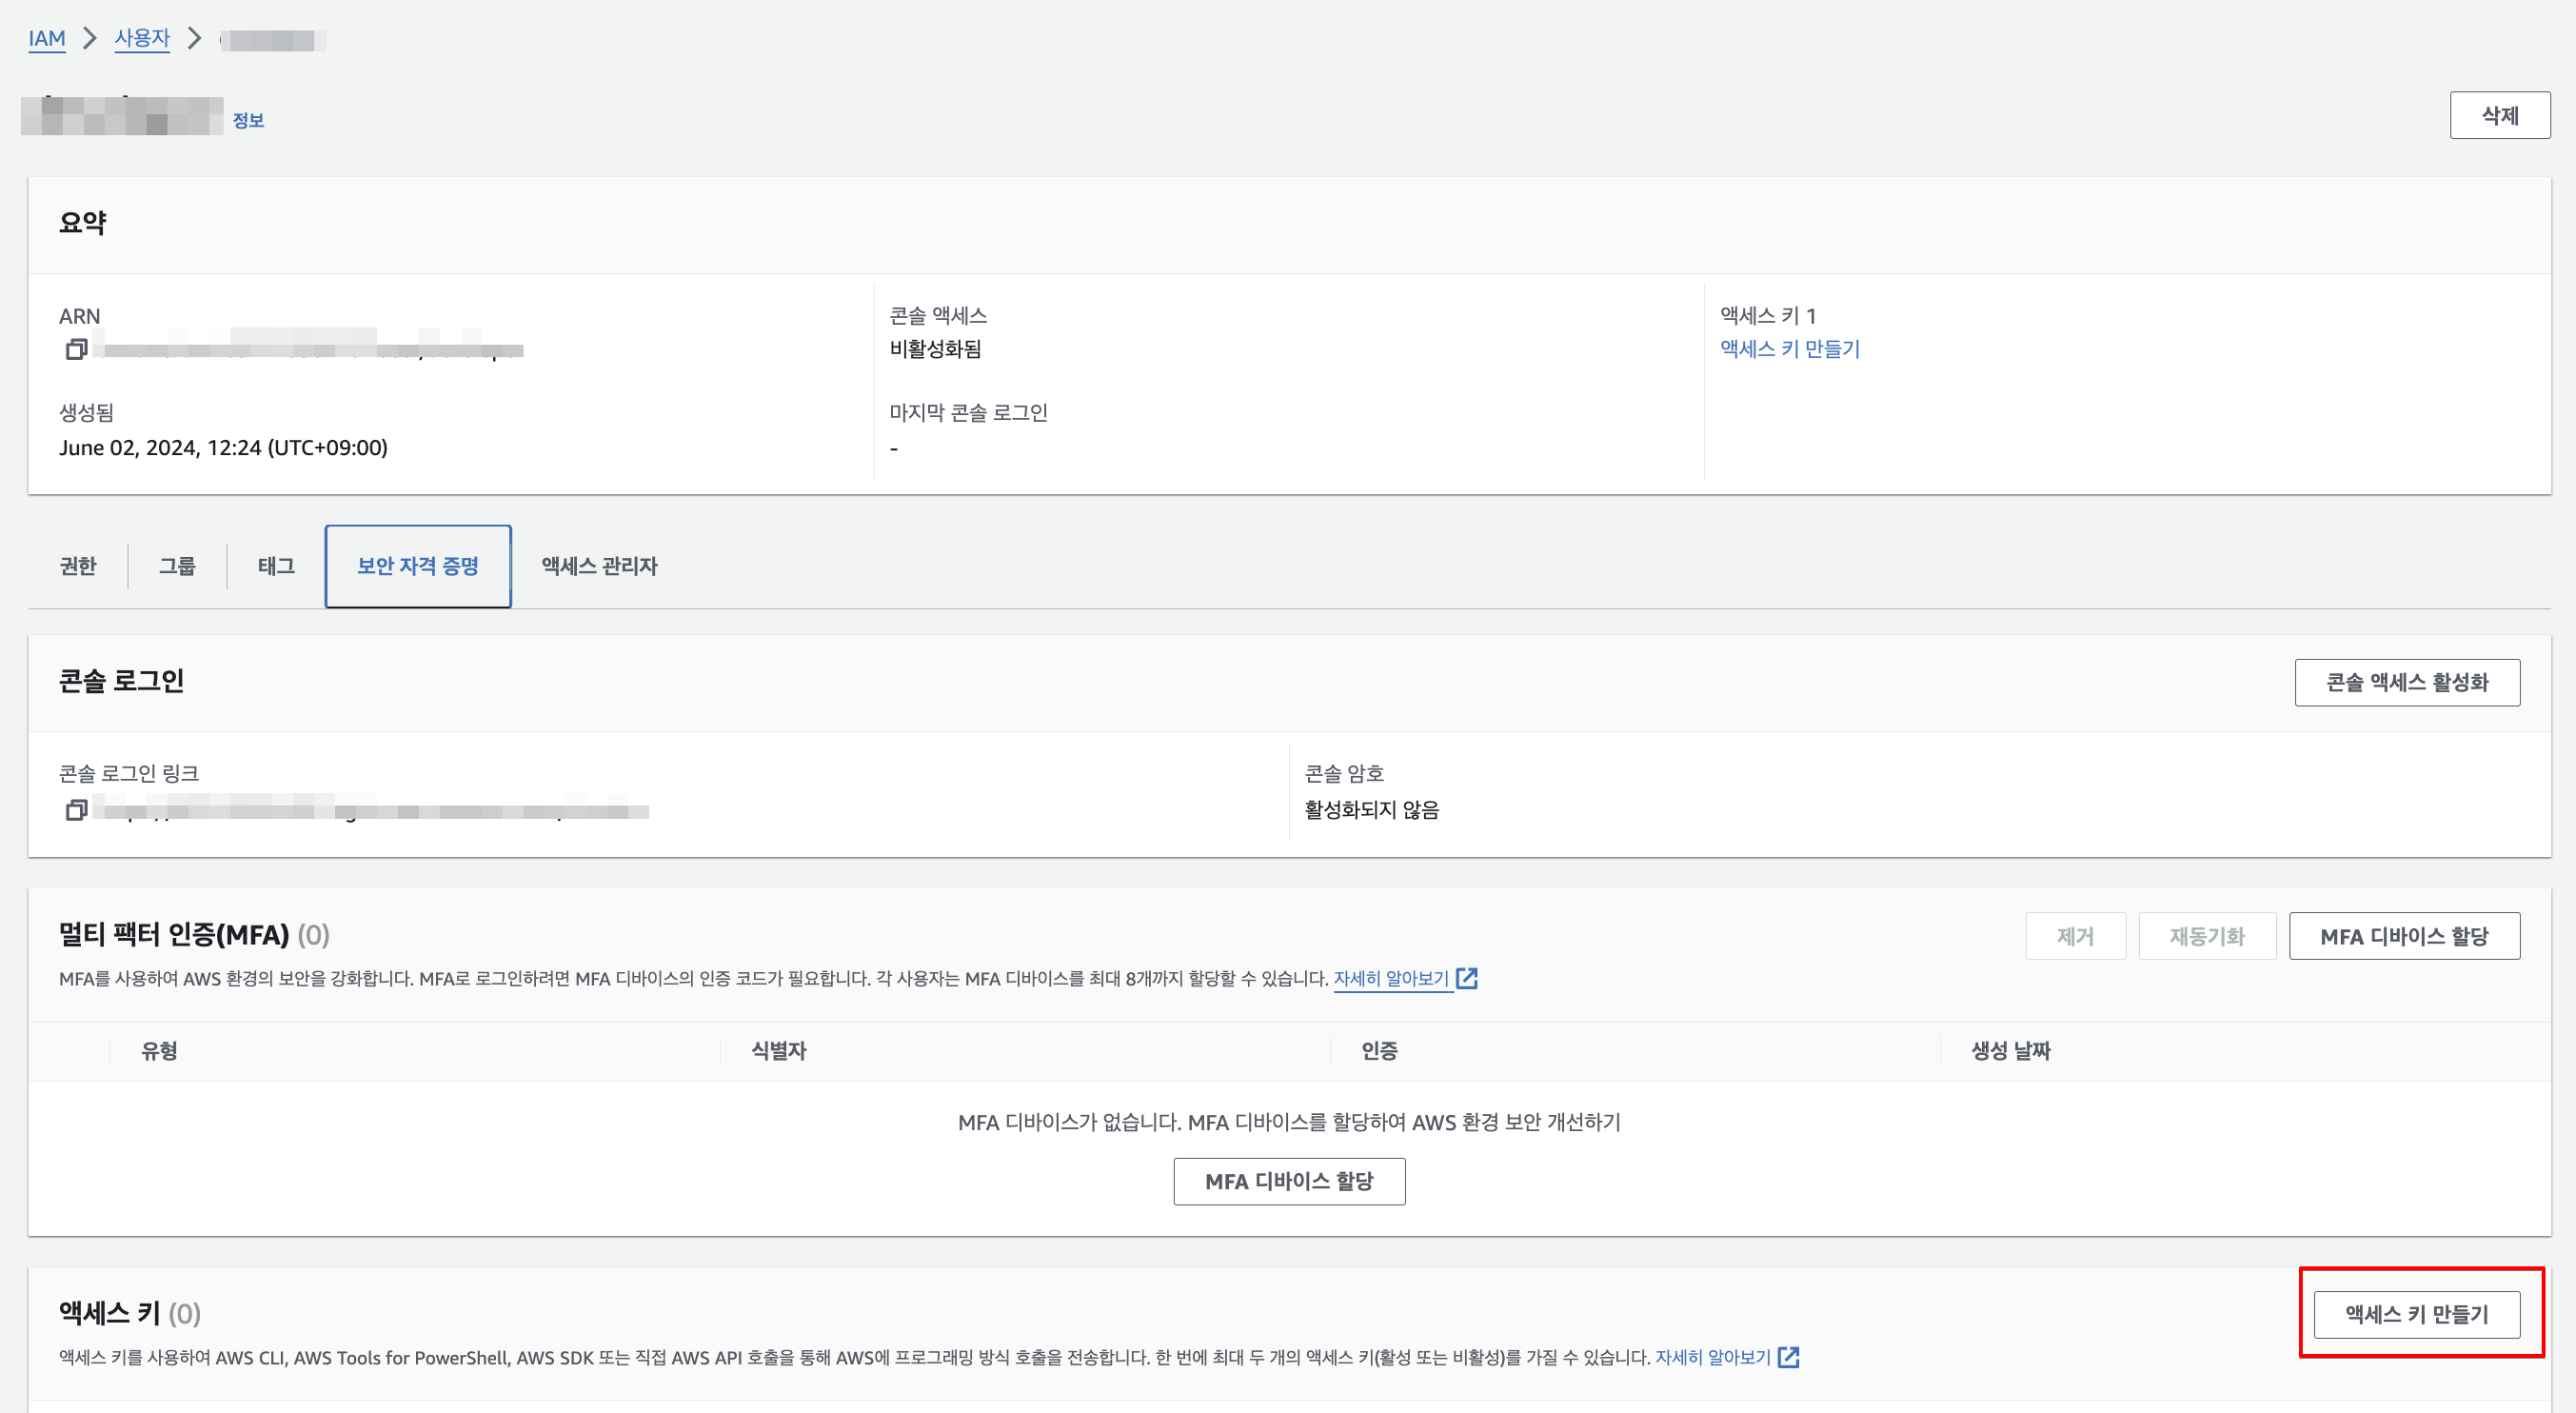
🔑 IAM 사용자 액세스키 생성
- 사용자 > 사용자 이름 > 보안 자격 증명 > 액세스 키 만들기
-
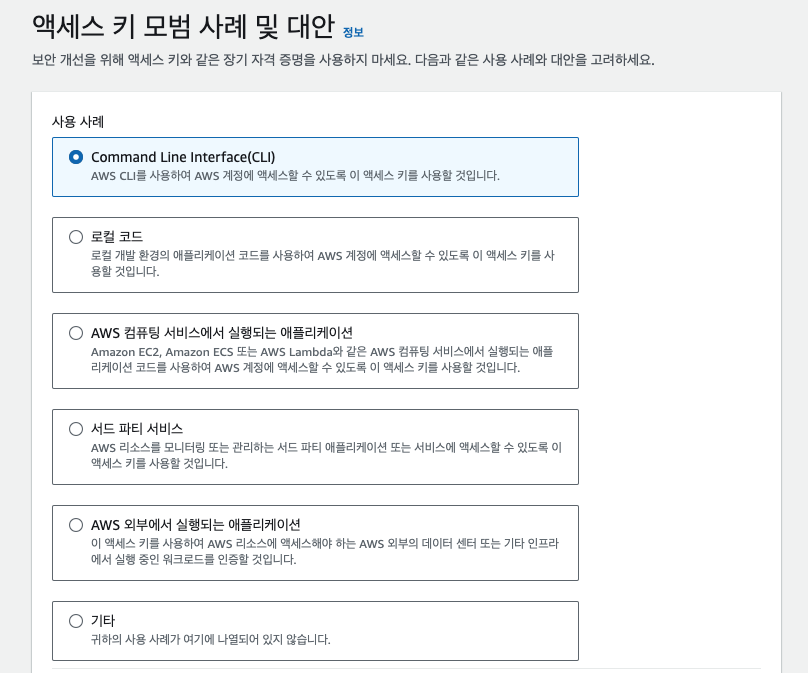
사례는 아무거나 해도 상관 없음 (말그대로 사례라 알려주는 거임)
-
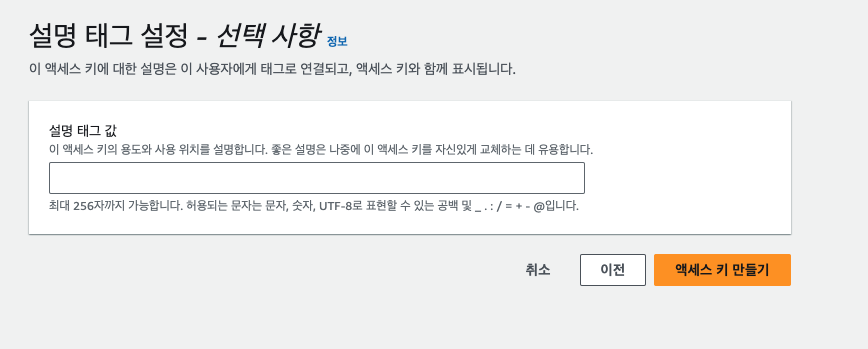
설명도 선택 사항 (예의상 for 어쩌고 달아줬다.)
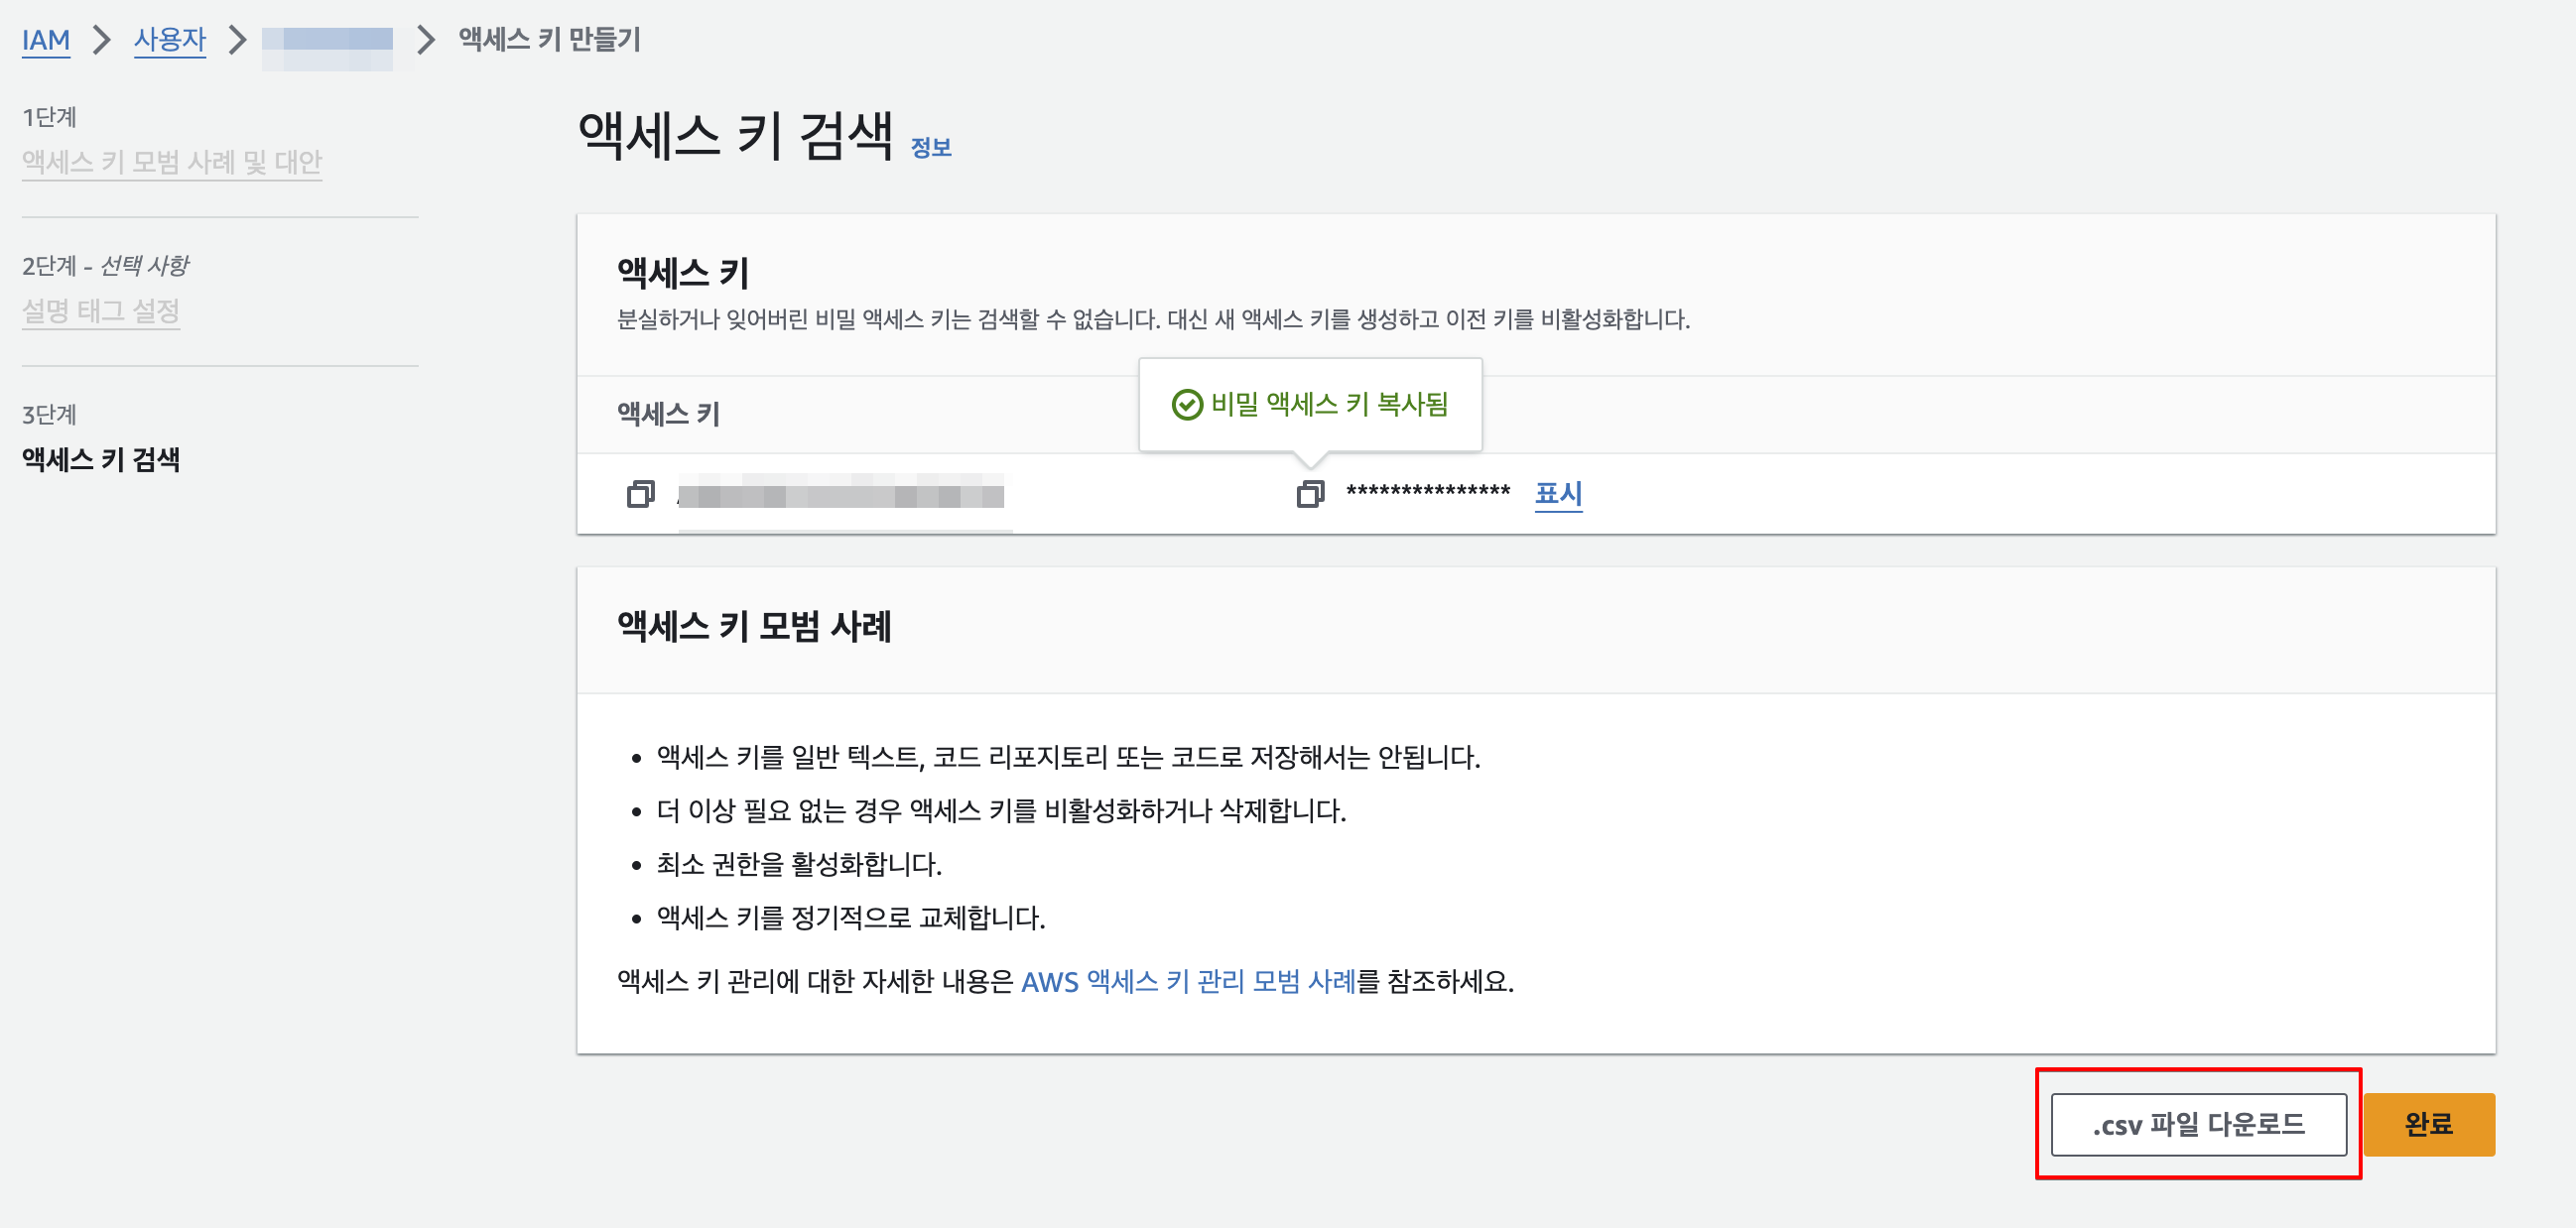
- 엑세스 키 검색 (파일과 액세스와 시크릿키를 잘 복사해두자.)
🔌 Spring boot 연동
0. build.gradle 의존성 추가
// AWS S3
implementation 'org.springframework.cloud:spring-cloud-starter-aws:2.2.6.RELEASE'
1. application.properties 설정
- 버킷이름과 잘 복사해온 액세스와 시크릿키, 그리고 지역을 넣어주자.
- 참고로 지역은 서울로 설정하지 않았으면 만들어진 버킷에 적혀진 AWS 리전을 보고 바꿔서 넣자.
- 당연한 말이겠지만 시크릿키와 액세스키를 노출시키지 말자!
#AWS S3 관련 설정
cloud.aws.s3.bucketName=BUCKET_NAME
cloud.aws.credentials.accessKey=ACCESS_KEY
cloud.aws.credentials.secretKey=SECRET_KEY
cloud.aws.region.static=ap-northeast-2
cloud.aws.stack.auto=false
2. S3Config
- AmazonS3Client 인스턴스 생성 정의
import org.springframework.beans.factory.annotation.Value;
import org.springframework.context.annotation.Bean;
import org.springframework.context.annotation.Configuration;

import com.amazonaws.auth.AWSCredentials;
import com.amazonaws.auth.AWSStaticCredentialsProvider;
import com.amazonaws.auth.BasicAWSCredentials;
import com.amazonaws.services.s3.AmazonS3Client;
import com.amazonaws.services.s3.AmazonS3ClientBuilder;

@Configuration
public class S3Config {

    @Value("${cloud.aws.credentials.access-key}")
    private String accessKey;

    @Value("${cloud.aws.credentials.secret-key}")
    private String secretKey;

    @Value("${cloud.aws.region.static}")
    private String region;

    @Bean
    public AmazonS3Client amazonS3Client() {
        AWSCredentials basicAWSCredentials = new BasicAWSCredentials(accessKey, secretKey);
        return (AmazonS3Client) AmazonS3ClientBuilder
                .standard()
                .withCredentials(new AWSStaticCredentialsProvider(basicAWSCredentials))
                .withRegion(region)
                .build();
    }
}
3. S3Uploader
- 파일 업로드를 위한 핸들러
- MultipartFile 객체를 받아서 File로 변환후 해당 파일을 S3에 업로드하는 형식
- 업로드 할 때 공개로 읽을 수 있게 PublicRead로 권한 주며, 이름 중복을 방지를 위해 이름을 랜덤하게 지정
- 또한 컨버터 과정에서 생성된 임시파일을 삭제
import java.io.File;
import java.io.FileOutputStream;
import java.io.IOException;
import java.util.Optional;
import java.util.UUID;

import org.springframework.beans.factory.annotation.Value;
import org.springframework.stereotype.Component;
import org.springframework.stereotype.Service;
import org.springframework.web.multipart.MultipartFile;

import com.amazonaws.services.s3.AmazonS3Client;
import com.amazonaws.services.s3.model.CannedAccessControlList;
import com.amazonaws.services.s3.model.PutObjectRequest;

import lombok.RequiredArgsConstructor;
import lombok.extern.slf4j.Slf4j;

@Slf4j
@RequiredArgsConstructor
@Component
@Service
public class S3Uploader {

    private final AmazonS3Client amazonS3Client;

    @Value("${cloud.aws.s3.bucketName}")
    private String bucket;

    // MultipartFile을 전달받아 File로 전환한 후 S3에 업로드
    public String upload(MultipartFile multipartFile, String dirName) throws IOException {
        File uploadFile = convert(multipartFile)
                .orElseThrow(() -> new IllegalArgumentException("MultipartFile -> File 전환 실패"));
        return upload(uploadFile, dirName);
    }

    private String upload(File uploadFile, String dirName) {
        String fileName = dirName + "/" + changedImageName(uploadFile.getName());
        String uploadImageUrl = putS3(uploadFile, fileName);
        removeNewFile(uploadFile); // 로컬에 생성된 File 삭제 (MultipartFile -> File 전환 하며 로컬에 파일 생성됨)

        return uploadImageUrl; // 업로드된 파일의 S3 URL 주소 반환
    }

    // 실질적인 s3 업로드 부분
    private String putS3(File uploadFile, String fileName) {
        amazonS3Client.putObject(
                new PutObjectRequest(bucket, fileName, uploadFile)
                        .withCannedAcl(CannedAccessControlList.PublicRead) // PublicRead 권한으로 업로드
        );
        return amazonS3Client.getUrl(bucket, fileName).toString();
    }

    private void removeNewFile(File targetFile) {
        if (targetFile.delete()) {
            log.info("파일이 삭제되었습니다.");
        } else {
            log.info("파일이 삭제되지 못했습니다.");
        }
    }

    private Optional<File> convert(MultipartFile file) throws IOException {
        File convertFile = new File(file.getOriginalFilename());
        if (convertFile.createNewFile()) {
            try (FileOutputStream fos = new FileOutputStream(convertFile)) {
                fos.write(file.getBytes());
            }
            return Optional.of(convertFile);
        }
        return Optional.empty();
    }

    // 랜덤 파일 이름 메서드 (파일 이름 중복 방지)
    private String changedImageName(String originName) {
        String random = UUID.randomUUID().toString();
        return random + originName;
    }

}
4. Entity
- 업로드 후 DB 저장을 테스트 해보기 위해 테스트 파일 엔티티를 하나 만들었다.
import jakarta.persistence.Entity;
import jakarta.persistence.GeneratedValue;
import jakarta.persistence.GenerationType;
import jakarta.persistence.Id;
import lombok.Data;

@Entity
@Data
public class TestFileEntity {

    @Id
    @GeneratedValue(strategy = GenerationType.IDENTITY)
    private int id;

    private String imgText;

    private String imgUrl;

}
5. Controller
- MultipartFile로 파일을 받고, 엔티티로 텍스트를 받아오는 컨트롤러
@PostMapping("/upload")
    public ResponseEntity<String> uploadFile(MultipartFile imgFile, TestFileEntity fileEntity) {
        log.info("파일 저장 컨트롤러 실행");
        try {
            testService.saveFile(imgFile, fileEntity.getImgText());
            return ResponseEntity.ok("파일 업로드 성공");
        } catch (Exception e) {
            log.error("파일 업로드 실패", e);
            return ResponseEntity.status(400).build();
        }
    }
6. Service
- 파일이 비워져있지 않으면 업로드 핸들러를 실행한다.
- 저장 이후에는 DB에 저장
public void saveFile(MultipartFile imgFile, String imgText) throws IOException {
if (!imgFile.isEmpty()) {
String storedFileName = s3Uploader.upload(imgFile, "images"); // s3 버킷에 images 디렉토리에 업로드
TestFileEntity testFileEntity = new TestFileEntity();
testFileEntity.setImgText(imgText);
testFileEntity.setImgUrl(storedFileName);
testFileRepository.save(testFileEntity);
}
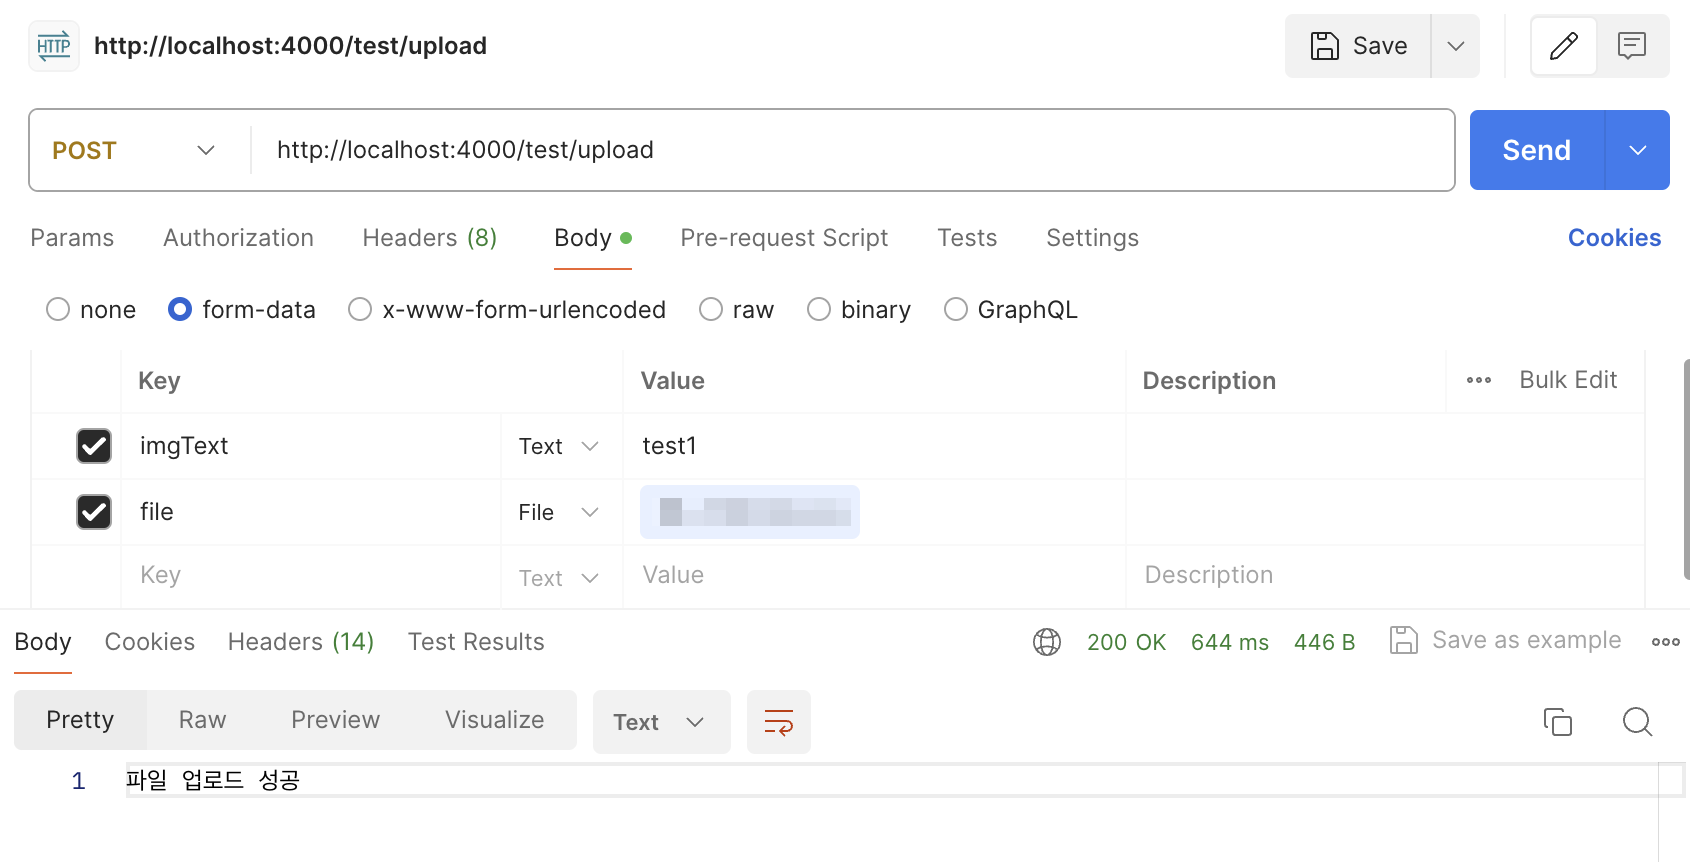
}😎 실행결과
-
포스트맨으로 컨트롤러에 맞춰 폼 데이터를 보냈고, ok 메시지도 받았다.
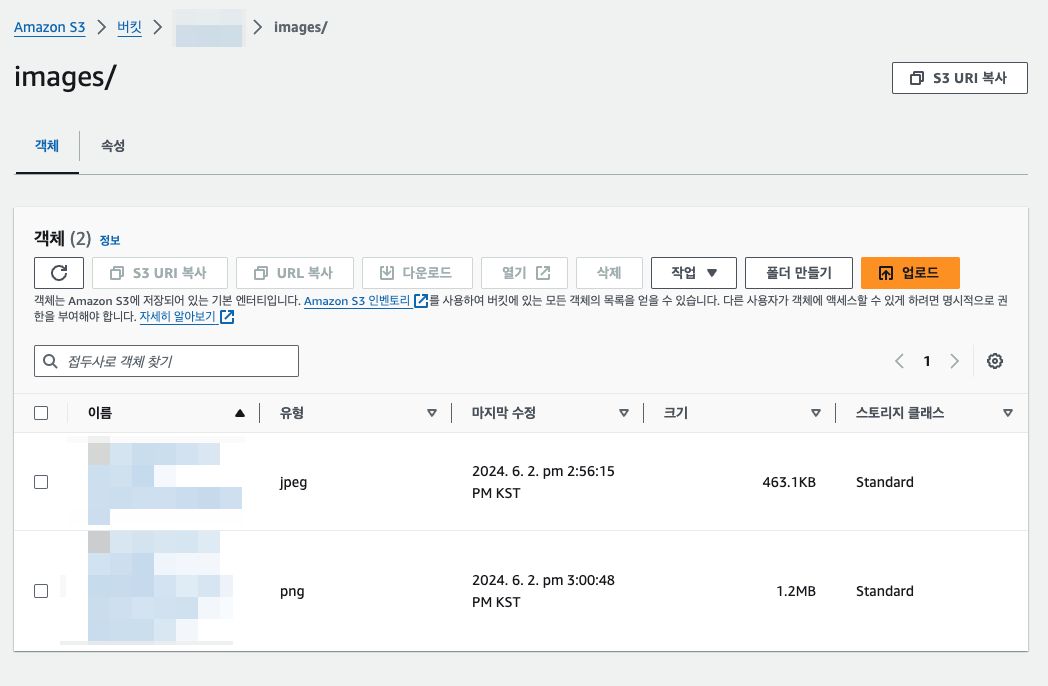
-
s3에도 정상적으로 올라갔다!
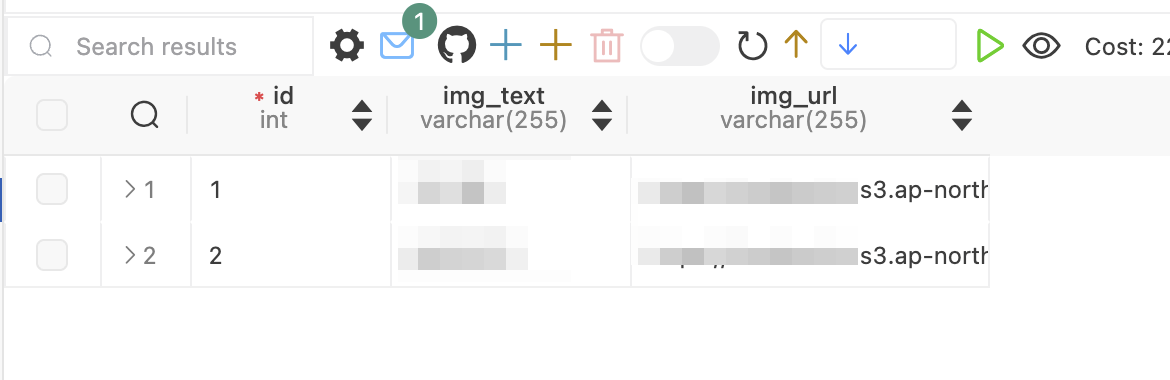
-
DB에도 정상적으로 올라갔음


선명한 삶을 살기 위하여