Shape
- RoundedRectangle(cornerSize: CGSize(width: 40, height: 80)) 이런식으로 모서리를 조절할 수 있음
- .fill 과 .foregroundColor 중 무엇을 써도 상관은 없으나 fill은 shape에서만 사용가능
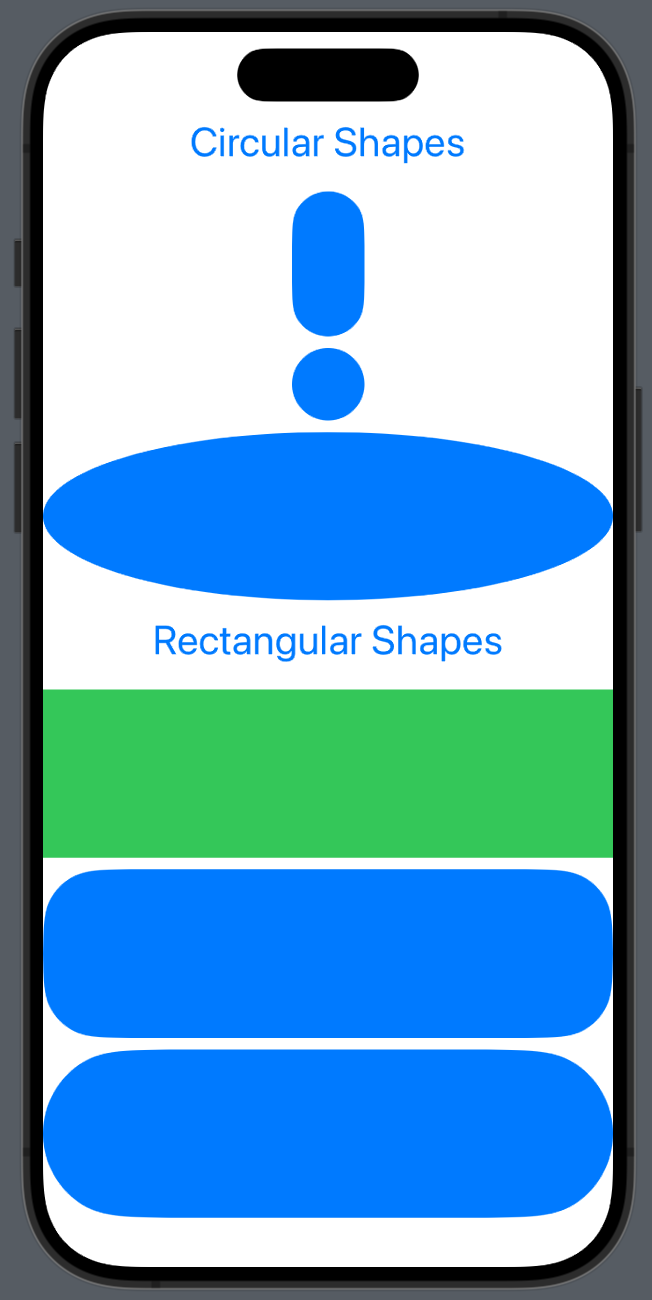
- capsule()은 자동으로 cornerRadius를 조절해줌
- Ellipse는 타원
struct Shapes: View {
    var body: some View {
        VStack {
            Text("Circular Shapes")
            Capsule()
                .frame(width: 50.0, height: 100.0)
            Circle()
                .frame(width: 50.0)
            Ellipse()
            Text("Rectangular Shapes")
            Rectangle()
                .fill(Color.green)
            RoundedRectangle(cornerRadius: 40)
            RoundedRectangle(cornerSize: CGSize(width: 100, height: 100))
        }
        .font(.title)
        .foregroundColor(.blue)
    }
}
ShapeOutlines_Stroke
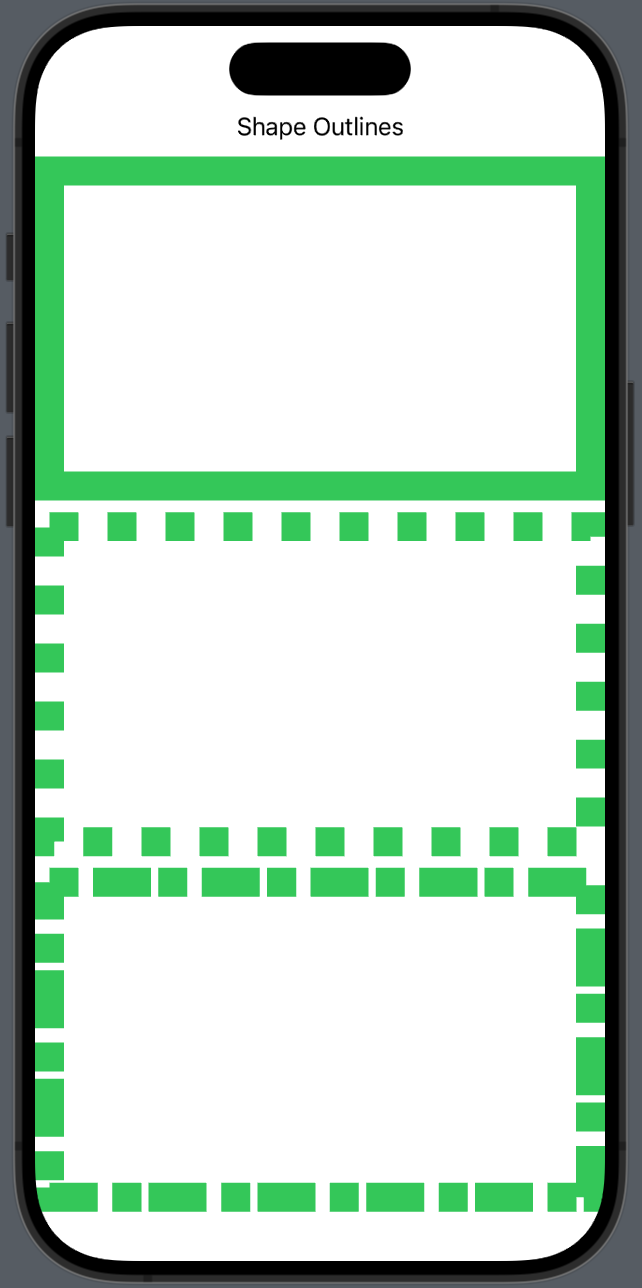
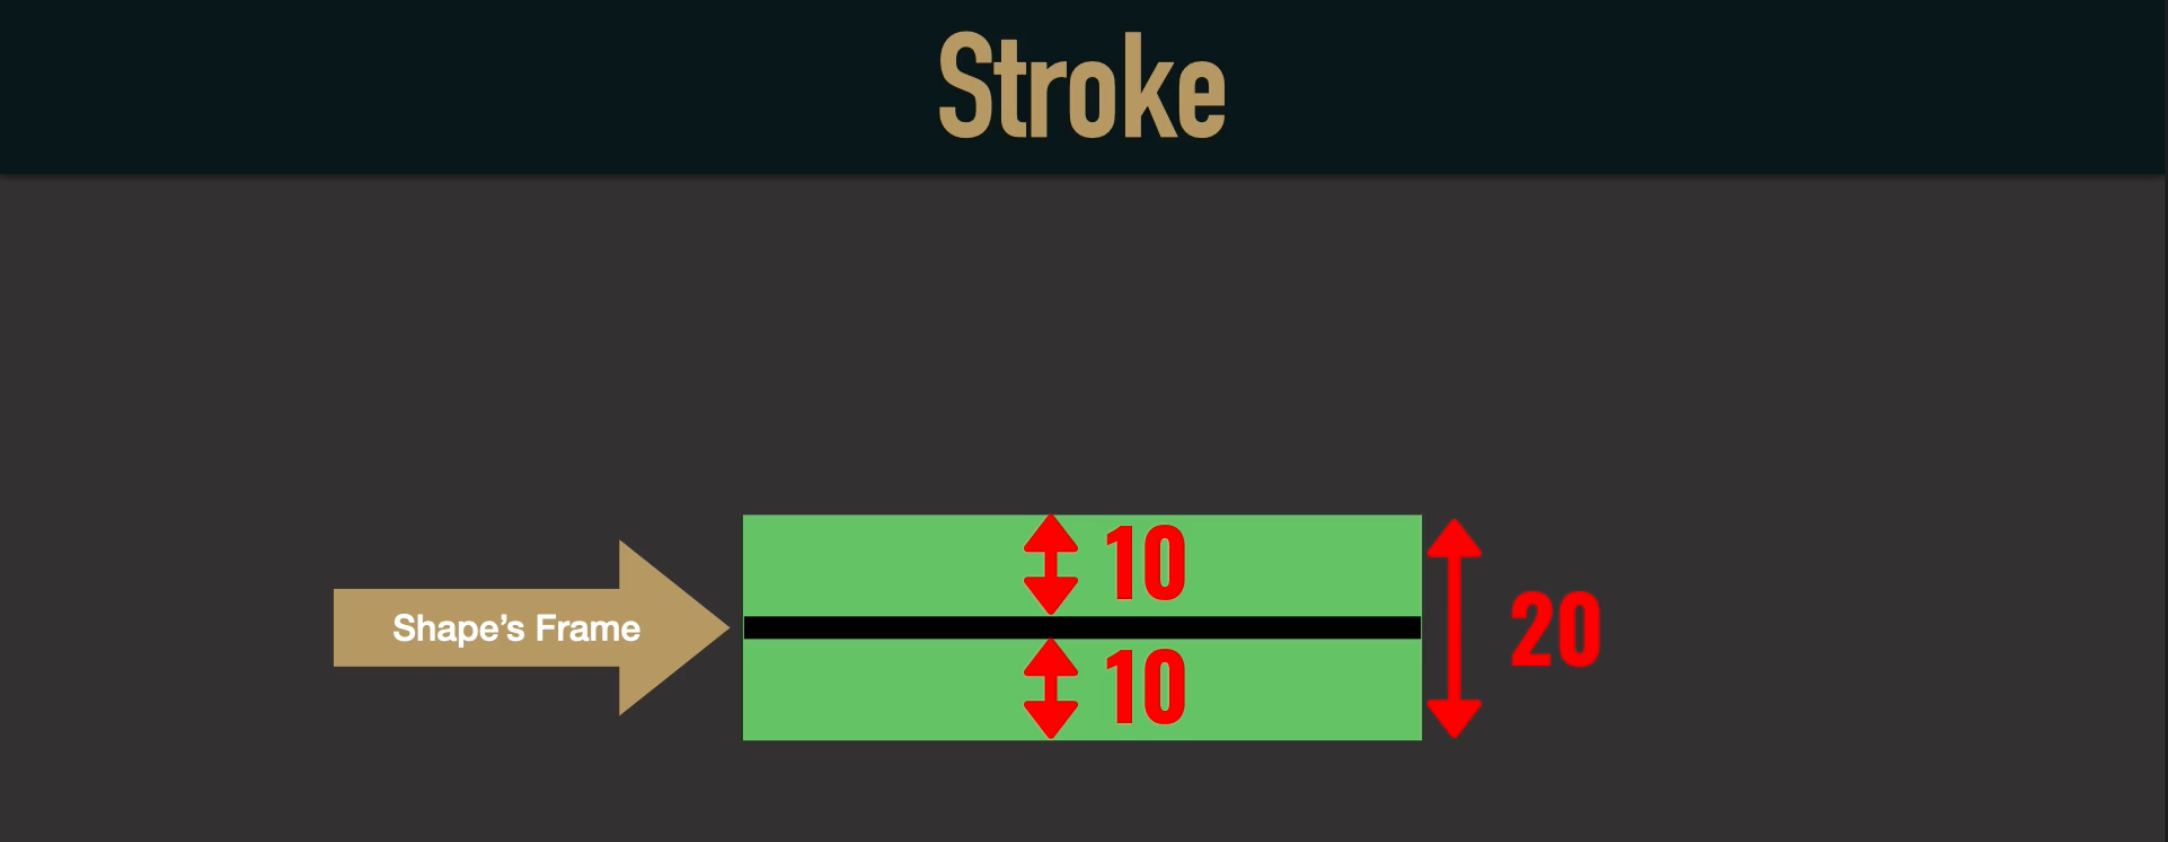
- .stroke면 frame을 기준으로 양쪽으로 테두리를 갖게 되지만 .strokeBorder를 사용하면 안쪽으로만 테두리를 갖게 된다.
- dash는 순서대로 테두리, 빈공간, 테두리, 빈공간,… 순으로 적용된다
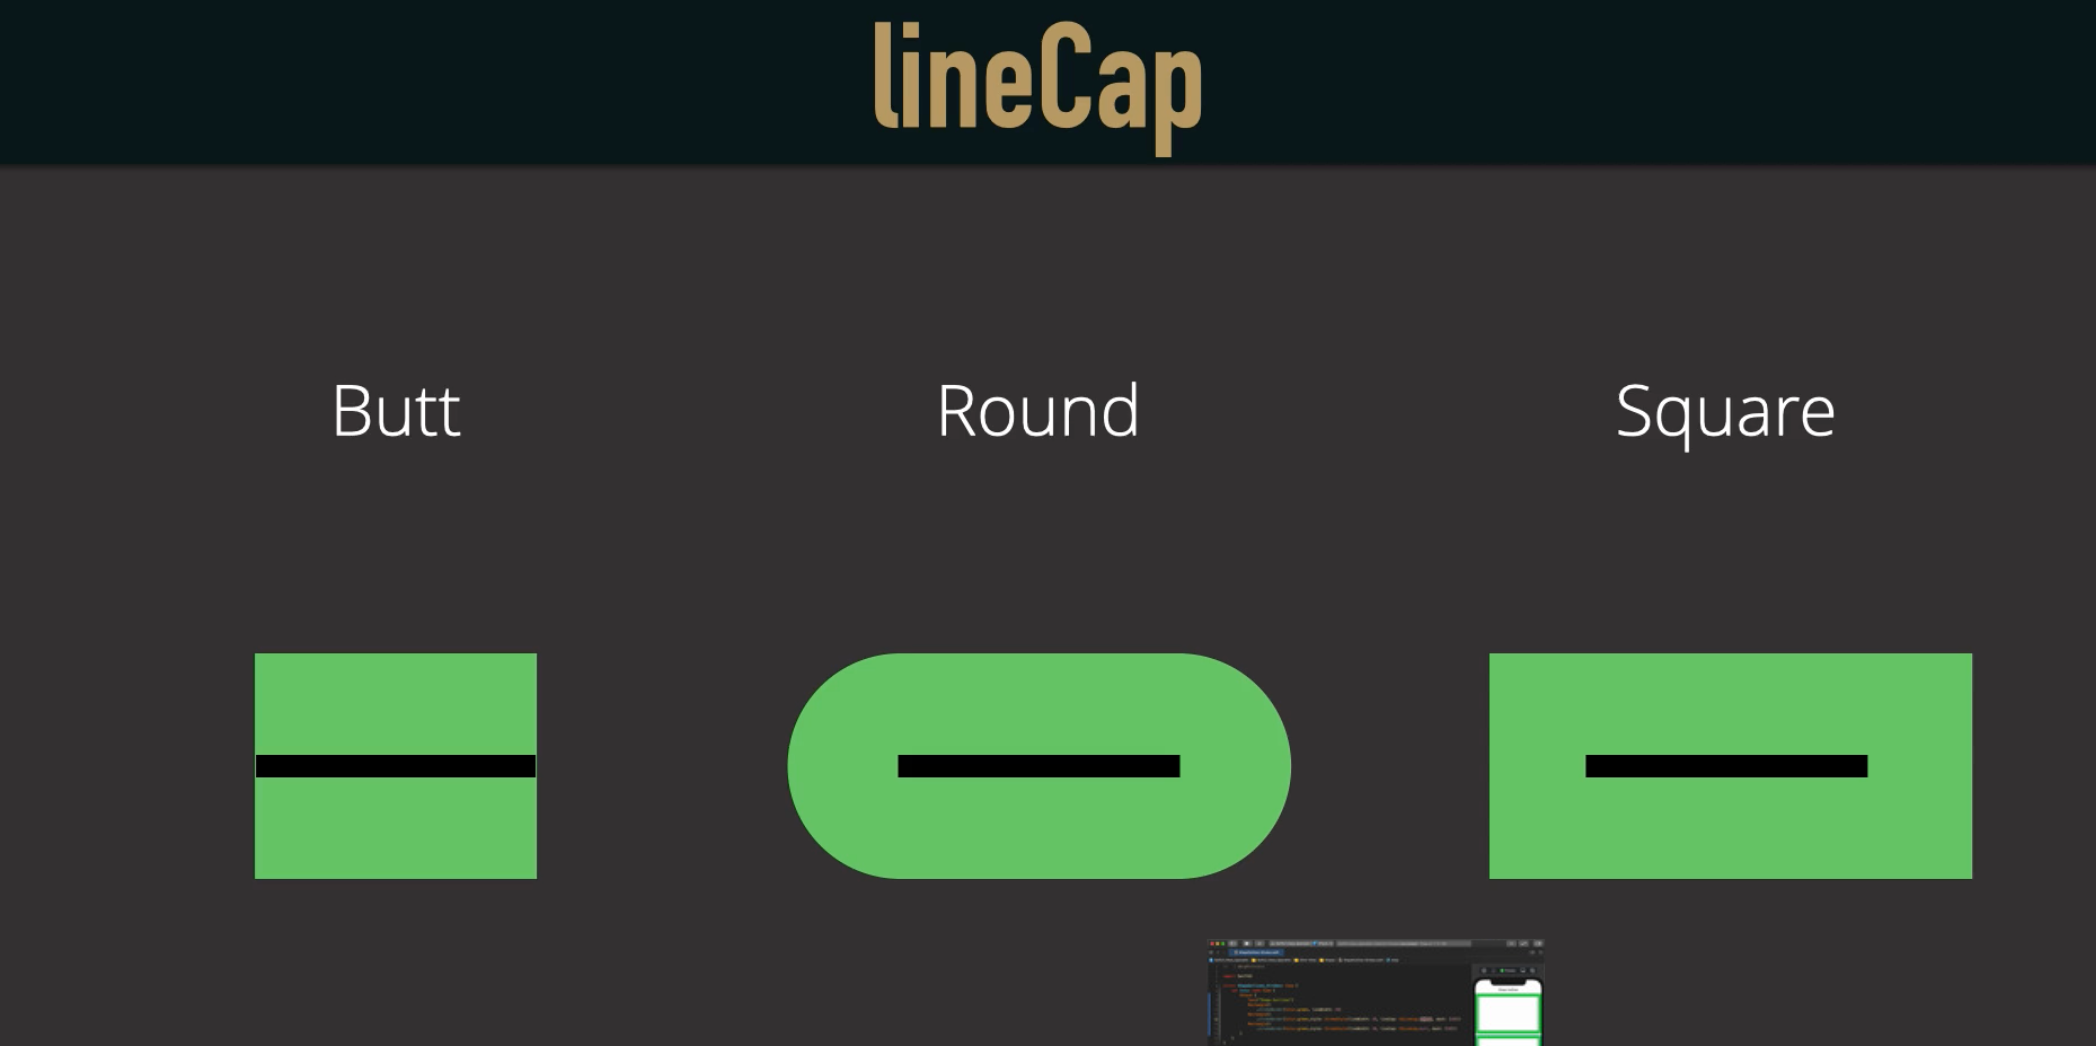
- lineCap이나 다른 옵션들은 아래 그림 참조
struct ShapeOutlines_Strokes: View {
    var body: some View {
        VStack {
            Text("Shape Outlines")
            Rectangle()
                .strokeBorder(Color.green, lineWidth: 20)
            Rectangle()
                .strokeBorder(Color.green,style: StrokeStyle(lineWidth: 20, lineCap: CGLineCap.butt, dash: [20]))
            Rectangle()
                .strokeBorder(Color.green,style: StrokeStyle(lineWidth: 20, lineCap: CGLineCap.butt,
                                                             dash: [20, 10, 40, 5]))
        }
    }
}

ShapesWithOtherView
- stroke에 바로 shadow를 주면 원하는대로 안나온다
- 그래서 background를 두번써서 도형에서 shadow를 주고 stroke에서는 주지 않는 방식으로 한다.
- background를 두번 썼을때 나중에 쓴게 더 뒤로 간다
- 이미지 크기를 조절할때는 .resizable()을 써주고
- .scaledToFit()은 가로세로 비율을 유지하면서 크기를 뷰에 가장 크게 맞춰줌
- .clipShape(Circle())은 뷰에 가장 크게 맞춘 원에 이미지를 넣는 것이다
struct ShapesWithOtherViews: View {
var body: some View {
VStack(spacing: 40.0) {
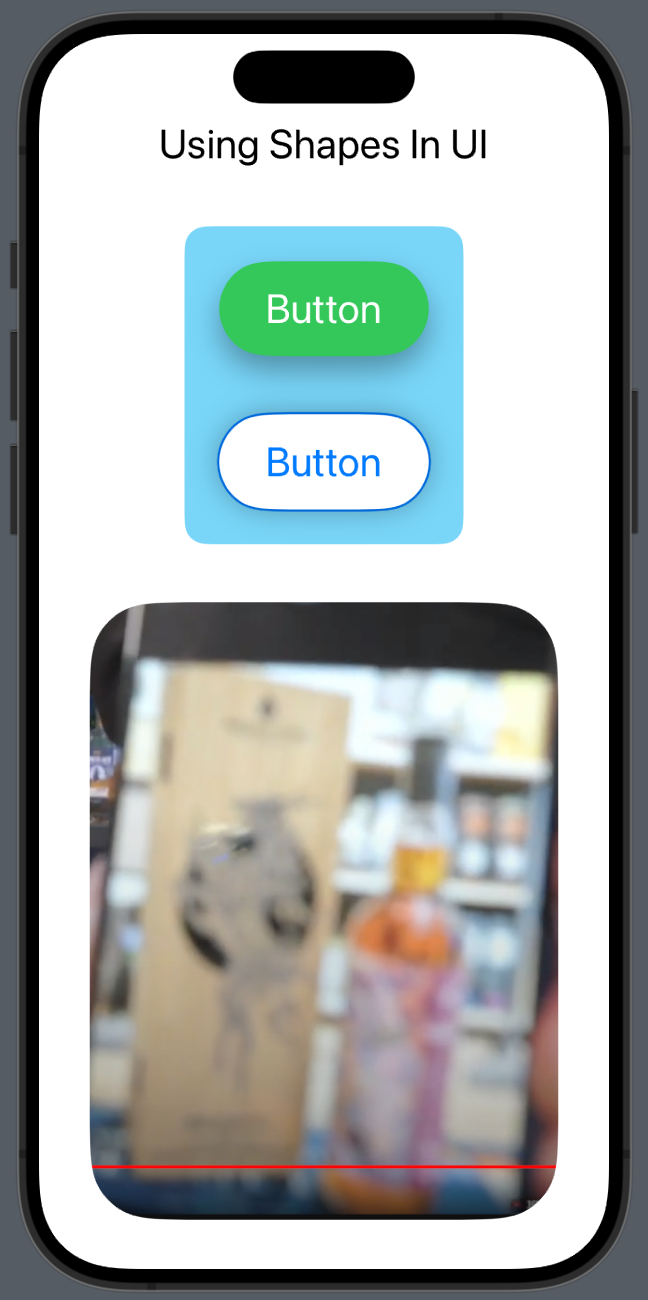
Text("Using Shapes In UI")
VStack(spacing: 40.0) {
Button(action: {}) {
Text("Button")
.foregroundColor(.white)
.padding()
.padding(.horizontal)
.background(Capsule().shadow(radius: 10, y: 10))
}
.accentColor(.green)
Button(action: {}) {
Text("Button")
.padding()
.padding(.horizontal)
.background(Capsule()
.fill(Color.white)
.shadow(radius: 10))
.background(Capsule()
.stroke(lineWidth: 3))
}
}
.padding(24)
.background(RoundedRectangle(cornerRadius: 15).fill(Color(#colorLiteral(red: 0.4745098054, green: 0.8392156959, blue: 0.9764705896, alpha: 1))))
Image("image")
.resizable()
.aspectRatio(contentMode: .fit)
.clipShape(RoundedRectangle(cornerRadius: 45))
}
.font(.title)
}
}

iOS, Spring developer