
참고문서: Vue 튜토리얼
해당 글은 공식문서 기반의 예제를 가져와서 정리한 글입니다.
1. Hello world
<template>
  <h1>Hello World!</h1>
</template>
[출력]
Hello World!
2. 선언적 렌더링
<script>
export default {
  data() {
    return {
      message: 'Hello World!',
      counter: {
        count: 0
      }
    }
  }
}
</script>

<template>
  <h1>{{ message }}</h1>
  <h1>{{ message.split('').reverse().join('') }}</h1>
  <p>Count is: {{ counter.count }}</p>
</template>
[출력]
Hello World!
!dlroW olleH
Count is: 0
default 객체에 data 함수에서 데이터를 return 한다.
템플릿 내에서는 {{}} 이 기호를 써서 변수를 보여준다.
자바스크립트 메소드도 활용할 수 있다.
3. 속성 바인딩
<script>
export default {
  data() {
    return {
      titleClass: 'title'
    }
  }
}
</script>

<template>
  <h1 v-bind:class="titleClass">Make me red</h1>
  <h1 v-bind:id="titleClass">Make me blue</h1>
</template>

<style>
.title {
  color: red;
}
#title{
  color: blue;
}
</style>
[출력]
Make me red (빨간색)
Make me blue (파란색)
return에 titleClass: 'title' 로 정의 해두고, titleClass는 템플릿에서 활용하고, title는 style에서 활용한다.
. 은 class에 적용이 되고, #은 id에 적용이 된다.
4. 이벤트 리스너
<script>
export default {
  data() {
    return {
      count1: 0,
      count2: 0
    }
  },
  methods: {
    increment1() {
      // update component state
      this.count1++
    },
    increment2() {
      // update component state
      this.count2++
    }
  }
}
</script>

<template>
  <!-- make this button work -->
  <button v-on:click="increment1">count is: {{ count1 }}</button>
  <button @click="increment2">count is: {{ count2 }}</button>
</template>
[출력]
count is: 0(버튼1), count is: 0(버튼2)
(누를 때 마다 각각 카운트 올라감)
버튼에는 v-on 지시문을 사용한다. 자주써서 약식 구문도 있다.
5. 양식 바인딩
// 1번
<script>
export default {
  data() {
    return {
      text: ''
    }
  },
  methods: {
    onInput(e) {
      this.text = e.target.value
    }
  }
}
</script>

<template>
  <input :value="text" @input="onInput" placeholder="Type here">
  <p>{{ text }}</p>
</template>

// 2번
<script>
export default {
  data() {
    return {
      text: ''
    }
  }
}
</script>

<template>
  <input v-model="text" placeholder="Type here">
  <p>{{ text }}</p>
</template>
[출력]
입력창 (입력하면 아래에 입력값을 바로 출력한다.)
뷰의 특징인 양방향 바인딩이다.
1번을 2번으로 대체하면 텍스트는 써지는데 한 박자 느리게 반영된다.
(methods 옵션을 지우고, input 태그 내의 옵션을 수정했다.)
123을 쓰면 12까지만 출력된다.
6. 조건부 렌더링
<script>
export default {
  data() {
    return {
      awesome: true
    }
  },
  methods: {
    toggle() {
      this.awesome = !this.awesome
    }
  }
}
</script>

<template>
  <button @click="toggle">toggle</button>
  <h1 v-if="awesome">Vue is awesome!</h1>
  <h1 v-else>Oh no 😢</h1>
</template>
[출력]
Vue is awesome!
(toggle 버튼 누르면 오른쪽 출력) Oh no 😢
(toggle 버튼 누르면 오른쪽 출력) Vue is awesome!
위 과정 반복
7. 목록 렌더링
<script>
// give each todo a unique id
let id = 0

export default {
  data() {
    return {
      newTodo: '',
      todos: [
        { id: id++, text: 'Learn HTML' },
        { id: id++, text: 'Learn JavaScript' },
        { id: id++, text: 'Learn Vue' }
      ]
    }
  },
  methods: {
    addTodo() {
 	  this.todos.push({id: id++, text: this.newTodo})
      this.newTodo = ''
    },
    removeTodo(todo) {
      this.todos = this.todos.filter(el =>{
        return el.id !== todo.id
      })
    }
  }
}
</script>

<template>
  <form @submit.prevent="addTodo">
    <input v-model="newTodo">
    <button>Add Todo</button>
  </form>
  <ul>
    <li v-for="todo in todos" :key="todo.id">
      {{ todo.text }}
      <button @click="removeTodo(todo)">X</button>
    </li>
  </ul>
</template>
[출력]
입력창과 Add Todo 버튼
Learn HTML X
Learn JavaScript X
Learn Vue X
methods 부분만 수정했다.
8. 계산된 속성
<script>
let id = 0

export default {
  data() {
    return {
      newTodo: '',
      hideCompleted: false,
      todos: [
        { id: id++, text: 'Learn HTML', done: true },
        { id: id++, text: 'Learn JavaScript', done: true },
        { id: id++, text: 'Learn Vue', done: false }
      ]
    }
  },
  computed: {
    filteredTodos() {
      if (this<.hideCompleted) {
        return this.todos.filter((t) => t.done !== true)
      } else {
        return this.todos
      }
    }
  },
  methods: {
    addTodo() {
      this.todos.push({ id: id++, text: this.newTodo, done: false })
      this.newTodo = ''
    },
    removeTodo(todo) {
      this.todos = this.todos.filter((t) => t !== todo)
    }
  }
}
</script>

<template>
  <form @submit.prevent="addTodo">
    <input v-model="newTodo">
    <button>Add Todo</button>
  </form>
  <ul>
    <li v-for="todo in filteredTodos" :key="todo.id">
      <input type="checkbox" v-model="todo.done">
      <span :class="{ done: todo.done }">{{ todo.text }}</span>
      <button @click="removeTodo(todo)">X</button>
    </li>
  </ul>
  <button @click="hideCompleted = !hideCompleted">
    {{ hideCompleted ? 'Show all' : 'Hide completed' }}
  </button>
</template>

<style>
.done {
  text-decoration: line-through;
}
</style>
[출력]

완료 숨기기 버튼을 누르면 뷰 배우기 만 목록에 남는다.
li태그에
<li v-for="todo in filteredTodos" :key="todo.id"> 이런식으로 for 문을 건다.
default에 computed 옵션을 정의해서 사용하면 된다.
9. 수명 주기 및 템플릿 참조
<script>
export default {
  mounted() {
    this.$refs.p.textContent = 'mounted!'
  }
}
</script>

<template>
  <p ref="p">hello</p>
</template>
[출력]
mounted!
생명주기에 관한 옵션이다.
mounted 옵션은 마운트 된 후에 실행된다.
그래서 처음에는 hello!지만 마운트되고 mounted!로 바뀌어 출력한다.
created및 와updated 같은 다른 후크가 있다.
10. watchers
<script>
export default {
  data() {
    return {
      todoId: 1,
      todoData: null
    }
  },
  methods: {
    async fetchData() {
      this.todoData = null
      const res = await fetch(
        `https://jsonplaceholder.typicode.com/todos/${this.todoId}`
      )
      this.todoData = await res.json()
    }
  },
  mounted() {
    this.fetchData()
  },
  watch: {
    todoId() {
      this.fetchData()
    }
  }
}
</script>

<template>
  <p>Todo id: {{ todoId }}</p>
  <button @click="todoId++">Fetch next todo</button>
  <p v-if="!todoData">Loading...</p>
  <pre v-else>{{ todoData }}</pre>
</template>
[출력]
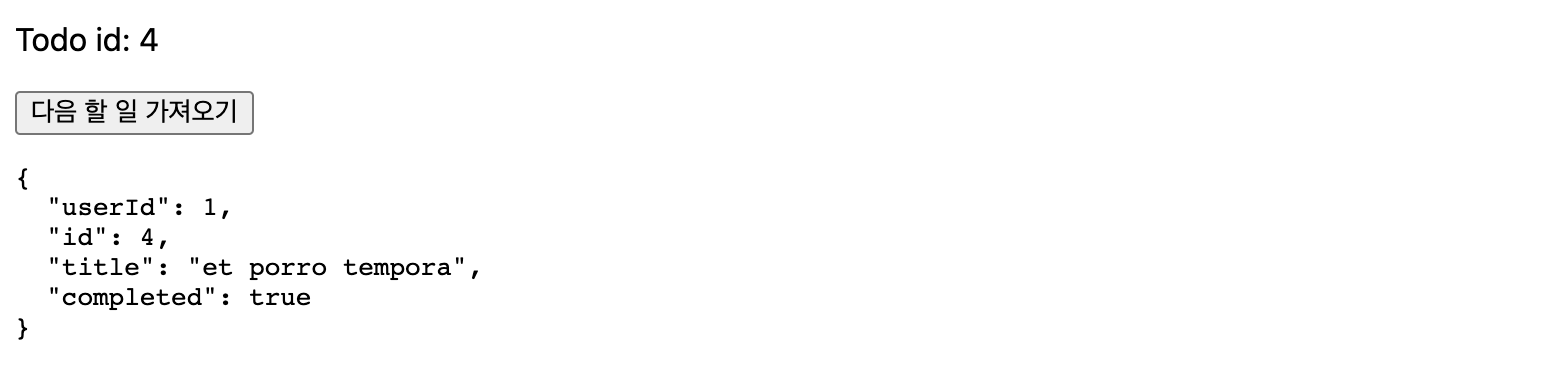
버튼을 누를 때마다 Todo id 가 +1 되고, 아래 객체에서도 내용이 바뀐다.
watch 옵션을 활용해 todoId가 바뀔 때마다 할일 목록을 가져오는 api를 호출했다.
11. Components
//App.vue 파일
<script>
import ChildComp from './ChildComp.vue'

export default {
  components: {
    ChildComp
  }
}
</script>

<template>
  <ChildComp />
</template>
//ChildComp.vue 파일
<template>
<h2>A Child Component!</h2>
</template>[출력]
A Child Component!
script태그 내에 ChildComp를 불러와서 components옵션에 정의했다.
template 태그에서 ChildComp 를 불러오니 화면에 변화가 일어났다.
12. Props
//App.vue 파일
<script>
import ChildComp from './ChildComp.vue'

export default {
  components: {
    ChildComp
  },
  data() {
    return {
      greeting: 'Hello from parent'
    }
  }
}
</script>

<template>
  <ChildComp :msg="greeting" />
</template>
//ChildComp.vue 파일
<script>
export default {
props: {
msg: String
}
}
</script>
<template>
<h2>{{ msg || 'No props passed yet' }}</h2>
</template>[출력]
Hello from parent
자식 컴포넌트는 props 를 통해 부모로부터 데이터를 받을 수 있다.
자식에 해당 props를 선언하고, 자식 컴포넌트에서 사용할 수 있다.
props는 리액트에서 배운 적이 있어서 굉장히 익숙하다.
13. Emits
//App.vue

<script>
import ChildComp from './ChildComp.vue'

export default {
  components: {
    ChildComp
  },
  data() {
    return {
      childMsg: 'No child msg yet'
    }
  }
}
</script>

<template>
  <ChildComp @response="(msg) => childMsg = msg" /> // 수정한 부분
  <p>{{ childMsg }}</p>
</template>

//ChildComp.vue

<script>
export default {
  emits: ['response'],
  created() {
    this.$emit('response', 'hello from child')
  }
}
</script>

<template>
  <h2>Child component</h2>
</template>
[출력]
Child component
hello from child
자식 컴포넌트에서 부모 컴포넌트로 데이터 보내기
자식 컴포넌트에서 emits 에 이벤트 이름을 정의한다.
this.@emit에서 두번째 파라미터 부터는 넘어가는 값이다.
부모 컴포넌트에서 @response="(msg) => childMsg = msg" 이런 방법으로 호출할 수 있다.
14. Slots
// App.vue

<script>
import ChildComp from './ChildComp.vue'

export default {
  components: {
    ChildComp
  },
  data() {
    return {
      msg: 'from parent'
    }
  }
}
</script>

<template>
  <ChildComp>Message: {{ msg }}</ChildComp> // 수정한 부분
</template>

// ChildComp.vue
<template>
  <slot>Fallback content</slot>
</template>
[출력]
Message: from parent
props같은 기능이다. 자식 컴포넌트에게 데이터를 내려준다.